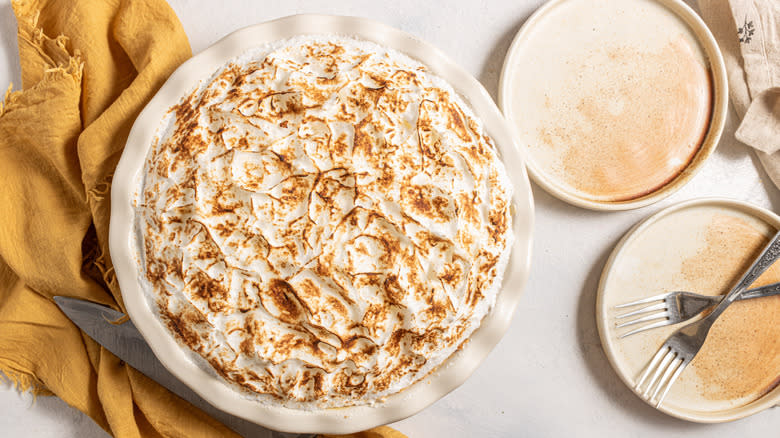
Classic Canadian Flapper Pie Recipe
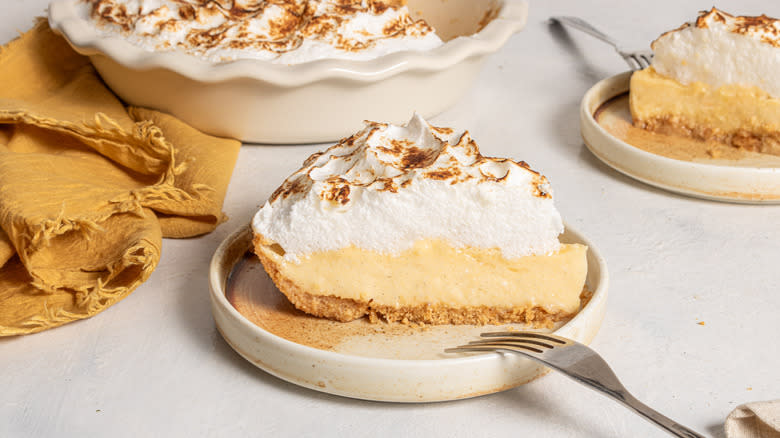
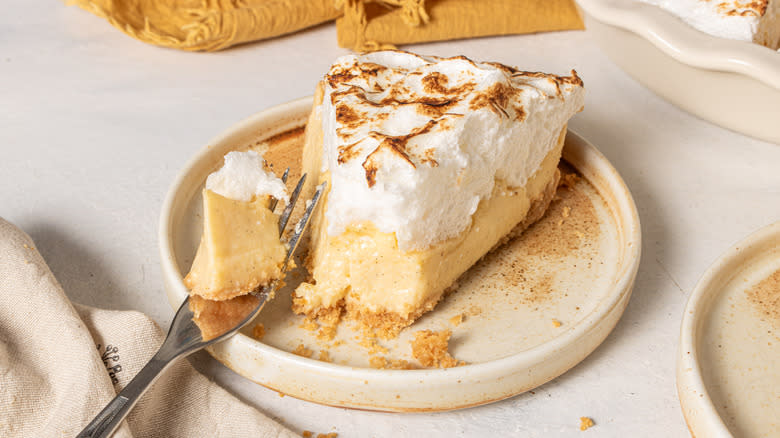
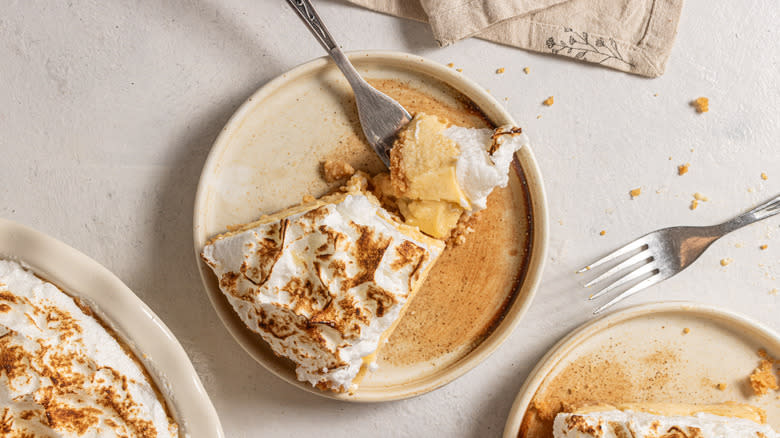
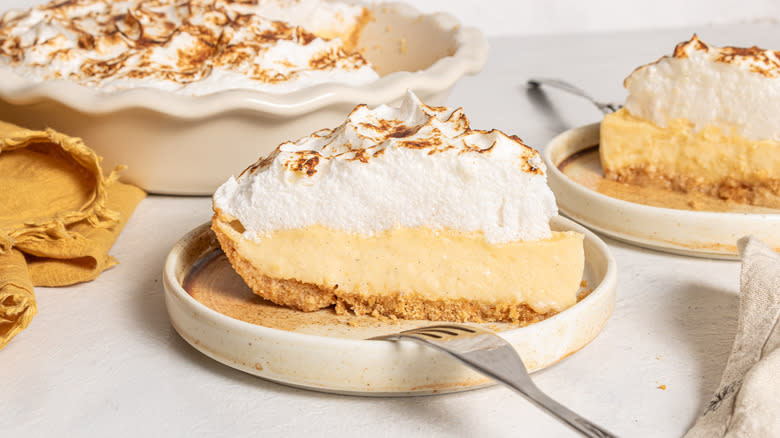
Brought to us by recipe developer Milena Manolova, this classic Canadian flapper pie has a buttery graham cracker crust, luscious vanilla custard filling, and fluffy meringue topping. True to the traditional recipe, it's the perfect blend of textures and flavors that will leave you wanting slice after slice.
Flapper pie originated in western Canada in the early 20th century, when home bakers were looking for creative ways to use simple, inexpensive ingredients to make something truly delicious. The result was a pie that was not only affordable, but also incredibly tasty. The pie gets its name after the flapper girls, who were young women embracing a new, modern lifestyle, characterized by their bold fashion choices, hairstyles, and behavior. The pie was named after these young women, perhaps because it was seen as a sweet, modern treat that embodied the fun and excitement of the era.
Since then, the flapper lifestyle has faded into history, but the Canadian flapper pie has remained a beloved dessert, and it's not hard to see why: It's creamy, sweet, and surprisingly light. While it may look fancy, flapper pie is actually quite simple to make, and the process can be a fun and rewarding baking project that will impress your guests at any gathering or special occasion.
Read more: 12 Popular Ice Cream Brands, Ranked Worst To Best
Gather The Ingredients For Classic Canadian Flapper Pie
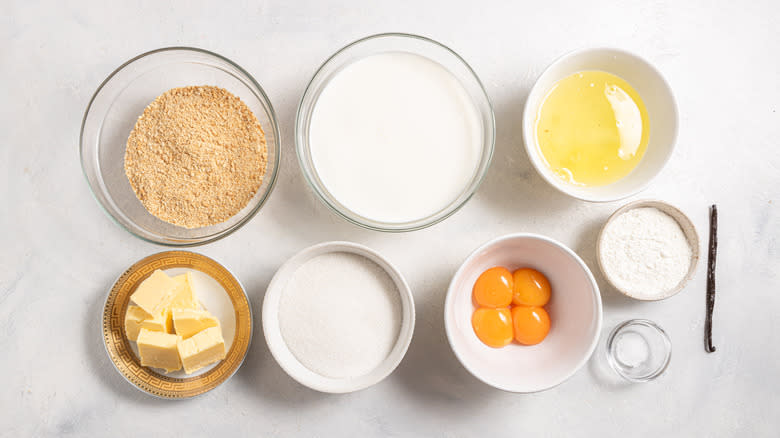
You'll need fewer than 10 simple ingredients to make this delicious Canadian flapper pie. Just check butter, graham cracker crumbs, sugar, vanilla bean, milk, eggs, cornstarch, and salt off your shopping list.
Step 1: Preheat The Oven
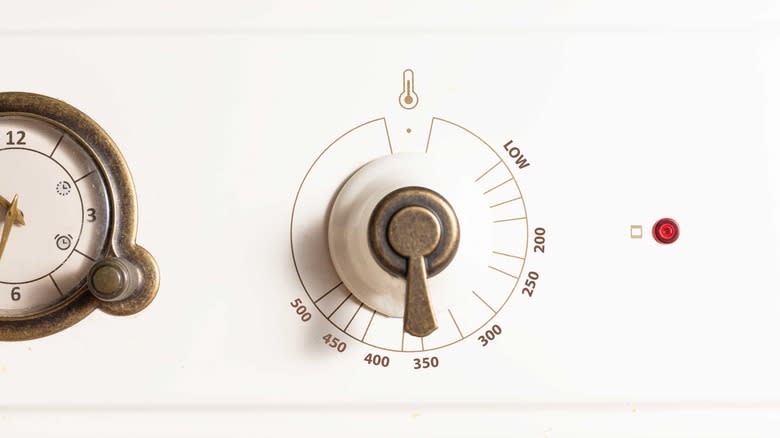
Preheat oven to 350 F and position a rack in the middle.
Step 2: Melt The Butter
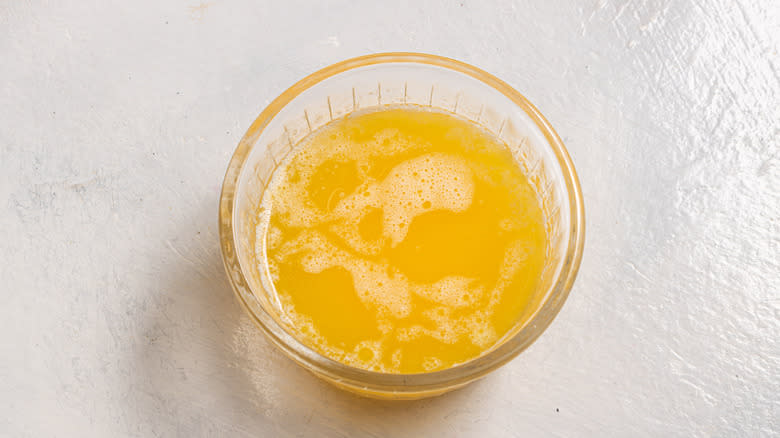
Melt 6 tablespoons butter.
Step 3: Combine The Graham Cracker Crust Ingredients
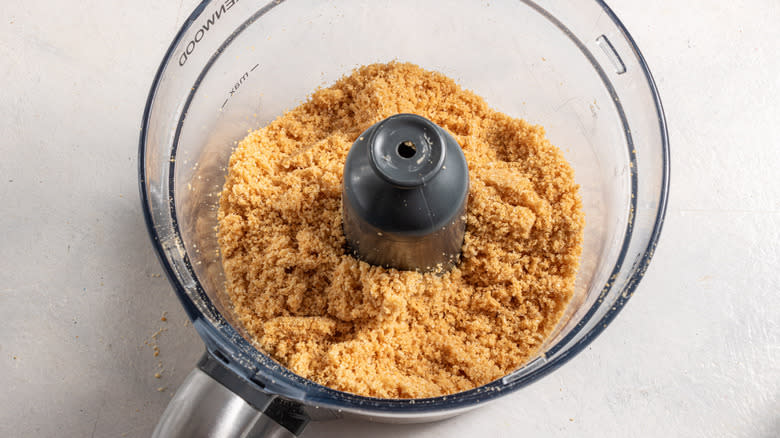
In a food processor, combine graham cracker crumbs, melted butter, and ¼ cup sugar. Process until combined.
Step 4: Bake The Pie Crust
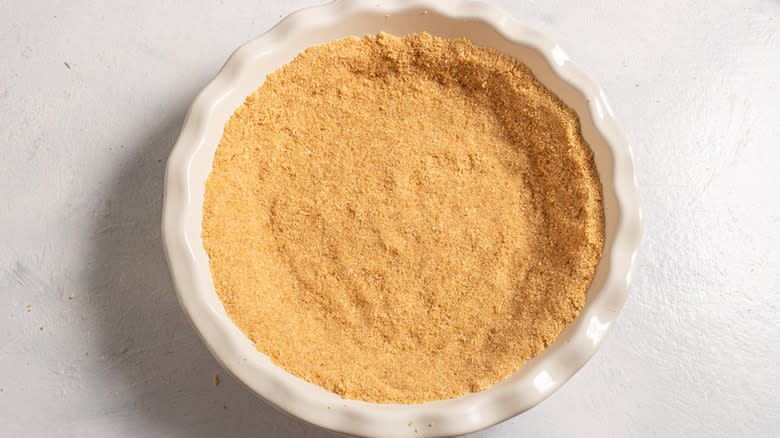
Press the mixture into a 9-inch pie dish, then bake on the middle rack for 12-14 minutes, or until golden brown.
Step 5: Let The Crust Cool
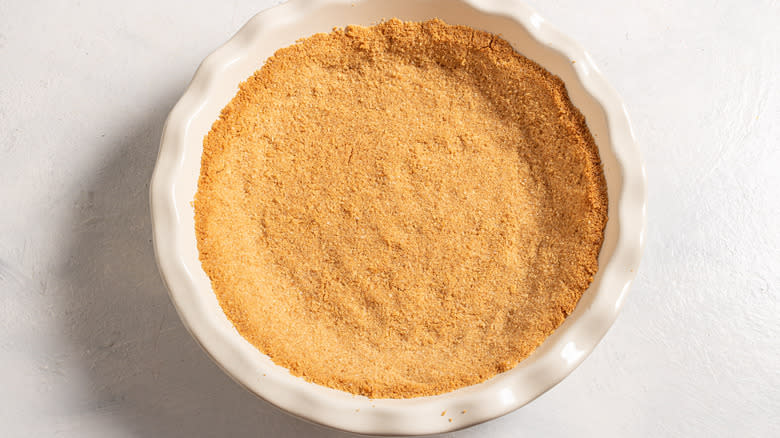
Remove crust from the oven and set aside to cool at room temperature or in the fridge.
Step 6: Prep The Vanilla Bean
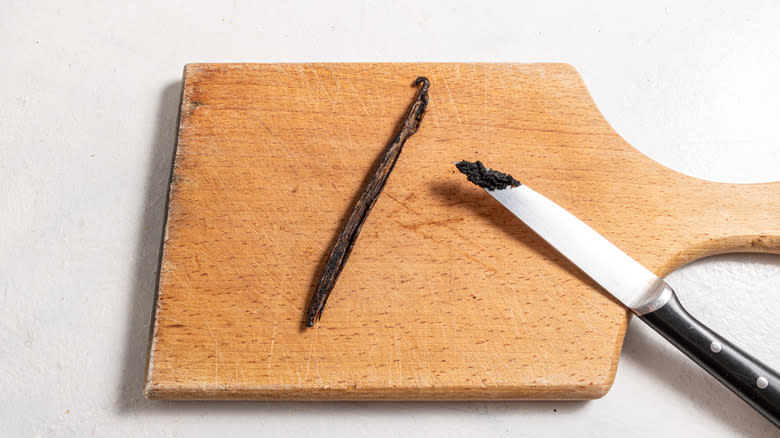
Split open the vanilla bean and scrape out the seeds.
Step 7: Simmer The Milk And Vanilla

In a saucepan, combine the milk with the vanilla seeds and bean. Let simmer on medium-low heat for 3-4 minutes.
Step 8: Whisk The Other Ingredients For The Filling
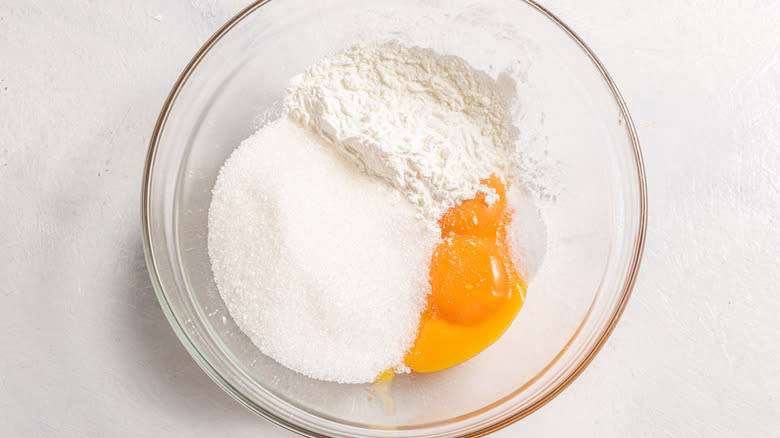
Meanwhile, in a medium bowl, whisk egg yolks, cornstarch, ½ cup sugar, and salt.
Step 9: Temper The Egg Mixture

Pour some of the hot milk over the egg yolk mixture, whisking constantly, to temper the eggs.
Step 10: Cook The Filling Until It Thickens
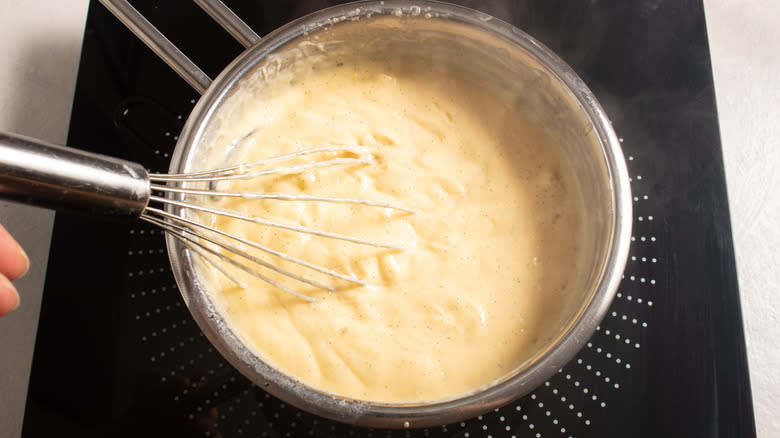
Place the rest of the milk back on the stove over medium-low heat. Pour in the tempered egg yolk mixture, whisking until it thickens, about 2-3 minutes.
Step 11: Add Butter
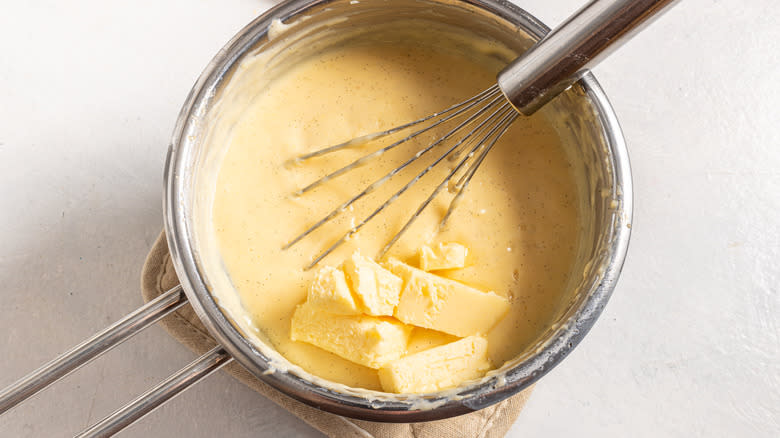
Remove the mixture from heat and whisk in the remaining 4 tablespoons butter until incorporated.
Step 12: Remove The Vanilla Bean From The Custard Cream
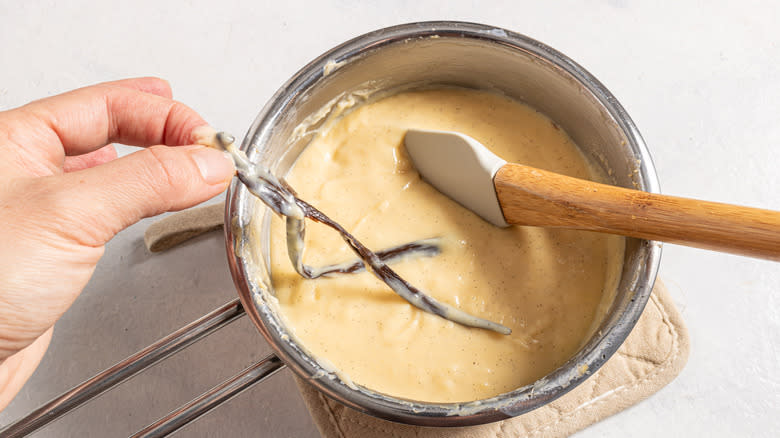
Discard the vanilla bean.
Step 13: Add The Filling To The Crust
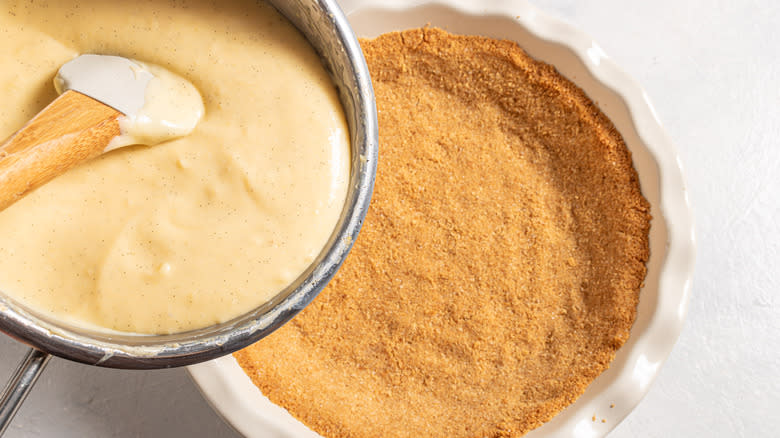
Pour the filling into the crust, then set the pie aside.
Step 14: Beat The Egg Whites
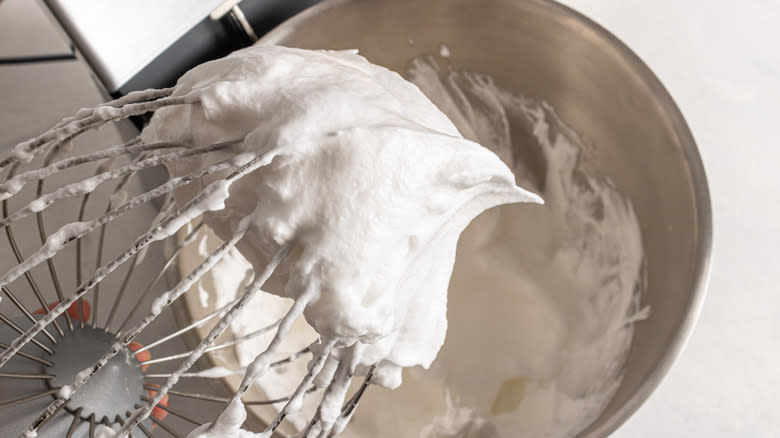
In the bowl of a stand mixer fitted with the whisk attachment, beat the egg whites until foamy. Gradually add the remaining ½ cup sugar, beating on high speed until stiff peaks form, about 5 minutes.
Step 15: Spread The Meringue Over The Pie Filling
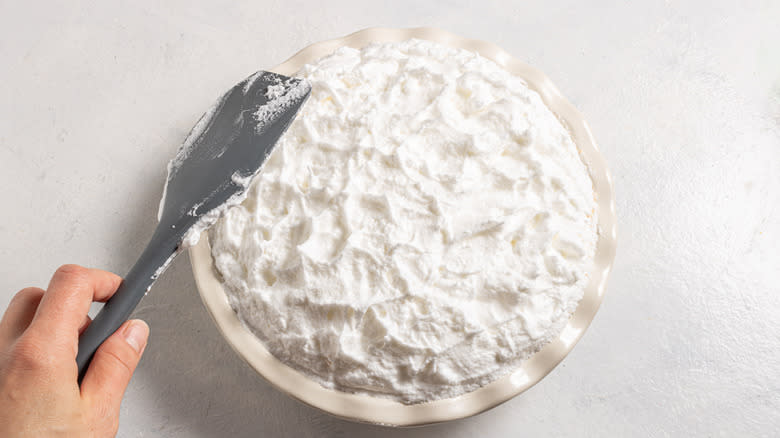
Top the pie with the meringue, using a rubber spatula to spread it out and create decorative peaks.
Step 16: Brown The Meringue In The Oven
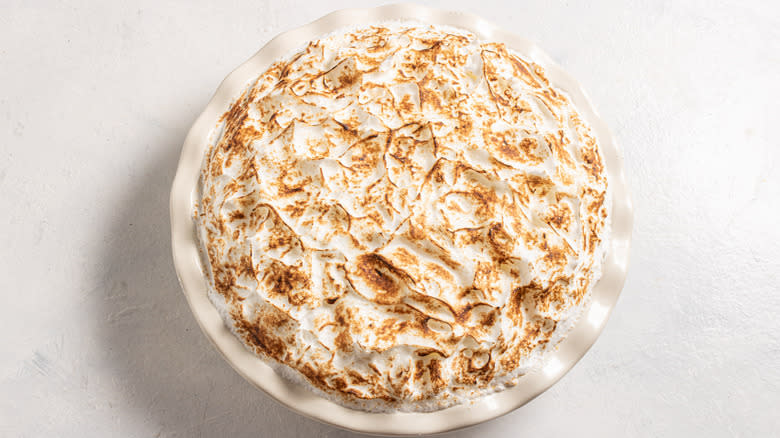
Bake the pie under the broiler until the meringue browns, 2-4 minutes. (Watch closely, as this can happen very quickly.)
Step 17: Cool The Pie Before Slicing And Serving
Remove pie from the oven and let cool completely before slicing and serving.
What Is Egg Tempering And How Do You Do It?
Egg tempering is a cooking technique that involves gradually raising the temperature of eggs without causing them to curdle or scramble. This is typically done by adding a hot liquid, like milk or broth, to the eggs while continuously whisking, which allows the eggs to come up to a higher temperature without cooking them too quickly. Tempering eggs is important in many recipes that require adding eggs to hot liquids, such as soups, custards, or sauces. By tempering the eggs, you can ensure that they blend smoothly with the hot liquid, creating a luscious and creamy texture without any risk of ending up with bits of cooked egg throughout your dish.
To temper eggs, you'll need your eggs, a hot liquid, and a whisk or fork. Gently heat the liquid on the stovetop, then crack the eggs into a bowl and whisk them until they're fully combined. Next, slowly pour the hot liquid into the eggs while whisking continuously until the mixture is fully incorporated. Once the eggs are tempered, you can add them to your recipe as directed.
What Are Some Tips For Making The Best Meringue?
A few tips can help you make the best meringue. First, use room-temperature egg whites. This will help the egg whites whip up to their full volume and create a stable meringue. Also make sure your bowl and beaters are clean and dry, as any traces of fat or moisture can prevent the egg whites from whipping up properly.
From there, beat the egg whites until they reach stiff peaks, meaning that when you lift the beaters out of the bowl, the egg whites hold their shape and don't fall back into the bowl. Slowly add sugar while continuing to beat the egg whites, which will help the meringue hold its shape and create a glossy, smooth texture. Finally, don't overbeat the egg whites, which can result in a grainy, dry meringue. Stop beating once the mixture reaches stiff peaks, then add the beautifully fluffy topping or mix-in to your dessert.
Classic Canadian Flapper Pie Recipe
Prep Time: 30mCook Time: 25mYield: 1 9-inch pieIngredients
10 tablespoon butter, divided
2 cups graham cracker crumbs
1 ¼ cups granulated sugar, divided
1 vanilla bean
2 ½ cups milk
4 eggs, yolks and whites separated
3 ½ tablespoons cornstarch
¼ teaspoon salt
Directions
Preheat oven to 350 F and position a rack in the middle.
Melt 6 tablespoons butter.
In a food processor, combine graham cracker crumbs, melted butter, and ¼ cup sugar. Process until combined.
Press the mixture into a 9-inch pie dish, then bake on the middle rack for 12-14 minutes, or until golden brown.
Remove crust from the oven and set aside to cool at room temperature or in the fridge.
Split open the vanilla bean and scrape out the seeds.
In a saucepan, combine the milk with the vanilla seeds and bean. Let simmer on medium-low heat for 3-4 minutes.
Meanwhile, in a medium bowl, whisk egg yolks, cornstarch, ½ cup sugar, and salt.
Pour some of the hot milk over the egg yolk mixture, whisking constantly, to temper the eggs.
Place the rest of the milk back on the stove over medium-low heat. Pour in the tempered egg yolk mixture, whisking until it thickens, about 2-3 minutes.
Remove the mixture from heat and whisk in the remaining 4 tablespoons butter until incorporated.
Discard the vanilla bean.
Pour the filling into the crust, then set the pie aside.
In the bowl of a stand mixer fitted with the whisk attachment, beat the egg whites until foamy. Gradually add the remaining ½ cup sugar, beating on high speed until stiff peaks form, about 5 minutes.
Top the pie with the meringue, using a rubber spatula to spread it out and create decorative peaks.
Bake the pie under the broiler until the meringue browns, 2-4 minutes. (Watch closely, as this can happen very quickly.)
Remove pie from the oven and let cool completely before slicing and serving.
Read the original article on Mashed

