This Small, Under-$50 Upgrade Is the Unsung Hero of Bathroom Makeovers

Luxurious bathrooms and powder rooms with vintage style are dreamy, whether they have stained glass windows, bistro-style tiles, colorful fixtures, or some other gorgeous feature. But making a bathroom look as if it’s taken a step (or two, or three) back in time — and still look chic — is no easy feat. And true authenticity can get pricey, too.
But luckily, with some ingenuity and a bit of know-how, you can create a vintage-inspired bathroom on a budget. Take, for example, this bathroom makeover achieved by homeowner Kiley Cutler.
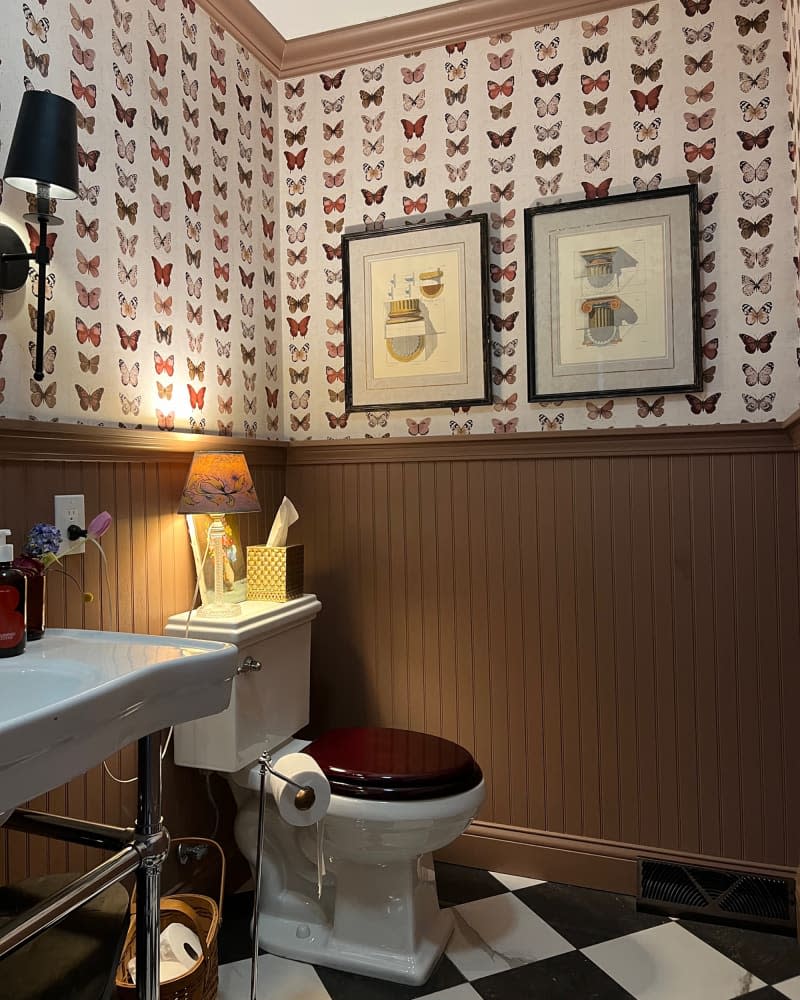
The result is something that echoes the 1920s and showcases dark and moody colors of the past, and it was done with cost-saving measures. “Changing hardware, faucets, lighting, and a mirror are all great ways to update a bathroom without a lot of cost,” says Amy Cuker, LEED AP, design director of down2earth interior design.
The other new-meets-old — and frankly, pretty ingenious — touch that Kylie added to her bathroom? She swapped out the toilet’s white seat for something darker to match the vintage fixtures in the space.
As she told Apartment Therapy, “When I thought I was pretty much done with the bathroom, something still felt ‘off,’ and I couldn’t figure out what. I realized that the white toilet stuck out as looking so stark and new and bright, when the rest of the room had a more colorful, moodier, vintage feel. I ended up getting a wood toilet seat, and I feel like it just added the perfect final touch on pulling the whole thing together.”
In Kiley’s bathroom, designer Amy Cuker observes, “The new toilet color is richer and a little unexpected, so it gives you a ‘wow’ moment. I also love that it was a way to add color to the room without committing to a colored toilet.”
Cuker also points out that if the homeowner gets sick of the pop of brown down the road, it’s much simpler, and less wasteful, to change the cover than to replace the whole toilet — and the great news is, it’s pretty simple to install yourself.
Allison Harrison, co-owner of GoodBee Plumbing, shares the following installation tips so you can swap in your own toilet seat:
How to Swap Out Your Toilet Seat
This is a really easy DIY that anyone can pull off, but you will need to make sure that you have the right seat and the right tools.
Find the right seat.
Home improvement stores sell basic toilet seats for as little as $10, but you can source vintage-looking ones from places like Signature Hardware and Amazon, too.
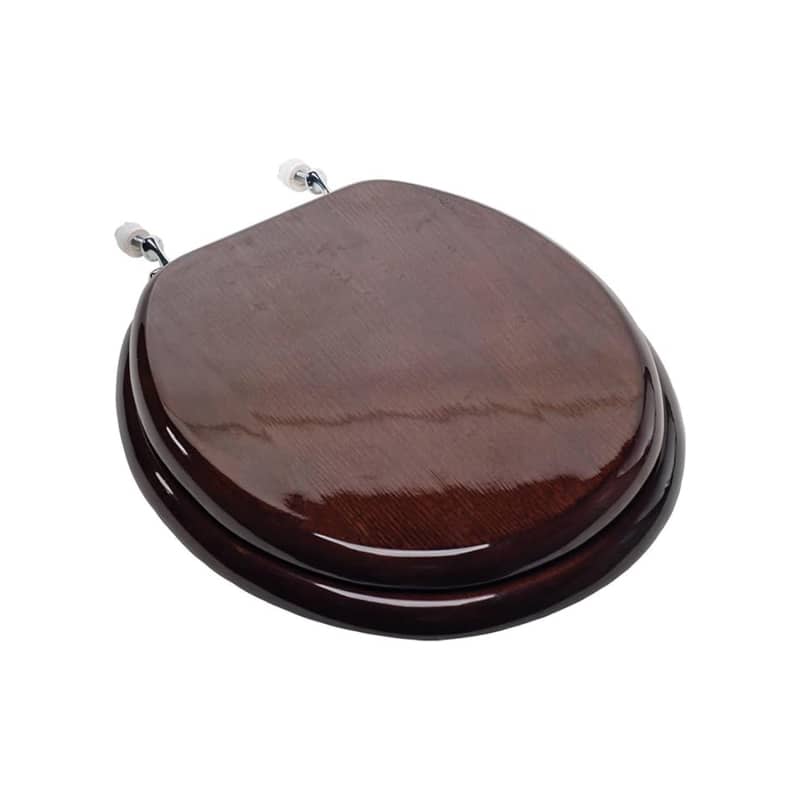
Round Toilet Seat Molded Wood Toilet Seat with Zinc Alloy Hinges
Choose the right shape and size.
Before beginning any installation, it’s essential to ensure the new seat has the correct dimensions for your toilet. To find the most compatible replacement, measure the distance between the mounting holes and the shape of the bowl. You should also make sure you buy the right shape. Toilet bowls come in an elongated oval shape or a round shape; the two shapes are not interchangeable.
Gather the necessary tools.
In most cases, Harrison says, you’ll need a flathead or Phillips screwdriver, adjustable wrench, and potentially pliers to swap your seat. Confirm you have the necessary tools for the job before beginning to avoid issues down the line. “Use a wrench that fits snugly to avoid stripping the bolt heads,” Harrison advises. “Sometimes, a socket wrench provides better leverage than pliers.”
Remove the old seat.
Loosen the screws and remove the old seat. “If the toilet seat has plastic nuts that are too tight to remove by hand, be careful not to crack them, as it will make removal more challenging,” Harrison says. You can hold the nuts underneath with pliers if they are difficult to unscrew. Then, lift the seat and clean the area thoroughly. For corroded bolts, apply a penetrating oil like WD-40 and let it soak for a few minutes to help loosen.
If the toilet seat has plastic nuts, those can often be removed by hand — but if they’re too tight to do so, be careful to prevent cracking when you use tools. That will make removal much more challenging.
Install the new seat.
Now you’re ready for the new seat! Position it over the mounting holes, and align it with the bowl before inserting the bolts and securing it. Tighten the seat to ensure a snug fit without overtightening, which can crack the toilet seat and cause more costly issues requiring professional help. ”A good rule of thumb is to tighten until you can no longer easily turn with your fingers, then use a wrench for a final quarter turn,” Harrison says.
Perform a stability test.
Sit on the seat and shift your weight to ensure proper installation. If the seat wobbles, adjust the position or further tighten the bolts.
Finish with a final check.
Test the lid and seat to ensure they open and close correctly, and then flush the toilet to confirm the seat remains stable.

