xTool Screen Printer review: an innovative alternative to traditional screen printing
xTool Screen Printer specs
Product size 615.8 x 293.5 x 208mm
Product weight 9.35kg
Working area 11.5 x 16inch
Compatible with xTool S1, D1 Pro (Basic and Multi-Color), M1, F1 and P2 (Basic Kit only)
Laser machine maker xTool has succeeded in making screen printing easily accessible with its new xTool Screen Printer. You’ll find this device easy to get yourself up and running if you’re a complete screen printing beginner, and if you’re a seasoned screen printer then you will undoubtedly be able to appreciate the ease and simplicity that this kit brings compared to traditional screen prepping.
Preparing a screen has always been such a faff, getting the right tension when stretching the screen, coating it with emulsion, applying the design, exposing it, then washing it off and waiting for it to dry. All those steps and the time they take can really dampen your creative spark. Thanks to the xTool Screen Printer, that process can become a distant memory.
To use the xTool Screen Printer you'll need one of the best laser cutters, and while I'd recommend an xTool laser machine for the best results, this is compatible with most laser cutters and engravers (though this could lead to more trial and error).
I have been using the Multi-Color Kit, which comes with brackets compatible with the xTool S1 and xTool D1 Pro laser machines enabling me to easily create multicoloured designs. A Basic Kit is also available which can work with the xTool M1 and xTool F1 machines, as this kit is only meant for single colour printing so alignment is not as crucial.
xTool Screen Printer review: in the box
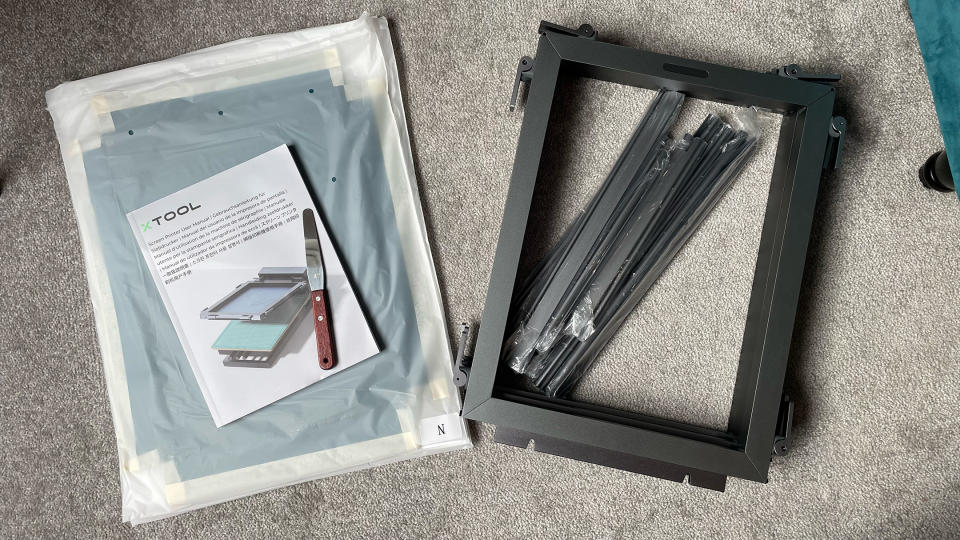
Inside the brightly printed cardboard storage box you’ll find the main screen printing unit, a wooden base board, a sticky mat to help hold materials in place, 11 water-based inks including primary colours, black, gold, silver and glow-in-the-dark, a 9 x 5 inches squeegee, a pallet knife, tote bag, sheets of A4 white card, positioning stickers, an FAQ sheet and the instruction manual.
Along with the main screen printing setup you get four frames, allowing you to have four screens on the go at a time, which is perfect for multi-colour prints. There are 12 screens in the kit too, allowing you to create three large four-colour designs or countless smaller single-colour designs.
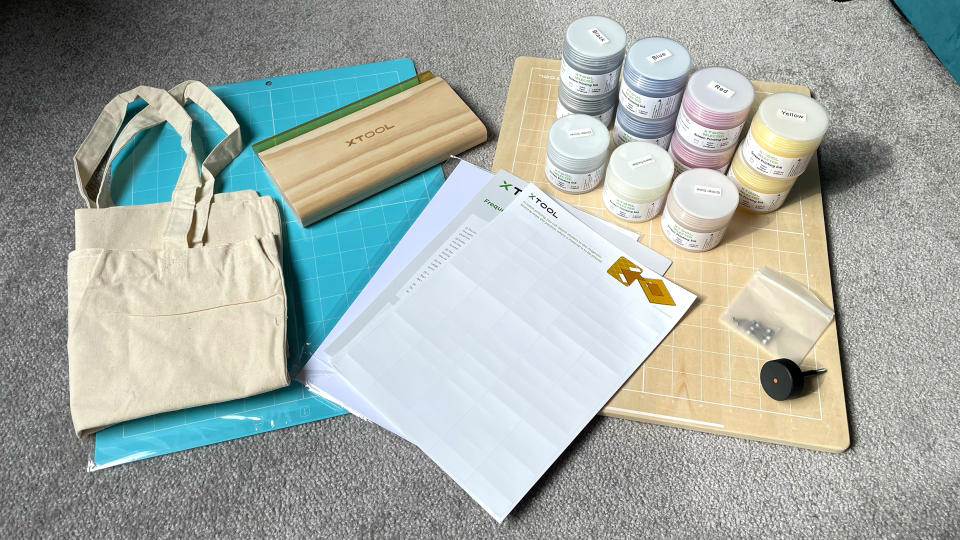
My review kit is the Multi-color Kit which comes with more inks and bag blanks to use, but even the Basic kit comes with enough inks and materials to get started out of the box.
There are a lot of plastic bags, tape and polystyrene used within the outer box. None of this is recyclable or easily reusable, making it quite an unsustainable approach to protective packaging, which is disappointing.
xTool Screen Printer review: design and build
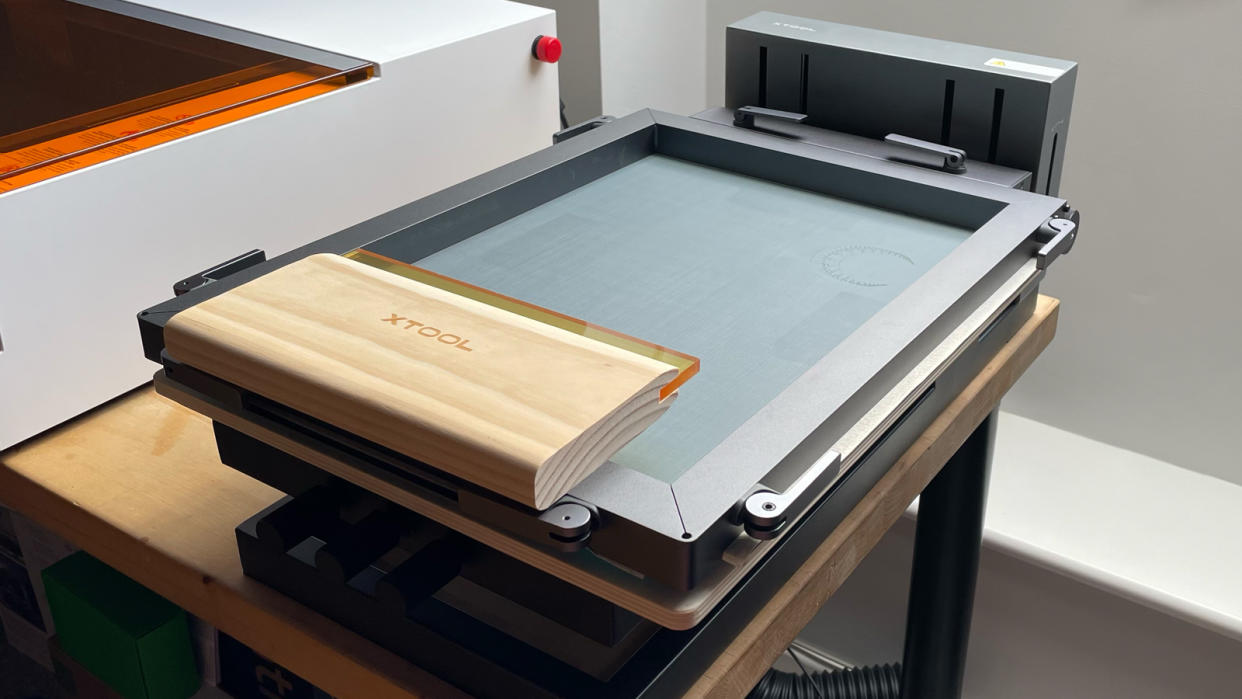
All components on the xTool Screen Printer setup feel robust and good quality. The main base unit itself is made out of metal, as are the screen frames. Everything fits together sturdily, so you can have confidence when it comes to print alignment.
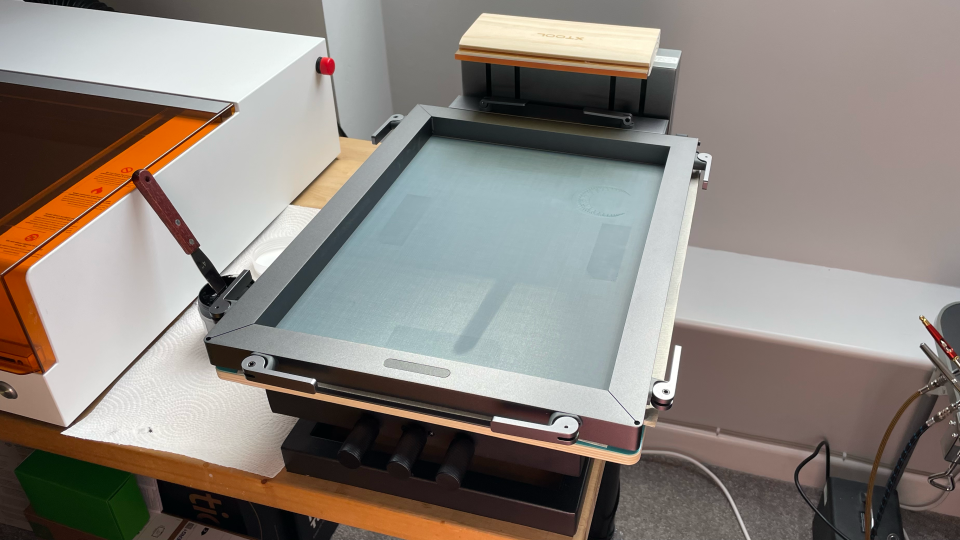
Each 'screen frame' is designed to attach at the back of the main base unit, which has two quick-release clamps, meaning that you can switch between frames in as little as ten seconds.
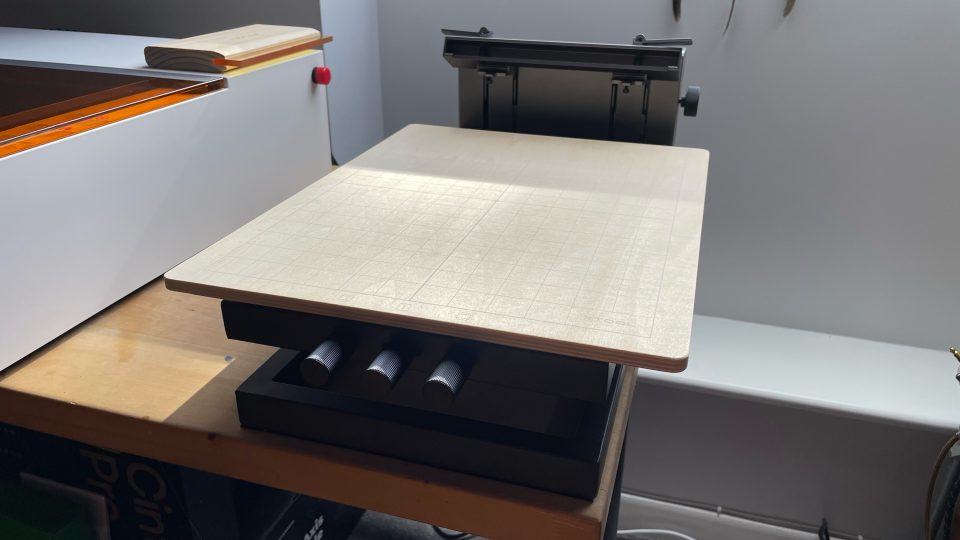
At the front of the main base unit there is a three-axis micro registration system, which comes in the form of three twistable knobs, with one adjusting the base board position backwards and forwards, and the other two rotating the base board. This gives you more control over the printing position, which is really helpful for complex prints. There is another knob on the back-right of the machine, which allows you to adjust the Z-axis, allowing you to print on object that are up to 60mm thick.
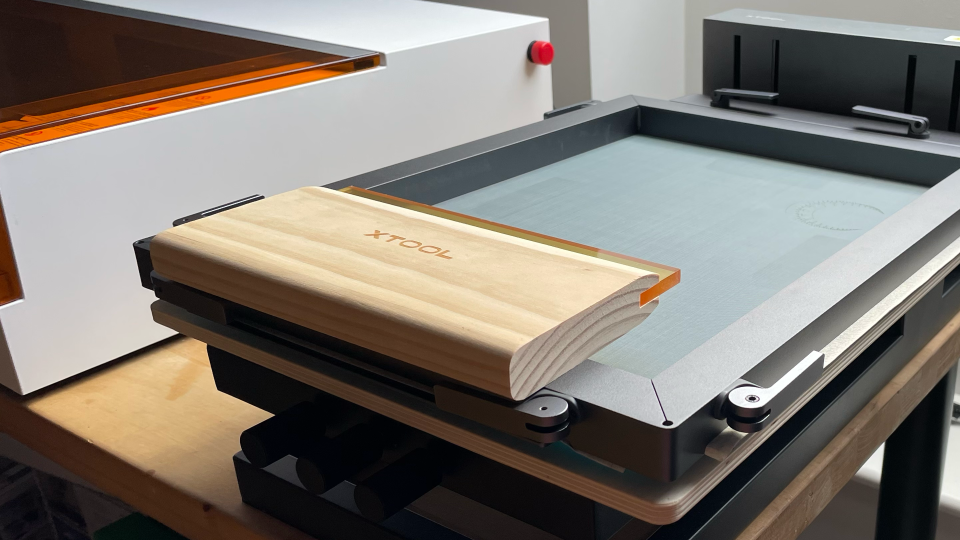
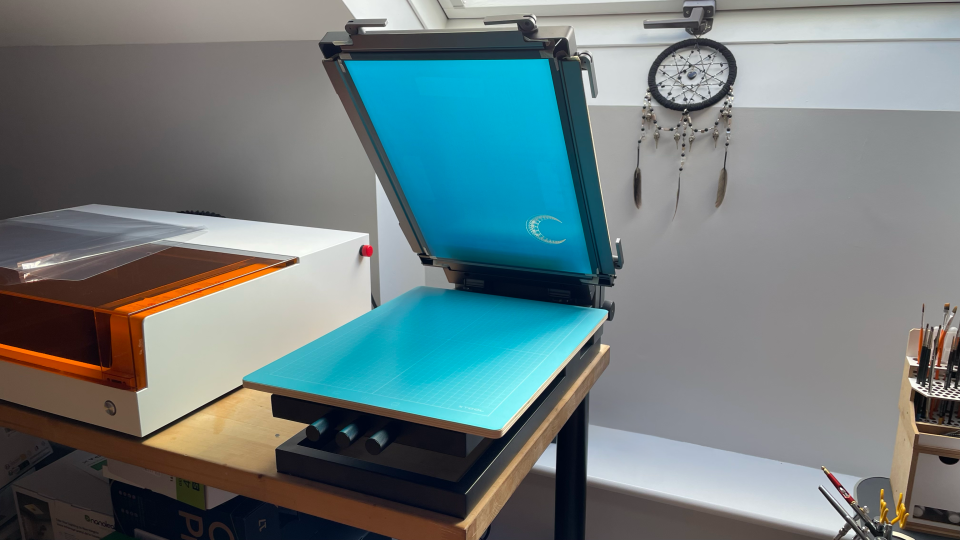
Another helpful feature is the 60 degree Hover Hinge. This makes life a lot easier when printing, and helps to keep things clean as you don’t have to worry about making a mess or finding space to put down your screen between print passes, as the screen remains attached as you raise and lower it, making it quick and easy to switch between materials.
Speaking of working cleanly, the squeegee that comes with the xTool Screen Printer has a magnetic section, so it’s easy to place it securely either on the magnetic section on the printing frame, or on the top of the back of the main base unit.
xTool Screen Printer review: setting up
Getting the xTool Screen Printer set up is fairly simple. The side knob that controls the Z-axis adjustment needs to be screwed into the side of the back of the main base unit. The magnetic base board clips straight on, and the sticky mat is easy to apply on top of this.
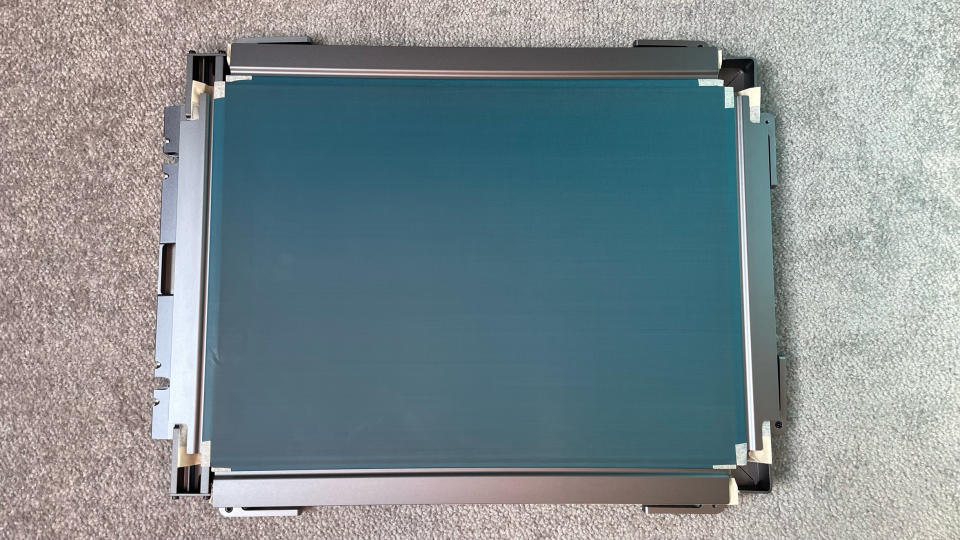
The trickiest part is applying the screens in the metal frames. This is only mildly fiddly though and is easy enough to master. Firstly you will want to make sure that all of the clamps are open. The pieces of cardboard stuck to the mesh screens means that it’s easy to place the screens in the right position within the frame. You’ll need a sturdy surface under the frame when pushing in the fixing pins as it requires a little force. The fixing pins need to be pushed in at a 45 degree angle, I found rocking each pin back and forth to be helpful to find the right position.
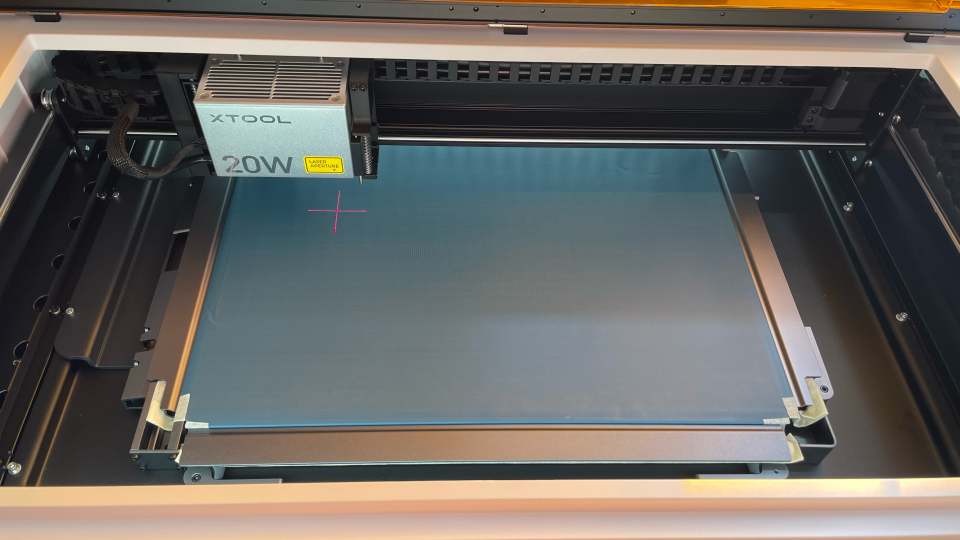
Once all of the fixing pins are in, it’s a case of removing the cardboard and shutting the clamps again. By this point the screen will be stretched really tight, so it’s ready to put into the laser cutter to engrave the design. If you have an xTool S1 or xTool D1 Pro you will find a compatible bracket in the Multi-Color kit which is screwed into the left hand side of the laser bed, allowing for perfect alignment when creating multi-coloured prints.
One frustrating obstacle that I come across, is that the screen printing bracket that is compatible with the xTool S1 cannot be used in conjunction with the xTool S1 Riser Base. I try a few workarounds, but long story short, the machine refuses to run like this. It means I have to remove the Riser Base from the xTool S1, unscrew the base plate from the riser and re-screw it to the xTool S1. Whilst not the end of the world, the xTool S1 is a heavy machine so it’s a shame that this is necessary to be able to use the bracket with the screens.
xTool Screen Printer review: how it works
The process is joyfully simple. You set up your design in xTool Creative Space just as you would for any laser-cutting project. You will need to flip your design horizontally, as the image is cut onto the rear side of the screen, and you will want to rotate it -90 degree so that you will be pulling the ink down the design and towards yourself. The screen is at a -90 degree angle from you when it is in the laser cutter.
The great news is, when using a compatible laser cutter such as the xTool S1 or xTool D1 Pro the engraving settings are already programmed into the XCS software, so all you have to do is select Screen Print on the controls on the right-hand side of the screen on XCS, and then select Coated Screen (100 Mesh) for the material, to ensure that the right settings are applied. With these settings being predetermined, you don’t have to worry about fiddling with any settings yourself.

Once your screen is engraved, the best practice is to use some compressed air to blow out any remaining debris or dust particles, this is especially important if you have a design with intricate details.
It is then a simple case of inserting the back edge of the screen frame into the main screen printing unit and pulling the clamps over to hold it in place. Then place the material that you wish to print and alter the screen height using the knob on the side of the unit until you’re happy, then apply some ink and use your squeegee to draw the ink over the screen so that it can pass through the engraved areas, printing your design on the material below.
Whilst there may be more of an aspect of trial and error if you are using a different laser cutter, when teamed with the xTool S1, getting a screen prepared is a perfectly streamlined process, offering the ability to produce a ready-to-use screen in a matter of minutes.
xTool Screen Printer review: performance
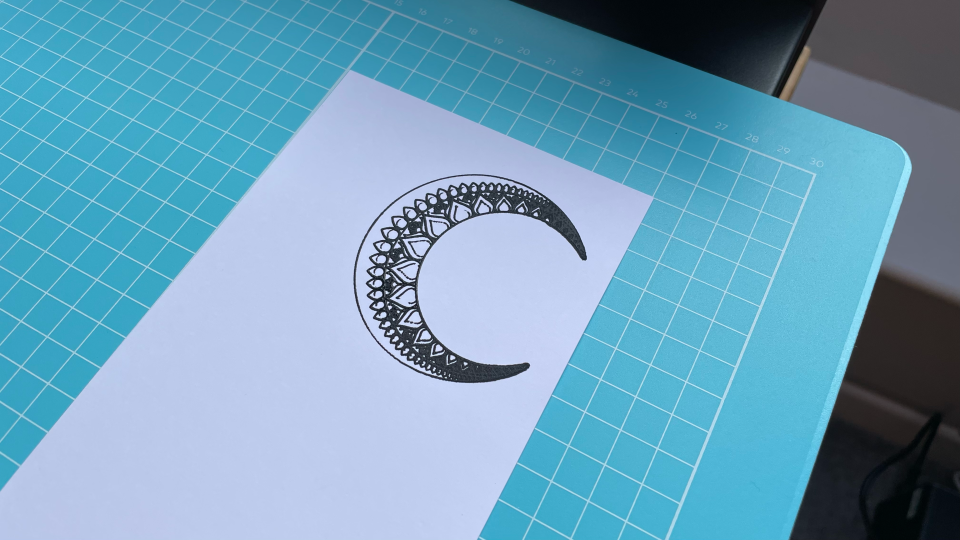
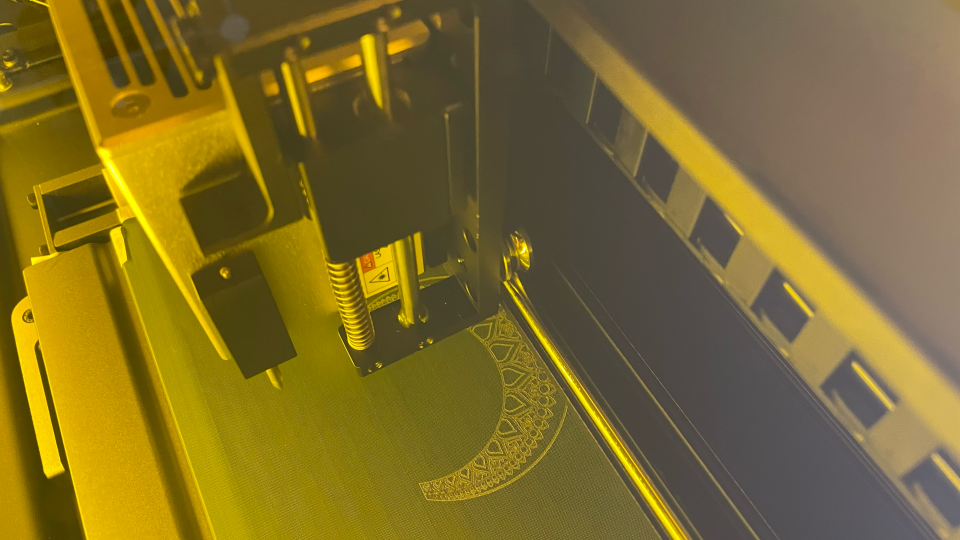
I am really happy with the performance of the xTool Screen Printer. Engraving designs into the cured emulsion was quick and easy. Using these default settings it takes ten minutes to engrave my 67 x 62 mm moon design through the emulsion coating, exposing the mesh underneath. I’m pretty happy with that speed, considering the intricacy of the design.
Once the design is engraved it is easy to attach the frame to the main unit and adjust the height so that the screen was in the correct position over the card. Despite the intricacy of the design, and the fact that I’ve not done any screen printing in ten years, I am really pleased with how easy the process is, and how well the first print came out.
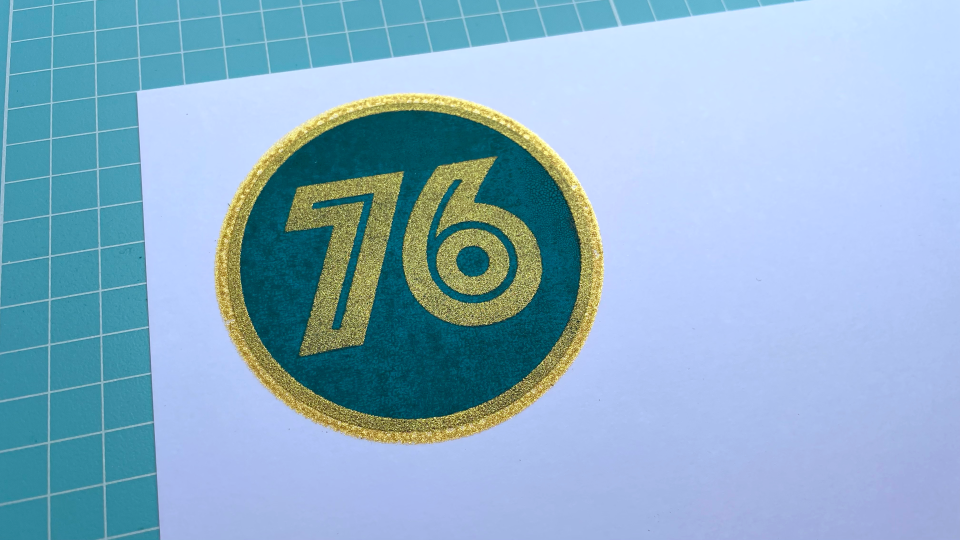
Once I’d worked on a few more prints it is easy to get back into the swing of things. The bracket in the xTool S1 made alignment an absolute breeze, I didn’t need to do any tweaking with the micro registration system. The water-based inks that come with the xTool set are good quality, and the glitter gold particularly is absolutely gorgeous.
The inks mix together really well to make custom colours too. Whilst printing I find the magnetic section on the squeegee to be really helpful. You are able to attach it on to the top of the frame in front of you, but I find it easier to stick it to the top of the main unit as it keeps it out of the way.
I would wager that, once you’ve watched a YouTube video or two on how to get the best results when screen printing, even a complete beginner should be able to achieve some good results with this setup.
xTool Screen Printer review: price
The xTool Screen Printer is priced at $693.06 / £549 for the Multi-Color Kit or $377.52 / £299 for the Basic Kit. It’s worth noting that you only get 3 screens and 5 inks with the Basic Kit., but if you’re only planning to do a few variations of single-colour prints then the Basic Kit should be all that you need.
There is no direct comparison on the market at present, as no other laser-cutting brands have developed their own screen printing solutions. If we compare the xTool Screen Printer to the cost of a traditional screen printing exposure kit however, such as the Speedball Advanced All-In-One Screen Printing Kit, which provides the bare basics to expose a single screen, at a cost of $281.45 / £222.95, it’s clear to see that the difference in the quality of materials and the increased efficiency from the xTool setup is definitely worth spending a little extra on.
There are additional costs to consider with long term use, such as additional emulsion-coated screens. Each screen should be good for over 100 prints, but there are replacements available if required. Whilst they retail at £52.99 for four screens, the cost isn’t too bad considering the amount of time and effort they could save you.
xTool Screen Printer review: should I buy one?
If you want a faster alternative to traditional screen printing, already own and are confident with the compatible xTool laser cutters, and you’re happy to invest in the kit, then I’d highly recommend purchasing the xTool Screen Printer. The speed at which you can batch-print t-shirts, tote bags and art prints is fantastic.
Whilst the replacement coated screens could be seen as quite costly, if you are developing products to sell you can easily get several small designs on one screen, plus, xTool themselves have confirmed that it is possible to recoat the screens yourself at home, offering a significant cost saving.

