I Just Found the Only Way I’ll Ever Cook My Morning Oatmeal Again (It’s Not What I Expected)
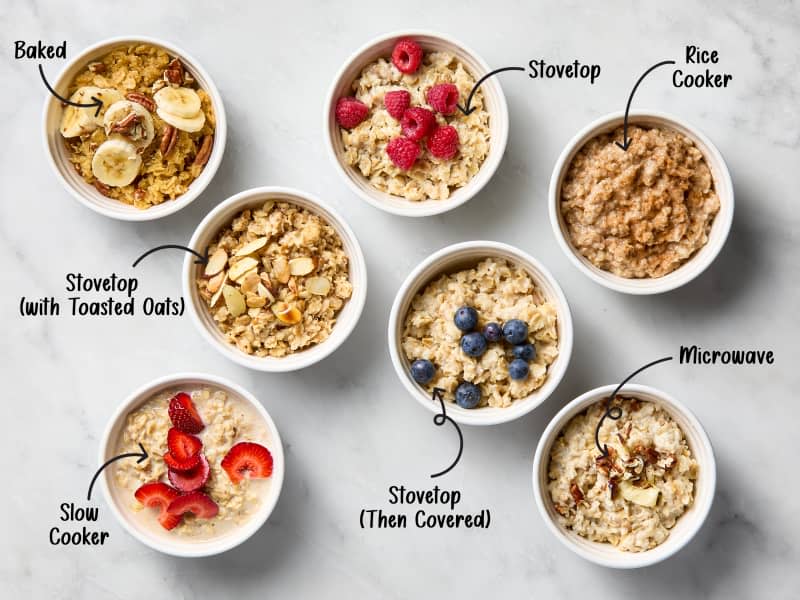
Table of Contents
Breakfast is a struggle for me. I am not a morning person and, quite frankly, lack the cognition and creativity required at 7 a.m. to come up with breakfast ideas. Oatmeal is a good solution for this problem. It’s filling, simple, and endlessly customizable. You can make it sweet or take it savory. The flip side, however, is that it can also be relatively easy to mess up.
Oatmeal is deceptively easy to make, lulling you into the vague sense that it doesn’t really matter how you prepare it. Don’t be fooled; it matters. The spectrum of oatmeal textures stretches from creamy treat all the way to gloppy, unappetizing mush. To figure out the best method for well-cooked oatmeal I tried out seven popular methods.
A Few Notes on Methodology
The oats: I used Quaker Old-Fashioned Rolled Oats for all of my testing. Rolled oats can cook relatively quickly, but are also hearty enough to stand up to longer cooking times. Quick-cooking oats, on the other hand, would turn to mush if cooked for a long period of time. Steel-cut oats are great for long cook times, but are too tough to use in any of the quicker cooking methods and would require a pre-soak.
Flavoring: In order to keep the flavor of the different oatmeals as similar as possible, I eliminated extra ingredients like fruit and nuts called for in each recipe. I kept seasonings to salt, sweetener (usually brown sugar, but one method called for agave and one for maple syrup), and cinnamon, even if a recipe didn’t call for them.
The testing: I tested all seven methods on the same day with oats from the same package. The oats cooked on the stovetop were cooked in the same small saucepan, which I washed between tests.
Ratings: I rated the oatmeal on a scale from 1 to 10, with 10 being well-cooked, flavorful oats with a creamy-but-not-mushy texture.
Cooked Oats Method: Microwave
Rating: 3/10
About this method: For this test I followed instructions right from the source: the container. Per the Quaker website, I combined 1/2 cup of oats, 1 cup of whole milk, and a pinch of salt in a microwave-safe bowl. I microwaved this mixture until the oats were cooked through, which took about 2 1/2 minutes. I added brown sugar and cinnamon before tasting.
Results: In terms of speed, this method cannot be beat; the whole thing takes about 5 minutes from start to finish. However, you are sacrificing texture for swiftness. The oats retained a level of chewiness that I found unpleasant. There’s not too much liquid leftover, which is nice, and the oats also aren’t dried out, but overall the texture is pretty lackluster. You could always attempt to save a gloopy bowl of microwaved oatmeal with toppings, but the fact remains that the oatmeal itself wasn’t great.

Cooked Oats Method: Slow Cooker
Rating: 3/10
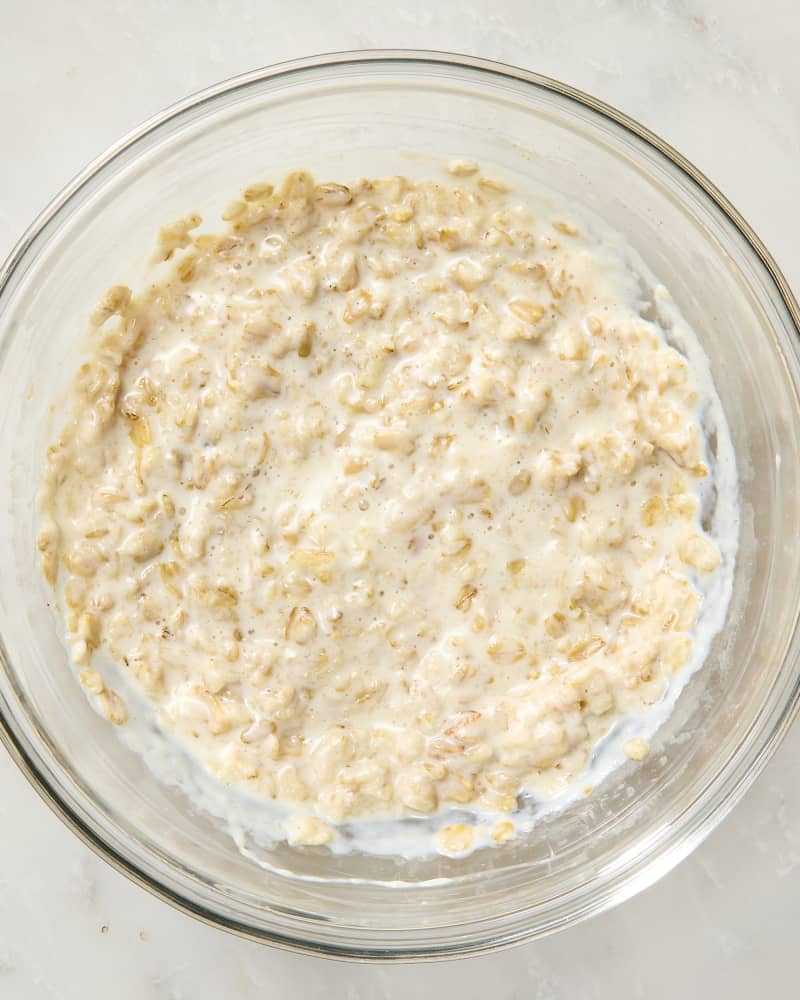
About this method: To make oatmeal in a slow cooker, you add in all of the ingredients at once and then just let it all hang out until it’s ready. I added 2 cups of oats, 3 cups of whole milk, 1/4 cup of brown sugar, 1 teaspoon of cinnamon, and 1/4 teaspoon of kosher salt to the cooker and stirred until well-combined. The recipe called for additional mix-ins, but for the purposes of keeping the oatmeals consistent for this testing I eliminated the fruit and nuts. I set the slow cooker to “high,” covered it, and let the mixture cook until the liquid had reduced and the oats were cooked through.
Results: Surprising no one, this took forever. Although the recipe stated that cooking the oats on a high setting would shorten the overall cook time, I found I still needed 1 hour and 45 minutes to get cooked oatmeal. Perhaps this was the fault of my admittedly rather old slow cooker. However, even if I had been able to cook the oatmeal successfully in 45 minutes, that’s a long time to wait for something you can cook in 2 minutes in the microwave.
This method lends itself to making a larger batch of oatmeal. I have a relatively large slow cooker, and the recipe called for 2 cups of oats and 3 cups of liquid, which yielded “8 servings” of oats. As a household of 2, that’s too many oats.
The advantage of using a slow cooker to make your breakfast is it’s a set-it-and-forget-it method. You add all of the ingredients in the beginning, so instead of ending up with plain oatmeal, it’s fully flavored — and/or full of mix-ins — and ready to just scoop and eat when it’s done. I found the oatmeal to be creamy from the milk, and quite flavorful, but the texture was pretty mushy and gummy. Not a huge fan and it was a long time to wait for middling oatmeal.
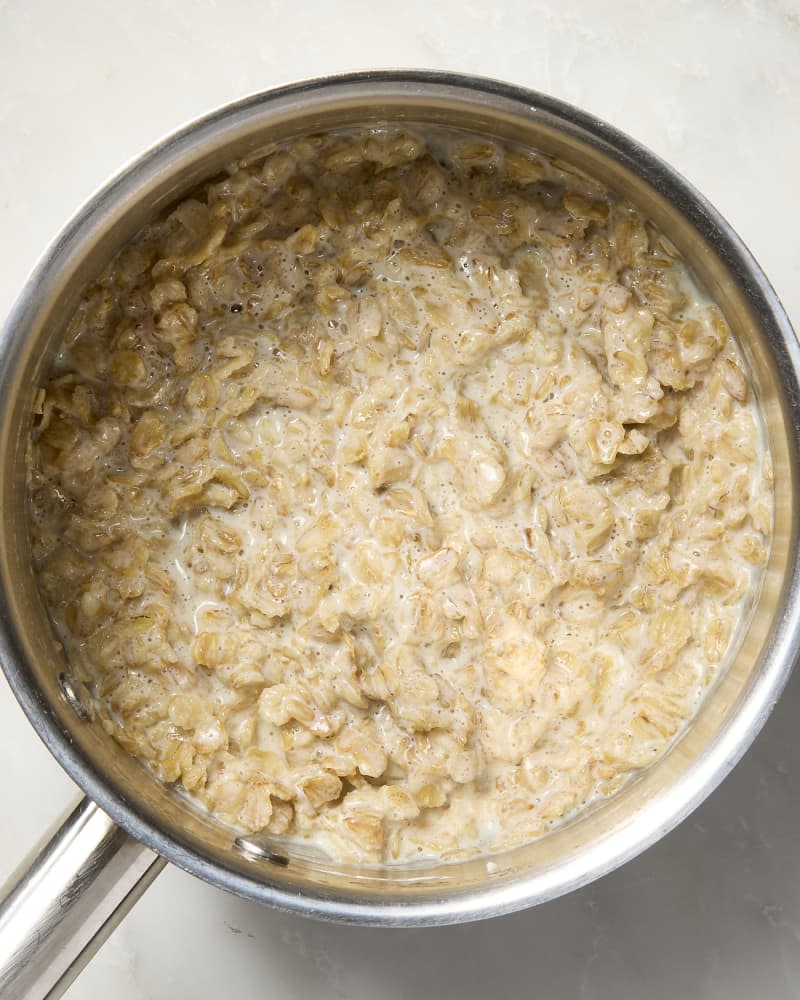
Cooked Oats Method: Stovetop
Rating: 5/10
About this method: I went back to Quaker once again for this test. Per Quaker, I brought 1 cup of whole milk to a boil before adding 1/2 cup of oats and a pinch of salt. I cooked the oats over medium heat for 6 minutes, and then stirred in a bit of brown sugar and cinnamon before tasting.
Results: This is arguably the most ubiquitous method in the lineup — the one that likely comes to mind when you picture making oatmeal. The results were … fine. This is the very definition of bog-standard oatmeal. The texture overall was pretty gloppy, but the oats did retain a bit of bite as a result of the short cooking time.
What’s great about plain oatmeal is that it’s a blank canvas for other flavors. You don’t add any of your own beforehand, as in some other methods I tested. You can also customize how much you’re making to how many people are eating, which gives it a bit of an edge over methods that are specifically large-format.
Nailing the texture here can be difficult, however, because oatmeal tends to seize up as it cools. Basically you need to stop cooking the oatmeal before it’s actually ready, which can be tricky to time. Stovetop oatmeal can go from the perfect texture to a coagulated, sticky mass very quickly as it cools off, and no one wants that.
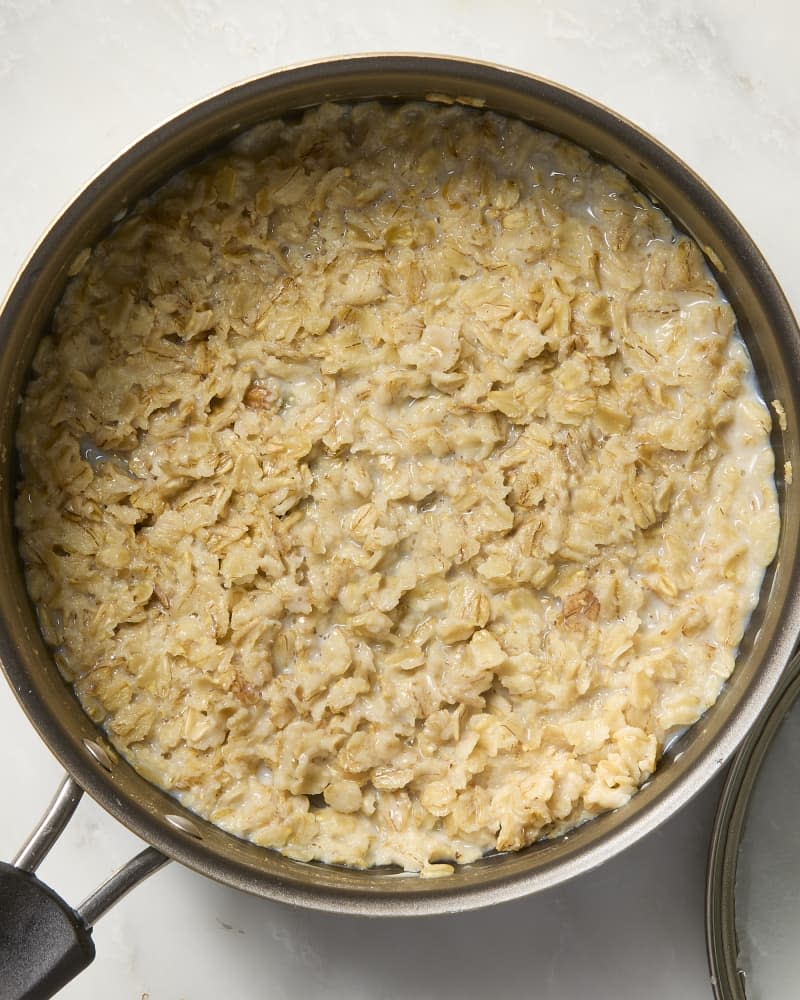
Cooked Oats Method: Covered at the End
Rating: 6/10
About this method: This method calls to boil 1/2 cup of water in a small saucepan before adding 1/2 cup of oats and a pinch of salt. The heat is then reduced to low and the oats cook until most of the liquid has been absorbed, which only took about 2 minutes for me. Next you stir in a few tablespoons of milk, cover the saucepan, and let the oats stand for 2 to 3 minutes before serving. I, once again, added a little brown sugar and cinnamon before tasting.
Results: I was intrigued by this one. Oats cooked in water do have a noticeable lack of creaminess (read: deliciousness). This method seems to be attempting to compensate for that lack of flavor by cooking the oats in water and then finishing up with a small amount of milk. I was also interested in the prospect of using carryover cooking to get the best possible texture from the oats.
I was surprised at how well this worked out, considering how little liquid went into it. The flavor did get a bit of a creaminess boost from the addition of milk, which I enjoyed. The texture of the oatmeal was similar to the regular stovetop method, but slightly drier, which helped avoid the oatmeal transforming into a sticky mass as it cooled. Overall I’d say this was better than the regular stovetop method, but only just.
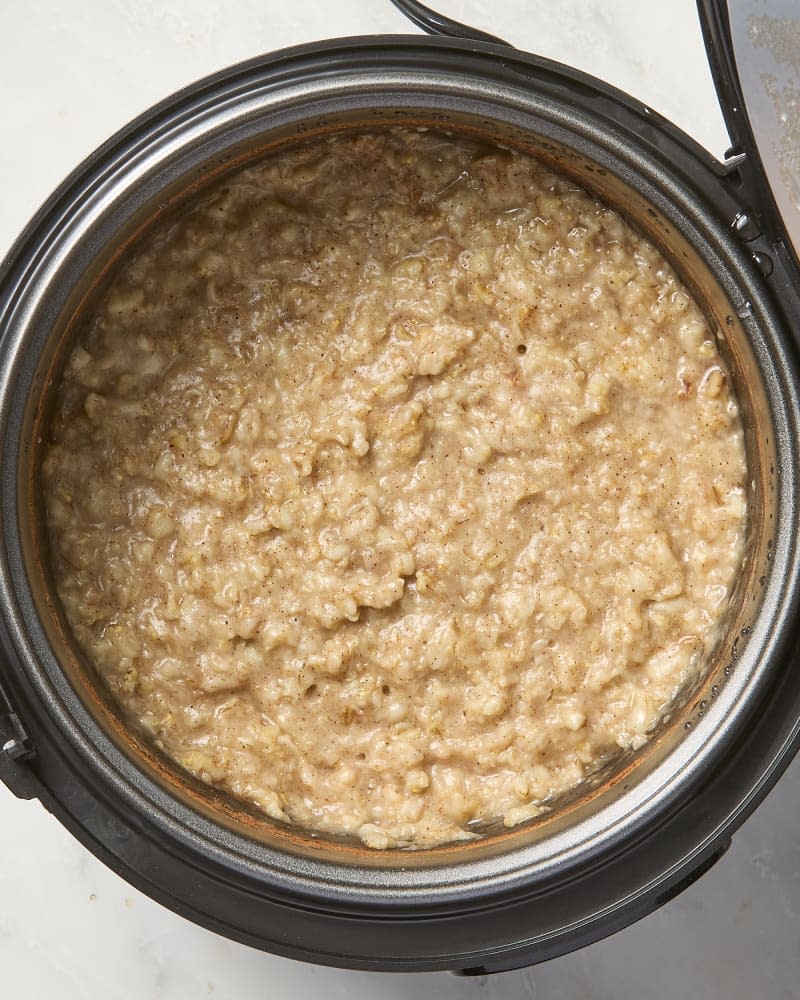
Cooked Oats Method: Rice Cooker
Rating: 5/10
About this method: Cooking oatmeal in a rice cooker is very similar to cooking it in a slow cooker. I added 1 cup of oats, 2 cups of whole milk, 1 tablespoon of agave, 1/2 teaspoon of cinnamon, and a pinch of salt to my rice cooker and stirred to combine everything well. I then set the rice cooker to its “oatmeal” setting and let it run to the end of the cycle.
Results: As with the slow cooker method, this one gets a leg up from me right from the start because you barely have to do anything, which is a key element of any morning activity in my house. I’m a big fan of adding all the ingredients in at the beginning, so when it’s done, it’s actually done, and you can just scoop and eat.
The oatmeal turned out OK. The oats themselves were cooked through, but the texture was a little bit gloopy. Overall, this was about on par with the stovetop method, with two big differences. Firstly, this method is one and done. You set it up, press a button, and come back to fully ready-to-eat oatmeal. You don’t need to dress it up in the bowl, because you did that at the beginning. But, secondly, this took 50 minutes in my rice cooker. Timing may vary from cooker to cooker, but waiting the better part of an hour for oatmeal is a far cry from the five-ish minutes it took to prepare a similar-tasting oatmeal on the stovetop. If you’re trying to eat breakfast and get out the door, the rice cooker is no help.
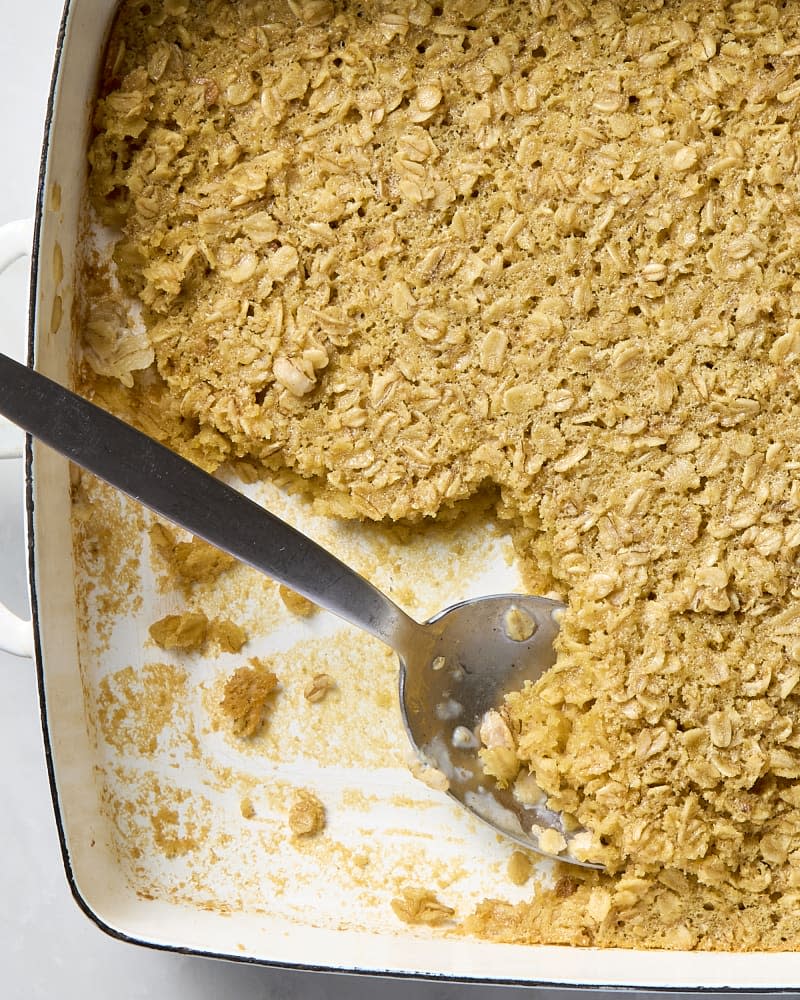
Cooked Oats Method: Baked
Rating: 9/10
About this method: To bake oatmeal, I combined 3 cups of oats with 1 1/4 cups milk, 2 eggs, 6 tablespoons of butter, brown sugar, maple syrup, baking powder, and salt in a greased 9×13-inch baking pan. It is baked, uncovered, in a 350°F oven for 25 minutes before serving.
Results: This is an undeniably maximalist way to prepare oatmeal. It requires way more ingredients than every other method, uses multiple bowls, and is generally kind of a project, rather than a quick breakfast preparation. That said, it was by far and away the best oatmeal of the bunch.
Oatmeal is not known for having a great texture. In fact, its gloopiness is a large part of its reputation. Baked oatmeal bucks this idea by offering a contrast between toasty, crunchy oats on top (especially at the edges), and well-cooked, soft oats in the middle. It’s untouchable.
It’s also the return of one of my favorite oatmeal preparation techniques: Adding all of the flavorful ingredients in at once, so when it’s done, it’s done and you can just scoop and eat. As with the other methods, I eliminated extra ingredients from this recipe, but oatmeal can be baked with fruit, nuts, and other toppings right in the mixture.
The downside of baking oatmeal is it’s the most time-consuming and labor-intensive of any of the methods I tested. It’s hardly achievable for a quick weekday breakfast. However, unlike other methods, this one has the advantage of making very good leftovers. So, if you can find the time to make a batch of this, say maybe on a Sunday, you have breakfasts ready to go moving into the busy work week. This makes a lot. This recipe yields 8 servings, but that works better here than it did with other methods that yielded more than a serving or two, because the leftovers are superior.
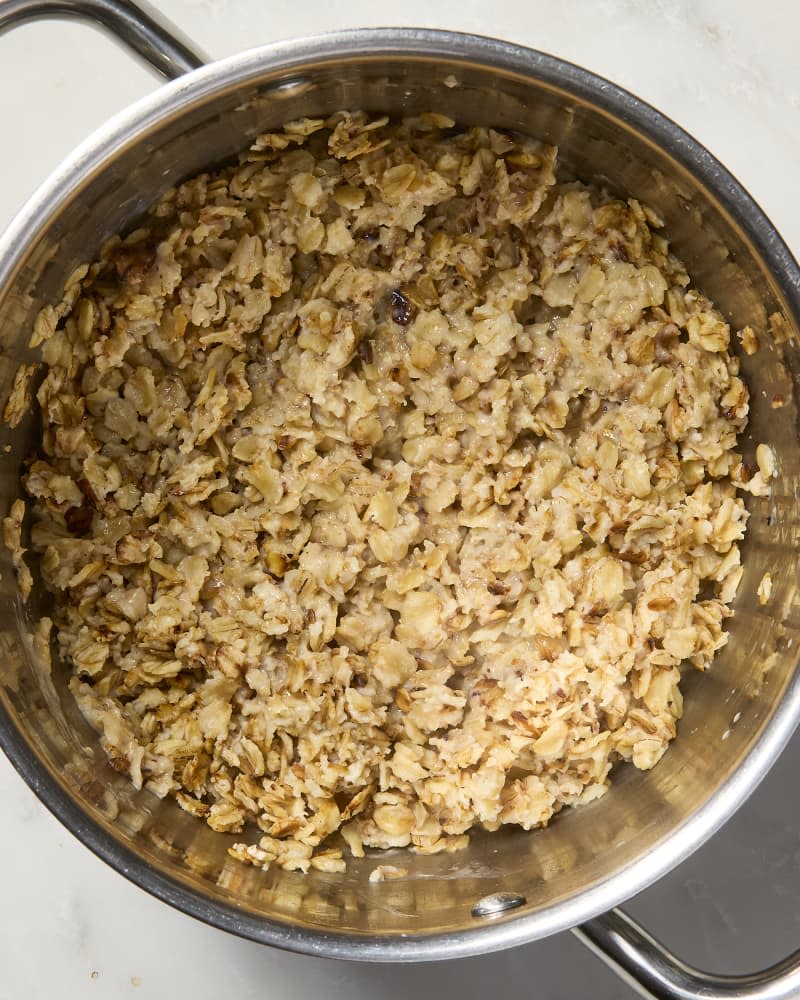
Cooked Oats Method: Toasted Oats
Rating: 10/10
About this method: This surprising method involves toasting 1 cup of oats in a skillet with 1 tablespoon of unsalted butter until fragrant and beginning to brown, which took about 5 minutes for me. Next, you bring a mixture of water, milk, salt, and cinnamon to a boil in a saucepan, add the toasted oats, stir to combine, then turn off the heat. The oats then sit, covered, for 7 minutes before serving.
Results: This method was a total surprise for me. It incorporates some of the best elements from all of my testing into one, resulting in oats that cook quickly, and retain a superior texture. The finished oatmeal was well-cooked, less wet than the traditional stovetop method without being dried out, so it didn’t seize up and become a sticky mass as it began to cool down.
Toasting the oats really did uncover a surprising depth of flavor (I’m sure the addition of butter didn’t hurt either). And the combination of milk and water made the oatmeal creamy without being too rich.
Toasting your oats is a little bit more work than simply cooking them in a saucepan, but that small amount of extra effort yields big rewards, while still keeping the overall cook time short enough to be achievable on a weekday morning. Wins all around.
Overall Key Takeaways
The best way to cook oats depends on how much time you’ve got on your hands. If you’re in a hurry, toasting the oats is a great shortcut to maximize flavor, but still get breakfast on the table fast. If you’re having a more leisurely morning, baked oats are worth the extra effort and time.
No matter how you choose to cook your oats, customizing your toppings can go a long way towards making them delicious. You can go savory with toppings like shredded cheese, scallions, soy sauce, or a fried egg; or sweet by adding chopped fresh fruit, whole berries, nuts, dried fruits, nut butter, or shredded coconut.

