Don’t Be Intimidated By Peel-And-Stick Wallpaper—9 Things To Know Before Installing It In Your Home
You’ll be a DIY pro in no time!
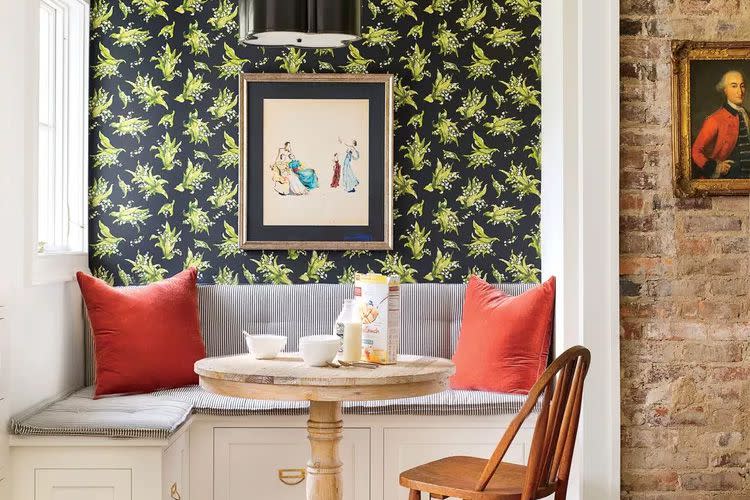
ANNIE SCHLECHTER; STYLING: MATTHEW GLEASON
Tired of that blank wall or boring shelf? Whether you're looking to add interest to the back of a bookshelf or install a whole wall, peel-and-stick wallpaper is a DIY-approved and affordable way to bring personality into your space. Thanks to the self-adhesive backing, it’s said to be a cleaner and easier process than installing traditional wallpaper; however, there’s a little more to it than just tearing off the protective backing. Here are 9 things to keep in mind before embarking on your peel-and-stick wallpaper project to ensure the smoothest installation process and help you work like a DIY pro.
Related: Shop Like A Pro: The Ultimate Guide To Choosing Peel And Stick Wallpaper For Your Space
The Benefits of Peel-and-Stick Wallpaper
If you’re looking to add color or pattern to your home, removable wallcoverings are a renter-friendly and typically more cost effective alternative to traditional wallpaper. The DIY method means you’re not only saving money on the material itself, but also saving on labor costs when you install it yourself. Plus it involves fewer tools and no messy glue or paste needed.
Related: We Put the Best Peel-and-Stick Wallpaper Brands to the Test—Here's What We Found Out
What You'll Need To Properly Install Peel-And-Stick Wallpaper
Peel-and-stick wallpaper
Utility knife
Measuring tape or ruler
Level or straightedge
Smoothing tool
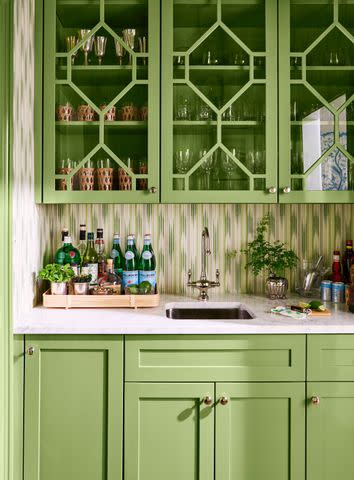
Brian Woodcock; Styling: Page Mullins
Advice To Consider Before Installing Peel-And-Stick Wallpaper
Phone a friend. “Installing peel-and-stick wallpaper is definitely a two person job, so don’t attempt it alone,” says Senior Lifestyle Editor Ivy Odom, who installed removable wallpaper in her work from home space.
Measure twice, cut once. Be sure to double check the measurements of your space before cutting the section of paper.
Buy more than you need. Take into account potential mistakes and any spots that might require more cutting to fit like doors, windows, and shelves. It's better to have a little extra wallpaper that can be repurposed than an unfinished project.
Prepare your surface. Be wary of anything recently painted and stay away from matte or flat finishes to minimize any damage upon later removal. It’s best to install peel-and-stick wallpaper on smooth surfaces with an eggshell, satin, or semi-gloss finish. Best practices may vary according to your specific paper, so always revert to the instructions for your product when preparing your space.
Temperature control. Let the wallcovering acclimate to the temperature of the room where you plan to use it for at least a day ahead of installation. This will help it adhere best.
Don’t peel off the backing all at once. “You want to start from the top and have one person very carefully pull the backing off slowly and evenly while the other uses a wide flat spatula to smooth it out,” says Odom.
Slow and steady is key. Smooth the panels as you go with a clean plastic spackle tool. Odom suggests using something like this, to help you keep air bubbles and wrinkles at bay as you remove the backing.
Consider your pattern. “Lining up the pattern is the hardest part, so if that intimidates you, choose a wallpaper with a more abstract pattern that doesn’t have to line up perfectly,” suggests Odom. “You might have to cut it a little longer and trim as needed, but if you match it up at the top then it should match all the way down.”
Ensure straight lines. “In addition to a sharp blade to cut with, a grid ruler, like this one, also came in handy for measuring when cutting,” adds Senior Social Media Editor Brennan Long, who installed Society Social grasscloth peel-and-stick on the back of her bookshelves.
Related: How To Apply And Remove Peel-And-Stick Wallpaper In Your Home
For more Southern Living news, make sure to sign up for our newsletter!
Read the original article on Southern Living.

