A complete guide to Adobe Illustrator's AI tools
The genie's out of the bottle – it seems that AI is here to stay. With Illustrator's new generative features (see our Illustrator 24 review), it's a good time to try out AI tech in your workflow, particularly for idea generation or mockups. Jump from imagination to screen to print with our tutorials that explain each tool below.
Text-to-Vector Graphic enables you to generate vector graphics from text prompt, Recolor uses AI to shift your colour scheme in an instant, Mockup puts your design in situ on a 3D product and Retype allows you to select a font and find the closest matches for your own designs.
Here, I have created a step-by-step tutorial for each of these tools, and you can use the side-nav to skip ahead to the one you want to read. Afterwards, check out the raft of other Illustrator tutorials we've collated.
Text to Vector Graphic
Even a complete beginner can conjure up a fantastical illustration in minutes, generating intricate vector graphics from even the most basic of text prompts. As a professional, you might want to use these to generate ideas, or to provide a rough mockup of your idea to clients before working on the real thing. It’s fun to experiment with and fully editable once created. The only limit is your own imagination.
01. Open the window
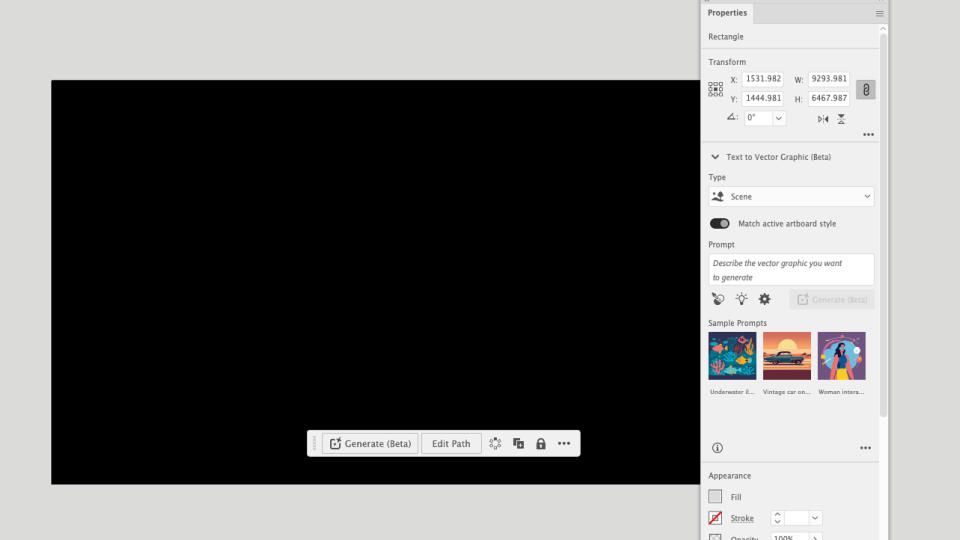
(Image: © Future)
Text to Vector Graphic is still in beta and not immediately available in the Illustrator interface, but can be accessed via the Properties panel, Window > Text to Vector Graphic. Alternatively, activate the Contextual Bar in Window > Contextual Bar. This will remain switched on indefinitely and appears beneath any object or frame selected. Initiate the process by drawing a frame. Since you’ll end up with a scalable vector graphic, size isn’t too important, but it's worth keeping the aspect ratio in mind, for example drawing a square for Instagram post or 16:9 for video.
02. Select the type of object

(Image: © Future)
If you’re using the Contextual bar, press the Generate (beta) button to open the options (this isn’t needed in the Properties panel). Select the item you wish to create – Scene, Subject, Icon or Pattern. For an illustration, it can be better to start with Scene, so you have an idea of the space and perspective available.
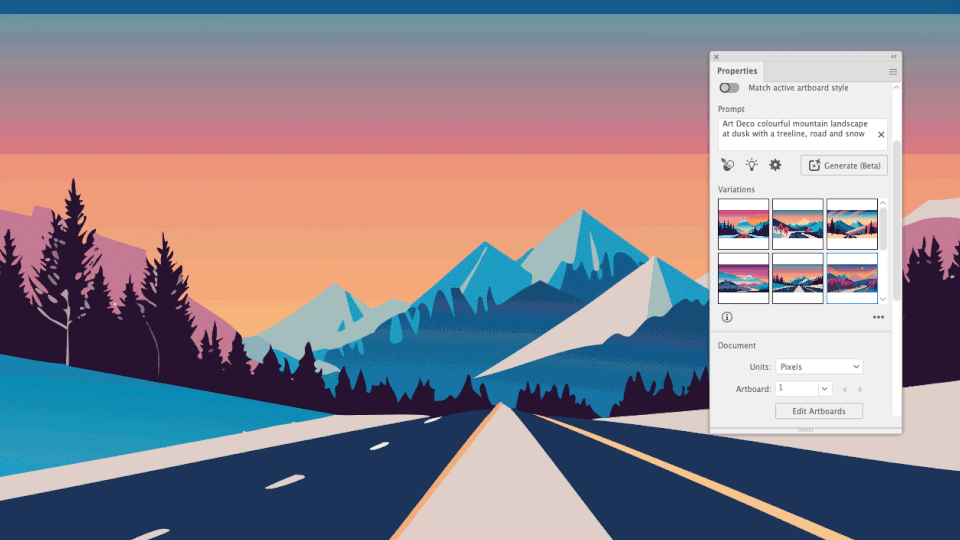
03. Type in text prompts

(Image: © Future)
Add as many text prompts as you like – the more information provided, the better the graphic (though you don't want to add too many and confuse it). Consider the setting, style, time of day and detail. An example prompt would be “Art Deco colourful mountain landscape at dusk with a treeline, road and snow.” If you wish to adopt the style of a pre-existing artwork, then you can drop it onto the Canvas and reference it with the Style Picker tool. The Properties panel also gives you some extra sample prompts and a slider to change the level of detail (set at 3/5 as default).
04. Review the results
(Image: © Future)
Any time you press the Generate button, you will be presented with three new, unique results. Cycle through these using the arrows in the Contextual bar or by previewing the thumbnails in the Properties panel. It’s still common enough to encounter erroneous results that clearly lack the human touch, so don’t forget to rate your results, the tool will only improve with constant feedback.
If none of the results meet your requirements, simply press the generate button again to get three new graphics or make edits to your current text prompts to refine the generation parameters. Every time you press Generate, you lose some credits from your Adobe account. Don’t worry about running out, you'll still be able to use AI tools, but they will work at a slower rate.
05. Build your scene

(Image: © Future)
Add to your scene by including objects or characters. Any content created will automatically conform to the style of the active artboard, though you can switch this option off in the properties panel. Finding enough elements that suit the perspective of your scene can be a process of trial and error, so be patient and don’t be afraid of adapting your vision.
06. Clean up your graphic

(Image: © Future)
If you’re only using this tool as a rough storyboard then you might be done at this point. However some of the vectors can still be rough, so this is the time to go in and clean up the details. Often an element may come with a false shadow that needs deleting or imprecise shapes that need smoothing or replacing.
Generative Recolour
After mastering the Text to Vector process, you might find that your creation requires an entire shift in tone. Avoid complicated colour theory and the laborious process of editing each colour by giving the software a few simple cues and letting it do the rest.
01. Open the Recolor window
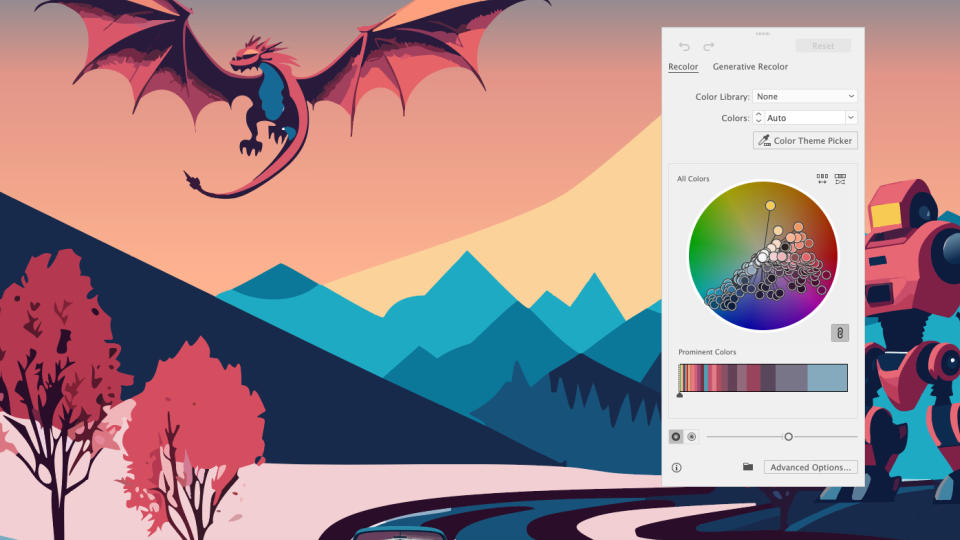
(Image: © Future)
Select your entire scene or graphic. When the Contextual bar appears, click the Recolor button and select the Generative Recolor tab in the Recolor panel. You can find the same panel in Edit > Edit Colors.
02. Sample prompts
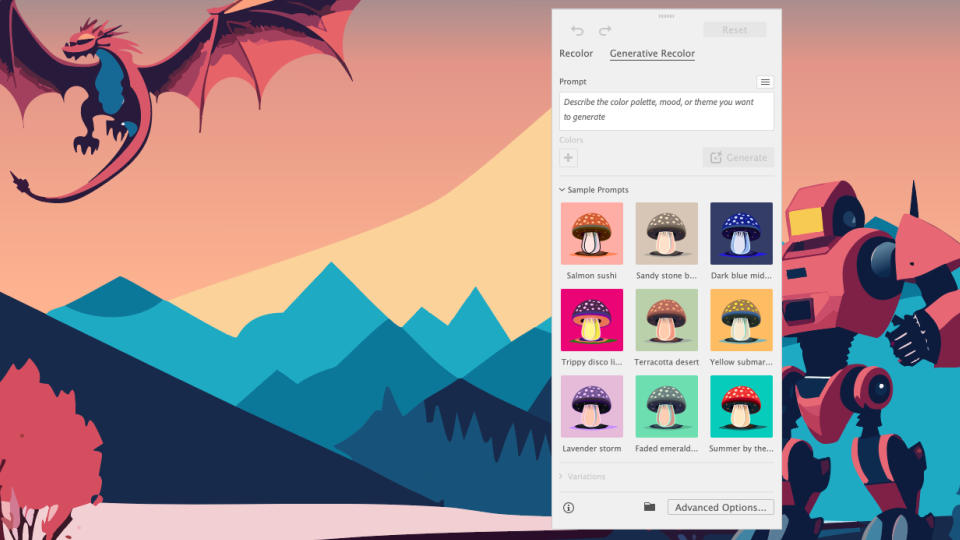
(Image: © Future)
A grid of Sample Prompts offer guidance for anyone feeling particularly uninspired. These give you a brief overview of potential contrasting tones and moods and might spark some ideas.
03. Type text prompts
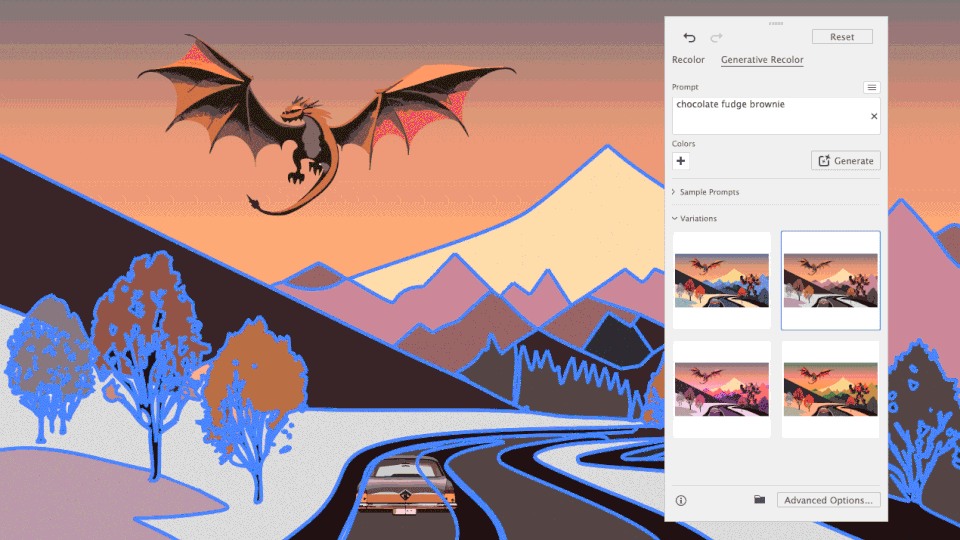
(Image: © Future)
If you're confident of the theme you're aiming for, type in some basic prompts into the text bar and press Generate. As with the Text to Vector effect, you're presented with three results, which you can toggle through and select any successful blends. There are more Advanced Options for people wanting to customise their colour scheme even more.
Mockup
Unlike the other tools here, it works offline and doesn’t utilise Firefly, but it is itself a beautifully impressive use of technology (and currently the only one here I use in a professional capacity). It uses AI to place a 2D image in situ on your choice of 3D settings, like a mug, so you can see how your design will work in reality.
In the past, I have relied on 3D renders in Blender to mock up product packaging, however Illustrator makes it possible to achieve similar results in a fraction of the time.
01. Source image
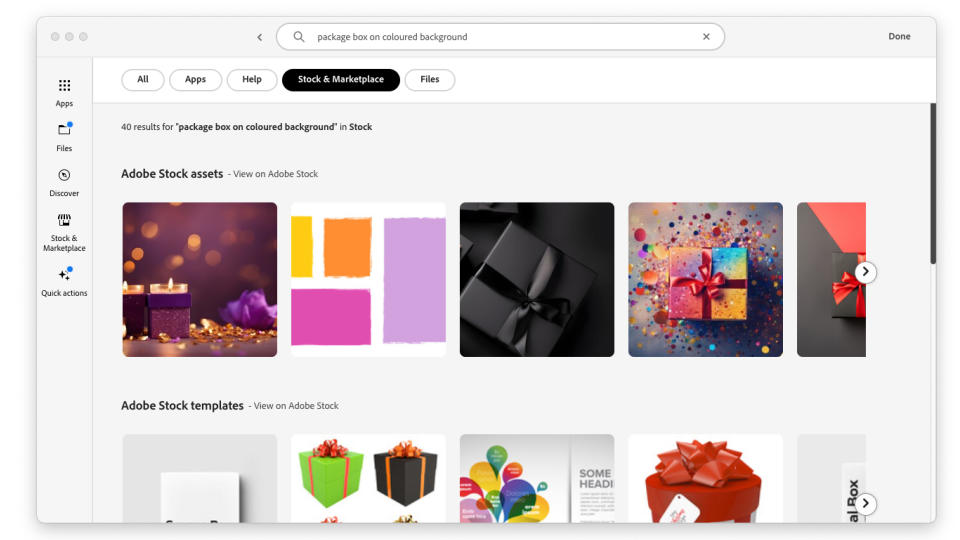
(Image: © Future)
Source an image. You can download directly into Illustrator from Adobe stock, take from an online image library or use your own image. Drag these onto the Canvas.
02. Generate Mockup
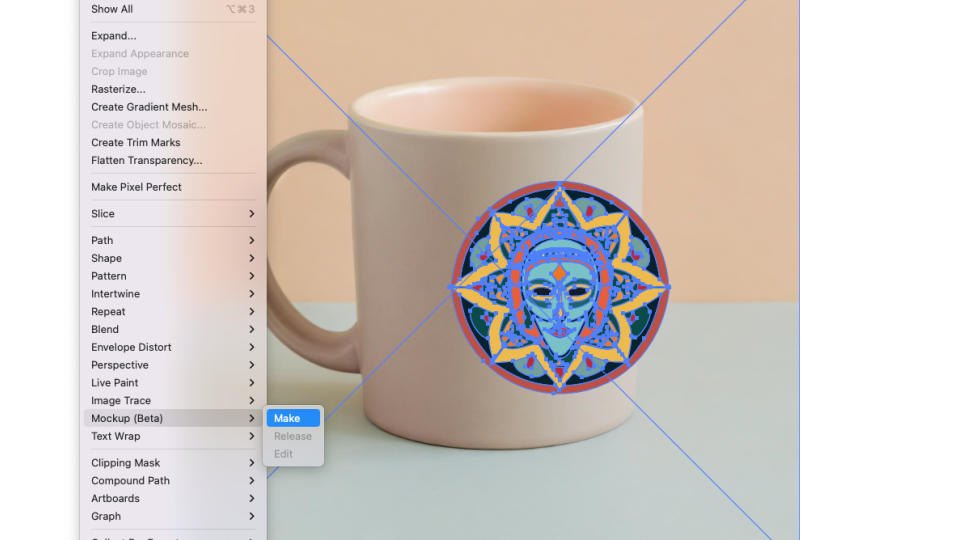
(Image: © Future)
Select both your graphic and the image. Go to Object > Mockup > Make. It will analyse the image and map the graphic onto the image, taking the contours and curves into account.
03. Position graphic
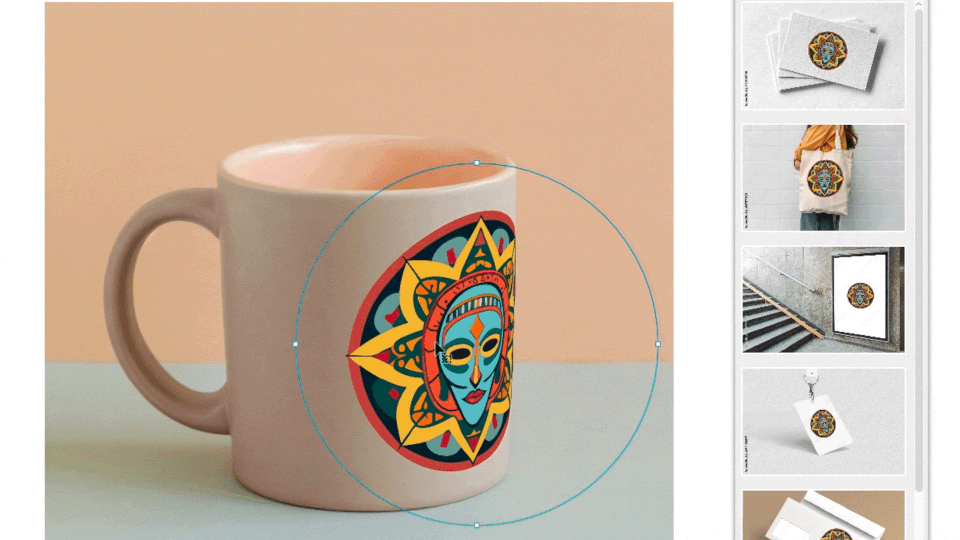
(Image: © Future)
Move your graphic around the image, until it fits your desired position. For a more realistic look, you can change the blending mode of the graphic to Multiply, so it adopts more of the colour of the image underneath.
Retype
Retype allows you to identify an outlined font in a static graphic and convert it into editable text. It searches Adobe Fonts as well as the font set on your own computer. While it doesn't always find the perfect match, it offers many similar fonts that might work just as well.
01. Select outlined text and Retype

(Image: © Future)
Open a flat graphic in Illustrator. Select it and go to Type > Retype (Beta). This will analyse the text in the graphic and offer you a list of closest matching fonts.
02. Edit text
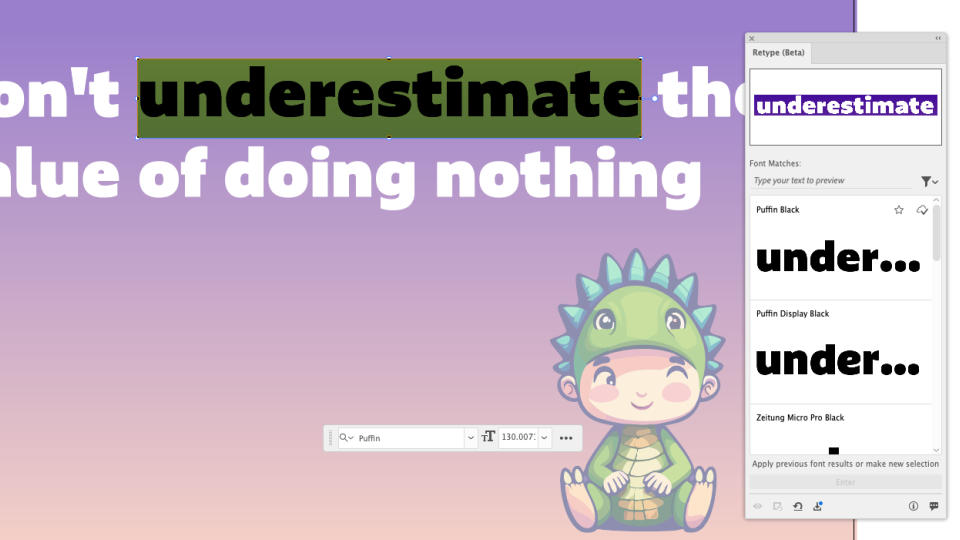
(Image: © Future)
If you're happy that a font in the list is identical or a close enough match, click on the font to download it or double click on the text to edit it. Once it's converted to live text, exit Retype to edit the text.
For more Adobe tips and tricks, see our list of Illustrator plugins and Adobe software list. Don't have Creative Cloud? Sign up below:

