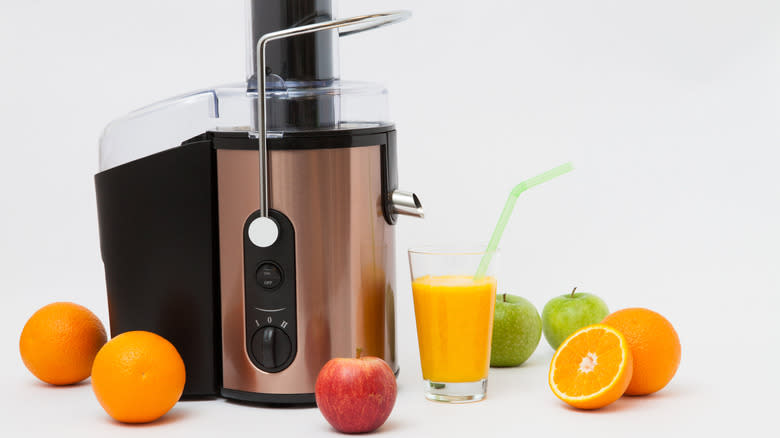
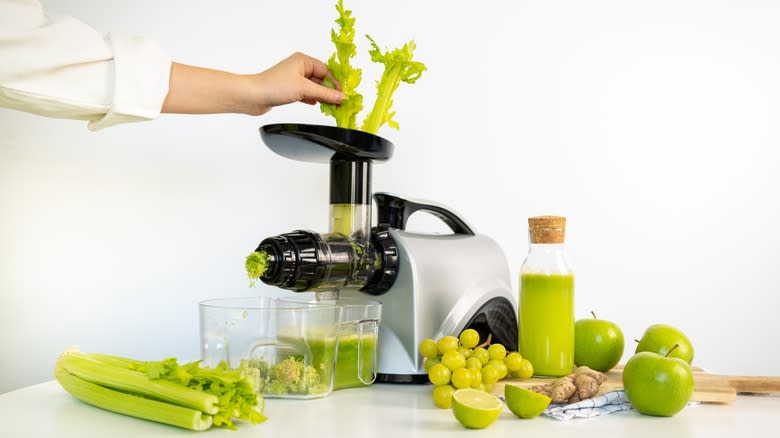
How To Clean Your Beloved Juicer
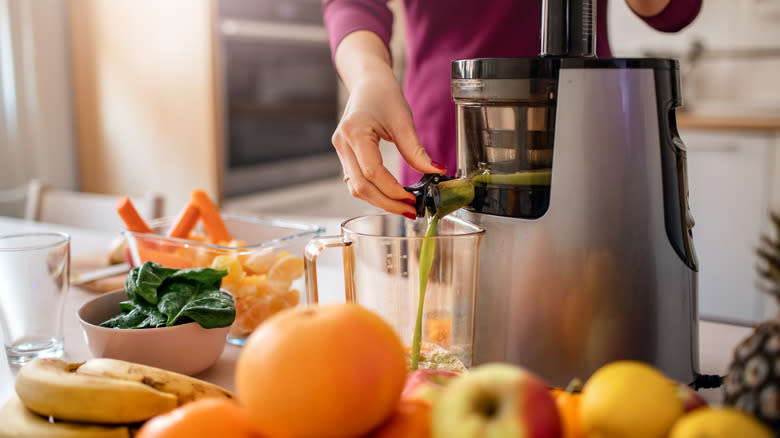
For many, a juicer is not just a kitchen appliance. It's a gateway to a healthier lifestyle, opening up the possibilities of adding healthier options and delicious flavor with fresh, nutritious juices made from the comfort of home. Embarking on the juicing journey in your own kitchen allows for a personalized touch in each glass, blending specific fruits and vegetables tailored to one's taste and health needs. But, with every delightful juice made with an at-home juicer, a not-so-sweet task looms afterward — cleaning the juicer itself. Not cleaning your appliance after every use is just one of the many mistakes people make with their juicers. And safety is a must: You should always unplug your juicer before you take it apart for cleaning.
A clean juicer not only ensures the longevity of your costly appliance but also guarantees that every drop of juice remains as pure and healthy as intended. That's just one of the many things you need to know before you start juicing. For many, particularly first-time juicing fans, this task can be overwhelming and confusing. Thankfully, there are several tried and true methods to tackle this chore, ensuring your beloved juicer remains in good-as-new condition. Whether you're in a hurry and need a quick clean or you're preparing for a thorough scrubbing to keep your machine in top shape, there's a solution to fit every need and schedule.
Read more: The Most Useless Cooking Utensils, According To Chefs
Wash In The Dishwasher
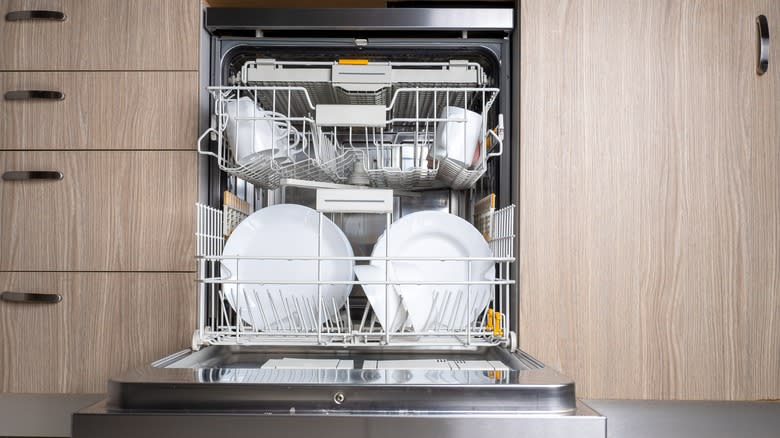
For busy home cooks, every moment counts. That means finding ways to streamline our daily chores is essential. For juicing fans who want to enjoy fresh-made juices at home without the hassle of cleaning, the convenience of a dishwasher-safe juicer can be a game-changer.
Before tossing your juicer components in the dishwasher, though, be sure to consult the manufacturer's guidelines on your particular make and model to confirm which pieces are deemed dishwasher safe (several brands that made our lists for best cold press juicers and best citrus juicers are dishwasher-safe). This step is crucial to ensure the longevity and functionality of your appliance.
Once you've verified the dishwasher compatibility, the process is straightforward: Disassemble your juicer, and remove all detachable parts that come into contact with fruits and vegetables. This typically includes the pulp container, the juicing jug, and the cutting blades, among other pieces. Arrange these components on the top rack of your dishwasher, and run as usual. Using the top rack shields pieces from the direct force of hot water and intense heat, preventing any potential warping or damage. Dishwashing is hands-down the easiest way to get a deep clean on your juicer.
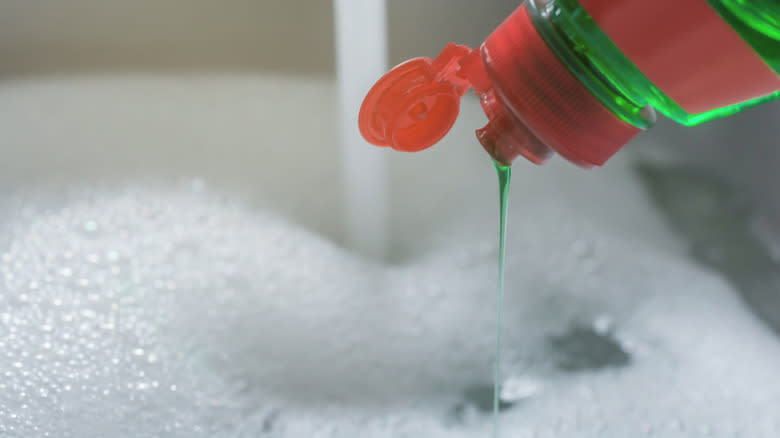
Hand Wash With Dish Soap

If your juicer is not dishwasher-safe or if you're just not willing to take the chance of warping your juicer components with the high heat from your dishwashing appliance, the next best option is washing the pieces by hand with standard dish soap.
Begin by carefully disassembling your juicer, separating each component that has come into contact with food. Use a combination of a non-abrasive sponge, warm water, and a few drops of mild dish soap to scrub away bits of fruit pulp, vegetable pieces, and juice remnants. Pay special attention to the mesh filters and cutting blades, which are prone to accumulating pulp and residue from the powerhouse of produce and herbs you send through your juicer.
Hand-washing is typically more time consuming, but it also ensures you don't miss any nooks or crannies. Starting with a clean juicer every time safeguards not only the functional integrity of your juicer but also the purity of the flavors of the juices you make with it.
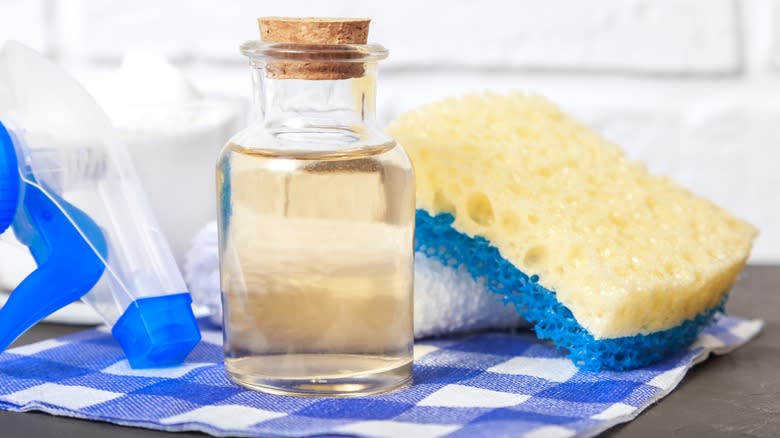
Soak Pieces With Dish Soap
When confronting the challenge of stubborn residue on your juicer's parts, a simple hand wash may not be enough. If there are stuck-on fruit and vegetable pieces, odors you can't seem to remove, or residual stains, a soak in warm, soapy water is a simple, yet highly effective, strategy to get things back to normal. Begin by filling your sink with warm water and adding your favorite dish soap. The combination of the water and suds will soften and break down the pulp and residue that clings to the pieces after juicing.
Allowing the parts to rest for a few hours or even overnight gives the soapy solution ample time to penetrate and loosen the grime. Taking this step before hand-washing significantly eases the cleaning process. You'll find that when it comes time to scrub, the residue easily gives way, sparing you from excessive elbow grease. This approach not only ensures a thorough clean but also preserves the integrity of your juicer's parts, ensuring they remain in top condition.
Wash And/or Soak With Vinegar
Embracing the simplicity and efficacy of vinegar to clean your juicer not only ensures an effective cleaning routine but also taps into the power of natural cleaning solutions. Vinegar, celebrated for its cleaning properties, emerges as an ideal choice to help maintain a pristine juicer. By mixing equal parts of water and white vinegar, you can create a potent solution capable of tackling the most stubborn odors and stains that can linger on your juicer's components. This mixture does not just achieve superficial cleanliness; it also ensures your juicer operates in its best condition, free from the residues and build-ups that can affect its performance and the taste of your juice. (And a clean juicer is definitely what you want when you try our vitamin-loaded green juice recipe.)
The acetic acid in vinegar is a natural enemy of mineral deposits, mold, and bacteria, effectively cleansing areas where water alone might fail. Whether you choose to wash your juicer parts directly with this vinegar solution or let them soak to penetrate deeper stains, this method is both effective and environmentally friendly. Soaking is particularly beneficial for those hard-to-reach spots or components with textured surfaces, ensuring that every hidden area of the juicer is addressed.
Wash With Baking Soda And Citric Acid
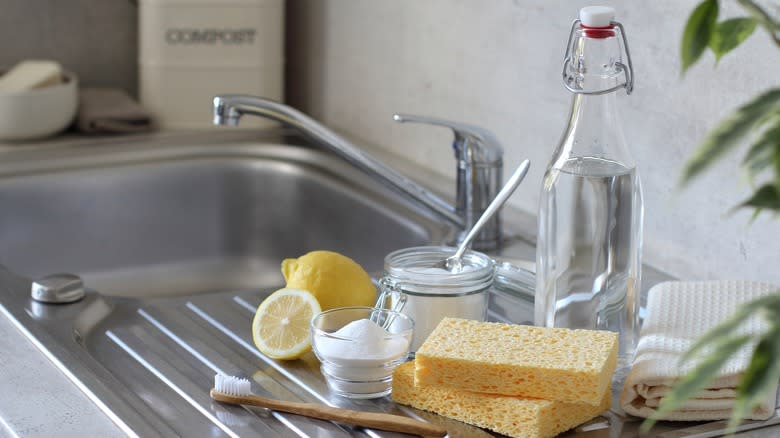
Another great natural cleaning solution for those seeking a deeper, gentle cleanse for their juicer parts is a combination of baking soda and citric acid. This mixture brings together the abrasive, yet non-scratch, properties of baking soda with the natural cleaning power of citric acid, found either in its pure form or via freshly squeezed from lemons (learning how to juice a lemon is easier than you think). Crafting a paste from these ingredients creates a potent cleaning agent, tailor-made for eradicating stubborn stains and residues that refuse to budge with dish soap alone.
To clean your juicer with this natural approach, mix baking soda with citric acid (or lemon juice) until you achieve a spreadable paste. The texture will allow the mixture to cling to the surfaces of your juicer parts, ensuring targeted action on every spot and stain. After applying the paste, allow it to sit for a few minutes, giving the natural acids and baking soda time to penetrate and lift the grime from the surface. Follow up with a gentle scrub using a soft brush or cloth to remove stains and residues. Once the parts are scrubbed, simply rinse them under running water, ensuring that all traces of the baking soda and citric acid mixture are washed away. The result is juicer components that are sparkling clean and ready for another round of juicing.
Scrub With A Soft-Bristled Brush
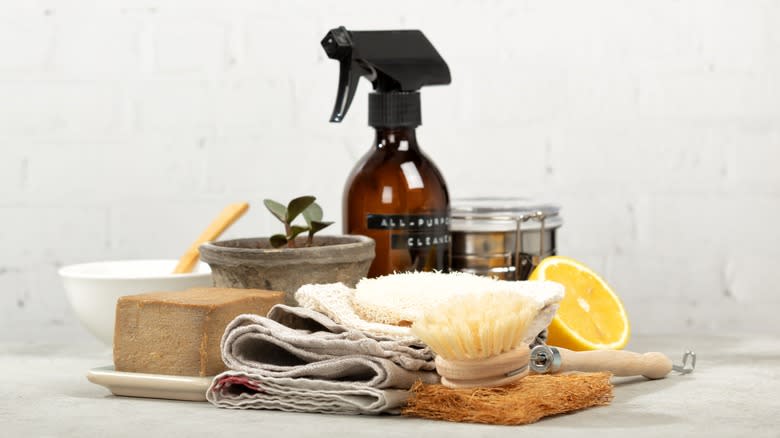
When it comes to precision cleaning, nothing quite matches the effectiveness of a soft-bristled brush or an unused toothbrush. These tools can significantly help you maintain your juicer, as they are adept at reaching every nook and cranny that most dish sponges simply can't access. Armed with a soft-bristled brush and any one of our other cleaning methods listed, you can tackle the intricate mesh filters, blades, and other hard-to-reach areas of your juicer with confidence.
The key is to use a brush that is gentle yet firm. The right texture of bristles provides just the right balance of scrubbing power without risking damage to your juicer's components. Whether it's dislodging stubborn pulp from the mesh filter or clearing residues from the crevices of the juicer's body, this method ensures a thorough clean without compromise. Plus, the compact size of something like a toothbrush is especially handy for reaching tight spaces and intricate details, leaving no spot untouched.
Run Water Through While Powered On
For a quick cleanup in between juicing sessions, there's a handy trick that offers a quick refresh: running water through your juicer while it's powered on. This simple yet effective method involves reassembling your juicer and powering it on, allowing water to flow through its components. The running water acts as a gentle rinse, dislodging any loose pulp and residue that may have accumulated during the previous use.
It's important to note that while this method provides a surface-level clean, it's not a substitute for a thorough cleaning routine. While it may suffice for a temporary refresh between juicing, it's essential to follow up with a more comprehensive clean as soon as possible. This ensures that any remaining debris or buildup is properly addressed, maintaining the hygiene and performance of your juicer over time. This quick clean should only be used when you're pressed for time and plan to do a deeper clean later in the day.
Soak With Diluted Bleach

When it comes to tackling extremely stubborn stains and ensuring the deepest possible clean for your juicer, diluted bleach can be a powerful ally, although one that must be used with caution and care. Begin by diluting a small amount of bleach in a large quantity of water, creating a solution that is potent yet safe. Submerge the juicer parts in this solution for a short period, allowing the bleach to work its magic in eradicating germs and stubborn stains that may have accumulated over time.
It's important to use caution throughout this process. Bleach is a dangerous chemical that can be overpowering, so ensure proper ventilation and avoid direct contact between your skin and the undiluted solution. Once the soaking period is complete, thorough rinsing is essential to remove any traces of bleach from the juicer parts. Follow up with a meticulous hand-washing using soap and water to ensure all residues are eliminated before reassembling your juicer.
While diluted bleach is effective at deep cleaning and removing stains, it's a method that should be used sparingly and only when necessary, particularly because juicer parts are in contact with food. Always prioritize safety and follow manufacturer recommendations to avoid damage to your juicer or potential health risks. However, with proper precautions and thorough rinsing, this method can restore your juicer to its sparkling best.
Soak With Oxiclean
If you want to avoid bleach but still need a robust solution to deep clean stains off of your juicer, turning to Oxiclean or a similar oxygen-based cleaner can work wonders. These cleaners are specifically formulated to tackle tough stains and stubborn odors, making them ideal for rejuvenating your juicer's components, especially if they're stained with fruit and vegetable juices. It is important to dilute the cleaner according to the package instructions, ensuring the product is safe to use.
Once the cleaner is properly diluted, you can dunk the juicer parts in the Oxiclean solution, allowing them to soak for a bit. This allows the active ingredients to penetrate deep into the surfaces, lifting away even the most ingrained residues. After soaking, be sure to rinse each part thoroughly to remove any remaining cleaner from the parts. Follow up with a complete drying process to prevent any potential residue or moisture buildup.
Dry With A Microfiber Cloth
Ensuring your juicer parts are thoroughly dried after cleaning is just as important as the cleaning process itself. Leftover moisture can lead to water spots or mold growth and can provide the perfect place for bacteria to thrive, compromising the cleanliness and functionality of your appliance. Use a microfiber cloth, a gentle yet highly absorbent towel, to quickly and easily dry the surfaces of your juicer components without leaving behind lint or scratches.
The ultra-fine fibers of microfiber trap moisture effectively, leaving surfaces clean, dry, and streak-free, all without the risk of scratching, which can occur when using rougher materials. Lastly, drying the pieces of your juicer immediately eliminates water spots, which are not only unattractive but can also create areas of water buildup that allow juice stains and pieces of fruits and vegetables to stick. This step can usually be skipped if you are putting your juicer components in the dishwasher, as the heat cycle will dry things thoroughly for you.
Air-Dry Your Juicer

Air-drying can be a good method for drying your juicer parts. While it may not be as efficient as using a microfiber cloth, there are instances where air-drying can be a suitable option. For example, air-drying is best when time is not a limiting factor and when there is adequate airflow in the drying area, such as with a drying rack. This method can be particularly useful for juicer parts that are not prone to retaining moisture or harboring bacteria, such as larger, non-porous components like juicing pitchers or pulp containers.
To air-dry your juicer parts effectively, arrange the parts in a single layer on a drying rack where air flow can access all pieces. To help ensure even drying and to prevent water from pooling in crevices, place components upside down. It's also important to ensure that the drying area is clean to prevent any potential contamination during the drying process. Allow the juicer parts to air-dry completely before reassembling and storing them. Depending on factors such as humidity and airflow, this process can take several hours or even overnight. Remember that air-drying may not be as effective at removing moisture from all areas of the juicer, especially those with intricate designs or hard-to-reach spots. Check that all pieces are fully dry before reassembling your juicer for the next use.
Read the original article on Mashed

