Classic Nutty Torrone (Italian Nougat) Recipe
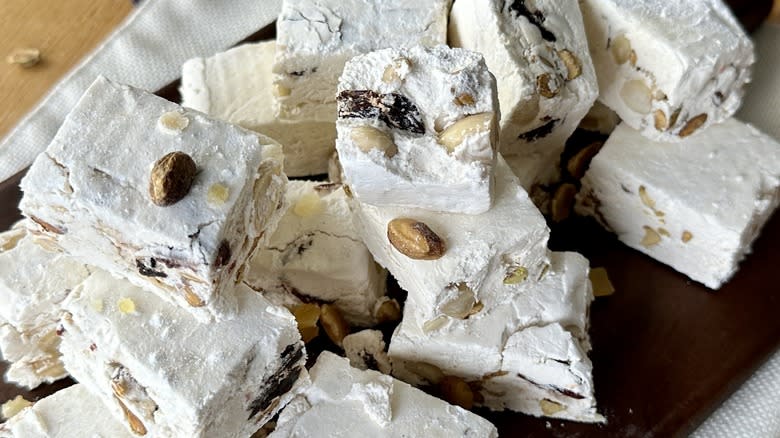
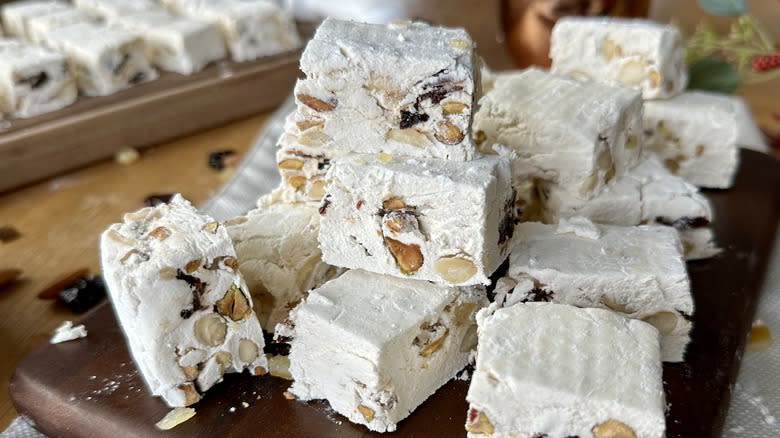
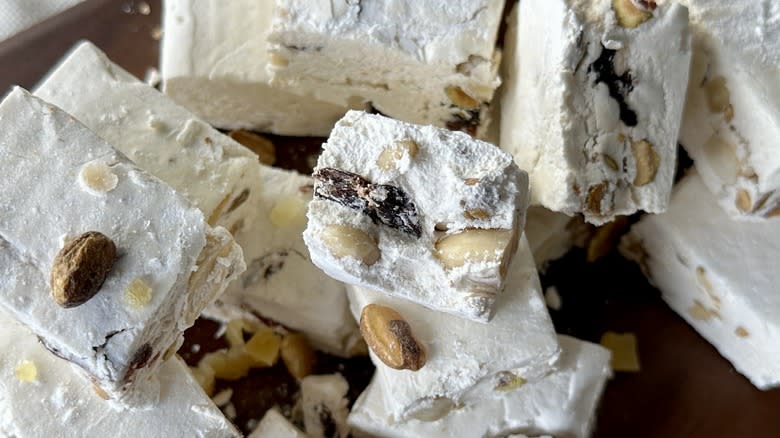
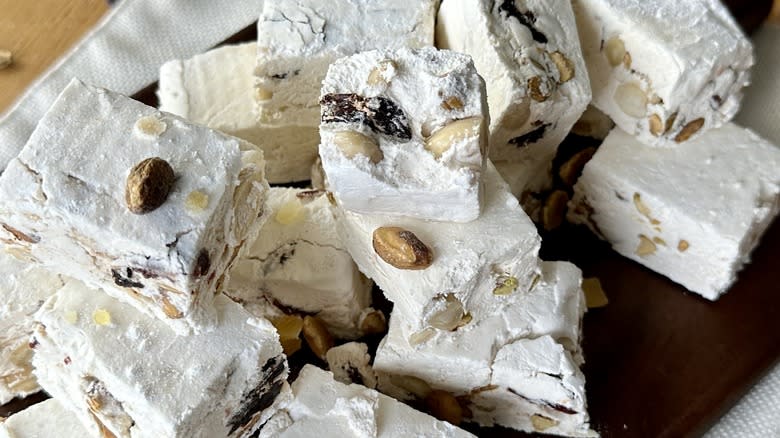
If you haven't had the pleasure of trying classic, nutty torrone, then you're in for a treat with this recipe, brought to us by recipe developer Katie Rosenhouse. This beloved Italian dessert/candy has gained popularity worldwide, particularly around the holidays. Delicately balanced, torrone features a floral touch from honey, and lightness from a sweetened meringue that helps the candy maintain a soft, tender texture. An eye-catching mix of dried cherries, candied orange peel, blanched almonds, and raw pistachios gives the candy a nutty and fruity flavor, further enhanced by a hint of kosher salt and vanilla extract for depth and balance. The texture of the nuts and fruits contrasts the velvety homemade nougat, making this delicate treat hard to resist.
In Italy, torrone is often served for special occasions, including Christmas, weddings, and other big celebrations as a symbol of sweetness, prosperity, and good wishes. You'll find that torrone can be prepared soft or firm, coated with melted chocolate for extra indulgence, or even incorporated into desserts like gelato for a sweet touch. Enjoy this candy on its own, or pair perfectly with a cup of espresso.
Read more: 25 Most Popular Snacks In America Ranked Worst To Best
Gather The Ingredients For Classic Nutty Torrone (Italian Nougat)
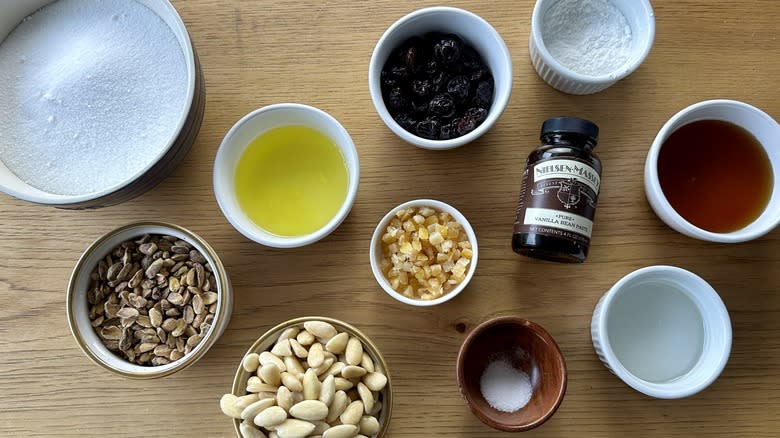
The ingredient list for making this classic nutty torrone is impressively short. The base of the nougat is egg whites whipped up to form an airy meringue. Cooked honey is whipped in, lightly tinting the meringue and adding sweetness and a mild floral note to the mixture. Choose any honey you love for this candy, including wildflower, clover, acacia, or other varieties.
A sugar syrup made with granulated sugar, corn syrup, and water, cooked to the "hard crack" stage, helps thicken and set the candy. Corn syrup works to create a smooth, chewy texture in the final candy by helping to prevent crystallization of the sugar syrup. Substitute the corn syrup with additional honey if needed.
To flavor the candy, vanilla bean paste or extract adds a nuanced depth, while kosher salt balances the sweetness of the honey and sugar. You can replace the vanilla with other types of extracts, including almond or orange, if desired. Candied orange peel, dried cherries or cranberries, shelled raw pistachios, and blanched whole almonds add color, texture, and flavor, but each can be swapped in equal quantities with any nuts or fruits you love.
To prevent the candy from sticking to the baking pan, a combination of cornstarch and confectioners' sugar dusted over the parchment paper lining creates a nonstick coating. Rice paper can also be used for this purpose.
Step 1: Preheat The Oven
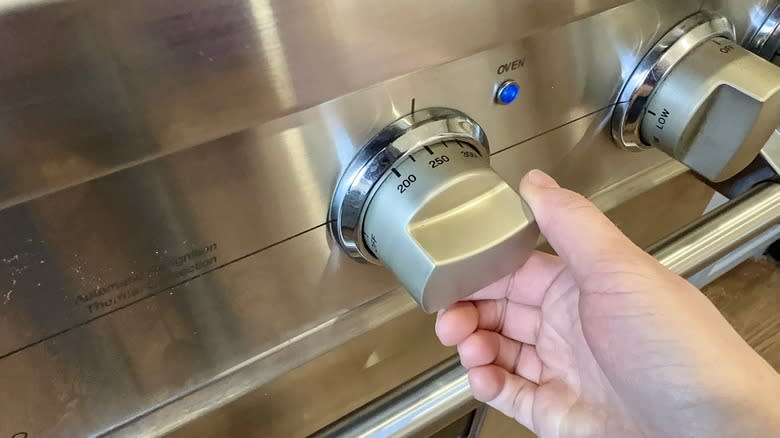
Preheat the oven to 250 F.
Step 2: Warm Nuts And Fruits
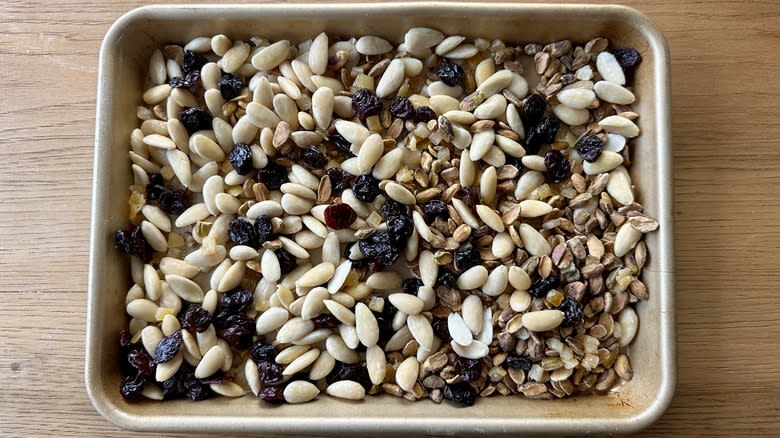
Combine the almonds, pistachios, dried cherries, and diced candied orange peel on a small baking sheet or pan. Place in preheated oven and turn off the heat. Leave inside until ready to use.
Step 3: Prepare Baking Pan
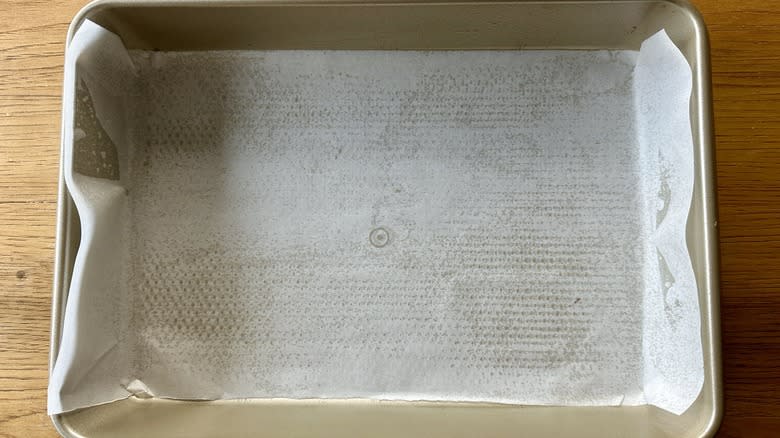
Coat a 9x13-inch baking pan with cooking spray and line with parchment paper, leaving an overhang on both ends.
Step 4: Coat Baking Pan
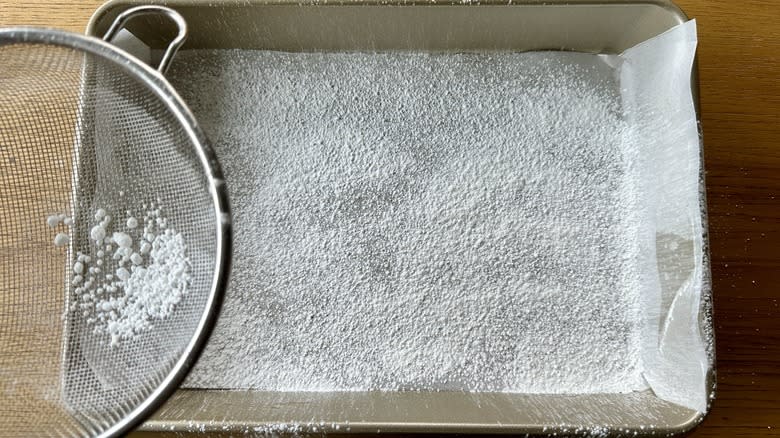
Sift a thin layer of the confectioners' sugar/cornstarch mixture evenly over the bottom of the baking pan, then set aside. You should have some sugar/cornstarch mixture remaining.
Step 5: Whip Egg Whites
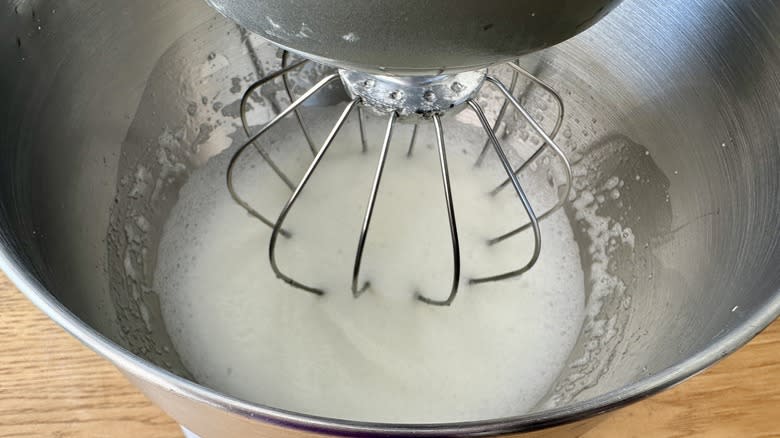
Place egg whites into the bowl of a stand mixer fitted with a whisk attachment and start to whip on the lowest speed.
Step 6: Heat Honey
Heat honey in a small pot over medium heat until mixture reaches 250 F. Remove from heat.
Step 7: Whip In Honey
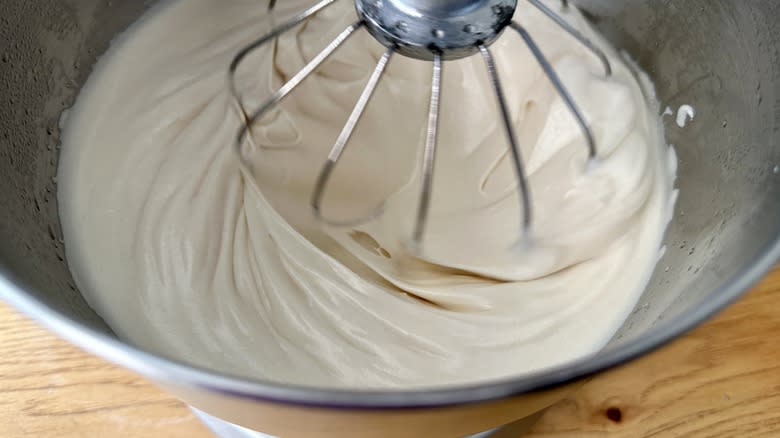
Increase speed of egg whites to medium. Slowly pour hot honey mixture down the side of the bowl into the egg whites, whipping to incorporate. Once added, reduce speed to low.
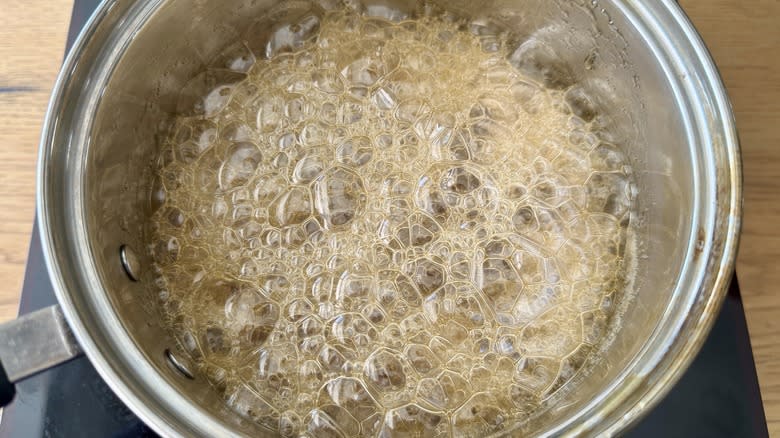
Step 8: Cook The Sugary Syrup
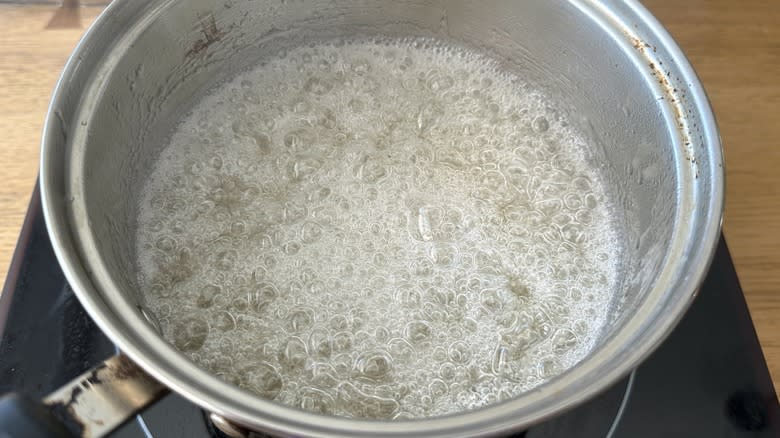
Stir the corn syrup, sugar, and ½ cup water in a small pot and place on the stovetop over medium heat until the mixture reaches 300 F. Once the mixture is over heat, do not stir.
Step 9: Whip Syrup Into The Egg Whites

Increase speed of egg white mixture to medium speed. Slowly pour hot sugar syrup down the side of the bowl into the whipping whites, whipping to incorporate.
Step 10: Whip Until Thickened
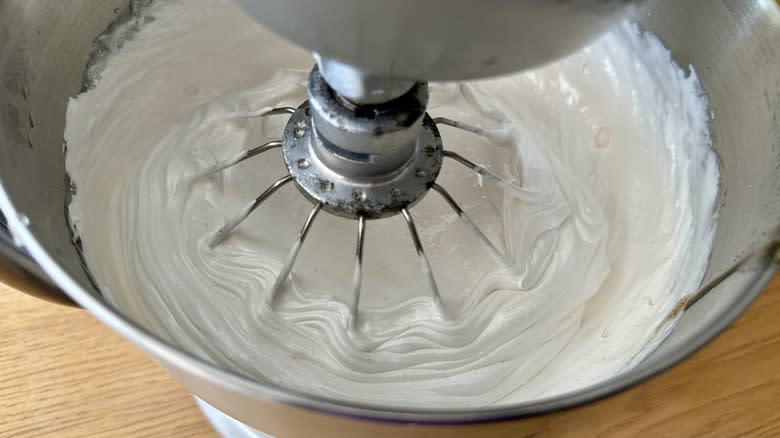
Add vanilla and salt and continue to whip for 2 minutes until the bowl is warm, but not hot, to the touch.
Step 11: Fold In Nuts And Fruit
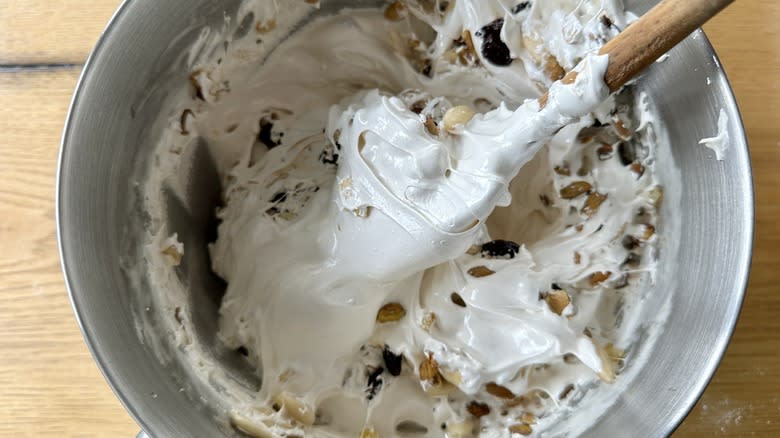
Remove bowl from mixer and fold in nuts and fruits.
Step 12: Transfer To Baking Pan
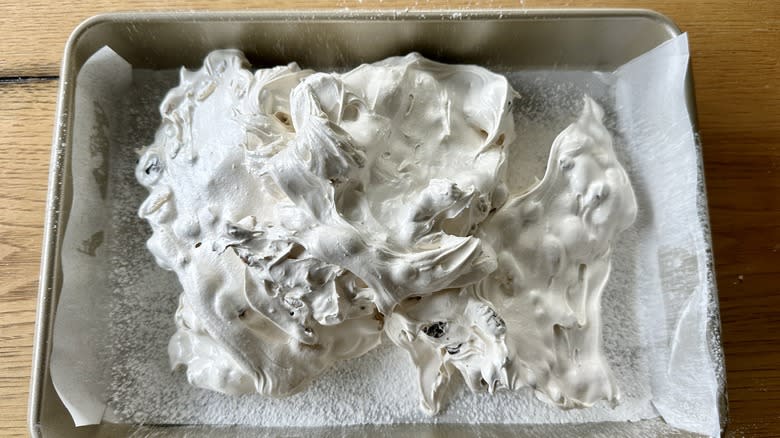
Immediately transfer to the prepared baking pan, spreading the mixture out evenly.
Step 13: Dust With More Sugar
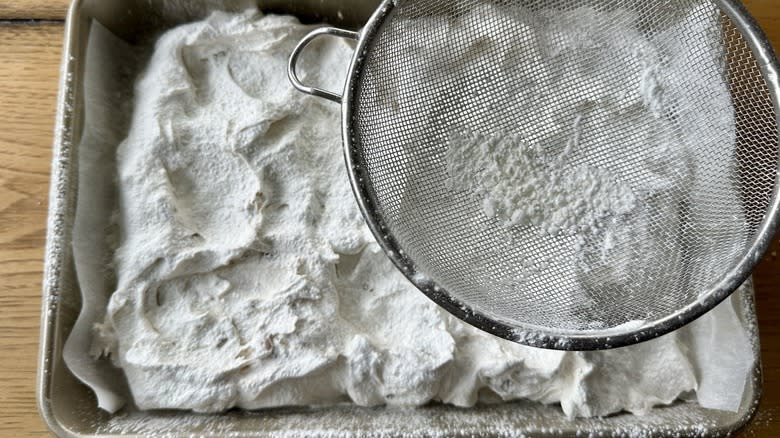
Sift to cover with remaining confectioners' sugar mixture. Use your hands to press the top of the candy to flatten.
Step 14: Rest The Torrone
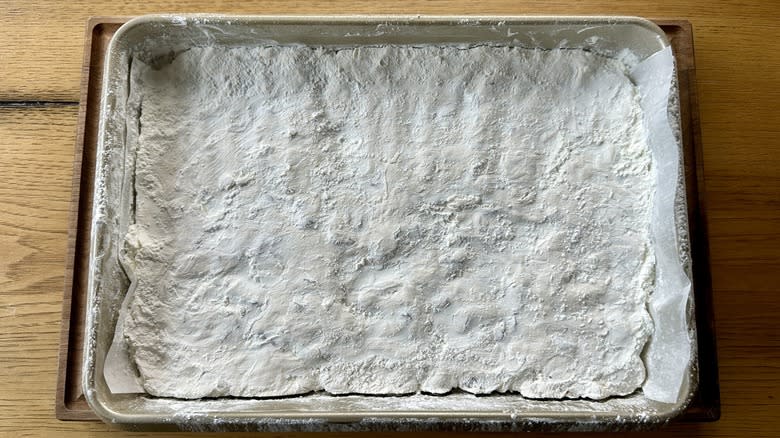
Set the candy aside for at least 2 hours to firm up.
Step 15: Flip Onto Cutting Board
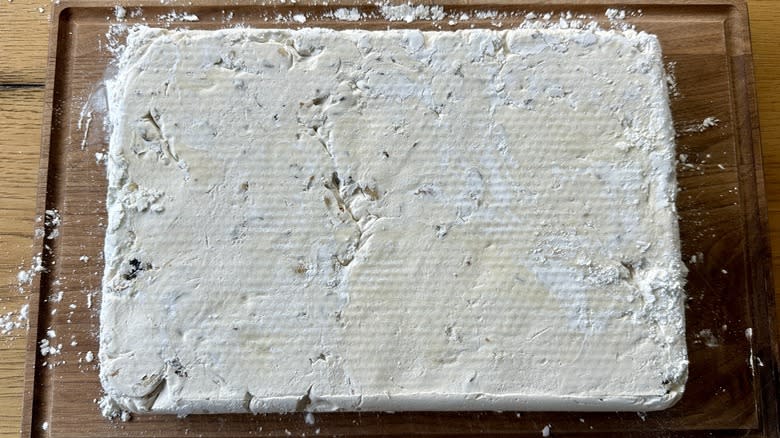
Use the parchment paper flaps to lift the candy out of the baking pan. Flip onto a cutting board and remove parchment.
Step 16: Cut Into Squares
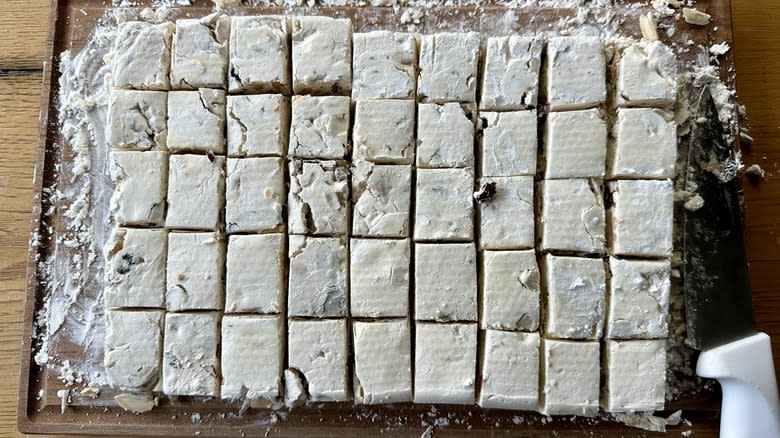
Trim edges. Cut into small squares and serve.
Is A Candy Thermometer Essential For Making Torrone?
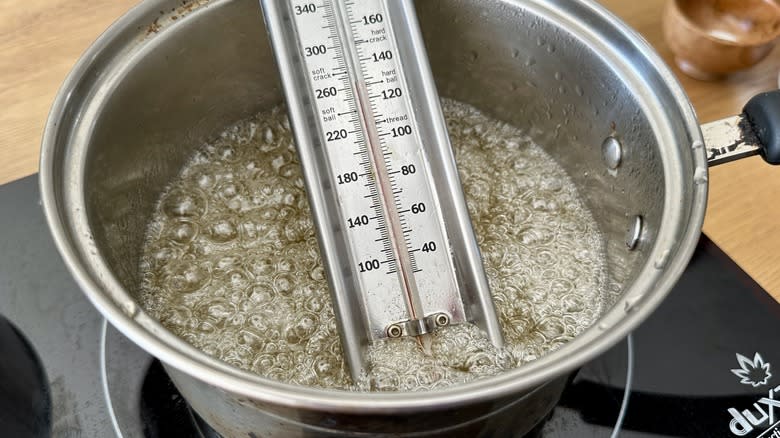
When making candy, using a thermometer can mean the difference between a candy that sets up firm enough to cut, and one that becomes, well, a sticky mess. In this recipe, a thermometer is used in two stages: The first, when honey is heated to 250 F, also known as "hard ball" stage, often used for candies like nougat and marshmallows. The second is when the sugar syrup is cooked to 300 F. This "hard crack" stage of sugar is the point at which sugar forms hard, brittle threads, and is usually used to create candies like lollipops and other hard candies. When beaten into the meringue, this sugar syrup helps the candy set so it's firm and sliceable.
While it is possible to test the consistency of the sugar syrup by dipping a few drops into ice water, the subtle difference of a few degrees can dramatically change the final texture of the torrone. If you're going to all the effort of making homemade candy, using a thermometer is a great way to ensure consistent results every time.
What's The Best Way To Store Torrone?
Sugary candies like torrone have a long shelf-life. Store the torrone in an airtight container at room temperature, stacked between layers of parchment paper if needed, to prevent them from sticking together. If stored in a cool, dry place, the torrone can maintain its quality for up to three months. But if you notice any signs of spoilage or changes in texture or flavor, it's best to discard the candy that's left.
While refrigeration might seem like the best way to extend the life of the nougat, it can negatively affect the texture of the torrone. A cool, dry spot is best, if possible.
If packaging to give to others, opt to pack the torrone in a sealed tin, cellophane bags tied with a twist tie or ribbon, or mason jars with ribbon or twine. Attach a festive gift tag so the recipient knows who to thank for all that delicious candy.
Can You Blanch Your Own Almonds For Torrone?
While raw whole almonds can be easy to find, it may be difficult to locate blanched almonds at your local store. Not to worry — you can easily blanch your own in minutes. Blanching almonds involves removing the skin of the nuts, leaving them with a milder flavor and smoother texture than traditional raw almonds.
To blanch your almonds, bring a small pot of water to a boil. Add raw whole almonds, and boil for about 2 minutes until the skins are softened. Drain and transfer to a bowl of ice water to stop the cooking process. At this point, use your fingers to gently slip the skins off of the nuts. They should come off easily. Dry the almonds thoroughly with a kitchen towel or paper towels before using.
To get ahead, blanch your almonds in advance. Dry and store in an airtight container at room temperature for up to two weeks. For longer storage, keep the almonds in the refrigerator or freezer (make sure they thaw out before starting the recipe if you go the freezer route).
Classic Nutty Torrone (Italian Nougat) Recipe
Prep Time: 2h 35mCook Time: 15mYield: 20 ServingsIngredients
1 ½ cups blanched whole almonds
1 cup shelled raw pistachios
½ cup dried cherries or cranberries
¼ cup diced candied orange peel
¼ cup confectioners' sugar + 2 tablespoons cornstarch, combined
3 large egg whites
½ cup honey
¼ cup corn syrup
3 ½ cups granulated sugar
1 teaspoon vanilla bean paste or extract
½ teaspoon kosher salt
Directions
Preheat the oven to 250 F.
Combine the almonds, pistachios, dried cherries, and diced candied orange peel on a small baking sheet or pan. Place in preheated oven and turn off the heat. Leave inside until ready to use.
Coat a 9x13-inch baking pan with cooking spray and line with parchment paper, leaving an overhang on both ends.
Sift a thin layer of the confectioners' sugar/cornstarch mixture evenly over the bottom of the baking pan, then set aside. You should have some sugar/cornstarch mixture remaining.
Place egg whites into the bowl of a stand mixer fitted with a whisk attachment and start to whip on the lowest speed.
Heat honey in a small pot over medium heat until mixture reaches 250 F. Remove from heat.
Increase speed of egg whites to medium. Slowly pour hot honey mixture down the side of the bowl into the egg whites, whipping to incorporate. Once added, reduce speed to low.
Stir the corn syrup, sugar, and ½ cup water in a small pot and place on the stovetop over medium heat until the mixture reaches 300 F. Once the mixture is over heat, do not stir.
Increase speed of egg white mixture to medium speed. Slowly pour hot sugar syrup down the side of the bowl into the whipping whites, whipping to incorporate.
Add vanilla and salt and continue to whip for 2 minutes until the bowl is warm, but not hot, to the touch.
Remove bowl from mixer and fold in nuts and fruits.
Immediately transfer to the prepared baking pan, spreading the mixture out evenly.
Sift to cover with remaining confectioners' sugar mixture. Use your hands to press the top of the candy to flatten.
Set the candy aside for at least 2 hours to firm up.
Use the parchment paper flaps to lift the candy out of the baking pan. Flip onto a cutting board and remove parchment.
Trim edges. Cut into small squares and serve.
Read the original article on Tasting Table

