How to connect a laptop to a monitor
You're likely to need to know how to connect a laptop to a monitor if you do creative work, photo editing, gaming or really anything else that can benefit from a larger screen. Many laptops today have enough power to replace a desktop computer, but even if the screen is bright and colour-accurate, it can still be too small to be comfortable for many tasks.
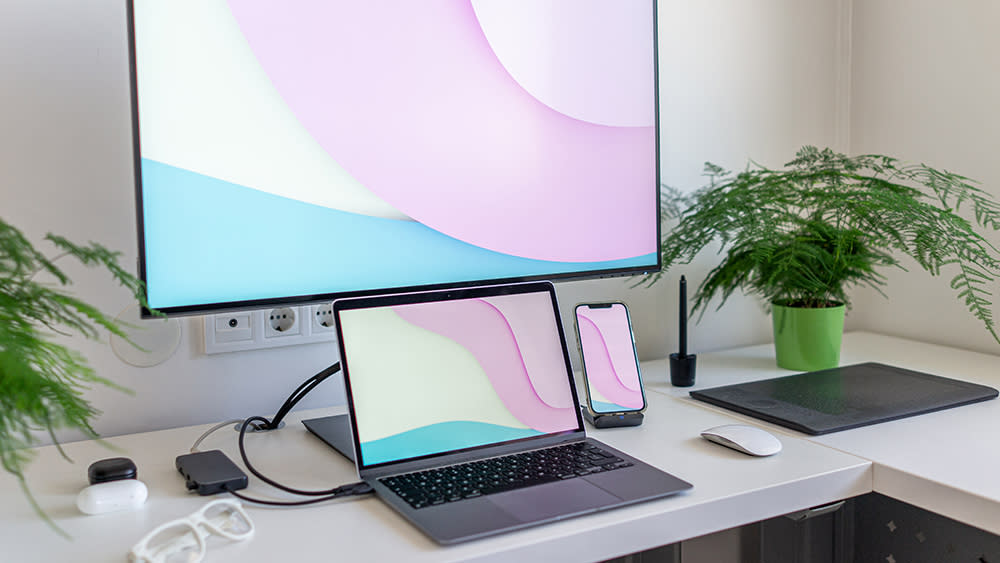
Fortunately, it's usually very easy to connect a laptop to an external monitor so that you can continue working on a compact portable device while gaining the benefit of more screen space to work on. You can then use the monitor to either mirror or extend your laptop screen, and use them together or close the lid of your laptop and use the monitor alone.
Below, we'll walk you how to do it. If you're still building your setup, see our pick of the best laptops for graphic design. We also have guides to the best laptops for video editing and the best laptops for 3D modelling.
How to connect a laptop to a monitor
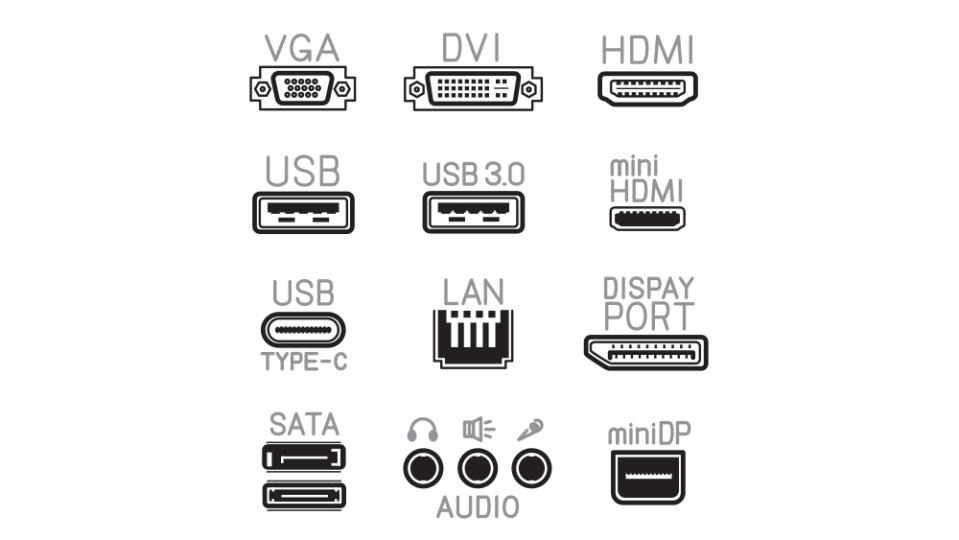
it's fairly easy to connect an monitor to a PC or Mac laptop, but you'll need to know what type of port your laptop and monitor have. The most usual connections for an external monitor are HDMI, Thunderbolt, USB-C and DisplayPort. Less common ports are VGA or DVI, but you may find these if you have an older device.
HDMI is a 6-sided trapezoid port, DisplayPort is similar but with one of the corners bent in and the other at a 90-degree angle. USB-C is the most common port on recent laptops and phones for connecting all kinds of peripherals, but note that not all USB-C ports can support a monitor.
Ones that can may be identified with a black 'D' that has a white 'P' inside it, indicating DisplayPort support. Thunderbolt ports looks similar to USB-C but should be identified with a lightning bolt.
01. Get the right cable
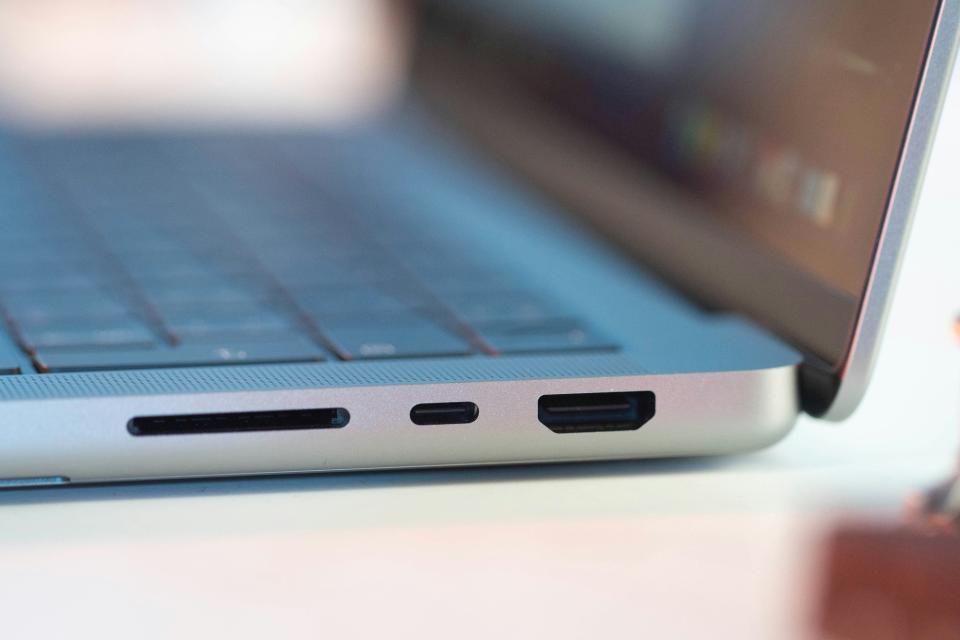
If your laptop and monitor have the same kind of connection, you're in luck and you you can use a standard cable. If not, you'll need an adapter, for example a USB-C to HDMI adapter. These can be found at most electronics stockists.
02. Connect your laptop to the monitor
With the devices unplugged, connect your laptop to the monitor using the correct cable by plugging one into your laptop's video output port and the other into your monitor's video input port. Once connected, plug your monitor into a power source and switch it on using the power button. Also turn on your laptop.
If your monitor only has one input, you should immediately see your laptop's desktop on the monitor screen, and you can then adjust the display settings as desired. On a monitor with multiple inputs, you will probably need to select the port that you have used to connect your laptop.
03. How to use an external monitor to mirror your laptop display
Windows
To mirror your laptop display on your newly connected monitor, go to Windows Settings (click the gear icon in the Start menu or press Windows key + I). go to System > Display, and select a display option.
On Windows 10, click the drop-down menu under 'Multiple Displays.' On Windows 11, click menu to the right of 'Identify'. To mirror your laptop display, select 'Duplicate these displays'. This will show the same thing on both screens at the same time.
You can select 'Show only on 1' if you want to use monitor 1 (your laptop) as your only monitor, turning off the external monitor. Choose 'Show only on 2' when you want to turn off the laptop screen and see only the external monitor.
MacBooks
To mirror your display on a MacBook, go to System Preferences in the Apple menu. Click Displays (look for the monitor icon), and then go to the Arrangements tab at the top of the window. If 'Mirror Displays' is checked, the screens will show the same thing at the same time. This is also the option you want if you want to close your MacBook lid and continue using the external display.
See our guide to the best monitors for MacBook Pro if you're still trying to choose an external display.
04. How to use the monitor to expand your desktop
You can also use an external monitor for your laptop to extend your desktop, allowing you go to drag windows between the two screens. To enable this, go to the Windows Display settings (see above) and select 'Extend displays'.
You'll need to choose one display as your main display, which is where apps will open by default. In the Windows Display Settings (see above), click 'Identify' button to see the number assigned to each screen. Click on the display you want to be your main display and select 'Make this my main display' under 'Multiple displays.'
Drag the rectangles in the Display window to reflect the position of your monitors – so if your second monitor is to the right of your laptop screen, you'll want its rectangle to be on the right of the rectangle representing the main display. When the setup is correct, click 'Apply.' You can test the extended desktop by moving your mouse in the direction of the other monitor. The cursor should appear on the other screen.
If you want to extend your display on a MacBook, uncheck 'Mirror Displays' in the Arrangements tab mentioned above. You'll then need to choose your primary monitor by moving the white bar between the two rectangles at the center of the window (your primary monitor will be the screen with the white bar above it. By default, this will be your MacBook's display). You can rearrange the screens to reflect the placement of your monitors by dragging the rectangles to the correct position.
05. How to use an external monitor with your laptop lid closed
Windows
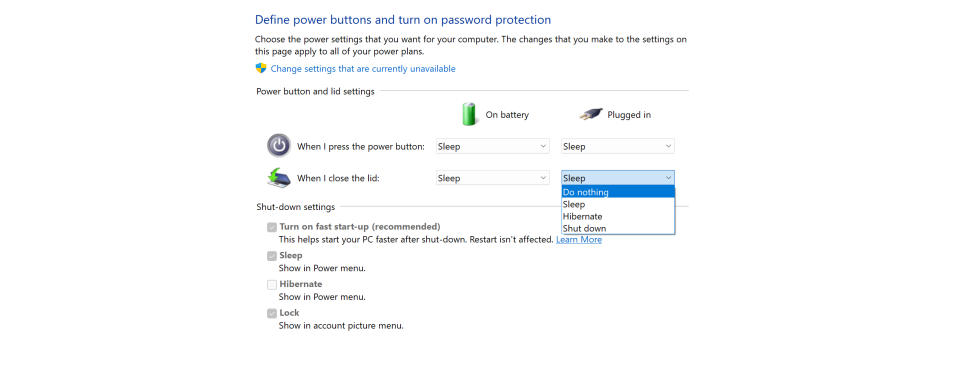
To use your laptop with an external monitor and the laptop lid closed, connect a keyboard and mouse to the device so that you can control it without the built-in keyboard and trackpad (this isn't necessary if you're only closing the lid to watch a film for example, but will be needed if you want to work). You'll also want to connect your laptop to power source to prevent it from going to sleep when you close the lid.
In Windows Control Panel, click on 'Power Options' (search for it or change the view to icons if you can't see it), and 'Choose what closing the lid does'. In the menu beside 'When I close the lid' in the 'Plugged in' column, select 'Do nothing'. This will prevent Windows from shutting down when you close the lid, provided that the laptop is plugged in (we don't recommend doing this when on battery since it can impact batter live considerably). Click 'Save changes'.
MacBooks
Connect a keyboard and mouse to your MacBook if you want to be able to work with the lid closed. You'll also want to connect to power, otherwise the external monitor will turn off when you close the lid of your MacBook. Make sure screen mirroring is turned on (see above) and then adjust your energy saving setting to stop the screen from turning off then the lid is closed. To do this go to System Preferences in the Apple Menu, click Battery and drag the slider to the right ('Never').
If you have any problems with your MacBook display, check our guide to how to fix a black screen on MacBook Pro.

