How to use Blender (and ChatGPT) to level up your video game assets

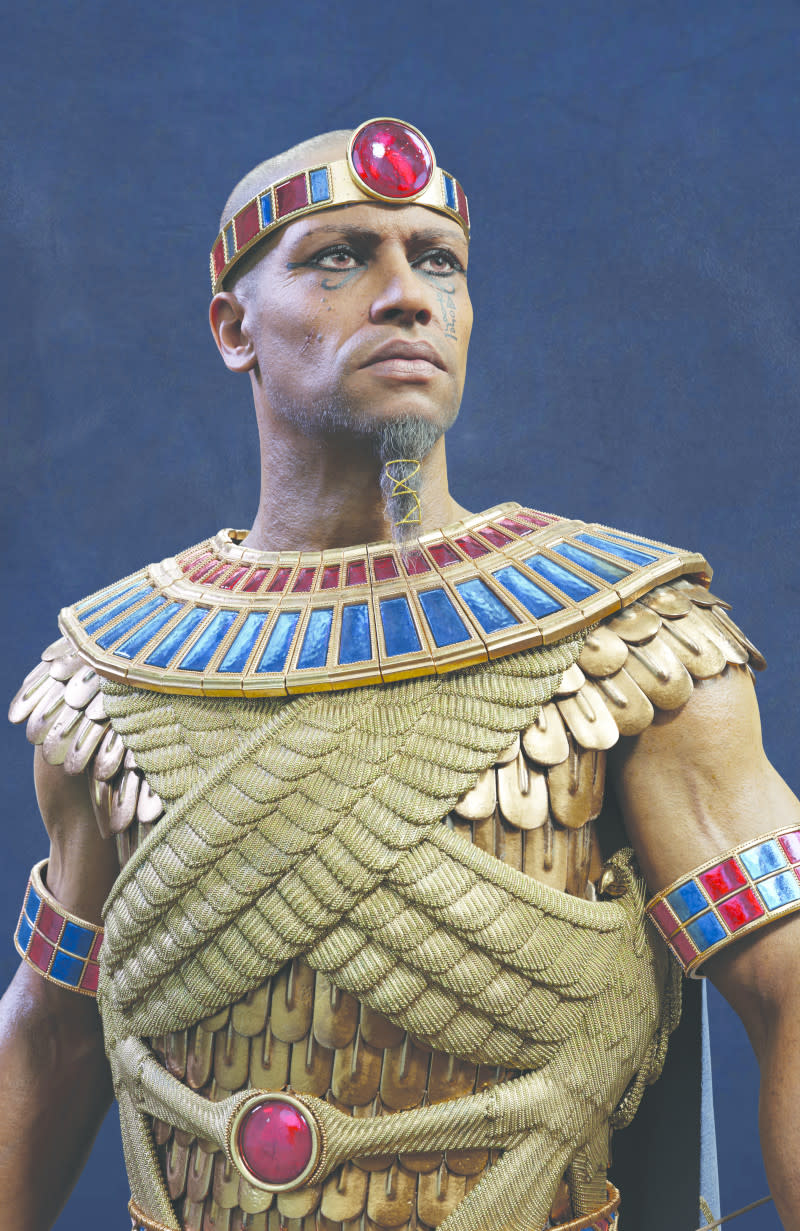
Me and my team at AMC Studio had the chance to contribute to the video game Total War: Pharaoh, in partnership with Creative Assembly and Sega, which was released last year. Our task was to upgrade some in-game assets to a higher quality for use within the game’s marketing and menu.
Given the difference in quality, this practically meant an almost total remake of the assets, with the initial sources used more as a reference for certain aspects. There was nothing special in the brief, except that renders created in Blender were also requested among the deliverables. I did a double-take when I saw that.
I was about to use Blender as the lead software for the first time, almost two decades on from my initial encounter with it. If you're not too familiar with Blender, check out our rundown of Blender: everything you need to know, as well as our 3D artist's review of Blender 4.0. Read the site's guide to the best laptops for game development if you're looking to upgrade.
Over the years, I’ve used Blender more discreetly, and saw how it has evolved from software for masochistic enthusiasts into an industry benchmark. But I won’t necessarily talk about Blender now, although I’ll use it as an example. Instead, I want to talk about how the most important aspect of my work is iteration.
How I levelled up Total War's assets
Here is a closer look at my process of working on upgrading in-game assets to higher quality for Total War: Pharaoh.
01. Iteration is key
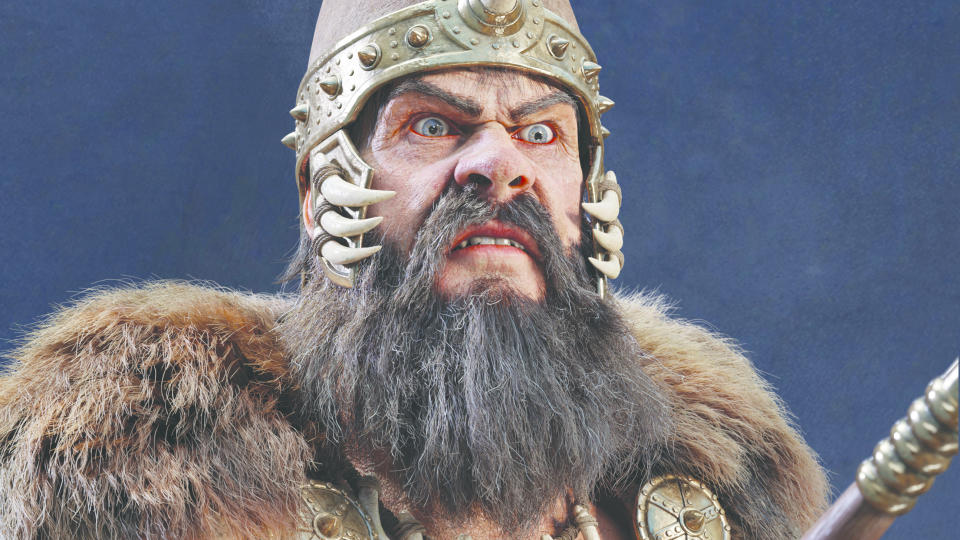
(Image: © Mihai Dobrin)
Like many others, I grew up believing in the myth of innate talent and mastery, and of course I was disappointed when I actually realised that very little came out perfectly on my first attempt. In the meantime, what I’ve learned is how to simulate this mastery with working methods that tolerate my mistakes, and allow me to try as many variations as possible before submitting one of them to the lead, art director, or client.
For me as a 3D artist, each asset isn’t just a finished product, it’s a structure that generates that finished product. Ideally I’d like each stage of asset creation to be as fluid as possible, favouring changes at any moment, whether it’s because I want to see another version or get feedback.
Of course, this is practical. Not necessarily impossible, but often challenging. However, any step in that direction is okay. This is my approach in this sense. I won’t go into all the details of how these assets were created as there were so many it would need an entire magazine. They’re not necessarily complicated, but I thought that discussing my approach to an asset was more suitable
02. Why Blender is the perfect tool
(Image: © Mihai Dobrin)
I don’t think I’m saying anything new here. I believe that everyone has an idea of how to use this sort of iterative workflow. For some that might mean speed sculpting, speed painting, or any other method that generates a result in the shortest time while remaining non-destructive.
For me, it means convincing the computer to do as many of the repetitive tasks as possible. It’s not always easy, but becomes quite fun once you start speaking the machine’s language. This is where I return to Blender.
Why is it cool in this regard? Because it’s open source and is built with open source in mind. Blender played its cards openly from the beginning. While Maya and 3ds Max used and built their scripting languages, Blender used Python, which proved an excellent choice. Today even Maya uses it, as do many other applications that interface with AI systems.
Python is an easy, extremely powerful, and well-maintained language. And because Blender has been open from the start, there is a vast community willing and eager to help. This entire library of scripts or code snippets on the internet has been helpful when generating code with ChatGPT. From my experience, the code generated for Blender works well, unlike that for Maya.
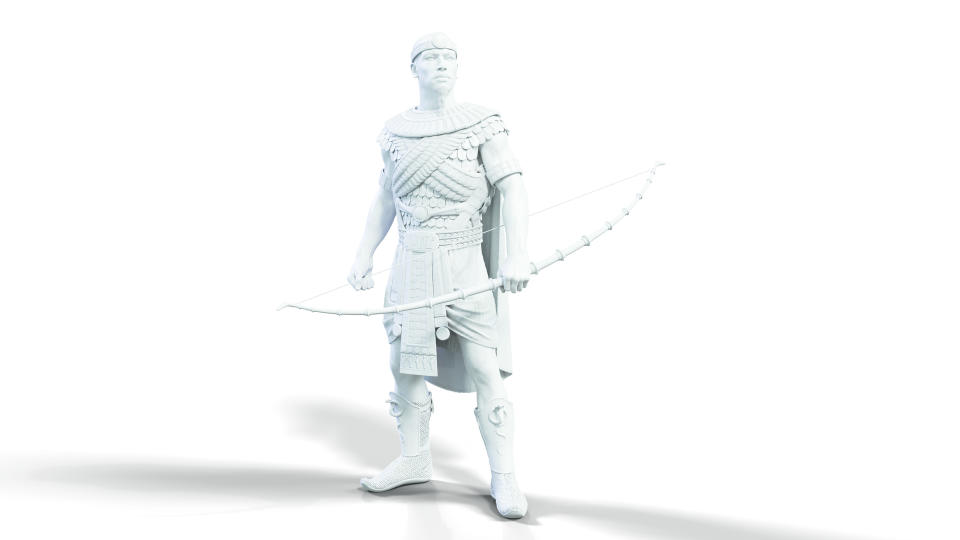
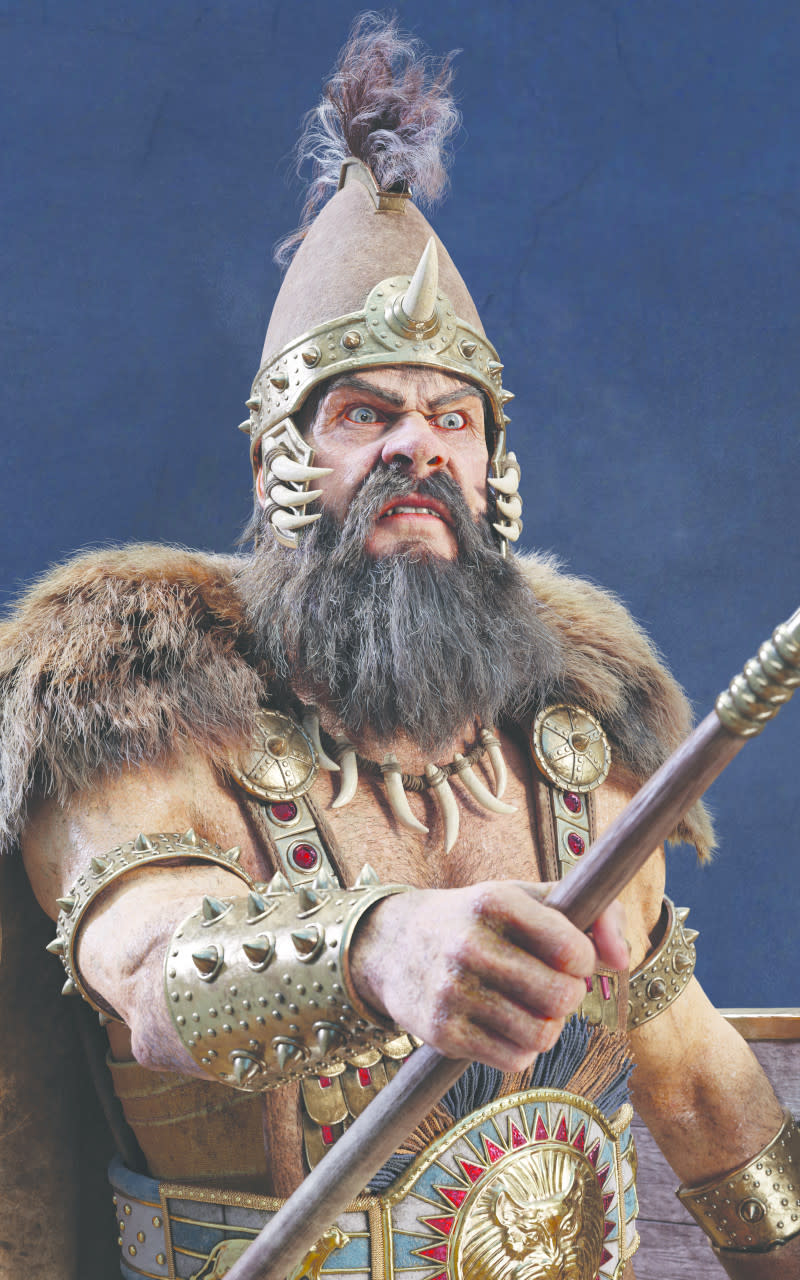
03. Upgrading Ramesses’ scaled armour
(Image: © Mihai Dobrin)
Onto the project. Total War’s Ramesses is clad in bronze scale armour. The in-game model uses a simple, optimised mesh with the heavy lifting done by the Normal maps and ambient occlusion. For our model, this approach wasn’t suitable as each scale needed its low-poly geometry. Hand-placing hundreds of scales was out of the question, and even though decimating might have worked, it would cause issues with the UV map. Even with a clever workaround there would still be a lot of manual work.
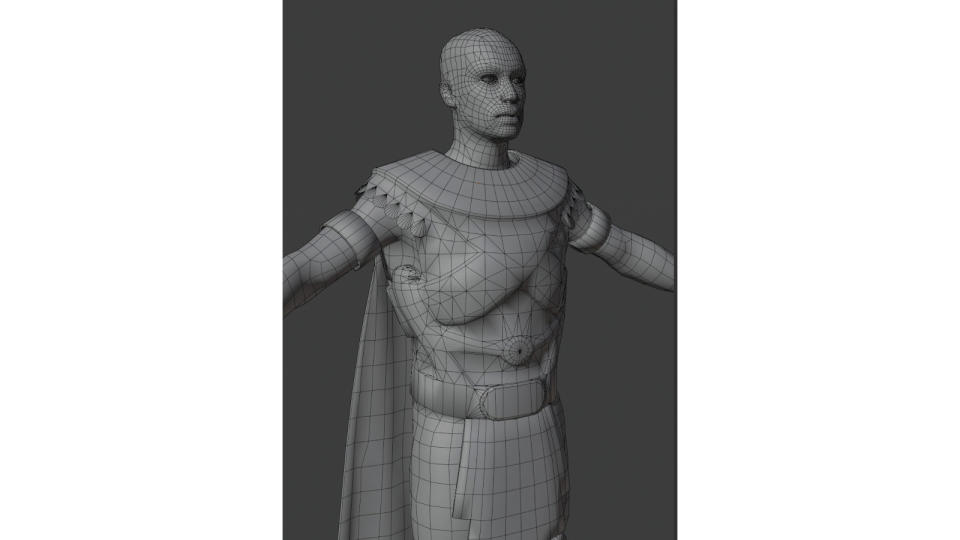
04. ChatGPT scripts
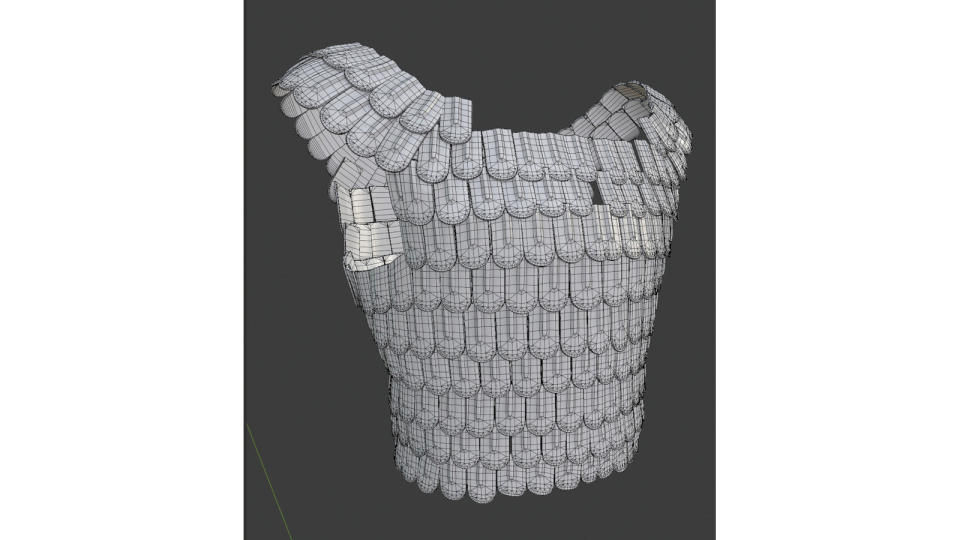
(Image: © Mihai Dobrin)
I took the high-poly armour and noticed that each scale had exactly the same geometry, and the indices were similarly located for each. I then created a low-poly scale and opened up ChatGPT. I asked it to make me a script that would take the low-poly scale, find the nearest corresponding vertex index from the high-poly version for each vertex on the low-poly, duplicate the low-poly, and then place the vertices at the corresponding position on the next high-poly scale. Job done!
This time I was lucky as the high-poly scale wasn’t decimated, although I might have found an answer in that case. On the other hand this approach, even with the help of ChatGPT, means thinking like a programmer. ChatGPT is effective if you can describe the problem algorithmically, but not everyone is familiar with that.
05. Thinking in layers
What industry artists are familiar with are workflows and filters using layers. A layer stack similar to that in Photoshop or Substance 3D Painter is just a series of nodes and filters. If I began describing the style that involves control nodes as visual programming, many artists would skip over it. But if you take it one step further from the layer stack, it might become easier.
If I say that Geometry nodes are actually custom modifiers, it might seem even more enticing. For those who aren’t familiar with modifiers, I’ll try to describe why they’re so essential for a nondestructive workflow. They’re just like the filters in Photoshop, but modify the geometry rather than pixels. Many aspects in Blender are controlled using modifiers; even a character’s rig is applied to the geometry using one.
The skeleton, called Armature in Blender, is a geometry filter, so when you pose it or animate it, it’s basically modifying the modifier’s parameters. Just like the filters in Photoshop, if you remove it, the geometry reverts to its previous shape or properties.
06. Ramesses’ hair
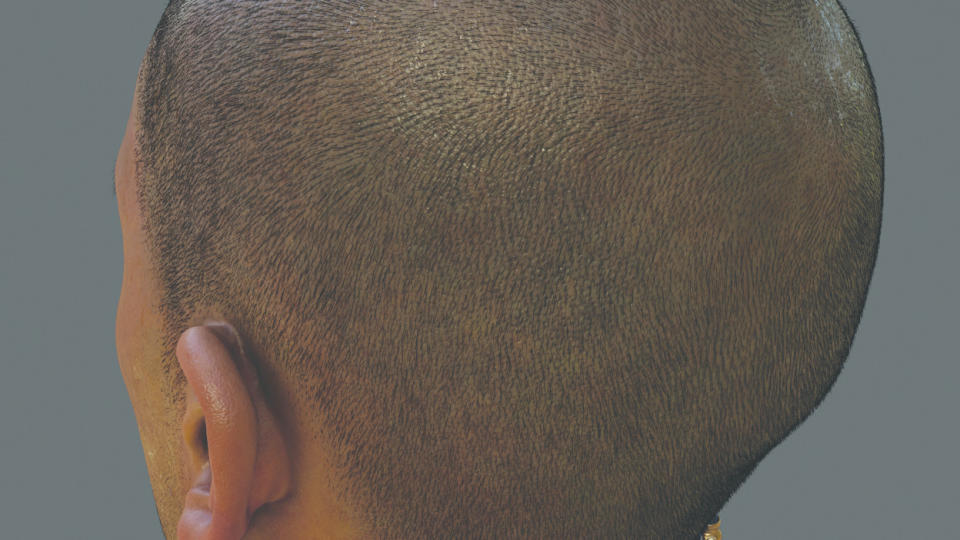
(Image: © Mihai Dobrin)
I was determined to generate the character’s hair from the skin’s pores, just like in real life. To do this I took the Normal map and, with a Geometry node, loaded and filtered the texture so that it could be used as a mask for placing hair strands.
At first glance, some Geometry nodes may seem complicated, especially if you didn’t make them yourself. However, once you start adding node by node everything becomes clear and, honestly, I think it can be the most enjoyable aspect. You’ll constantly start to think about accomplishing each task using nodes.
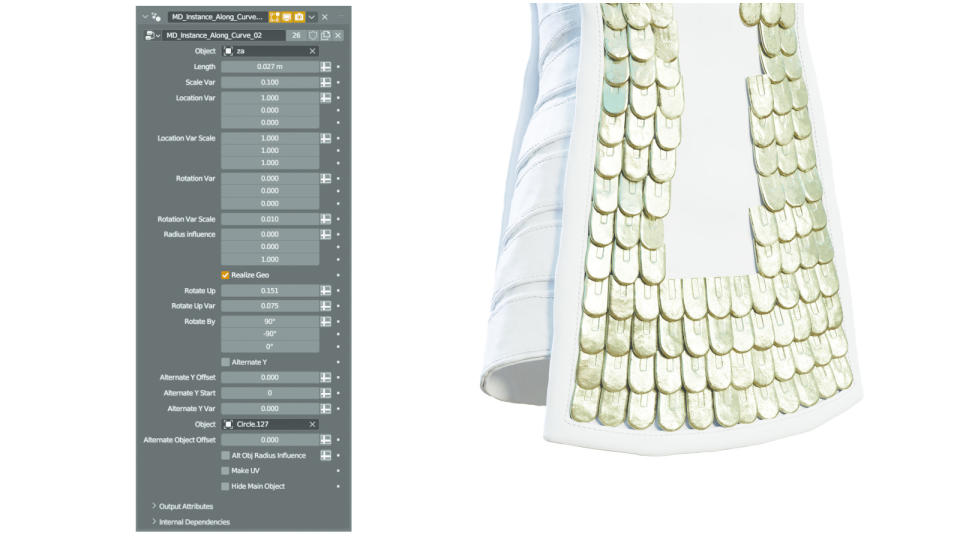
07. Tackling Irsu's scaled armour
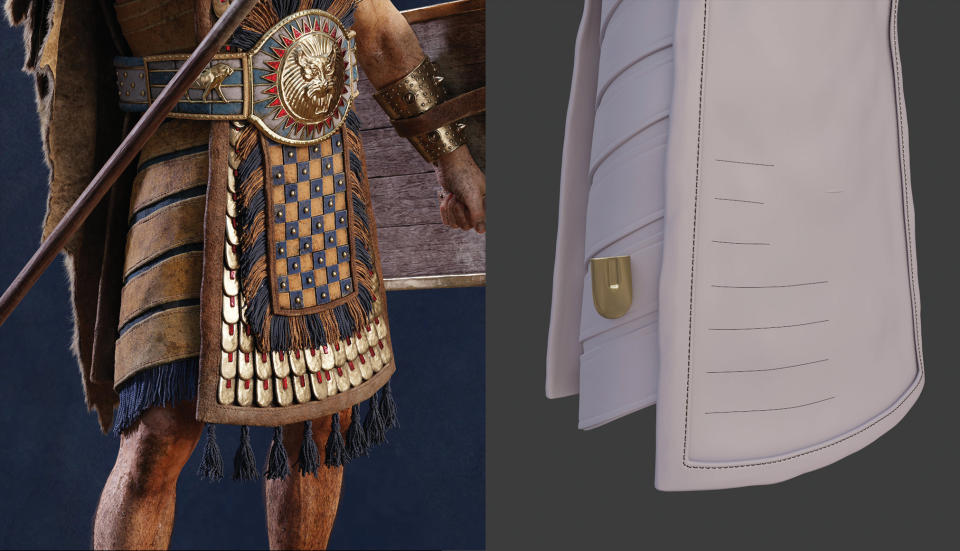
(Image: © Mihai Dobrin)
Similarly for the second character, Irsu, I had to replace the highpoly model provided to us by the client. To speed up the process I skipped the ZBrush stage and created the fine details directly in Blender, and had the opportunity to use Geometry nodes.
It started with a few curves and a scale, with modifiers applied to these curves. Unlike Maya, curves in Blender have control over tilt at each control point, so I can adjust them anywhere along the length of the curve. The first of the modifiers is a Geometry node. I generated and distributed the scales along the curves with adjustments made for rotation and location variation.
Under the hood it gets a bit more complicated because of the implementation of variation on different axes, but overall the functionality is quite simple. After applying the modifier, the armour in that area looks like this:
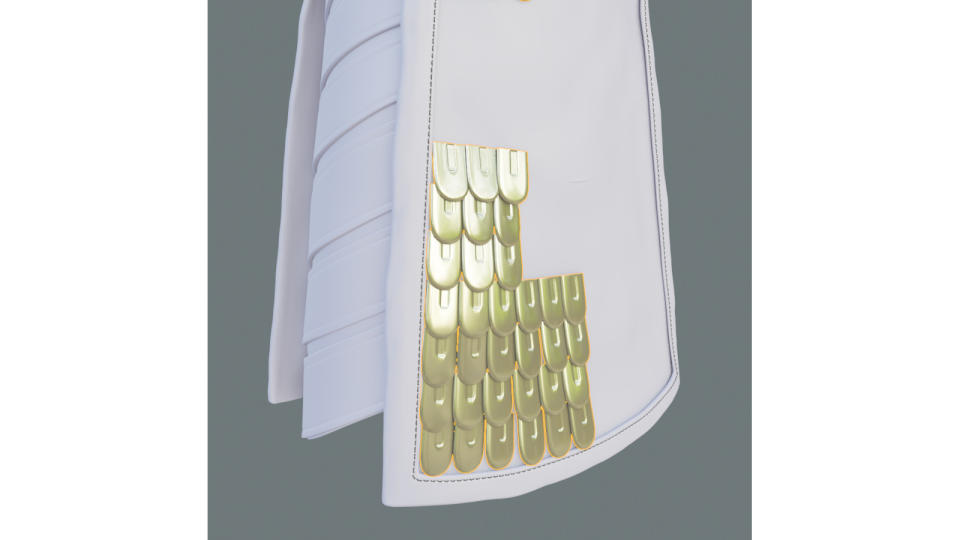
08. More modifiers
(Image: © Mihai Dobrin)
The next modifiers were a Surface Subdivision modifier and three more Geometry nodes for fine details. These basically used multiple Perlin noise generators at different resolutions. At this point, the armour was already good enough that it didn’t need to go through ZBrush.
The same curves were used for placing the low-poly version, so a simple series of modifiers were responsible for a large portion of the armour workflow, which could be changed at any time.
The transition from classic modelling to the process using Geometry nodes is just as vital and disruptive as the transition from Photoshop to Substance 3D Painter for textures. These are a few simple examples to highlight an essential aspect that’s well implemented in Blender; it’s all about the flow of information.
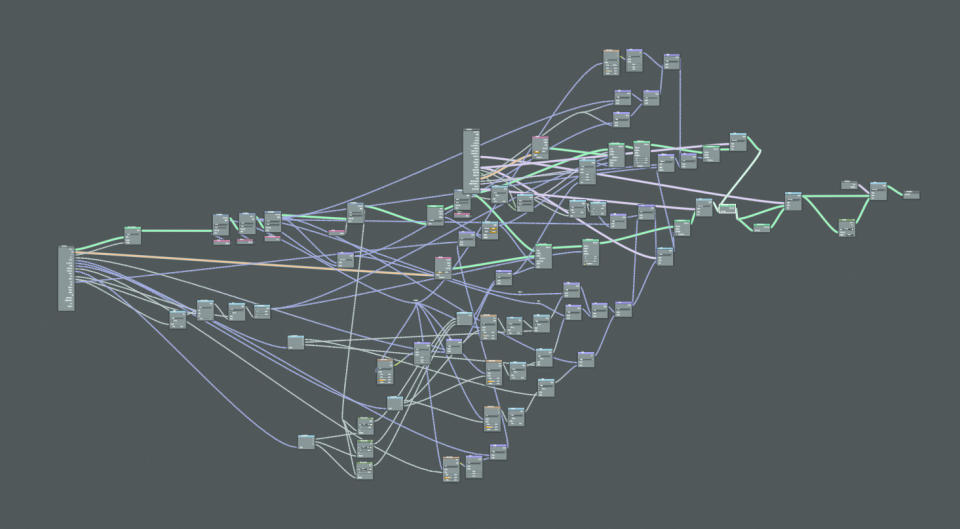
09. Fluid data
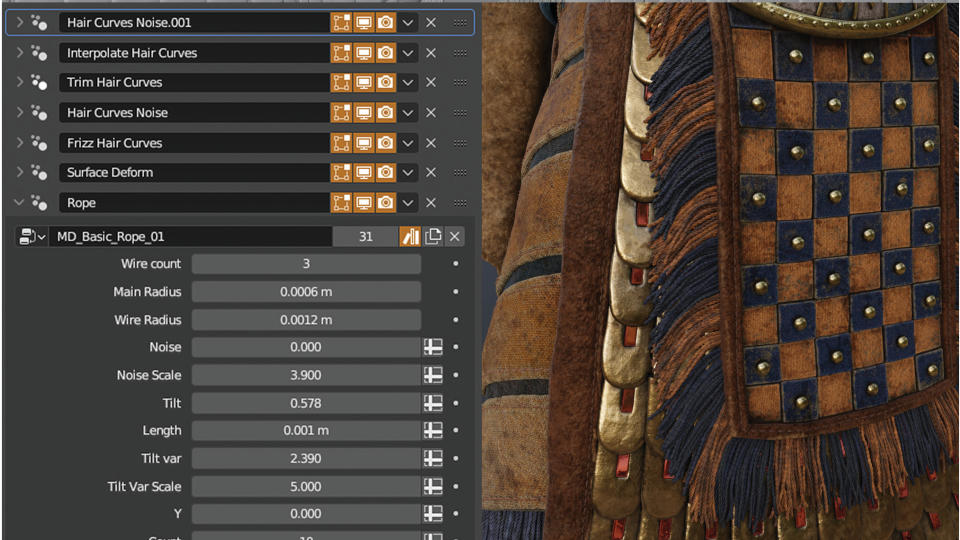
(Image: © Mihai Dobrin)
As a small example of the fluidity of data in Blender, here’s how I created the fringes on Irsu’s armour. Essentially I used the Hair generator and created a handful of control curves. I interpolated them, added modifiers for noise, frizz and trimming, and finally added my Geometry node for the generating fringes.
I followed a similar process for the texturing. Each strand inherits the properties of the surface it’s generated from, so I could colour some blue and others orange. I also added variation directly from the shader. This way I avoided complications with low geometry, UVs and space on the texture. This functionality isn’t out of the box, but a hair strand is essentially a curve, and you can use and convert a curve any way you like.
Using Blender: quick tips
Here are a few quick tips for getting more out of Blender.
The power of nodes
Why would you want to do everything with nodes? The simplest answer is that you can reuse them. Every time you encounter something new that can be optimised this way, it’s better to spend a little extra time as an investment for the future, even if the future actually means creating a new version with more details or functionality.
A tool is not a finished product
By design, Blender tends to be more of a tool compared to other applications that, even if they have different modules, feel more like a series of black boxes linked together. For example, skinning in Blender is done with the help of Vertex Groups, which are nothing more than a floating-point value from zero to one associated with a vertex. Access to it isn’t restricted solely to deforming your geometry using a skeleton. You could write your dog’s name with ASCII codes in a geometry group if you wanted to.
See more of AMC Studio’s work on Total War: Pharaoh at the studio's ArtStation page. Total War: Pharaoh is developed by Creative Assembly and published by Sega. AMC Studio worked in collaboration with the internal teams. AMC is part of Keywords Studios, the global technical and creative services provider to the video games industry.
Get more software tutorials at 3D World
This content originally appeared in 3D World magazine, the world's leading CG art magazine. 3D World is on sale in the UK, Europe, United States, Canada, Australia and more. Limited numbers of 3D World print editions are available for delivery from our online store (the shipping costs are included in all prices). Subscribe to 3D World at Magazines Direct.

