How to Get a Pro-Looking Manicure at Home

From gel manicures to french tips to trendy nail designs, regular trips to your local nail salon can be a great way to indulge in self-care. But it's not always practical...or, at this point, even an option. Learning how to do a manicure at home, just like the professionals, ensures you'll have salon-quality nails whenever you please. Plus, keeping up with your regular beauty routine can be therapeutic.
So, to help you create that Instagram-worthy manicure all by yourself, we enlisted Miss Pop, a celebrity nail artist, who's worked with names like Regina King and Ashley Graham, to offer up her best tips, tools and techniques for doing a manicure at home—including a unique nail soak method. This easy step-by-step guide to DIYing a professional mani—that will actually last longer—starts with priming your nails and finishes with the perfect spring or summer polish, plus some easy nail art if you're feeling ambitious.
Step 1: Gather these essential manicure tools.
Before you sit down to do your nails, here's what you'll need:
Cotton balls, rounds, or squares
Bonus materials: pencil and roundhead pin
Step 2: Remove any old polish on your nails.
This should go without saying, but starting your manicure with a clean canvas a.k.a unpolished nails is a must. If you're wearing regular polish, use the cotton balls and—you guessed it—a gentle remover, to take it off. If you have gel polish on, use a special kit to help remove the color.
Step 3: File your nails in whatever shape you desire.
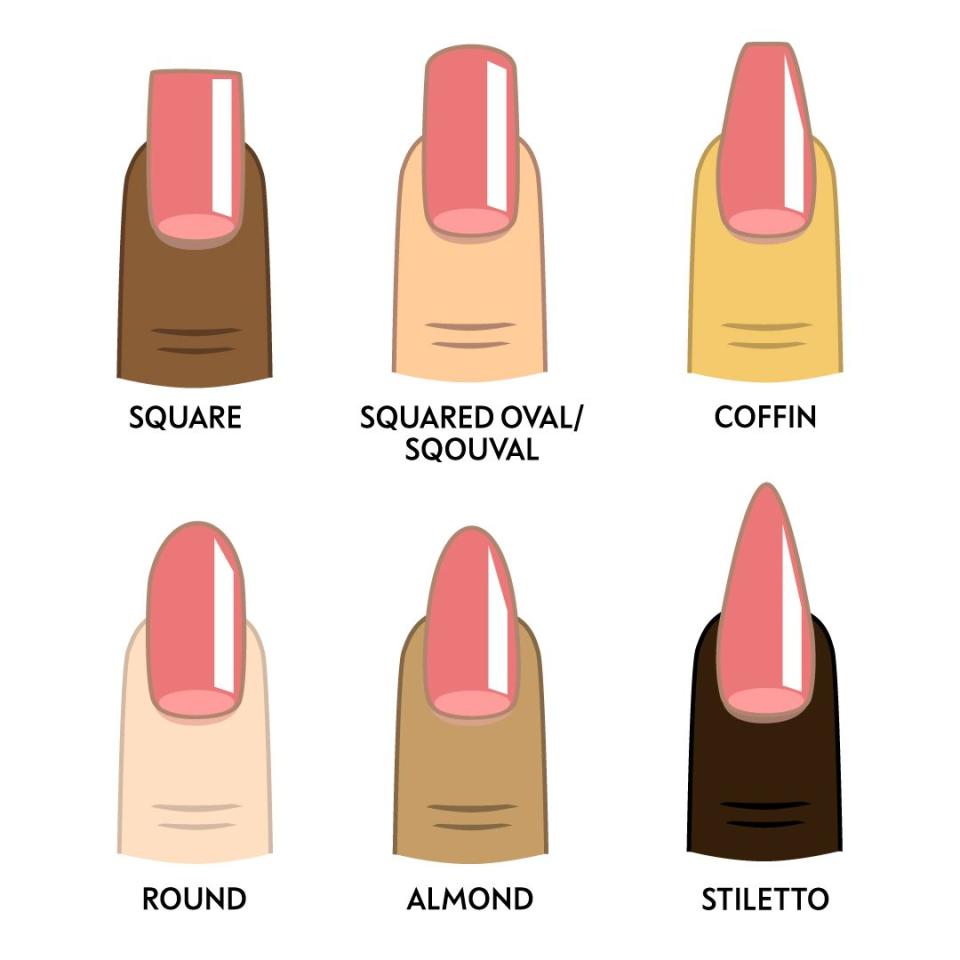
The key here is to file your nails in one direction at a time.
"If you file back and forth, you'll create micro-tears which can lead to breakage," Miss Pop says. Instead, swipe consistently to just one side.
Step 4 (optional): Buff your nails, but only if you need to.
Gently buff your nails in one direction if they are peeling or flaking, she says. If not, you can skip this step.
Miss Pop adds that she doesn't normally buff nails because it strips the top layer, which is the most keratin-rich.
"The reason people buff nails before they apply regular polish is because it helps the polish last longer," she says. "Doing that, however, removes the natural oils on the nail."
Step 5: Apply a cuticle remover on the outside edges of your nail.
This will gently soften and exfoliate the dry skin by the cuticle, making it easier to push back. An added bonus? Miss Pop finds that a cuticle remover can help eliminate the yellow staining you get after removing darker nail polish colors, too.
"Paint the cuticle remover on the nail as if it were a base coat or top coat. Let it sit for a couple of minutes and then gently rub it in with your finger, and wipe it off with cotton," she instructs.
If you're looking for another way to remove that yellow tint to your natural nail, Miss Pop recommends soaking your nails in a bowl of warm water and a dissolved denture tablet for a few minutes.
Step 6: Push your cuticles back using a manicure stick with a cotton head.
This is a public service announcement: don't cut your cuticles. There is no reason for it, says Miss Pop. "Cutting the cuticle—which is the seal between the nail bed and your body—leaves you open to infection," she warns.
Also, if you keep cutting your cuticles, you run the risk of getting that bumpy, ruddy skin around your nail—and no one wants that, either. Instead, stick to the cuticle remover.
Step 6: Cut hangnails, if necessary.
Tilt the cuticle nipper (to avoid cutting yourself) and trim the unwanted skin, avoiding the cuticle.
Step 7: Apply one thin layer of base coat.
It's really the base coat that helps your manicure last by providing a barrier between your nail and the polish.
"The nail has natural oils, so using a base coat is like applying primer before foundation. It gives you those extra days of wear," Miss Pop says. "It protects your nails from staining."
Step 8: Paint on your nail polish.
Start applying the polish in the middle of the nail and work your way towards the edges of the nail in even strokes. Once that's dry, apply a second coat."This helps with the wear and longevity of your manicure."
Not sure what color to choose? Along with year-round classic nudes, radiant reds, rich blues, sunny yellows, lavender-hued whites, and fun glitter are perfect for on-trend spring or summer nails.
Step 9: Remove the excess polish.
Helpful tip: Use a paint brush dipped in acetone and gently wipe the excess off your skin. "This allows you to get in those corners," says Miss Pop.
Step 10: Time for a top coat.
Once your two coats of polish are completely dry, paint on a thin layer of your favorite top coat to seal everything together. To make your at-home mani last longer, Miss Pop recommends staying away from quick dry ones because they chip more often.
If you're in a hurry, try fast dry drops instead of a quick dry polish, which tends to cause nails to chip more quickly. Instead, drops won't hamper the consistency of your colored coats or risk the longevity of your manicure.
Bonus step: Create an easy nail art hack.
Take a pin with a rounded top and insert it into the eraser of a no. 2 pencil. Voilà! You've officially created a DIY nail tool.
Now, take the rounded top and dip it into a nail polish color of your choosing. Lightly press down where ever you want to add a dot on your nail. You can keep it simple, or decorate all of your nails with a polka-dot pattern. The sky (and your time!) is the limit.
Step 11: Finish with a touch of cuticle oil.
Whether or not you decided to add a pop of nail art, the last step of your at-home manicure should be to add some cuticle oil to rehydrate the skin around your nails.
"Even if you like your nails bare, apply cuticle oil regularly to stave off hangnails and maintain the health of your skin and nails," adds Miss Pop.
Videographer: Elyssa Aquino; Photography: Tyler Joe; Nails: Miss Pop
For more stories like this, sign up for our newsletter.

