Why I'm still using ZBrush ZSpheres in 2023 - these are my tips

I first saw ZSpheres in 2006 when I visited the Pixologic office in Los Angeles. It was a pre-release version and their then product manager Ryan Kingslien was showing me a raft of awesome new features. Here we are in 2023 and the question is: are ZSpheres still relevant all these years later?
First of all, let’s just be sure we know what ZSpheres are and what they can be used for. ZSpheres are a unique feature in ZBrush. They’re a powerful tool used for creating base mesh structures and establishing the overall form of a 3D model. ZSpheres allow artists to build a flexible armature that you can then easily manipulate and transform into a complex character or creature.
ZSpheres provide a flexible, intuitive way to create complex organic models, as they allow for easy manipulation of the base structure. ZSpheres are particularly useful for character artists and creature designers who want to establish a solid foundation before diving into the intricate sculpting process.
Why ZSpheres still have a use
Once you’ve established the basic form using ZSpheres, you can convert them into a sculptable mesh. To do this, go to the Adaptive Skin sub-palette in the Tool menu and click on the Make Adaptive Skin button. This will generate a mesh based on the ZSphere structure. After creating the adaptive skin, you can switch to the Sculpting mode by clicking the Edit button in the Tool palette. This allows you to refine and add details to your model using the various brushes and sculpting techniques available in ZBrush.
I’ve used ZSpheres extensively making creatures and characters, and before VR sculpting tools such as Adobe Medium or more recently Substance 3D Modeler came along, I found them the fastest way to create my base meshes. No other company has come up with anything like the ZSphere concept. Creating in VR uses voxel technology, which is much more like spraying shaving cream in the air and is a lot less flexible overall. (Read our guide to the best VR headsets.)
I still recommend ZSpheres to my students. There are more options but this one still needs to stay in your arsenal. If you know what you want to make and you need to get a basic armature out quickly, ZSpheres are still an excellent tool.
Using ZSpheres: Basic ZSpheres for creatures
Below I offer a quick workflow of how you can use ZSphere's in your 3D sculpting to get a quick start on a project. My final sculpt using this technique is at the top of this page. (Take a look at our best laptops for 3D modelling if you like this and want to get started.)
01. Start a ZSphere model
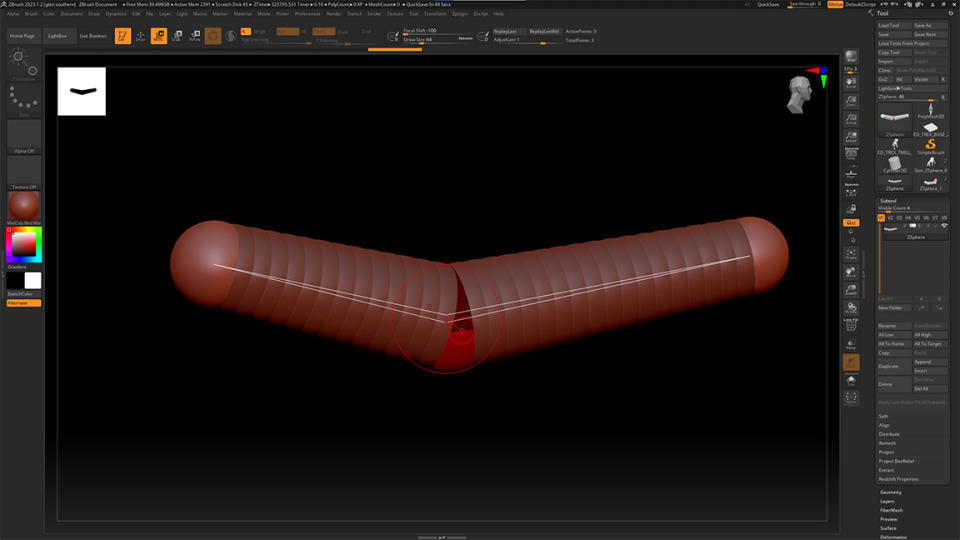
(Image: © Glen Southern)
Go to Tool and look for the red sphere, which is the ZSphere tool. New ZSpheres always start with a single red sphere, and you simply add more spheres to it. Make sure you’re in Edit mode (‘T’ is the keyboard shortcut for that), and hit ‘X’ first to create symmetrically, which is useful for creatures. Next you’ll want to add a sphere at the front and another one at the back. You have the ability to move, rotate, and scale all the ZSpheres and connecting lines.
02. Adding joints for the body
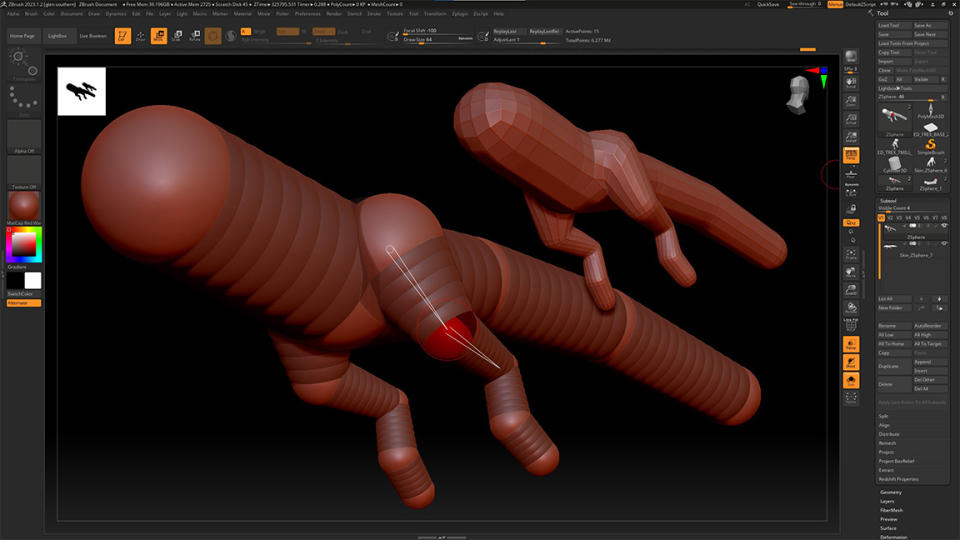
(Image: © Glen Southern)
You can quickly refine the basic anatomy of your creature. Add a sphere everywhere you want a joint such as the shoulder, elbow, knee and so on. Move the end sphere around and don’t forget that you can rotate any sphere to affect the spheres and connecting lines below it in the chain. Build up the entire anatomy in this way, but don’t try to add any detail such as eyes or teeth.
03. Getting it correct now
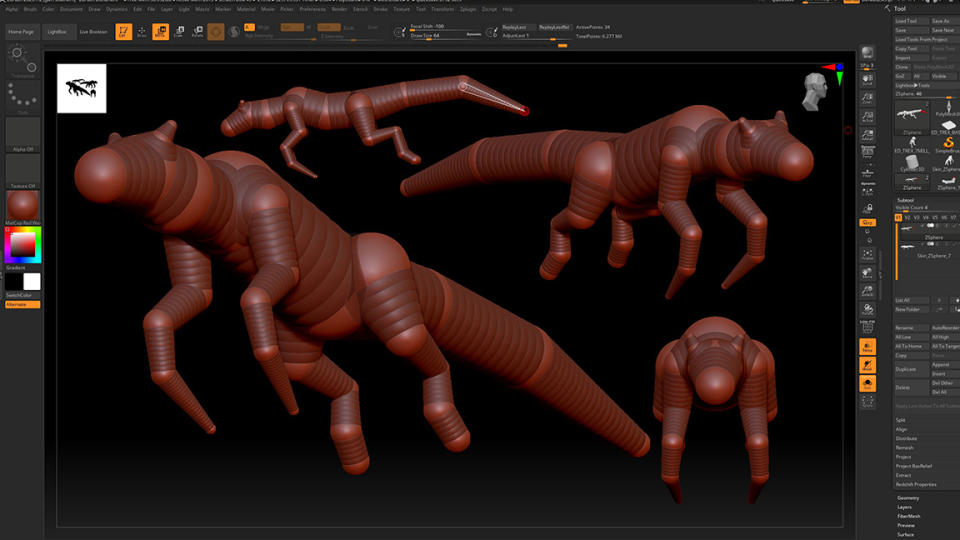
(Image: © Glen Southern)
The important thing to remember is that this is your armature and it’s what you’ll sculpt on, so the more accurate this is the better your model will be. This is the best time to get the length of the limbs right. Don’t worry about the volume of muscles or elements like the belly area, just focus on getting the full anatomy scale correct from nose to tail. Use ‘A’ to see a preview of your model as geometry.
04. Moving to geometry
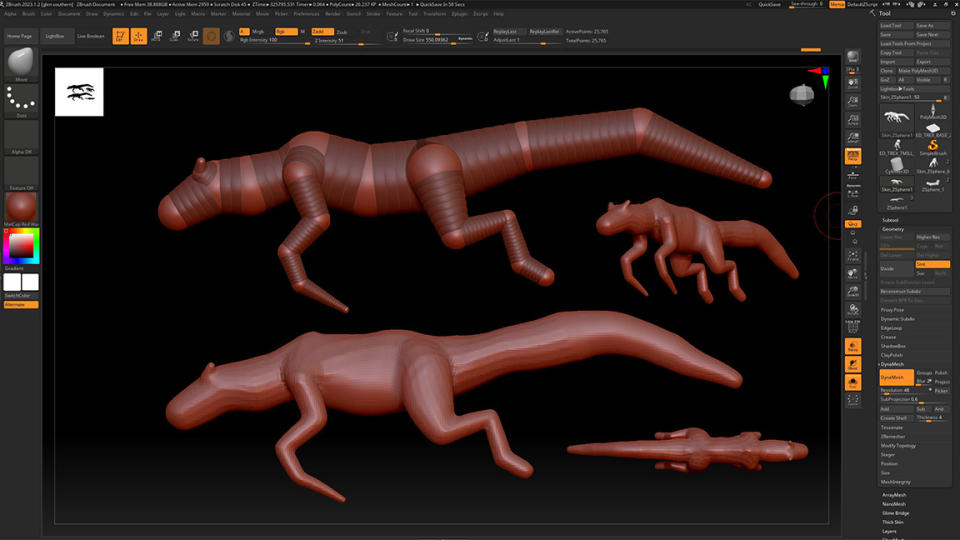
(Image: © Glen Southern)
Once you have the full body laid out you can convert it to geometry to sculpt on. Look in the Tool panel for Adaptive Skin. Here you can play with a few settings to improve the look of the model you’re about to create. The basic settings are fine, so just hit Make Adaptive Skin and a new model will appear in the Tool menu. This is your true geometry and can no longer be manipulated as a ZSphere model. You can now use the normal sculpting tools to work this model into your full design.
This content originally appeared in 3D World magazine. Subscribe to 3D World at Magazines Direct.

