Whittling 101: whittling tips, tricks and inspiration from our expert
The ancient art of whittling and carving bowls, mugs, spoons and other handy utensils has been going for many thousands of years. A craft born out of necessity, these days many people indulge in a spot of whittling just for the fun of it. While useful items are often still the objective, many people create works for purely decorative purposes too.
As an avid camper, I enjoy putting my camping knife to use and crafting items that will be beneficial to my basecamp. If using cast iron pots and pans in camp, wooden utensils are essential, as they don't damage the metal or their non-stick surfaces, and they don't conduct the heat generated by the camping stove. It's hugely satisfying creating something that's genuinely useful.
As well as all of this, the process of working wood promotes mindfulness and relaxation. It's also wonderfully accessible, with the only items required being a whittle-worthy blade, such as those found on a camping knife or multitool, some sanding paper and a bit of timber – though other items like saws and axes can be a help too.
To get you started on your whittling journey, I've put together a straightforward guide to whittling a wooden spoon. The finished product, no matter how rustic, is bound to be a thing of beauty and it won't be long before you're eying up creating an entire kitchen cupboards worth of bowls, ladles, spoons and more.
Meet the expert
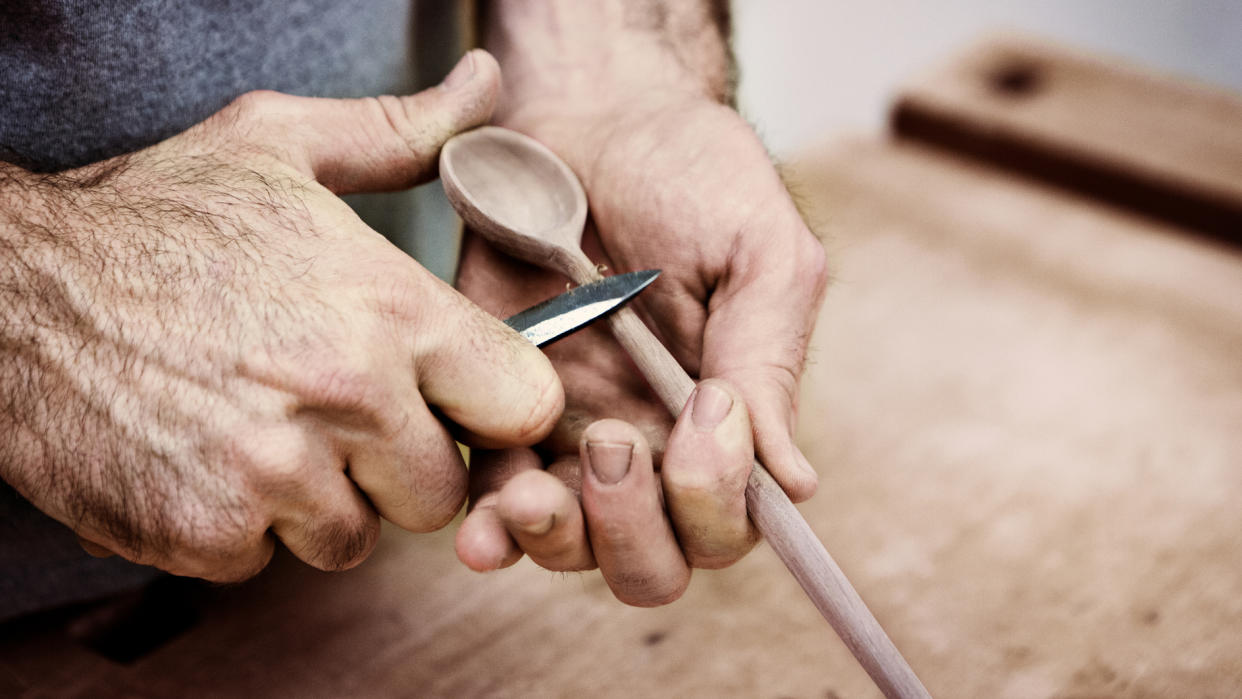
Carving a camp spoon
A wooden spoon makes a useful addition to any outdoor cooking kit and is an ideal camp craft project for beginners. Following is a step-by-step guide explaining how to whittle your own wooden spoon.
1: Choose your whittling wood
First, choose your base bit of timber. For a small eating or serving spoon, you’ll need to find a small piece of wood about 8cm (just over 3 inches) in diameter and no more than 25cm (just under 10 inches) long.
Look for a clean, broadly straight piece of wood that is free of knots. Study your chosen piece of wood and look for any natural curvature or similar features that you might want to use as part of the design of your spoon.
In terms of tree species, many different types of wood can be used for spoon carving. Some of the best include sycamore, birch, maple, cherry, lime, rowan or alder. Just avoid woods with a high tannin content if you want to use your spoon for cooking or eating – as a rule of thumb, the lighter-coloured the wood, the lower the tannin content.
2: Choose your whittling tools
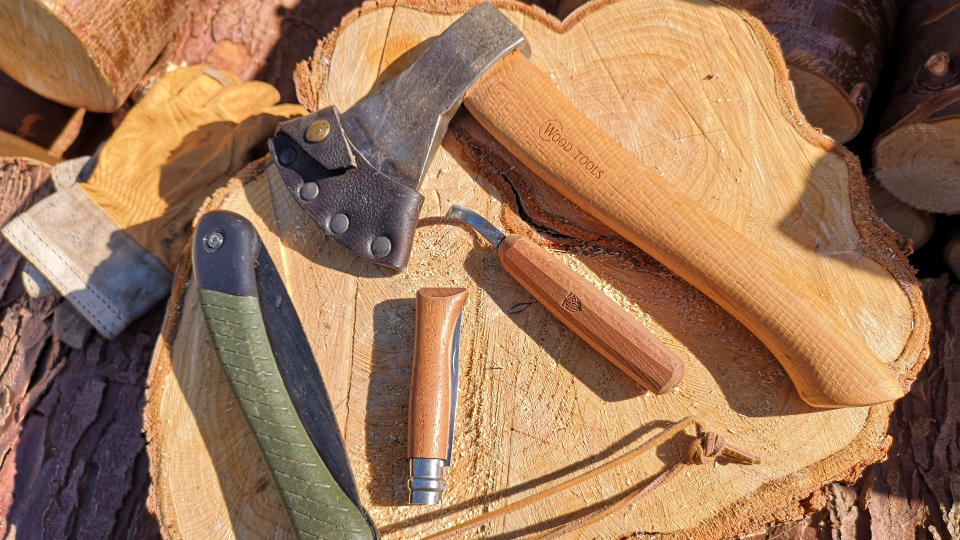
The only essential tool required to start whittling is a small, sharp pocketknife. Knowing how to choose a camping knife and how to sharpen a camping knife can be useful before you begin. The last thing you want is a blade that'll be ruined by the process.
However, a spoon or crook knife, which has a curved blade, is also useful for carving out the bowl of the spoon. A folding camping saw is also handy for cutting away branches or small limbs when selecting your wood. And if you get into whittling as a serious hobby, you might also want to invest in a carving axe, which makes removing bigger chips of wood for larger projects much quicker.
Lastly, a selection of sandpaper in varying grits and some food-grade oil will enable you to finish your spoon.
3: Split your roundwood log or branch
Unless you’ve managed to find a split chunk of wood, the next step is to split your roundwood log or branch in half, using a camping axe or a fixed blade knife and a baton (a heavier branch or log is ideal).
You should find that the wood will split exactly down the central growth ring, which should be clearly visible as a darker line down the middle of each of the split halves.
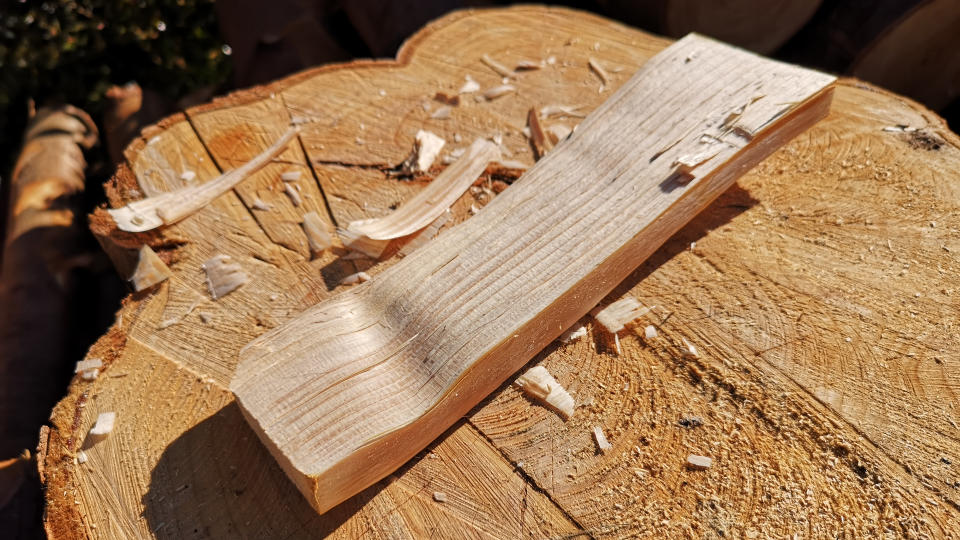
4: Mark out your spoon
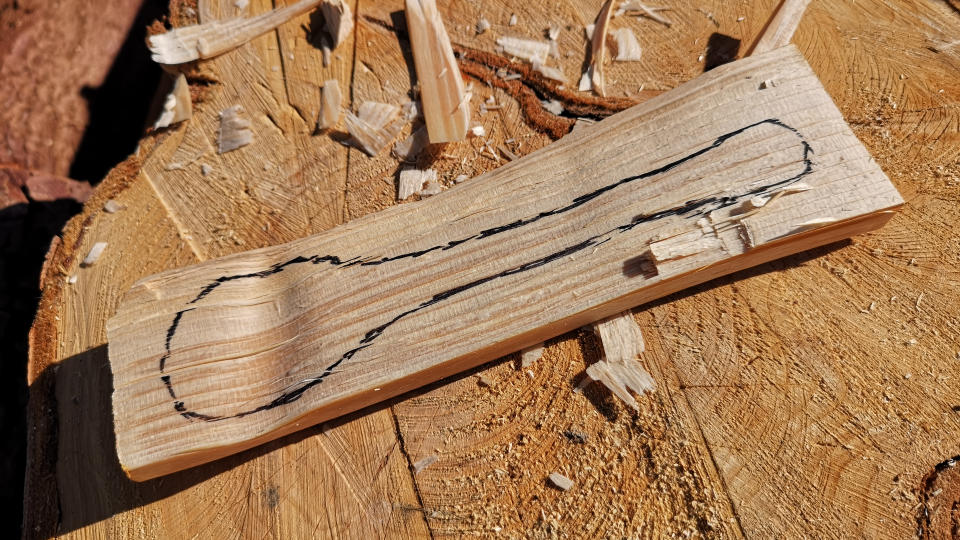
Take one split half of your piece of wood and draw the outline of your spoon on the flat surface, using a carpenter’s pencil or a black marker such as a Sharpie.
Leave a little extra wood at either end, as you’ll need to remove plenty of wood to form the spoon’s bowl and handle. This also makes it less likely to split.
5: Rough out the outline
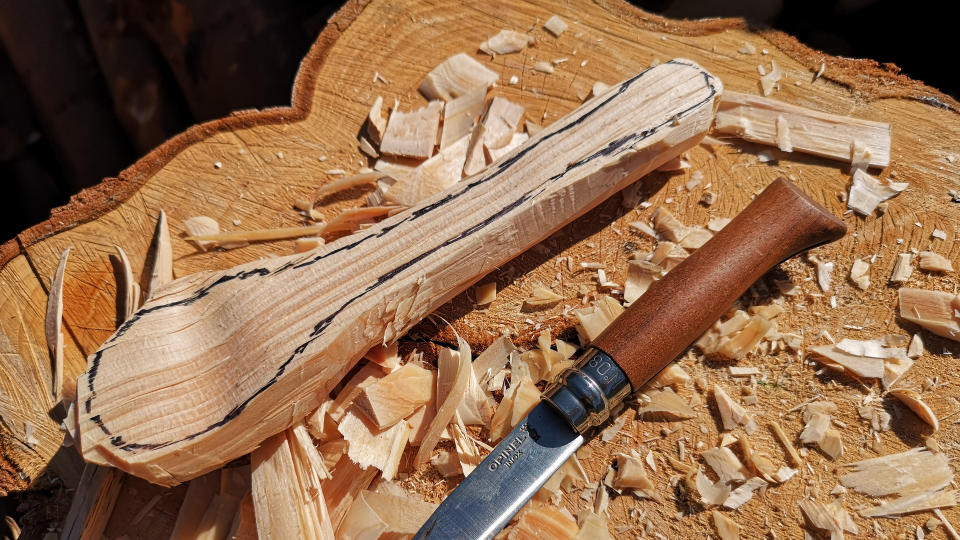
Start to remove chips of wood, following the grain and shaving away surplus wood with long, smooth cutting strokes. You’re aiming to get down to your pencilled outline.
Turn the wood around in your hands and work from both ends.
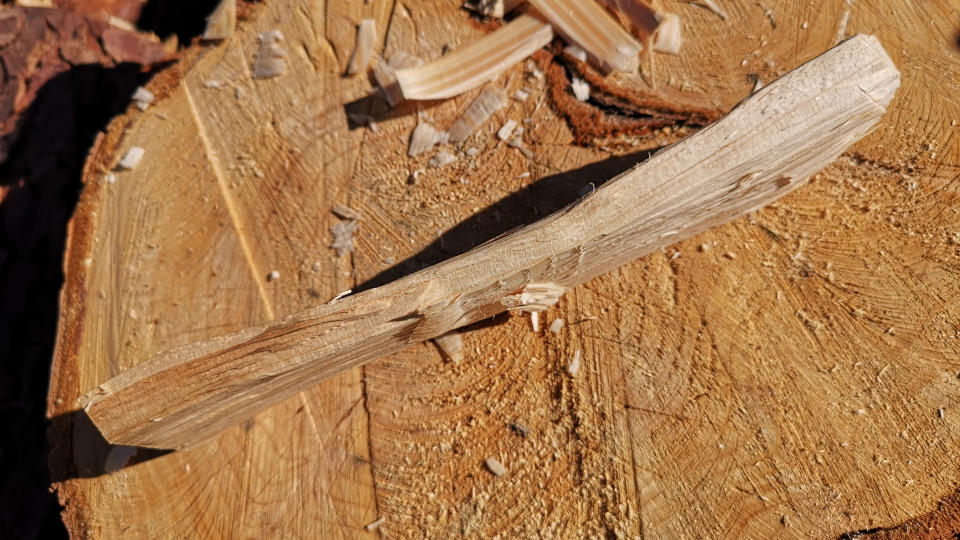
6: Shape the handle and bowl
Gradually thin your spoon out, shaving away more and more wood. Initially, focus on creating the basic outline. It's far easier to work on one horizontal or vertical plane at a time, so don’t worry about shaping the top or bottom of the handle or bowl until you roughed out the spoon as per your pencilled outline.
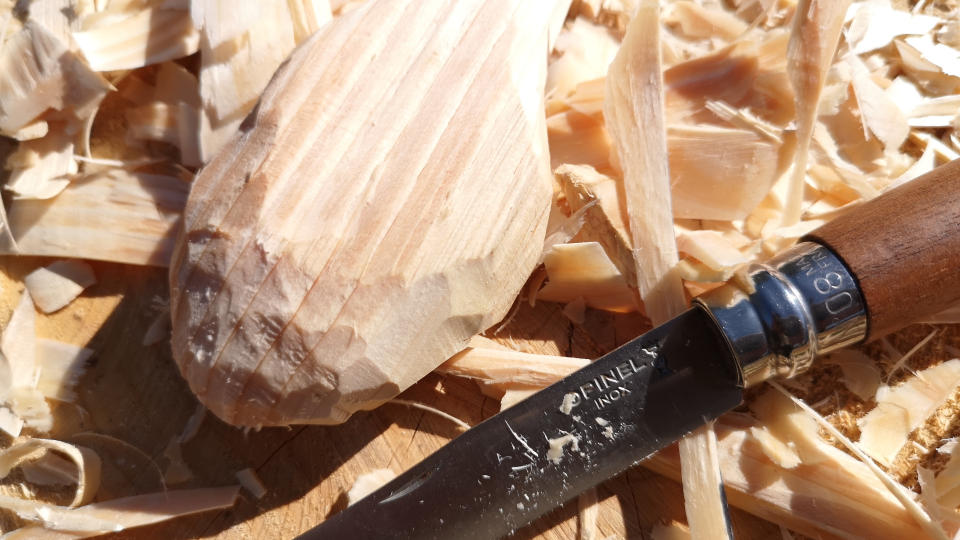
Leave a little additional length at the bowl end of the spoon, as this will give you something to hold when trying to shape the spoon where the handle joins the bowl, enabling you to always cut away from yourself.
Next, you can carefully and steadily work on the depth of your spoon by taking wood away from the underside of the handle and starting to round off the bowl. When you are happy these elements, you can remove surplus wood from the tip of the bowl.
Finally, work on the top surface of the spoon. You may want to retain a flatter shape, or you may want to round off the handle. Now you are ready to hollow out the bowl.
7: Hollow out the bowl
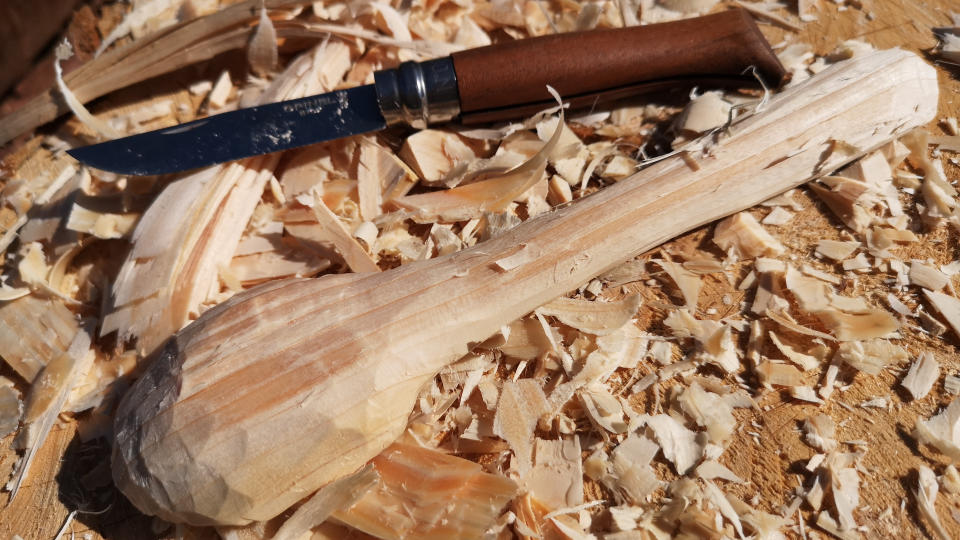
Traditionally, bowls were hollowed out using a smouldering ember from a campfire. It’s much easier if you have a crook or spoon knife though.
Use a scooping, twisting action right in the centre of the bowl, a bit like using an ice cream scoop. Once you have made a small depression begin working from both sides from the middle outwards, cutting across the grain. Continue until you have hollowed out the bowl to an even thickness.
You can hold the wood up to the light to assess the thickness of the bowl – don’t make it too thin or you may hollow straight through it!
8: Finishing your spoon
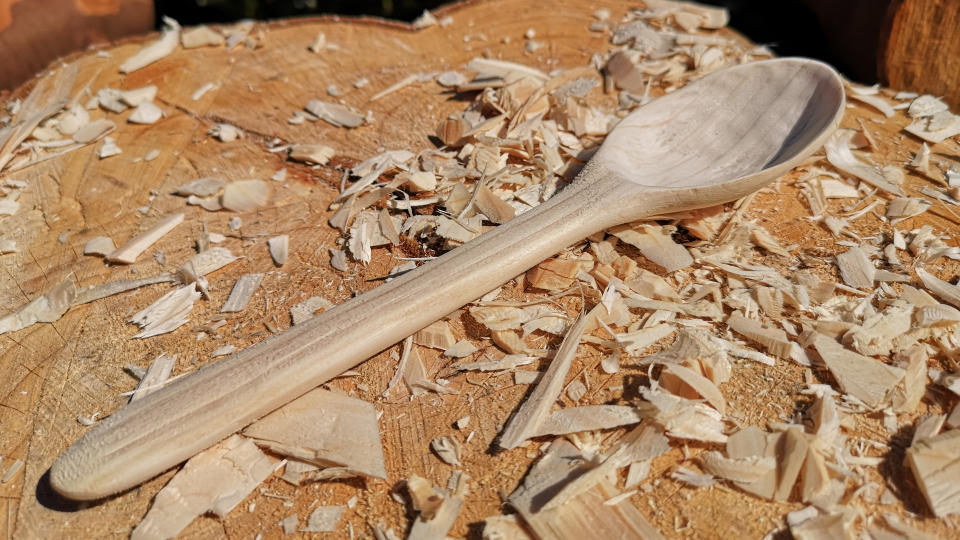
Unless you want to leave a rustic finish, you’ll probably now need to sand your spoon. Start with a coarse (60 or 80) grit and work through medium (100 or 120) and fine (240+) grits until the wood is smooth.
To finish your spoon and protect the wood, lightly coat it with a food-grade oil. Edible drying oils such as hempseed oil, walnut oil or flax oil are the best choices, but olive oil will also work. Oiling your spoon will also help to bring out the grain.

