The Right Way to Paint Furniture (So Your Paint Job Actually Lasts)
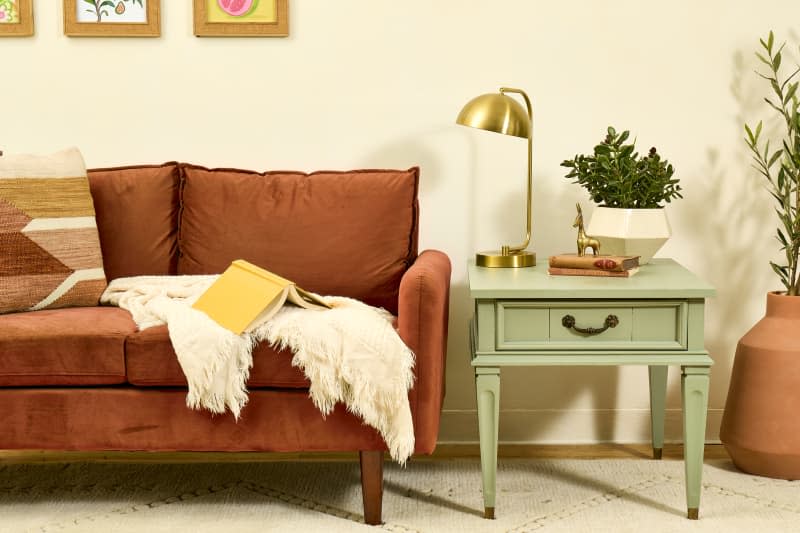
Sometimes you’re out and about, walking the aisles of your favorite thrift store, and you see a piece of furniture that just screams “potential.” It might be a bit banged up with dings and dents, but has a perfectly solid foundation. Or maybe the finish is actually flawless, but it’s a dark wood stain and breezy white paint colors are more your style. Great news: Even if the furniture isn’t exactly to your taste, if the price is right it’s still worth snagging. That’s because painting wood furniture is a super-affordable and easy way to create the exact item of your dreams.
If you’re not a patient person, the most difficult part of painting wood furniture can be the wait time in between coats — especially after you’ve painted over that first coat of primer with your top coat and it’s in the “ugly stage.” This is the part where you question every decision you’ve ever made with a paint brush and are considering abandoning ship (er, chair/bookcase/etc.). Don’t panic! As long as you follow the directions on the back of the can of paint and wait the intended time between coats, your newly painted wood furniture will come out beautifully. (Looking to repaint laminate furniture? For the best results, you need this guide to painting IKEA furniture.)
Have I, an experienced DIYer who’s painted double-digit pieces of furniture, always followed the best practices for painting wood furniture to achieve the best results? Um, no — I’m definitely guilty of being too impatient and thinking “paint is paint and it will stick to anything.” But oh, have I been wrong! Once you make the mistake of not priming a surface and not properly sealing it after having spent precious time painting, you’ll recognize the error of your ways and find the patience to take the extra time to do it right. Here’s my tried-and-true best method for painting wood furniture.

Tools and Supplies Needed to Paint Wood Furniture
Tack cloth or microfiber cloth
Latex paint of your choice
Paint tray and liners
Lint-free nap roller with additional roller sleeves (one for primer, one for top coat)
Drop cloth
Screwdriver
Respirator or mask
How to Paint Wood Furniture
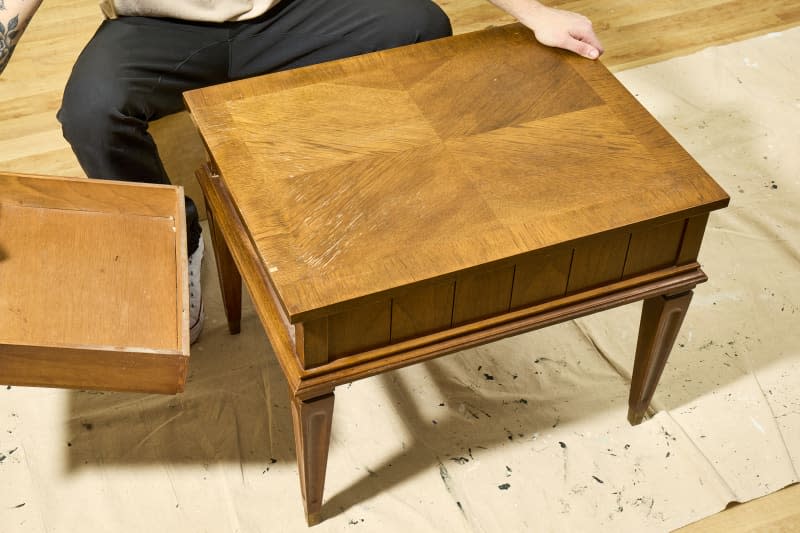
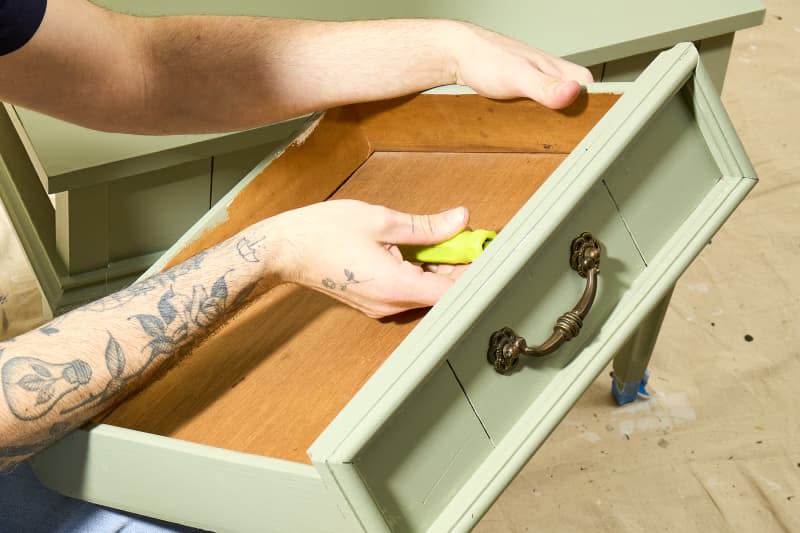
1. Prep your workspace and remove any hardware.
Find a workspace that is well-ventilated and lay down a drop cloth. Grab a screwdriver and take out any hardware.
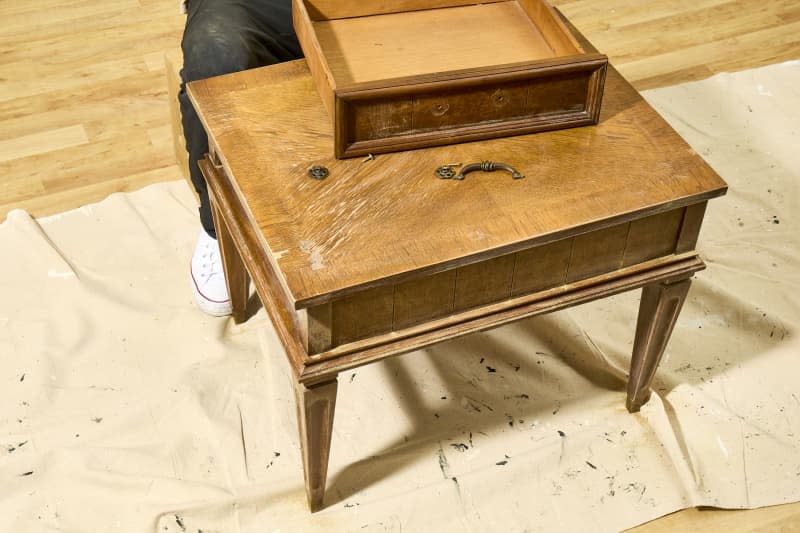
Remove all drawers and tape off any glass, metal, or mirrored surfaces.
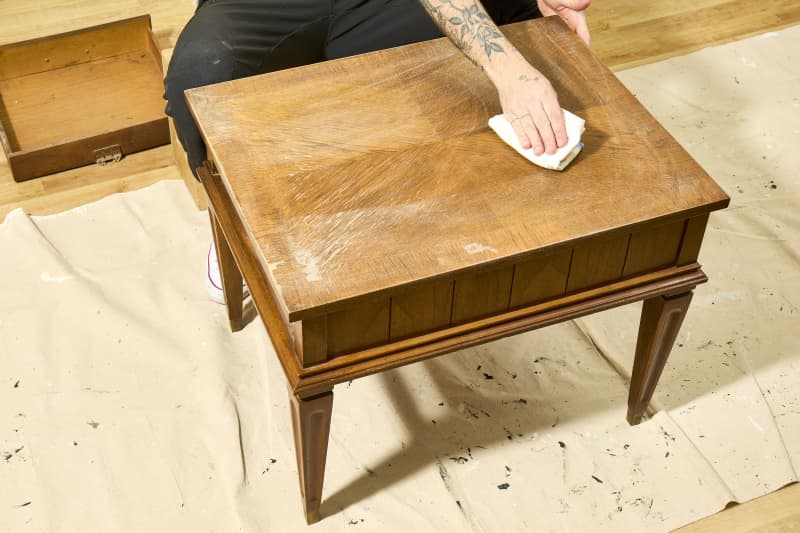
2. Clean the surfaces of your piece.
Prep the surface for paint by cleaning it well with something like Murphy’s Oil soap. If the surface has any gunk leftover from stickers, you can try #0000 steel wool in combination with soap to get the surface nice and clean.
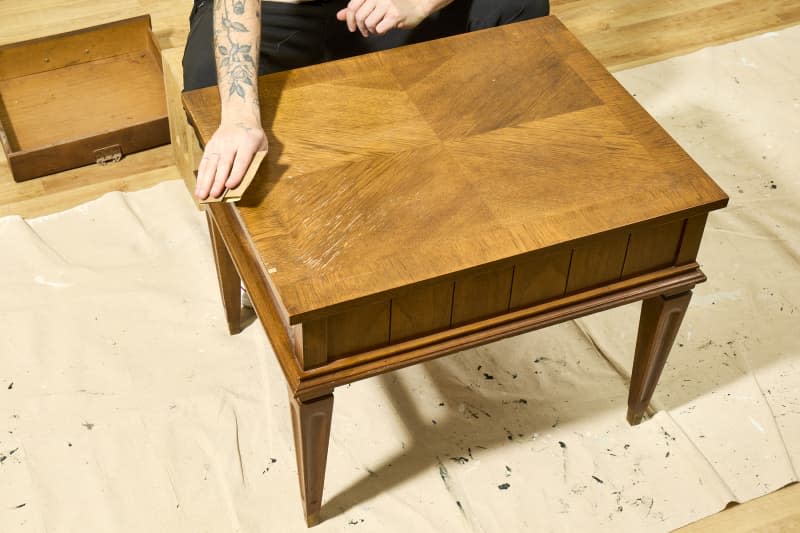
3. Sand the surfaces.
If your piece is already painted but not so smooth, you can completely remove the paint by sanding the finish using 80, 120, then 220 grit sandpaper. Wipe the surface with a tack cloth to completely remove all dust and debris, then clean with Murphy’s Oil soap. If the surface is painted or stained and already smooth, you can get away with just lightly sanding the surface using 120 grit sandpaper to help the new layer of primer adhere.
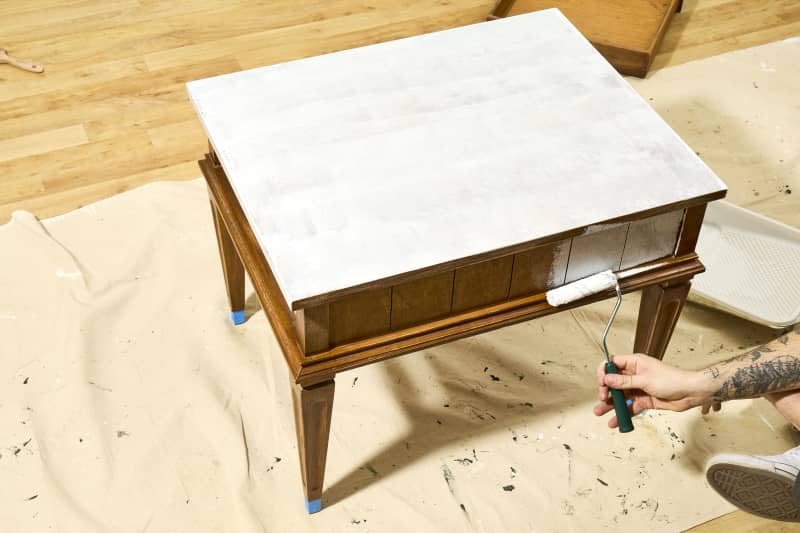
4. Prime the surfaces.
If your piece is in relatively good shape with no smells, a water-based primer will be effective. If it has a funky odor, however, you might need something else. Zinsser B-I-N is a good option because the shellac formula creates a barrier over the wood, trapping any funky smells. When using this primer, follow the safety instructions on the back of the can, always paint in a well-ventilated area, and wear a respirator. This stuff is intense!
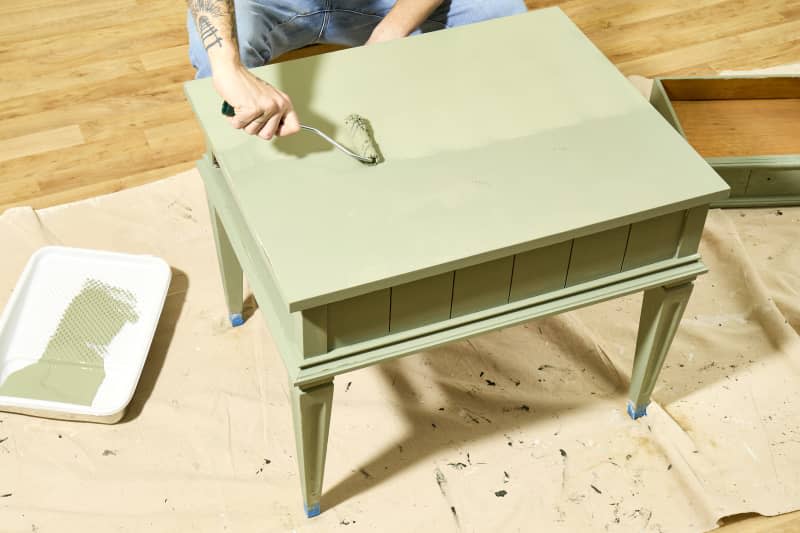
Use a roller to prime large flat surfaces, and a brush to get tighter spaces.
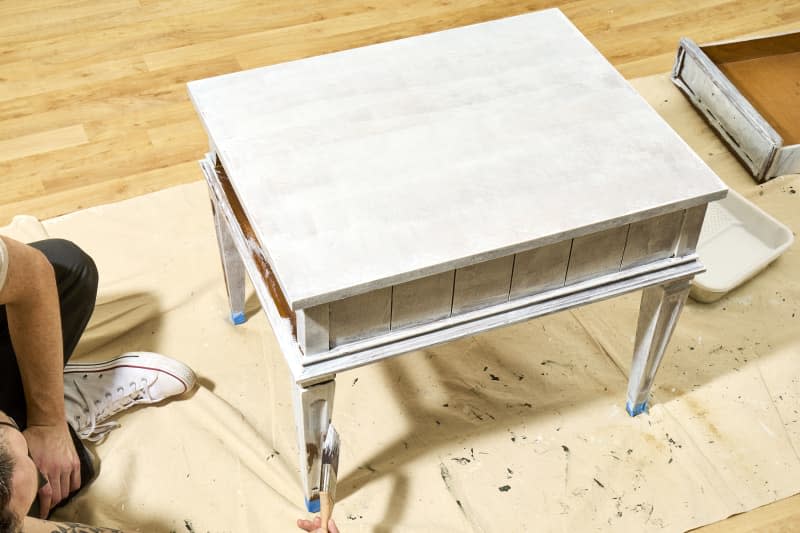
5. Sand any imperfections before following with paint.
Allow the primer the appropriate time to dry according to the manufacturer’s recommendation. Next, using a fine grit sandpaper (220 is sufficient), remove any visible brushstrokes left by the primer for a super-smooth finish. Wipe down the surface with a tack cloth to remove any dust or debris.
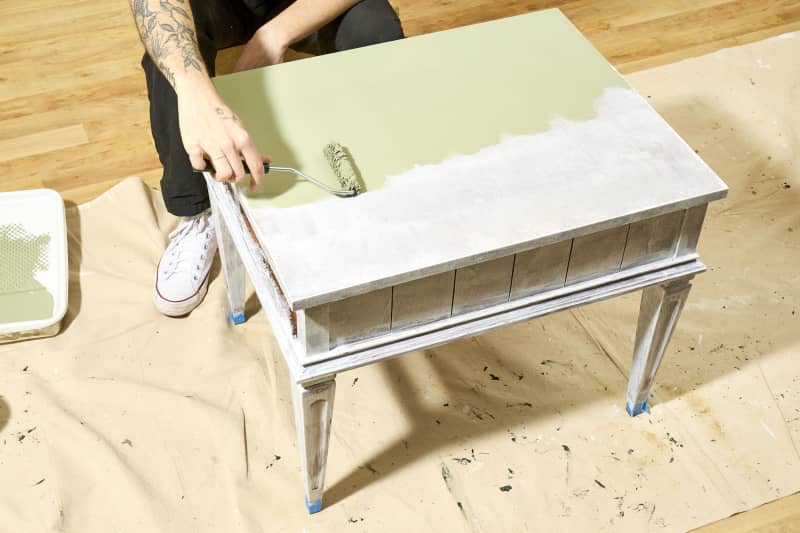
Then, apply your first coat of paint using a roller for the large surfaces. Do not load up the roller with excess paint — you want to build up thin layers over time for a really nice, smooth finish.
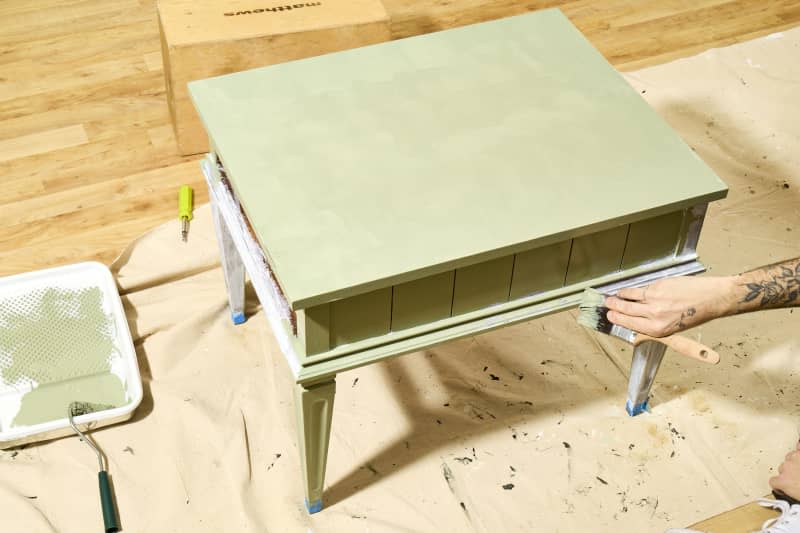
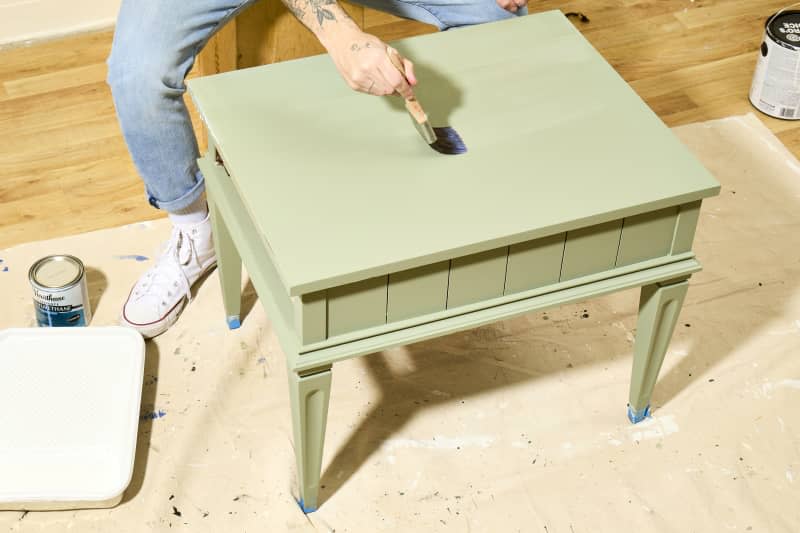
6. Use a paint brush for precision areas.
Cut into all the nooks and crannies (areas the roller will not be able to reach) using a paint brush. I like using the Wooster 2-inch angled brush, which is fantastic for furniture projects. Be sure not to overload it with paint — drips are the enemy. Avoid them at all costs.
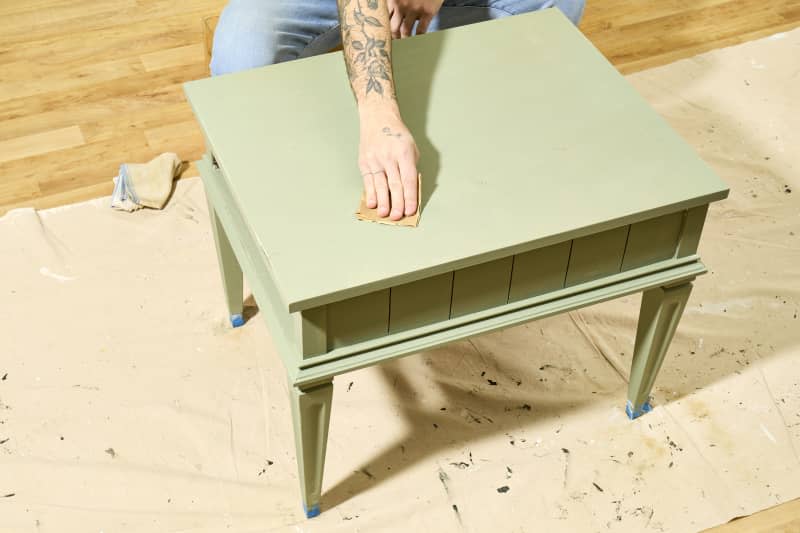
7. Allow your first coat to dry, then address imperfections.
Refer to the manufacturers guidelines for how long to wait between coats. For a completely smooth surface, you can sand between layers using 220 grit sandpaper.
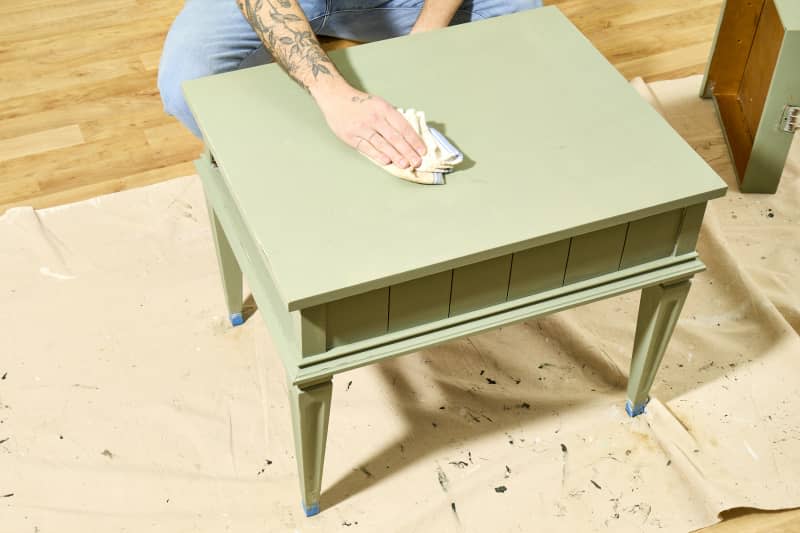
Make sure to clean well after sanding so that you don’t end up with grit in your next layer of paint. A tack cloth or microfiber cloth will pick up any excess debris.
8. Paint a second coat.
Most paints will only require two coats for full coverage, but you’ll know after this coat if you need a third.
9. Finish with sealer.
Sealing your painted piece is optional, but it’s always a good idea because it lessens the occurrence of chipping, water damage, or scratching, and lengthens the life of the paint job.
Choose the same sealant finish as your paint; for latex paint, water-based acrylic is the way to go. Acrylic sealer is invisible and won’t need to be reapplied for years. Once again, follow the directions on the back of the can, allowing adequate time for the sealant to dry before using your furniture piece.
10. Reassemble the furniture piece.
Once the sealant has had a chance to dry completely, reattach any hardware and slide the drawers back in place.
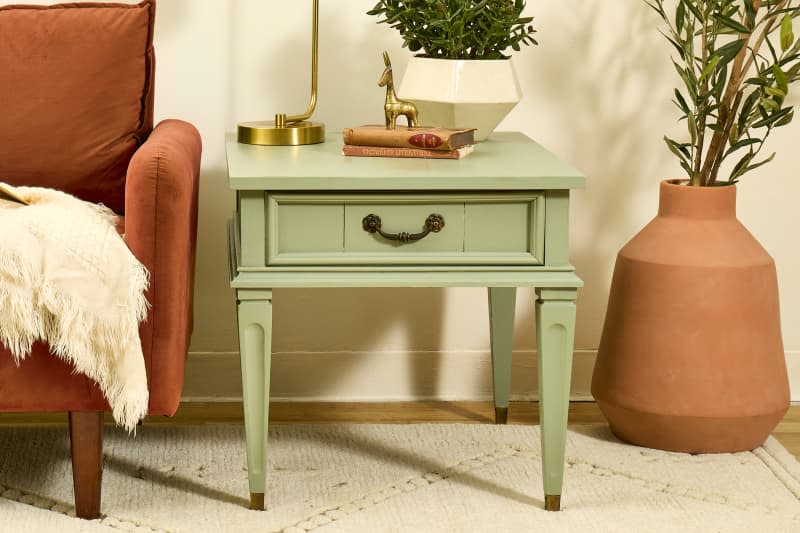
Following these steps will give you a beautifully painted piece of furniture that will last for years — or at least until you’ve changed your mind and are ready to repeat the process with a different color!

