If You Want to Redo Dated Oak Cabinets, This Tool Will Be Your MVP
One of the absolute easiest ways to make over your kitchen cabinets is to swap out the existing hardware. Suddenly, you can make dated cabinets look sleek and modern, or playful and quirky, or vintage and artsy — and all it takes is the ability to turn a screw.
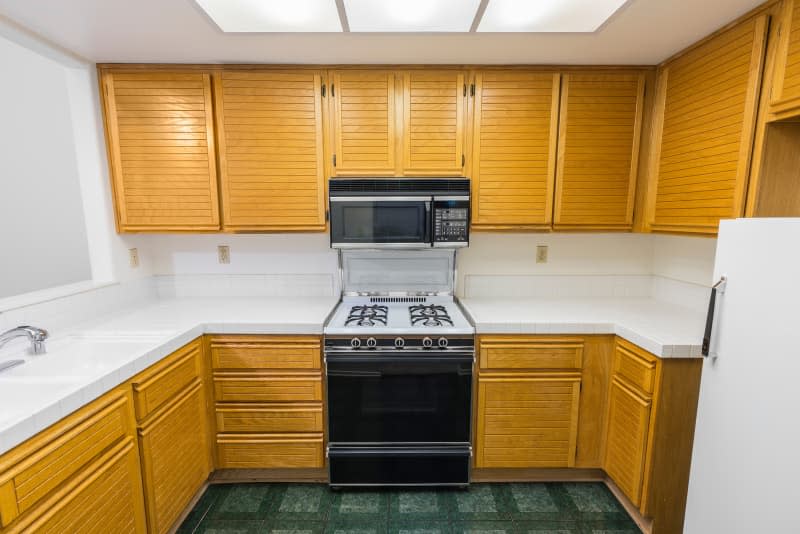
But if your cabinets have plain fronts without any hardware — as so many of the ‘80s- and ‘90s-era oak cabinets do — then this process gets a little trickier. You can use a drill to create holes for hardware no problem, but placing that hardware in exactly the right spot on every single door and drawer is a tall order, and basically impossible to do without the help of a template. Even with a template, you can start to see slight variations — the result of wear-and-tear on edges, or of not lining up lines exactly right. The end product is a kitchen full of hardware that looks a little crooked, unevenly placed, and just a little … off. So when I saw a Reel on Instagram that showed off a weird-looking tool that promised to make the entire process of installing hardware easier and more accurate, I knew I had to try it out.
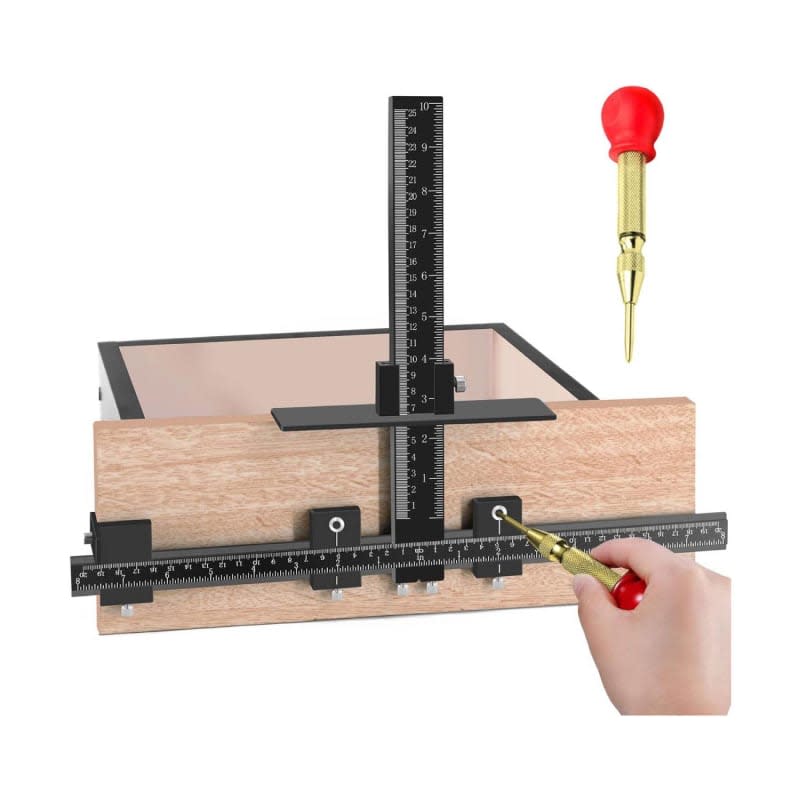
The weird tool is called a cabinet hardware jig, and it’s something you can easily find online. (The one I spotted was $48 on sale at Amazon, and that’s the one I decided to test.) The idea is simple: The jig helps you lock in the measurements of where you need your hardware holes to be, then fits onto the cabinet door (or drawer) you’re working on to show you exactly where to drill. It promises to be more accurate than regular old templates, so you can have consistent holes across the board. And in my experience, it’s definitely worth the price if you’re installing hardware on plain cabinets, as it can make your work neater, more accurate, and, most of all, easier.
My jig came disassembled with no instructions, so it took a minute to figure out how everything fit together. It ended up being pretty easy to do with an online photo to reference. Once you put the jig together, you can easily use it for basically any size drawer or door and basically any size of hardware. That’s a lot different from my usual hand-drawn cardstock templates, which I have to make fresh for every different project (and need to make separate for doors that open in different directions).
Making and using those templates used to take me hours of measuring, taping, and double-checking, and it wasn’t always perfectly accurate. But it was free, so in comparison, this $50 jig felt like a splurge. However, the amount of time and headache it saved for my one project alone totally made the purchase worth it. Setting the correct holes took only a minute, and it was easy to transition between doors while still being confident in the accuracy of my holes.

If you’re side-eyeing the price, know that there are cheaper alternatives: jigs priced at under $20 made with less durable materials that will serve the same purpose (even if they aren’t as longlasting). For projects that require even two matching pulls or knobs installed with the exact same placement, you need this tool. It will make any DIY job look totally pro.
Sold, but unsure how to use it? The tool looks intimidating, but it’s easy to work with. Here’s how to use a cabinet hardware jig to install pulls on plain cabinet doors and drawers.
How to Use a Cabinet Hardware Jig
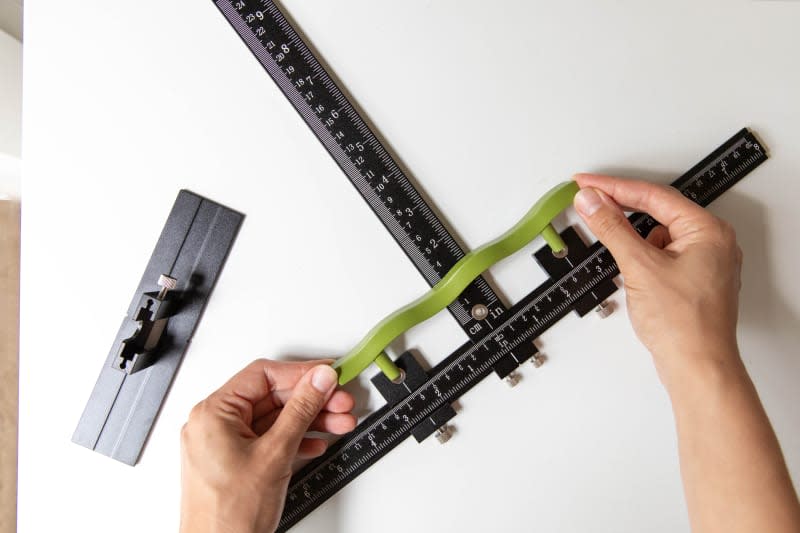
1. Line the holes up with your hardware of choice.
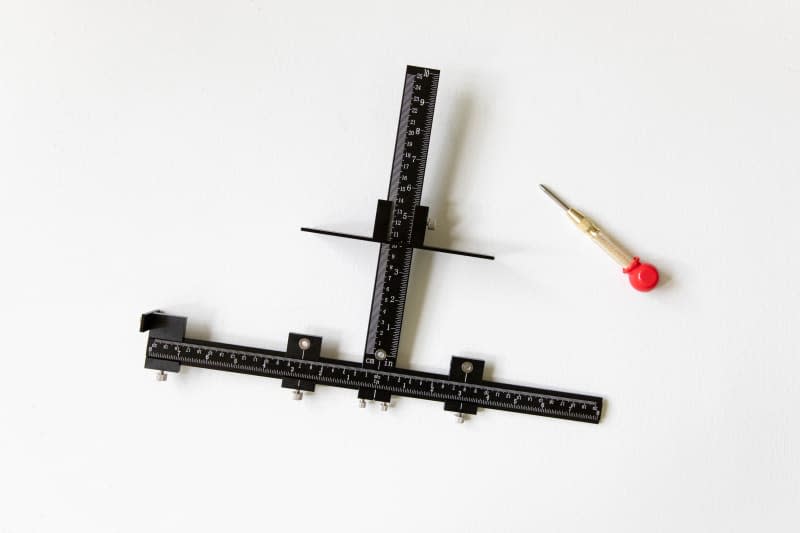
To use the jig, you’ll first need to line up the holes of your hardware to the horizontal drill holes. I found this was easier if I took the horizontal and vertical stops off to lay the whole jig flat. Use the adjustment knobs to tighten the hole sliders in place so that they exactly match the holes on the hardware you’re installing.
Note: You’ll see that there are three holes on my jig: Two sliding holes, and a center reference hole which remains stationary. Some people prefer to use that stationary point as one of their holes so that they are only moving one piece. If you choose not to use it for that, make sure not
Something to be mindful of is that there is a center reference hole; some people like to use that instead of a secondary sliding hole to prevent confusion. I admittedly made this mistake when using the jig, and had to do a little patching before I could re-drill in the correct spot. I’ve since painted the center hole with enamel paint to prevent that mistake again; you could cover yours with painter’s tape to prevent the same.
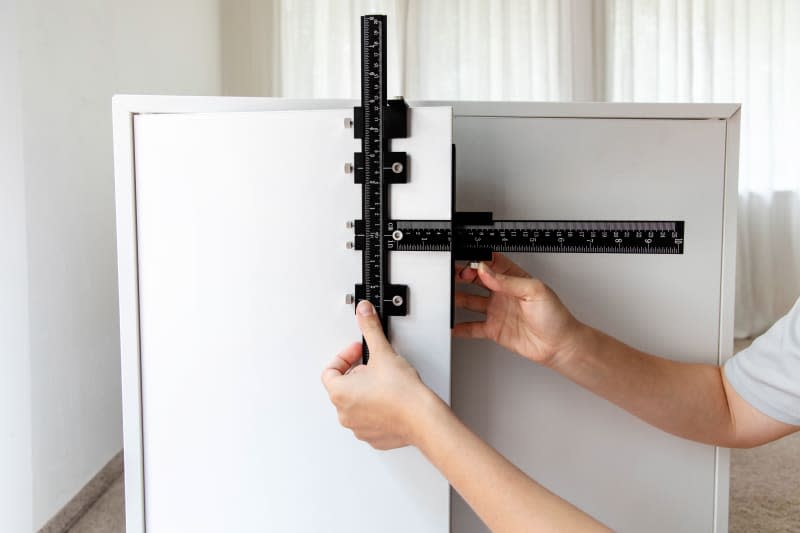
2. Adjust hole placement on the cabinet door.
Once you know how far apart your holes need to be, it’s time to figure out where you’d like them to be on the cabinet door. Set the jig against the cabinet door you’re working on, and use the horizontal and vertical stops to help position the holes exactly where you’d like them to be.
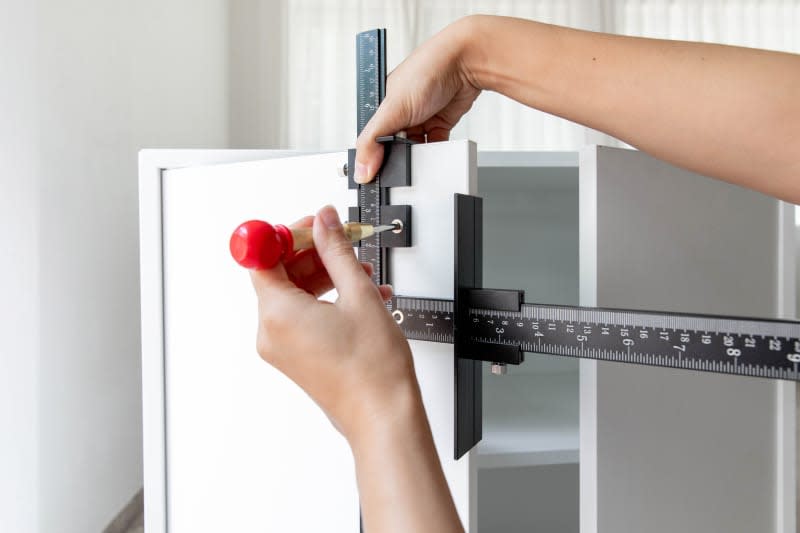
3. Mark where the holes will be.
Slide the jig into place over the cabinet front. Using one hand to hold the jig tightly to the cabinet, press the pointed end of the center punch into the cabinet front to mark where the holes are. This will help you see where to drill when you pull the jig off.
Note: I’ve also seen videos of people using clamps to hold the jig securely in place so they could drill straight into the holes without ever taking the jig off.
4. Drill holes and screw in cabinet hardware.
Using your marks (or the jig) as a guide, use a bit the size of your new hardware’s screws to drill all the way through the cabinet. Then, install the hardware. Repeat for all the doors that open the same direction as your first door.
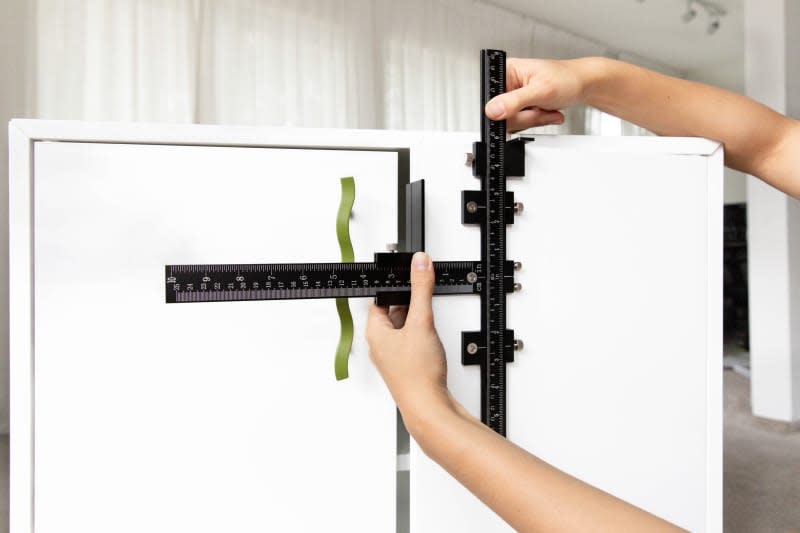
5. Move to the opposite-side doors.
To install the hardware on the doors that open in the opposite direction, make a note of where your horizontal stop placement is located on the jig. Then, slide it off from one side. Keep the vertical stop in place.
Hold the hardware jig over the cabinet door, moving the slider to the open side. Place the stop so that it’s at the same measurement you noted previously. Then, repeat steps 3 and 4 until you’ve installed all your hardware.

In the end, you will have made exactly zero cardboard templates, and your hardware will look so straight and even that no one will know your cabinets didn’t come with pre-drilled holes.

