Unihiker Single-Board Computer Review: Fun for Beginners, Less-so for Makers

Unihiker is a $79 Single Board Computer (SBC) from DFRobot. If that name sounds familiar, then it should. DFRobot are the makers of the LattePanda 3 Delta and LattePanda Sigma. From this pedigree we expected great things, but the $79 price point is tough and something had to be cut.
Unihiker has a 2.8 inch resistive touch screen dominating the board, but under the hood we have a competent quad core Arm A35 CPU and 512MB of RAM. This isn’t a desktop PC, but neither is it “just” a microcontroller (in fact the MCU is based on RISC-V)
What can it do? Who is it for? And should we buy one? To answer those questions and learn more about this board we need to put it on the bench.
Unihiker Specifications
Unihiker Look and Feel
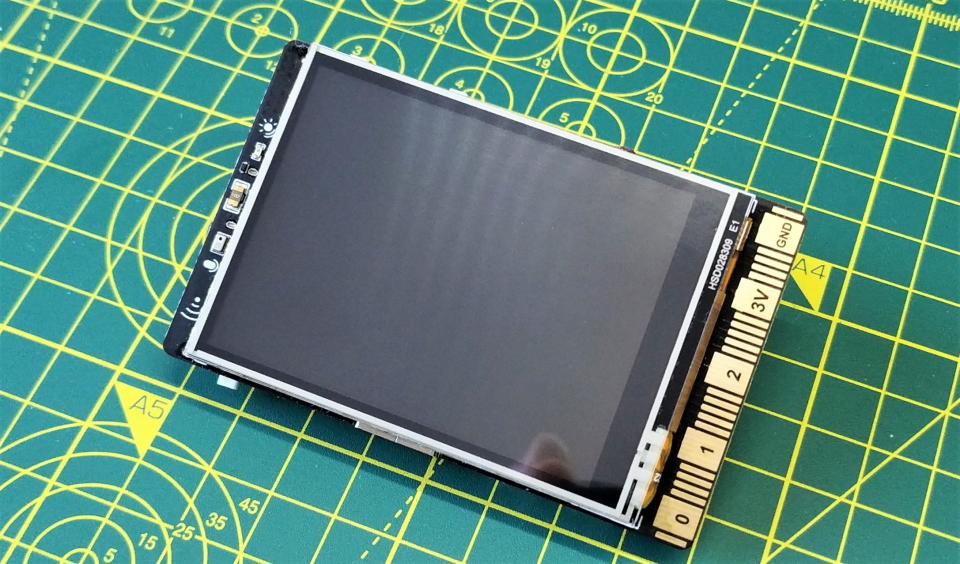
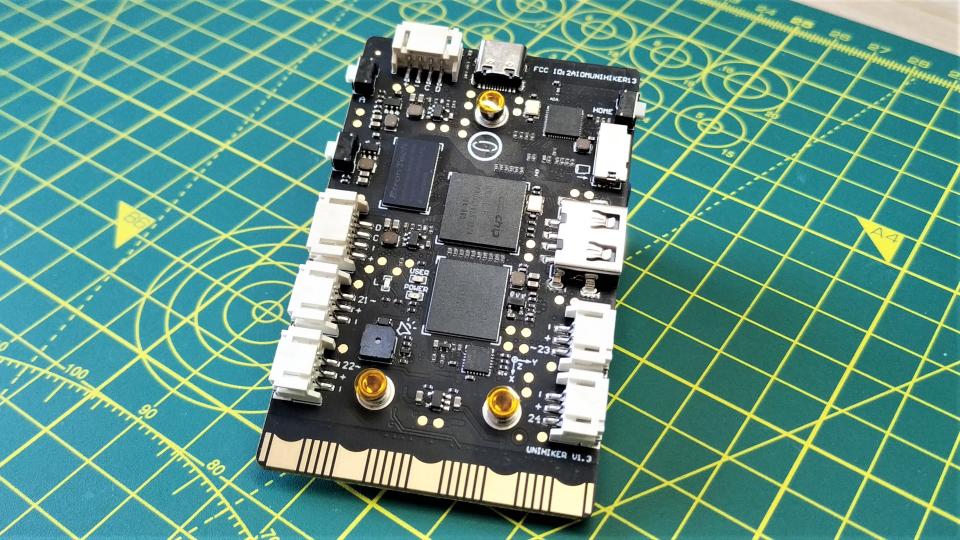
Bearing more than a passing resemblance to an early 2000s PDA, Unihiker is small in the hand. The 2.8-inch screen dominates the front of the board. The product page claims that the screen is a touch screen and initially we couldn’t get it to work. Looking through the config options on the device we spotted a calibration tool. A few clicks of the resistive touch screen and we had a working user interface. Moving around the back we have the electronics that make up the board. These include GPIO connections via “Gravity” ports. These ports resemble Grove / Stemma QT connections, but they are not directly compatible, more on this later. Power and data connectivity is provided by a single USB C port. The extra USB A port is for a keyboard / mouse or even a USB webcam.
Unihiker is a Linux PC
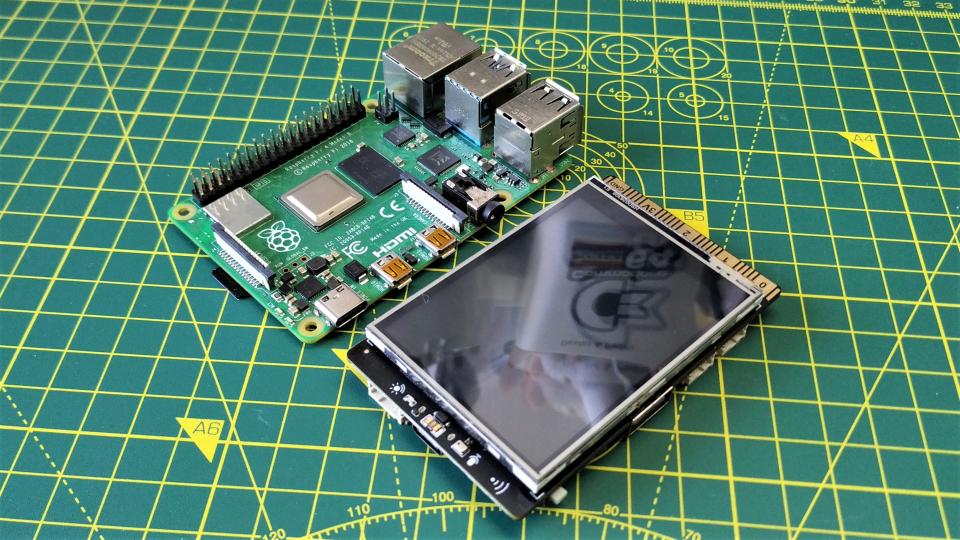
It may look like just another screen and microcontroller, but Unihiker is really a quad-core Arm PC with 512MB of RAM and 16GB of eMMC storage. This is by no means a powerhouse, but it is comparable to a Raspberry Pi 3B+. The board has plenty of power considering the projects it can be used with.
The Unihiker website has tutorials covering machine learning and image classification, robotics, weather stations and humble GPIO projects. Being a Linux PC, and with VNC server capabilities, we could use this as a desktop computer, but it is not the intended use case.
Getting Started with Unihiker
Plug in the board and you can elect to try out the ready-to-go projects on the board, or follow the tutorials. A long press of the Home button loads up the menu and from there we tried out the demos. The simple “Hello World” shows off how the screen works, Charts show how to plot data onto the screen. The most interesting demos being the Spirit Level (using the accelerometer) and a Face Tracking demo which requires a USB webcam to track faces and places rabbit ears or a wizard hat on the target.
All of the demos provide a good introduction to the board, and show how versatile it can be. But the menu isn’t just for demos. From the menu, we can set the board up as a Wi-Fi hotspot, get system information, calibrate the touch screen and toggle services. This last option, Services, is where we find a number of extra features. From here we can set up a Jupyter notebook (a web based interactive computing platform), SIoT (using MQTT), file sharing and screen sharing.
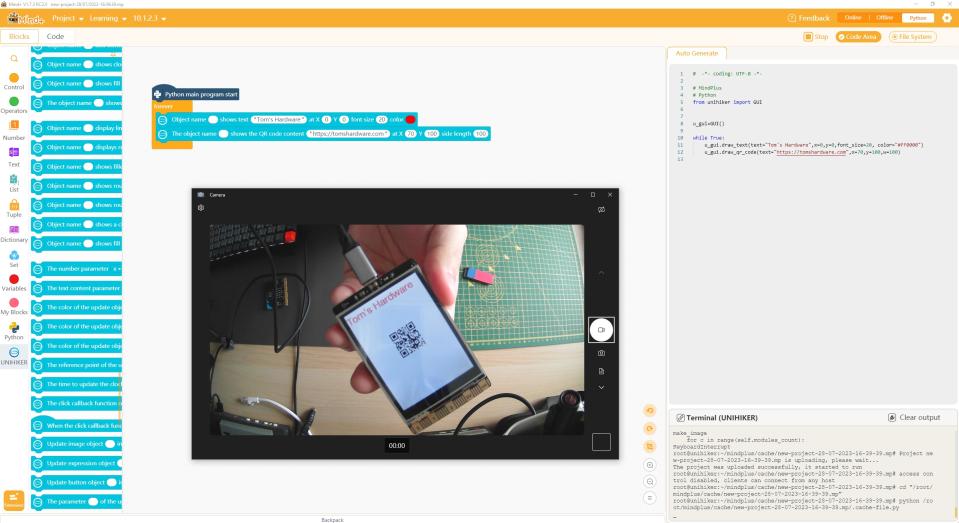
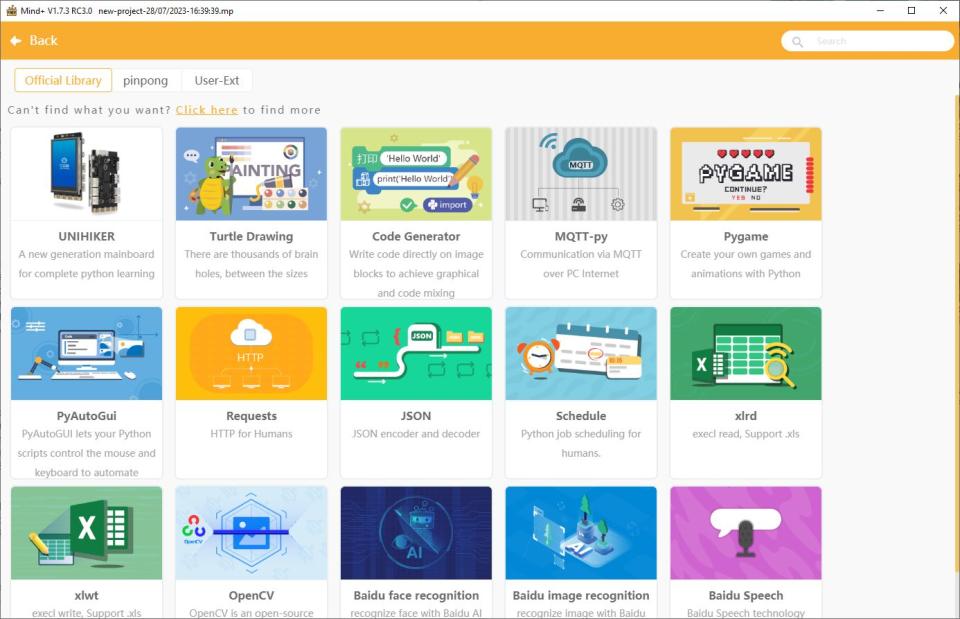
Programming Unihiker is primarily done via Python, but there are a few different ways to do it. At the beginner level we have Mind+, a colorful and easy to use IDE that features both block and text based Python programming options. Mind+ can also remotely connect to Unihiker via USB. By doing this we can run our code directly on the board, well you could.
We encountered a few issues writing Python projects in the IDE. Block based projects worked flawlessly, but writing Python directly in the IDE produced syntax errors and an anomalous file path that caused Python to crash. This had us stuck for a while, so we used SSH to connect and ran the same code, no errors. It looks like the IDE was adding illegal characters to the file path. Using SSH we wrote all of the test code for the review, and it all worked with no issues.
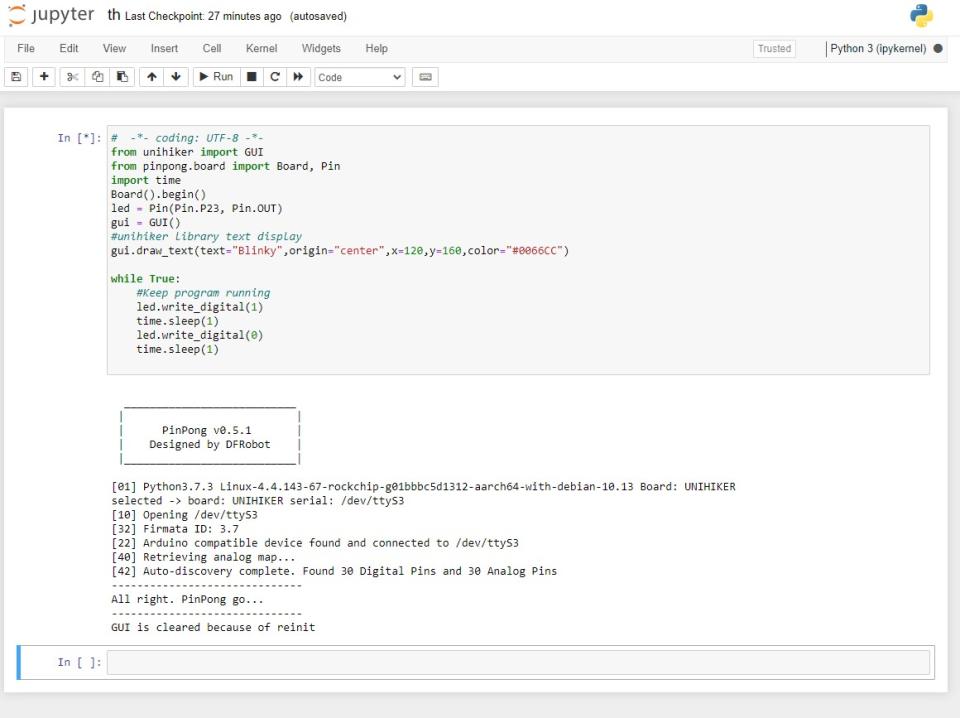
Unihiker has a range of “services” that we can activate, and we took a look at Jupyter and SIOT. Jupyter notebooks merge code and documentation into one page. We can explain a programming concept or problem, then use an embedded section of Python code to illustrate.
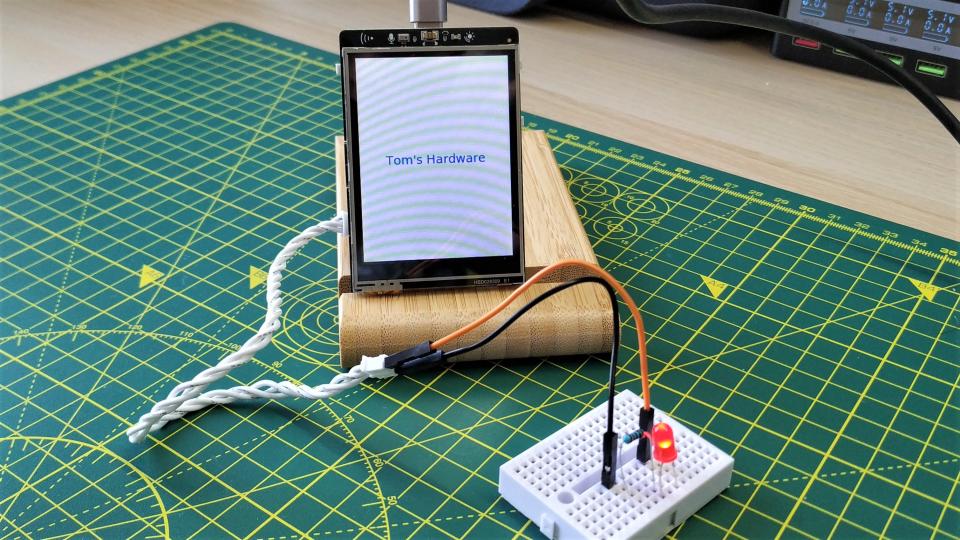
Using a Jupyter notebook we wrote a quick script to show text on the display, and to blink an LED connected to GPIO23. The code worked, and the notebook was accessible by anyone on our home network. We also tested SIOT, essentially this is a local MQTT server, useful for the classroom and for keeping your data off the Internet. We were able to send messages to and from Unihiker using a mixture of topics.

Using Microsoft’s VSCode with Unihiker is a breeze, we are merely connecting to the board using VSCode’s SSH extension and from there we can write code directly to the onboard eMMC. Running code from a terminal and we can see the output on the screen. Very easy and the Unihiker documentation is easy to follow.
GPIO Access
Unihiker has a GPIO, provided by the onboard RISC-V MCU, but unless you have bought into the Gravity components system, you are left hanging. The Gravity connectors are merely polarized connectors used to make quick connections. Similar in function to Qwiic / Stemma QT / Grove connectors, Gravity connectors are not compatible with the other formats.
Yes you could force a Grove connector into the I2C Gravity ports, but it wouldn’t work as the pinout is incorrect. The three pin versions breakout one GPIO pin (21,22,23,24), 3V and GND. Whereas the four pin versions are reserved for I2C. But what if we want to use conventional components with Unihiker? You could insert jumper jerky strips into the supplied Gravity cables. It works but it will damage the connectors over time. A better means is to use the edge connector located at the bottom of the board.
Tinkering with Unihiker and it seems that the edge connector pinout is the same as @microbit_edu pic.twitter.com/zqffIpiwr5July 27, 2023
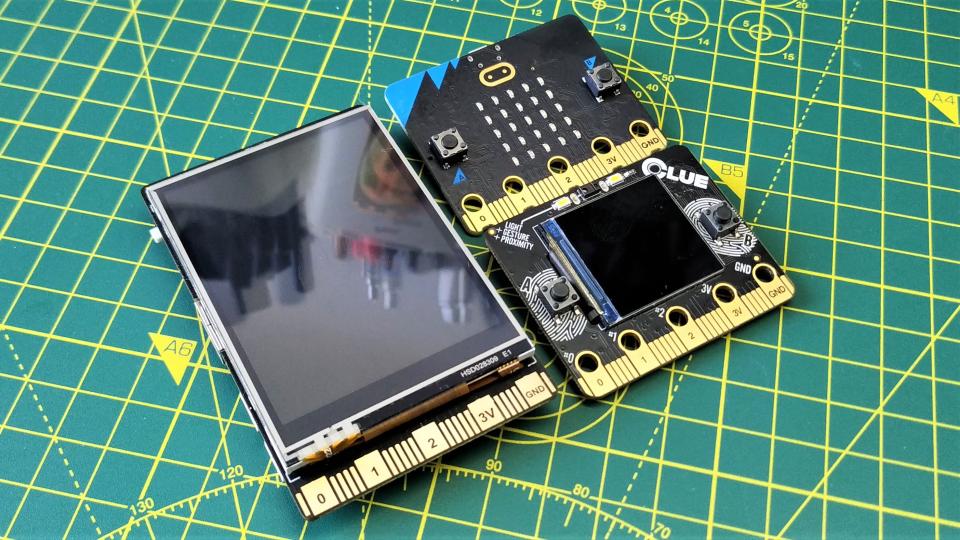
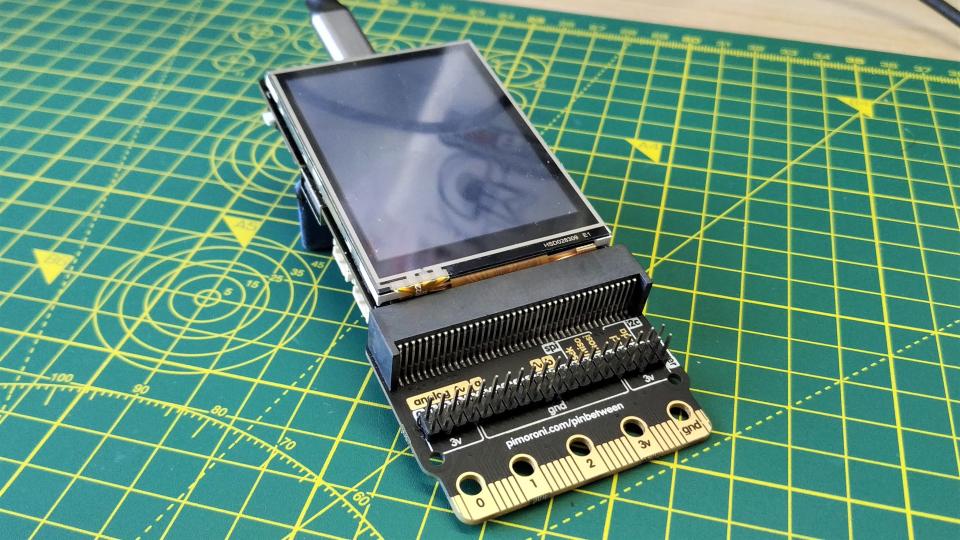
The edge connector may look a little out of place. We’ve seen them before on the micro:bit and Adafruit’s Clue board. The Unihiker’s edge connector looks to have the same pinout as the micro:bit and this got us thinking about micro:bit breakout boards. Luckily we have a few and used Pimoroni’s Pinbetween to break out the GPIO pins.
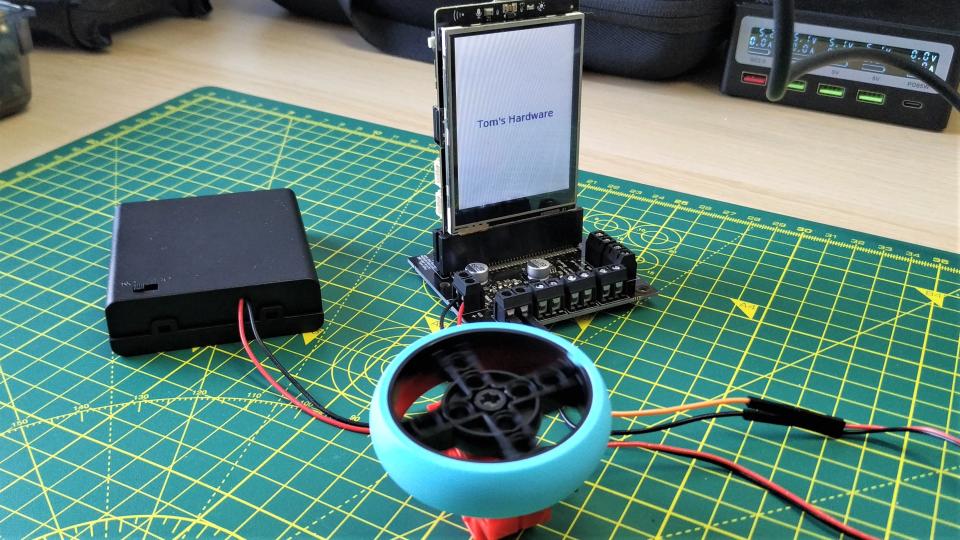
A few lines of Python and we had a blinking LED. Modifying the code to control two GPIO pins, we connected a Kitronik motor control board to Unihiker, supplied 6V of power for the DC motor and then saw the motor spring into life.
The onboard sensors (sound, light, acceleration and orientation) are easily used thanks to the pinpong and Unihiker Python modules (both Blocks and text). With the modules we easily queried the values from the sensors and with an additional few lines of Python we had the data updating on the display.
Sadly, GPIO access is where Unihiker falls down. We have to either buy into one set of bespoke components or another. A proper GPIO breakout would’ve been nice, but alas it was never meant to be. Maybe in version 2? Should there be one?
Who is Unihiker for?
This is a great question. A small Linux SBC with an embedded screen has lots of applications. It could be a great user interface for a machine learning project, control devices across a network and gather data from sensors. If we’re looking at it as a GPIO focused board, we feel a little let down.
Sure we have multiple ways to write code (Mind+, SSH, Jupyter, SIOT etc) and we love that, but the only means to access the GPIO is via Gravity ports, or using a micro:bit breakout board. Sure, we can buy into the Gravity format, and for educational purposes this could be an option. For hobbyist users, we will want to access the GPIO using accessories we have on hand and that will be difficult unless we spend a bit more money.
Bottom Line
Unihiker offers a fun experience, once you get your head around the form factor and the means to code it. The face tracking demo is especially interesting. What lets the board down is the GPIO. For the $79 price tag, we appreciate that it cannot be a “one size fits all” board considering it is a Linux PC with a built-in display.
If you are coming into this completely fresh, then the Unihiker board is an interesting introduction to IoT. It is easy to use and the compact form factor lends itself to portable projects. The embedded sensors (sound, light, acceleration) are really easy to access via the Python module, and that means quick results for eager learners. We enjoyed our time with Unihiker, but the GPIO limitations leave us wanting more from the next model.
Should you buy one? If you need GPIO, then a Raspberry Pi Pico W or Raspberry Pi Zero 2 W is lower cost and provides many more possibilities. That said, the touch screen works well, the hardware is solid and the software support means we can build projects quickly.

