The Ultimate Guide To Cured Vs Aged Sausages, According To Meat Experts

Whether it's breakfast, lunch, or dinner, sausages can be the versatile (and delicious) protein that kicks up your dish's flavor profile. There are tons of different types of sausages for every palate, each with its own cooking style and cultural history. But have you ever wondered if it is possible to make your own at home? Doing it yourself puts the power in your hands to customize your sausage to your taste.
Curing and aging sausages can sound intimidating, but in reality, it is totally doable at home (with some guidelines). From salami to Italian sausage, to Andouille and bratwurst — you have endless choices on your sausage-making journey. Sausages are often named for their geographic origin with a lot of history behind them. What sausage type you choose will determine your process, as things like sausage texture vary by type.
"Making sausages can be a really good family event as well," Traeger Pitmaster Danielle "Diva Q" Bennett told Mashed. "Involving the family in selecting the spices you want to use the type of grind whether it's a medium plate or a large plate grind and also the utilization of casings." We spoke with a sausage-making expert and scoured the internet to find out tips on curing and aging sausages -- and how you can, too!
Read more: Sausage Brands Made With The Highest & Lowest Quality Ingredients
Cured Vs Aged: What's The Difference?
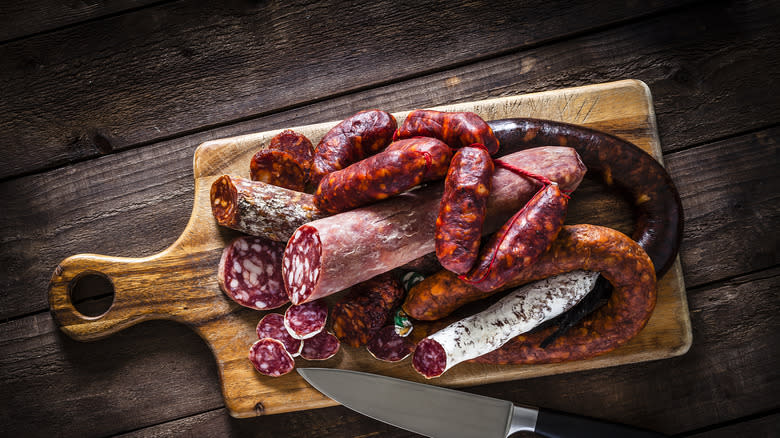
Cured and aged are often used interchangeably. While they are both sausage preparations, they are not the same. Cured and aged meats have different preparation techniques and ingredients. The types of meats influence the flavor for either of the preparation methods.
"With thousands of varieties of sausage, the possibilities are endless. Some are better served with a curing or fermenting technique versus a dry aging," said Danielle Bennett. "That's one of the things to love about making sausage the endless opportunities to try new textures, flavor profiles, and grinds."
Cured meat uses brining, smoking, canning, or drying techniques to preserve it. Dry curing drains the meat of excess salt, while wet curing uses water, salt, and a refrigerator. Cured meat must be cooked so harmful microorganisms are killed, making it safe to eat. All smoked sausage is cured to prevent illness.
Aged meat is hung in a controlled temperature room for months to years. There's also a process called dry aging which historically was done in the Mediterranean area due to its climate, but is now possible with dry aging fridges. "When it comes to at-home use, I would highly recommend purchasing a dry-aging cabinet," Bennett said. "This removes a lot of food safety issues that can be detrimental to dry aging sausages safely. When keeping the sausages in a temperature and humidity-controlled cabinet you are removing many of the detrimental issues that can cause spoilage."
Pick Your Meat For Sausage
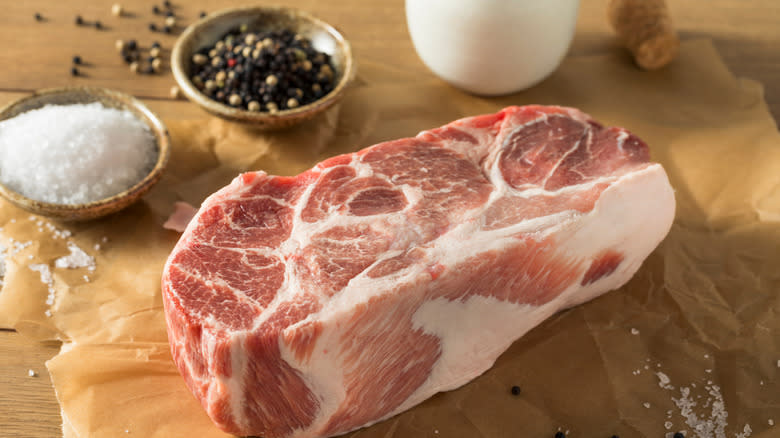
Versatility is a key benefit of making your own sausage at home. This means the choice of meat is yours. Pork is the most common meat used in sausage and is typically what you would find in smoked sausages in stores. The fat content in your meat is an important consideration, as that can be the difference between a slimy or tough, flavor-lacking sausage. To avoid tasteless sausage, experts recommend choosing meat with 25 to 35 percent fat content, but you can stay under 50 percent fat at most (via Traeger).
So, what cut of meat should you choose? You can buy already ground pork at the store, or get pork butt or pork shoulder to grind yourself. Pork butt in particular has an ideal meat and fat ratio (via Smoked BBQ Source). For a beef option, a chuck roast will do the trick.
There are specialty cuts for sausage like pork heads or pork back, but those are typically found at a butcher. While you may not find a fat percentage on your meat packaging, some trial and error will lead you on the right path to knowing which meats are fatty enough for your preferred palate.
Don't Count Out The Less Popular Meat Options
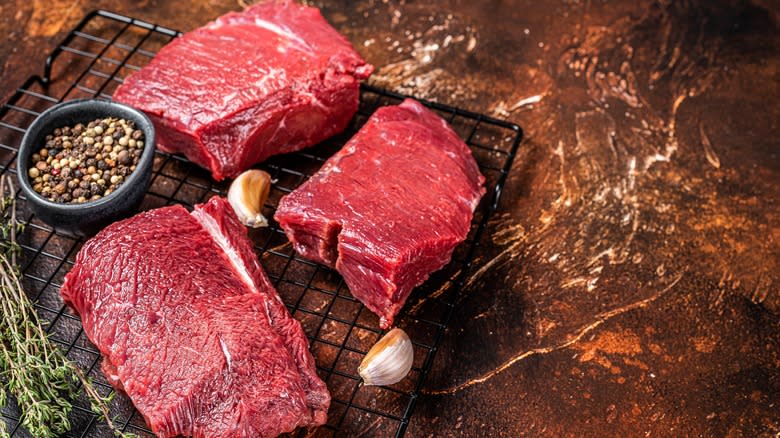
While pork is arguably the most popular choice, that's not your only option. Many hunters will take their game meat and make a delicious sausage with it. Salami in particular can be a good option for beef or wild game like venison (via Dry Ager). Plus, that is part of the fun of making your own sausage -- getting to experiment with different meats and preparations!
Fresh sausage using wild game meat will likely need additional fat from beef or pork, like the fatback -- fat from the back of a pig (via MeatEater). This may seem counterintuitive to add fat when using lean meat, but adding in fat is a necessary step to have sausage that isn't dry. Butchers or meat counters will have pork fat, but local farmers or online stores can be another source to check.
If you're looking for a chicken sausage, thigh meat is a good option with both moisture and fat (via The Kitchn). You could also try out cheaper cuts of meat you wouldn't normally purchase, but be sure to remove the gristle.
Make Your Sausage Mixture
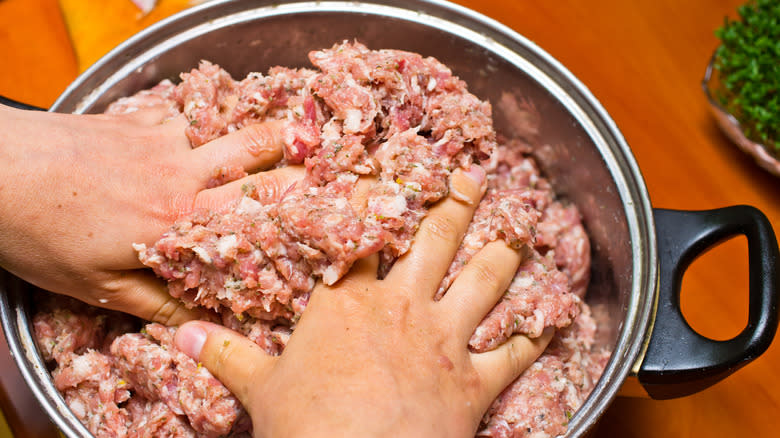
Now to the fun part -- making the meat. Seasoning is key to making your sausage tasty and is customizable based on the sausage you're making. You can use a stand mixer to mix your seasonings if making a large batch, or you can get your hands dirty for even distribution.
Andouille sausage is typically seasoned with Cajun spices, with heavy paprika, onion, and oregano. There are also different German sausages, with bratwurst being the most popular. In this preparation, beef, veal, or pork is finely ground giving a smooth texture. You can also spice things up with Spain and Portugal's chorizo, a pork sausage reddened by chili peppers. Kielbasa, a Polish-style sausage, typically includes lots of garlic.
If you are curing sausages, you'll also want to add in sodium nitrite before grinding. You can find commercial cure products and seasoning blends at specialty stores, meat processors, or butcher suppliers. Following instructions carefully, curing will prevent the growth of Clostridium botulinum (and give that pink coloring that we're used to seeing).
Are you unsure if your seasoning blend is right? Danielle Bennett suggests testing the sausage grind mixture first by cooking up a little patty in a pan and taste-testing so you can adjust the seasoning if needed. You also want to be mindful of the consistency of the meat. Your mixture is good to go if the meat sticks to your hand and you start to see "feathery hairs" (via Smoked BBQ Source).
Take Inventory And Prepare Your Equipment
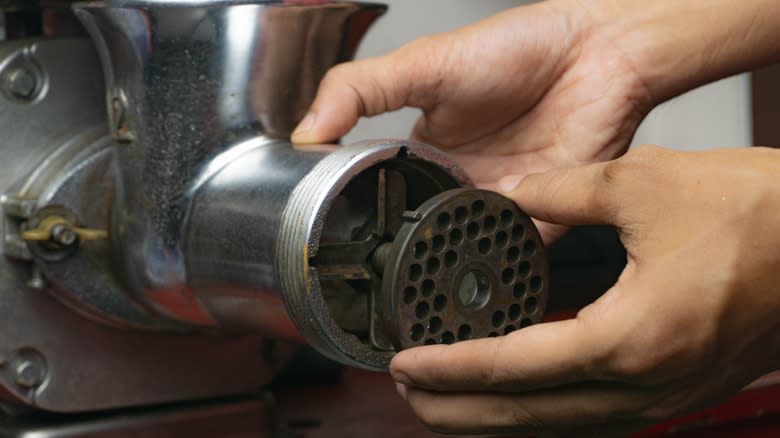
Having the right gear is what will make your sausage a success. While you don't need to have the fanciest equipment, some upgrades can certainly make your process easier. Some basic equipment that you can count on needing for any sausage recipe includes scales to weigh your meat, mixing containers, a sharp knife, a grinder, a sausage stuffer, and casings (via Mississippi State University Extension). Depending on if you are planning on smoking your sausage, you will want a smokehouse and a way to hang smoked links.
Don't be discouraged if you don't have access to a sausage grinder. Your handy KitchenAid mixer has a meat grinder attachment that will work just fine, or you could even use a food processor. But it may not be as consistent of a texture as if you were using a grinder (via The Kitchn).
Equally as important as the equipment you choose to use is the temperature of said equipment. Working with cold equipment will lead to the best sausage-making success because you don't want your meat to heat up. This can even happen if you work your meat with your hands. Warm meat means that the fat will start to soften and smear in the grinding process. To avoid this, pop everything into the fridge or freezer, including your mixing bowls and grinder head/attachment, or set them on ice as you work.
Perfect Your Grinding Process
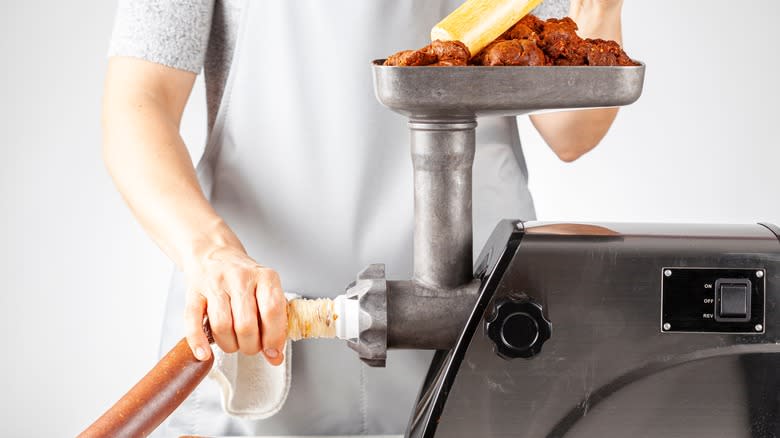
Once you have your meat mixture chilled at 32 degrees Fahrenheit and ready to go, it's time to grind. Cut lean and fat into small pieces for the grinder. The size of these pieces depends on how big your meat grinder is. Experts at Traeger say fewer chunks are better if your grinder allows for it. Before grinding, cool down your meat for at least 15 minutes in the freezer so the meat grinds cleaner.
It also may take more than one pass through your grinder, depending on the type of sausage you are making. Snack sticks or summer sausage may require two passes between a large and small plate attachment (via Smoked BBQ Source). For fresh sausage, one pass through the grinder may be sufficient.
Beginners are recommended to let the meat sit in the freezer to cool down for 20 minutes before regrinding (via Hunt Gather Cook). Another tip is to use some bread in the grinder at the end of grinding so you don't waste any meat. Experts at The Kitchn is to keep your blades and plates dry during grinding, but apply vegetable oil before starting. After the grind, be sure to clean your equipment promptly to prevent sticking and a lot of mess.
Choosing Your Sausage Casing
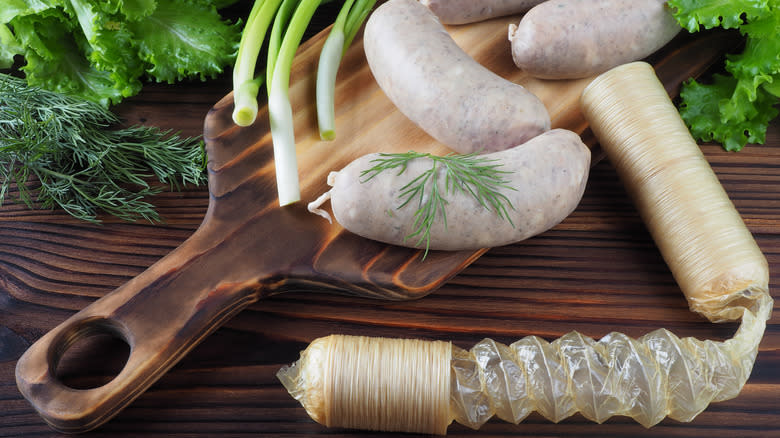
Another personal choice that can make or break your sausage is the casing. A sausage casing is the material used to close up your sausages. Casings have been used since ancient times, and were traditionally made from the intestines of animals. Now, there are other options than these traditional casings. You will want to ask yourself what size and type of sausages you want to make and what you want your sausage to look like.
Natural casings can be good choices for traditional sausage but can be difficult for beginners to master due to their irregular shape. Natural casings also provide the best texture for what sausage experts call a "snap." Collagen casings keep things easy to stuff and can be easier for beginners. Link sausage and snack sticks are two examples where collagen casings are a good choice. Synthetic casings can be made from cellulose, plastic, or even plant-based. They are inedible so they need to be removed before eating, but can be a good option for sausages that need strong support.
You likely won't notice a difference in taste between edible sausage casings, but there will be a difference in texture. If you don't have access to casings, opaque plastic bags can be used if you are making fresh breakfast patty sausages. Your sausage can be casingless, however, you may notice some difficulty keeping the sausage from sticking during cooking.
Stuff Your Sausage Carefully

Stuffing can be intimidating, as you don't want to overstuff your sausage and make a big mess. There are methods to make your sausage without a sausage-stuffer by using plastic wrap (via The Kitchn), or even a sausage stuffing attachment for your stand mixer. But you may find it worthwhile to invest in a dedicated piece of equipment -- especially if you plan to make this a regular activity.
"Use a good quality stuffer," Danielle Bennett told Mashed.com. "Invest in good pieces of equipment at the beginning of your journey and they can last you a lifetime." Bennett says another tip is to take it slow and avoid overstuffing. Running just a bit of water through the casing before stuffing can also help make the process run smoothly. "The meat has to be allowed enough room to expand during the cooking process," she said. "Use a sausage pricker if you notice pockets of air building up in the casing."
During the actual stuffing process, it is key to put as much casing onto your stuffing attachment or horn as you can, holding it firmly with your fingers on the stuffing horn (via Mississippi State University Extension). Applying pressure to fill the casing fully will help prevent those air pockets. After stuffing your sausage, you will likely tie or twist your sausage to make individual links. Smoked BBQ Source recommends pinching and tying as you go.
Dry Or Cure Your Sausage — But Follow Directions
If you plan on making fresh sausage and enjoying it right away, this is a step you can disregard. However, if you want to dry or cure your sausage, you need to wait before cooking it up. Dry-cured sausage can take anywhere from 20 to 50 days to be ready to eat depending on your casing and casing size (via Bradley Smoker).
If you use a cure on your sausage, you can immediately put your sausage in the smoker after stuffing (via Smoked BBQ Source). The difference with the dry-curing preparation is the timing after. Bradley Smoker's recipe states meat should be placed in a 38-40 degree cooler for 48 hours, then reground and stuffed before hanging in a drying room kept at 60 degrees Fahrenheit and a relative humidity of 65 to 70 percent for 48 hours. The sausage stays in a 38 to 40-degree Fahrenheit cooler to cure for 20 days.
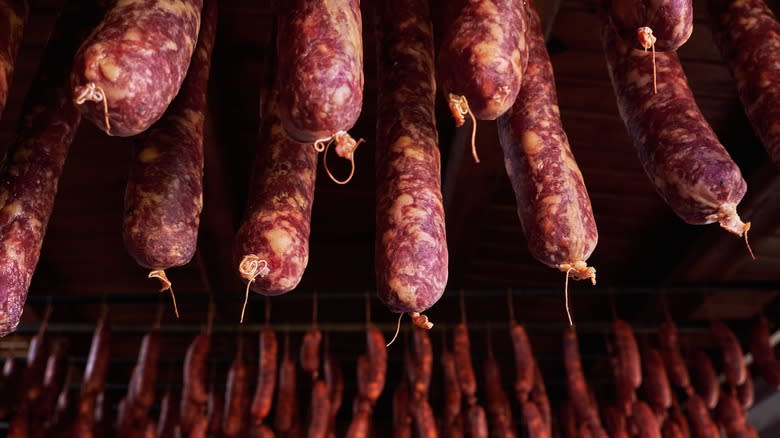
For dry-aging salami sausage utilizing a dry-aging refrigerator, sausages are strung up after the stuffing process so they don't "sweat" for a day at 68 to 75 degrees Fahrenheit and 80 percent humidity (via Dry Ager). They then hang for five days at 62 degrees Fahrenheit and 70 percent relative humidity, while being sprayed daily with brine.
As you can see, the process varies by type of sausage and your preferred cure/aging method. You'll want to follow the directions on the curing kit packaging or your dry-ager closely.
Cook Your Sausage
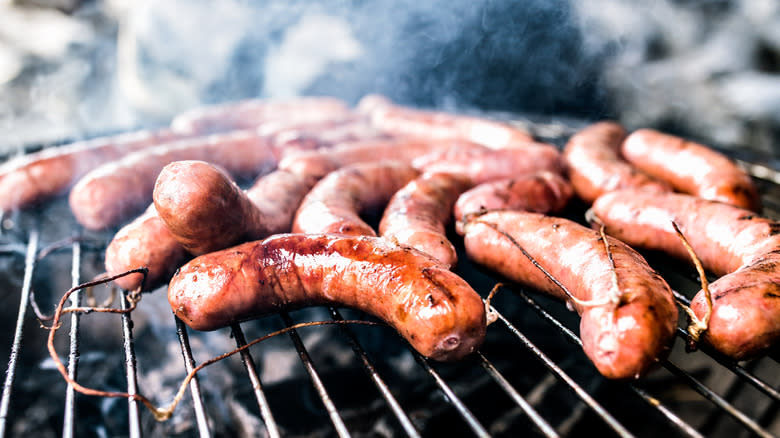
How you cook your sausage is up to you (but you will definitely want to avoid these mistakes when cooking sausage). If you aged your meat, there is an important step before cooking. You will want to scrape it to eliminate the crusted mold coating that has developed during the aging process. Otherwise, it's finally time to get cooking!
If you opt for the smoking route, Traeger recommends that homemade sausage be smoked at 225 degrees Fahrenheit for 1-2 hours directly on the grill grate. You can also cold smoke your sausages to hang and dry in a dry-aging fridge. This process is done at 59 degrees to 77 degrees Fahrenheit in a smoke box or a smoking oven (via Dry Ager). This cooking method provides a long shelf life and is ideal for salami preparation. If smoking isn't an option for you, you can grill your sausage, bake it in the oven, fry it on the stove in a pan, or even boil it. It is important to note that cured sausage is not shelf-stable after cooking it, so it must be refrigerated or frozen.
Store Your Sausage Properly
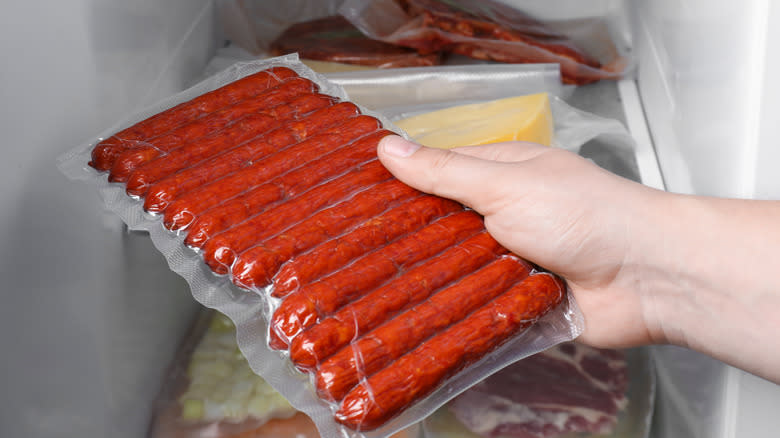
Now that you have your sausage, you want to be sure you store it properly to use it for days to come. Homemade smoked sausage can be stored in the fridge for three to four days (via Traeger).
If you've made a particularly large batch of fresh, uncooked sausage, a vacuum sealer may be your friend. You can freeze sausages for 2-3 months. For dry-cured sausages, you won't see any quality suffering by keeping them in a wrap (there are even some reusable ones like beeswax wraps) in the fridge. While a salami won't spoil, it won't be as tasty as it once was. Dry curing properly creates an environment that stifles bacteria growth, so you shouldn't expect any safety issues if stored properly.
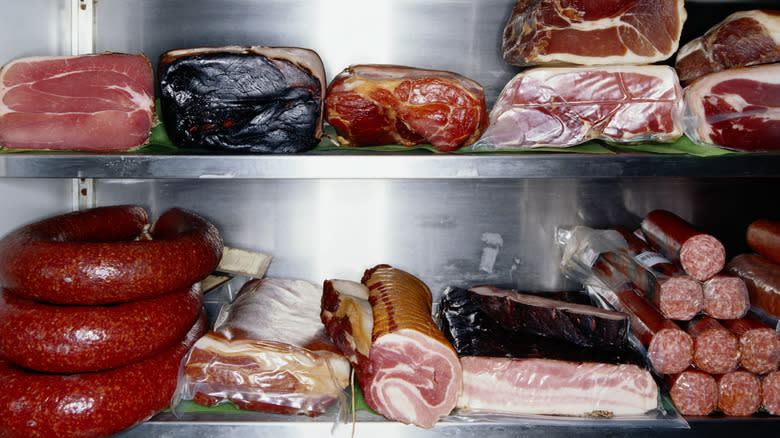
The USDA recommends that whole hard or dry sausage can be stored in the fridge unopened indefinitely and three weeks opened, six weeks in the pantry, and in the freezer for up to one to two months. Similarly, semi-dry sausage can be stored unopened in the fridge for three months and three weeks opened, and one to two months in the freezer.
Safety Tips While Making Sausage
You can make delicious sausage safely at home, but be aware that certain precautions should be taken in preparation, storage, and cooking. "Above all food safety has to be of number one importance when making sausages at home," Danielle Bennett said. "Keeping the meats, cold enough and safe enough temperature -- storing them properly and utilizing online or book resources that are once again from trusted sources that have the educational background to support making sausages at home safely."
As mentioned at least a few times throughout this guide, be sure to keep your meat cold (40 degrees Fahrenheit or lower) during grinding and mixing. You also want to sanitize your surfaces and your equipment thoroughly (via Mississippi State University Extension). According to the USDA, uncooked sausages that contain ground beef, pork, lamb, or veal should be cooked to 160 degrees Fahrenheit to prevent foodborne illness. Uncooked sausages that contain ground turkey and chicken should be cooked to 165 degrees Fahrenheit.
Read the original article on Mashed

