Try This Creative (But Super Easy!) Technique to Wrap a Picture Frame
"Hearst Magazines and Yahoo may earn commission or revenue on some items through these links."
Giving someone a framed photo of a favorite shared memory is a gift only you can give. While this photo gift is relatively simple and inexpensive, you can heighten their joy of receiving it even more if you know how to wrap a picture frame.
If you have a gift-ready picture frame on hand, but all your photos are stored on your smartphone's camera roll, you can easily print out the one you want at your local convenience store, office-supply store, or electronics retailer. The process is usually straightforward and surprisingly cheap, depending on your chosen size and paper quality. For example, the single 4x6-inch print from CVS that's pictured in this tutorial only cost us $.48, and we were able to connect wirelessly to the store's printer in just minutes.
Once you've slid your photo into its frame and are ready to wrap it, you'll first want to cut your wrapping paper down to size. Measure the length, width, and depth of your picture frame, then use the below formula to calculate the size of your paper.
From here, you can follow the below steps on how to wrap a picture frame. Plus, if you have any excess paper left over, you can turn it into a small gift bag, an envelope for a handwritten note, or a folded-heart tag for accenting your present.
How to Wrap a Picture Frame
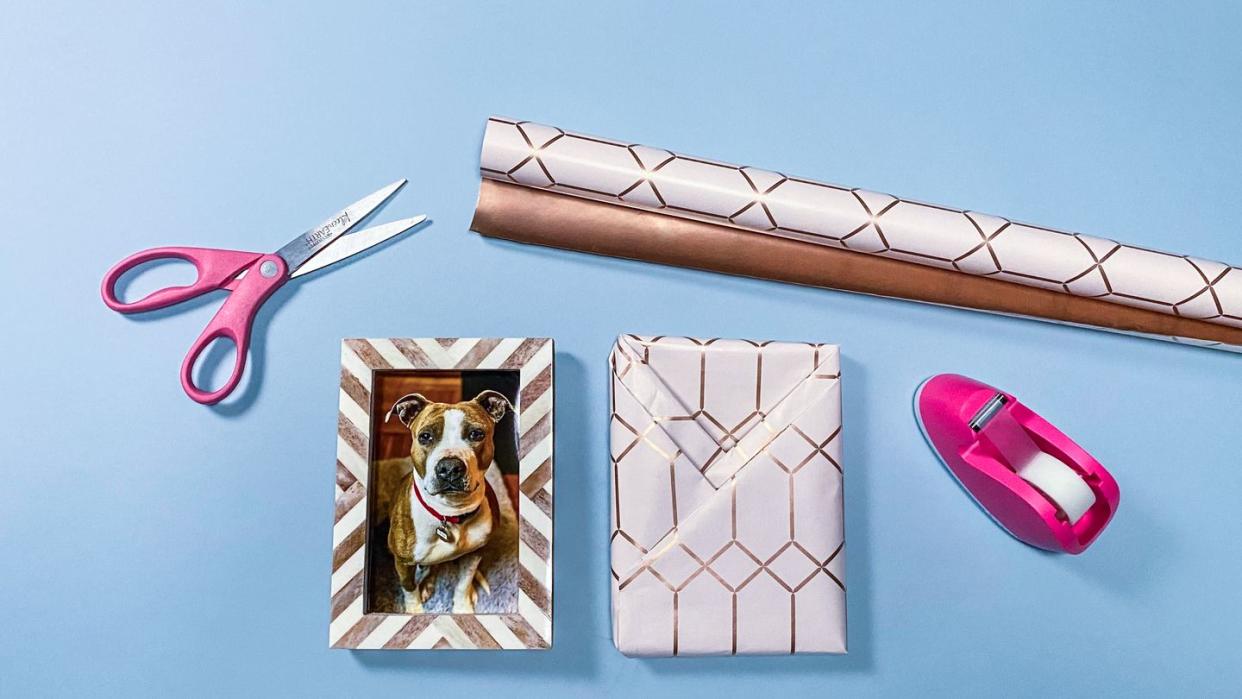
Supplies:
Wrapping paper
Tape
Picture frame
Instructions:
Angle the picture frame portrait-style in the middle of the paper. Fold up the bottom part of the paper to cover all but the very top, leaving about 2 inches of paper above the frame.
Fold up the side of one of the flaps against the frame, then crease down to create two angular folds on one side of the frame.
Repeat this on the other side.
Fold one of the top angled flaps across the frame. Tucking under any excess, repeat on the other side and alternate until all flaps are folded down.
Tape it in place. Then, flip the frame around.
Seal the top of the frame by pushing in the sides and tucking one flap over the other.
Tape in place at the back, and you're done!
Product Credits: Hallmark Modern Metallics Reversible Wrapping Paper, Handicrafts Home Photo Frame, KleenEarth Recycled Stainless Steel Scissors, Scotch Magic Tape Dispenser
You Might Also Like

