I Tried 6 Ways of Storing Garlic and Said Goodbye to Green Sprouts Forever
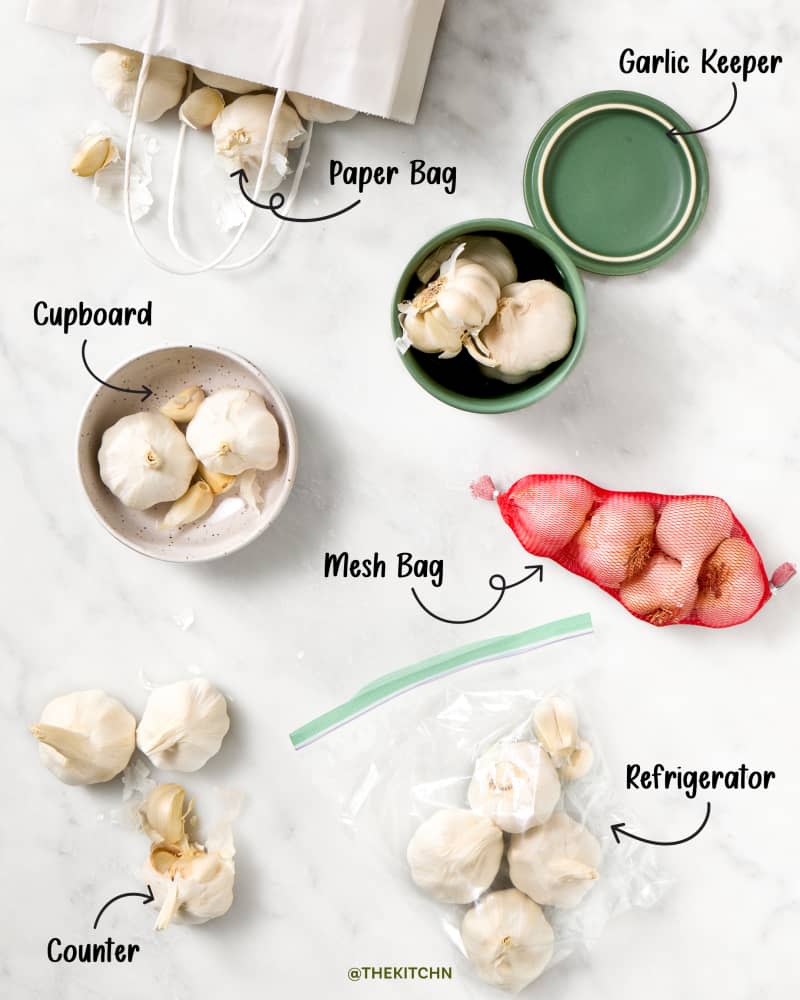
Table of Contents
Perhaps the top flavor booster in most people’s kitchens (aside from salt and pepper) is garlic. It’s a key savory element in countless dishes — everything from pasta sauces to braised meats to cozy soups and everything in between. As for me, I am never, ever without fresh garlic in my house. Seriously — it’s something I have never even come close to running out of.
Given that, I’m a bit surprised that I hadn’t yet discovered the best way to store it. I’ll often find green sprouts emerging from the cloves, but I typically chalk that up to inevitability and either use it anyway (because the green sprouts are safe to eat), knowing that the garlic will taste a bit bitter, or fish around for un-sprouted cloves.
But what if there was a way to keep garlic fresher longer, to help keep those bitter sprouts at bay? I sought out to discover just that — an ideal method to hold garlic in its ideal state longer.
All of the garlic that I tested stored well for at least three weeks, but after the fourth week, some methods emerged as poorer or better than the rest. The garlic that I stored in a ceramic garlic keeper maintained the best texture and flavor, but a no-cost method fared almost as well.
A Few Notes on Methodology
The garlic: In an effort to select garlic heads that were all about the same age, I purchased a two-pound bag from Costco. The tag on the bag indicated a pack date of just two weeks prior to my purchase. Although the garlic skins had a bit of light purple coloring, the garlic was softneck garlic, not a hardneck purple variety. To test each method, I used four garlic heads that I broke into, so that there were four half-intact heads and lots of loose individual cloves. (I didn’t leave them whole because whole, unbroken garlic heads will last for much longer.)
The storage spaces: For all of the room-temperature methods (with the exception of the pantry method), I stashed the garlic on my kitchen counter, underneath the upper cabinets and in a corner with no direct sunlight. I spaced them about six inches apart and made sure they were nowhere near any produce that might emit ethylene gas, such as apples or bananas, which can cause food to spoil more rapidly. Room temperature in my kitchen was 67 to 68°F.
The testing: I stored the garlic for just a bit more than a month (4 weeks and 2 days, to be precise). I checked on the garlic every week but did not detect signs of aging until that last week of the test. To evaluate the garlic, I tested by feel first, pressing into all of the loose cloves with firm pressure to find any soft spots; I did this as well at several points of the half-intact heads. Next, I cut into the loose cloves from each batch, and I pulled some cloves off the half-heads and cut those in half as well; here, I was looking for the development of any green sprouts inside the cloves and gauging the aroma of each. Finally, I tasted garlic from each batch first by rubbing halved cloves on crostini to taste it raw and then by sautéeing minced cloves in a little oil and dipping bread into it. Spoiler: All of the cooked garlic tasted the same to me, but I did notice flavor differences in the raw garlic.
Ratings: I judged each method on a scale of 1 to 10, with 10 reserved for perfection. I considered the texture of the garlic as well as the appearance (whether there were any visible shoots growing out of it). Finally, the flavor of the raw garlic played into my ratings as well (as noted above, I didn’t detect flavor differences in the cooked garlic).
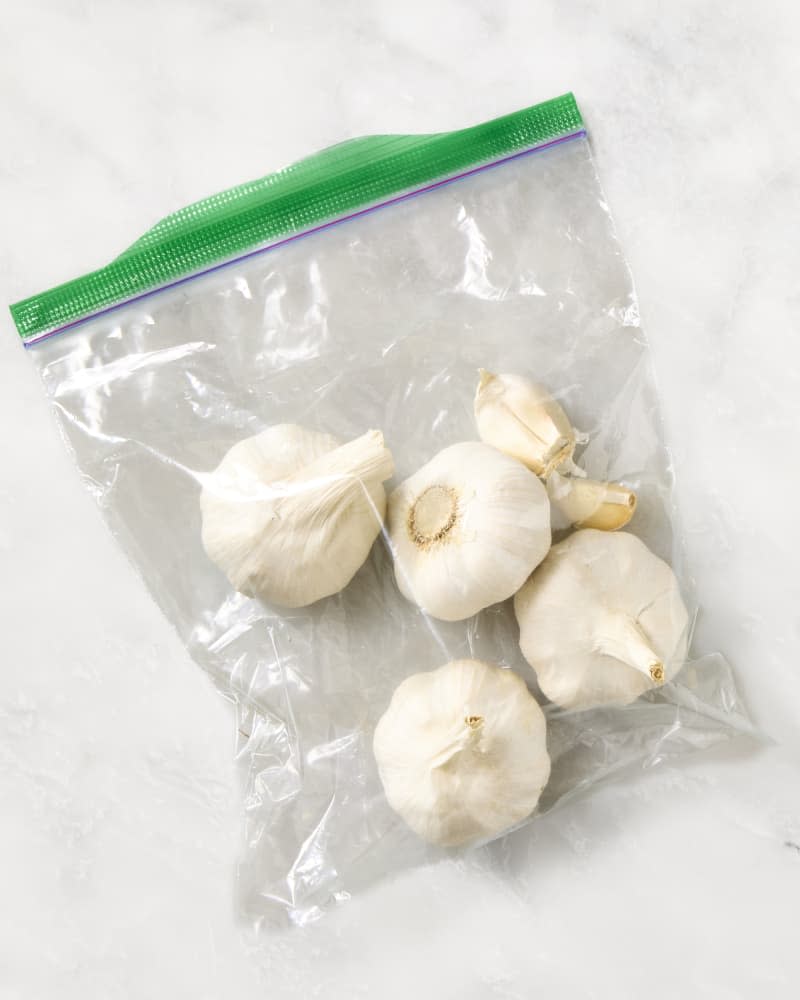
Garlic Storage Method: In a Zip-Top Bag in the Fridge
Rating: 5/10
About this method: I used a quart-sized zip-top storage bag and sealed the garlic inside, placing it on a shelf toward the back of the fridge.
Results: About half of the garlic felt firm, but the other half of the cloves had soft spots. When I cut into the garlic, I saw some pale green sprouts developing in the center of each clove. The aroma was very mild and blunted, and most significantly the flavor was muted as well, lacking the pungency that raw garlic should possess.
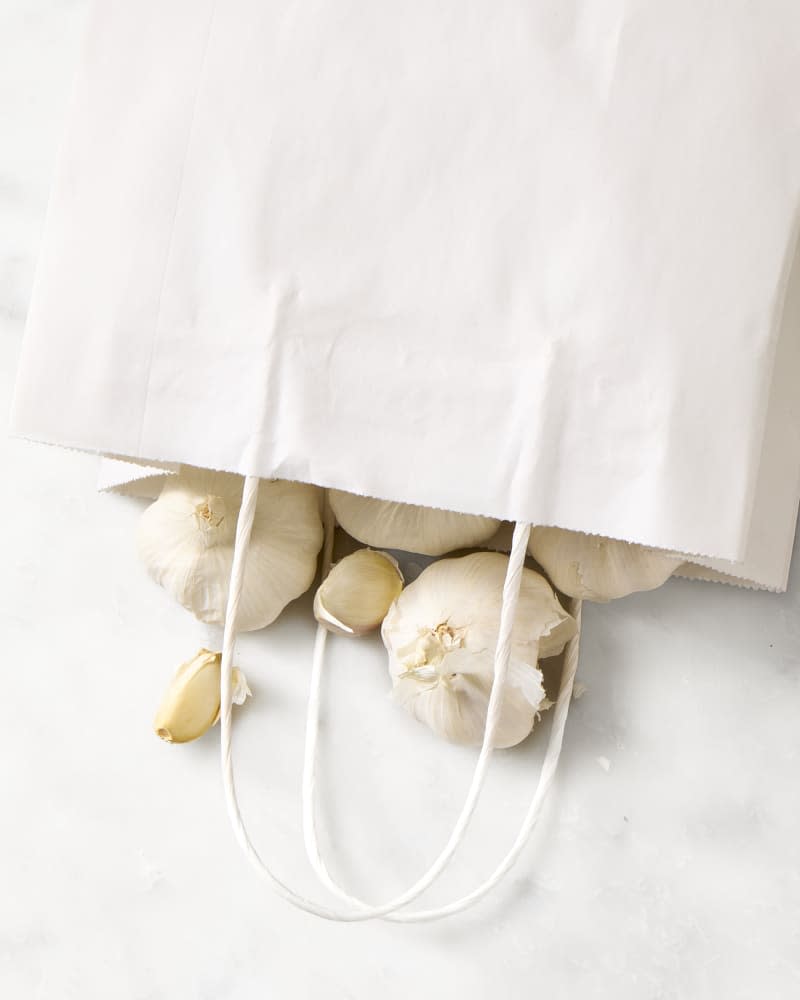
Garlic Storage Method: In a Paper Bag
Rating: 7.5/10
About this method: I tossed the half-heads and loose cloves into a lunch bag–sized brown paper bag, folded the top down, and stashed it on my countertop as detailed above in my methodology notes.
Results: Although the garlic all felt very firm and showed no signs of softening, a few of the individual cloves had started sprouting little green shoots from the pointy ends. When I cut into the garlic, I saw well-developed grass-green colored shoots in the middle. While the aroma was a little sweet, the flavor was quite bitter and “hot.”
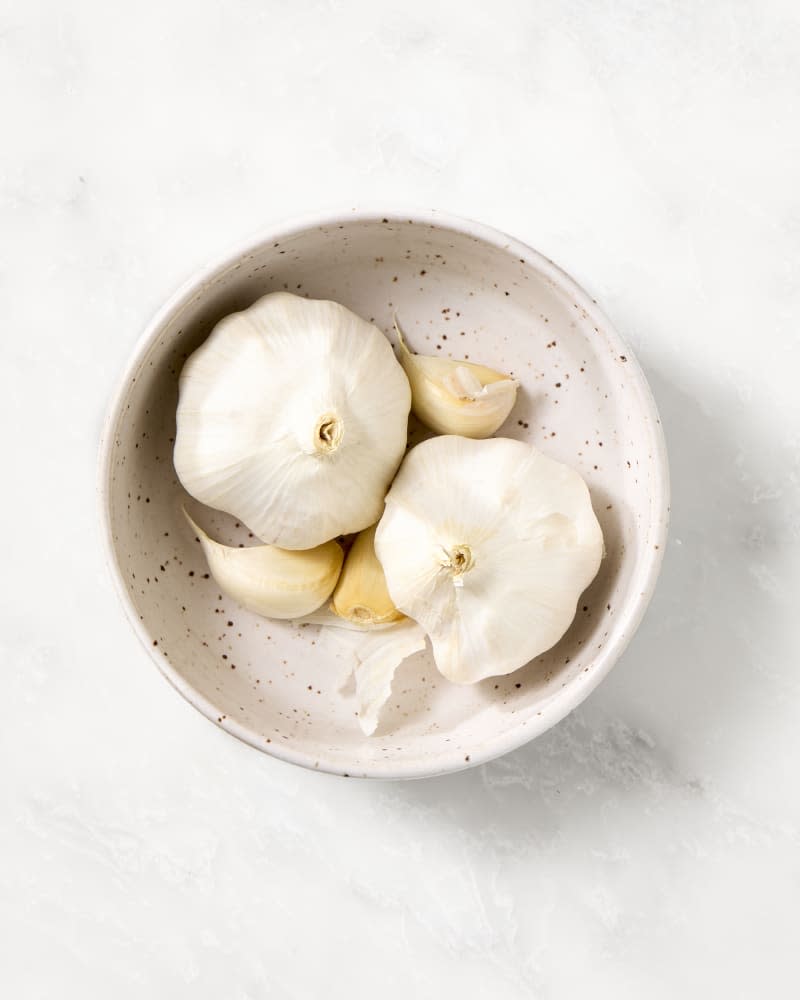
Garlic Storage Method: In the Cupboard (in a Bowl)
Rating: 8/10
About this method: For this test, I placed the garlic in a bowl and stored it in a part of my pantry that gets less traffic than other areas. It remained cool and dark the whole time.
Results: This is the way I’ve always stored garlic, and I was a little surprised that it didn’t fare as well as some of the other methods. Most of the garlic remained firm, but there was noticeable softness in some of the cloves. A couple of cloves had green sprouts emerging from their skins as well. After cutting into the garlic, I found pale yellow-green sprouts inside. The aroma was grassy, not characteristically spicy-pungent, but the flavor was pleasantly robust and spicy.

Garlic Storage Method: In a Mesh Produce Bag
Rating: 8.5/10
About this method: I used the mesh bag that the garlic came in at Costco, simply securing it with the tag and letting it hang out on my kitchen counter as detailed in my methodology notes.
Results: My exterior examination revealed no visible sprouts emerging from the cloves, and they all felt very firm when squeezed. Cut into, about three-quarters of the cloves had medium-green-colored sprouts inside (the others had none). The aroma was strongly spicy, and the flavor was a bit mellowed but fairly robust.

Garlic Storage Method: On the Counter
Rating: 9/10
About this method: I placed all of the half-heads and loose cloves on a salad plate that kept them in a single layer and stored them on my kitchen counter (specific notes about that above in the methodology section).
Results: When I felt the garlic, it was all still very firm, and there were no outward signs of sprouting. Cut into, the garlic had a strong spicy smell and (as with the mesh bag method) about three-fourths of the cloves had green sprouts growing in the middle. The flavor was strong, spicy, and robust, with a bit of bitterness.
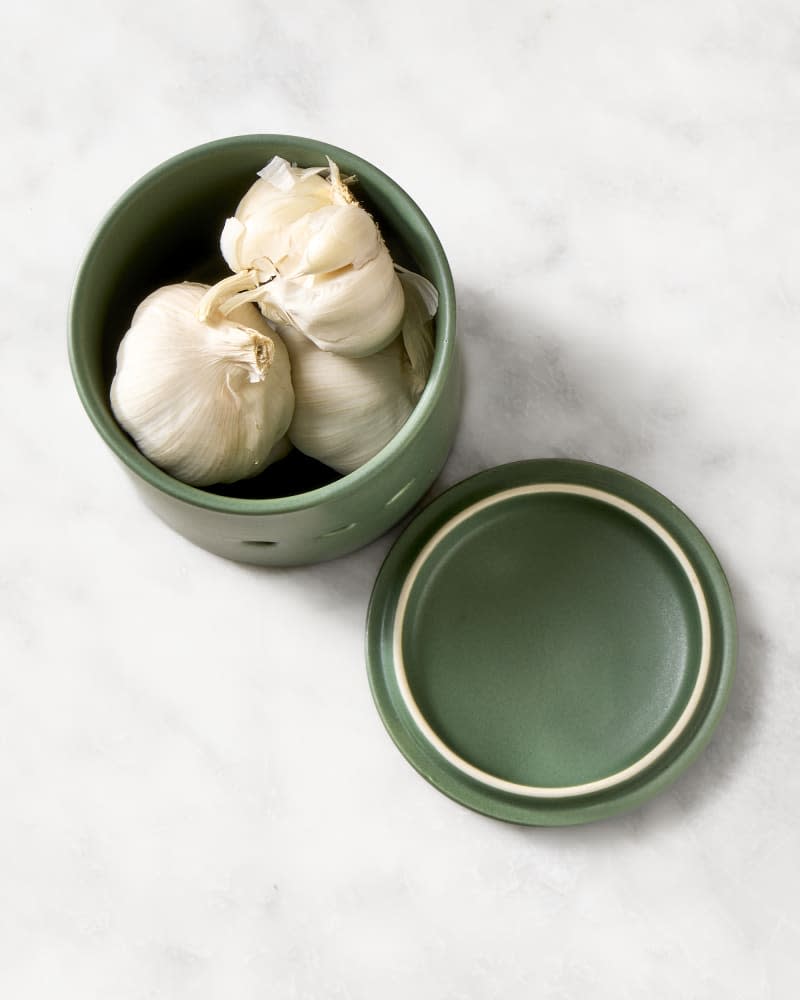
Garlic Storage Method: In a Ceramic Garlic Keeper
Rating: 10/10
About this method: To test this method, I ordered this ceramic garlic keeper and loaded it up with my loose cloves and half-intact garlic heads. I placed the keeper on my kitchen counter (details above in methodology notes).
Results: Every bit of the garlic retained a very firm texture — firmer than with any other method. There were no outward signs of sprouting, and no emerging green shoots from any of the cloves. The cut cloves had a potent, spicy-strong allium aroma. Some of the cloves contained pale, less developed sprouts inside, but most remained sprout-free. And the flavor was spicy, pungent, and perfectly garlicky.
Overall Key Takeaways
Airflow seems to help garlic last longer and taste better; the lowest-scoring methods (fridge and paper bag) allowed for the least amount of airflow. Although the garlic keeper was a mostly closed environment, there are holes for venting/airflow, and that seemed to make a difference.
For me, the garlic keeper is a great investment, as it made the biggest difference in how the garlic performed after a month in storage. However, the second-best method (just on a plate on the counter, out of sunlight and away from ethylene-releasing produce) fared almost as well — so if you don’t want to buy a garlic keeper, no need.

