How to Make a Traditional Japanese Breakfast
A start-to-finish guide to cooking the perfect Japanese breakfast.
When I get on a plane to Japan, breakfast is the meal I anticipate most. Not ramen, not a sushi omakase or pristine slices of sashimi, but a "Japanese breakfast." Salted salmon, rice, and miso soup. There is no better breakfast in the world.
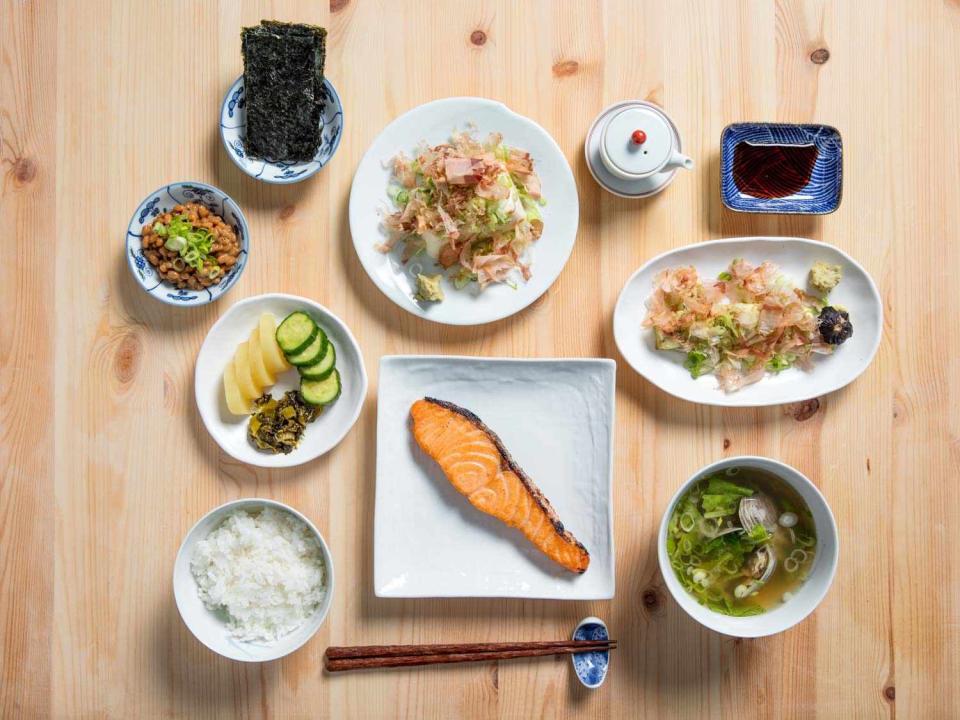
Japanese breakfasts are available all over the country, in homes and hotels and at nationwide chains like Yoshinoya. Exactly what you're served will vary from one place and day to the next. When I think of a Japanese breakfast, though, I have something more specific in mind, namely, the morning meal served at my grandmother's table: a small bowl of polished white rice; another full of miso soup, made with my family's specific blend of red and white miso, built on a niboshi dashi base, and studded with the diminutive river clams known as shijimi; and a very salty piece of shake (pronounced "SHAH-kay"), or salted salmon, a little charred, its skin crisped, the fat still spitting from the broiler.
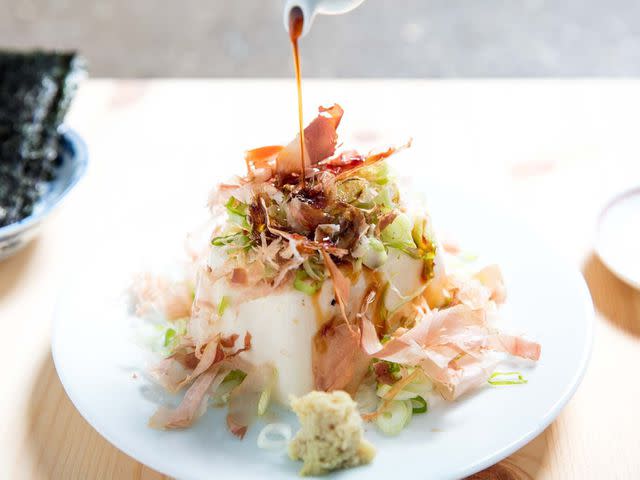
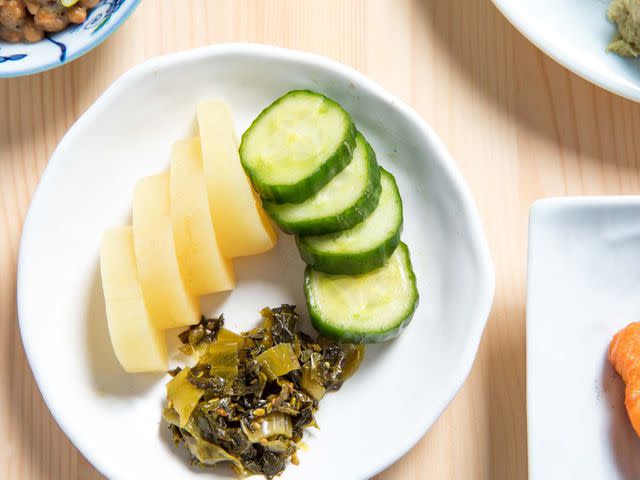
I suppose it should go without saying that the Japanese, like any other people, eat a variety of things for breakfast; some might opt for a rice porridge instead, or a bacon, egg, and cheese sandwich, or a couple hash browns from McDonald's. And I should note that the Japanese breakfast of my mind—the salted salmon, the rice, the miso soup with clams—is a simplification of ichiju sansai, or a meal that consists of a soup, three side dishes, and rice (the phrase literally means "one soup three dishes").* Those side dishes will typically include a piece of fish and two vegetable dishes—cold braised daikon, say; maybe some blanched spinach, dressed lightly with sesame oil and rice vinegar, or ohitashi; or some tofu, as pictured above. There are also a number of tertiary components my grandmother will put out, like natto (fermented soybeans), sheets of nori, and a variety of pickles, from the yellow pickled daikon known as takuan to quick pickles made from the distinctive long, thin, and spiny Japanese cucumber.
*My aunt claims that the sansai portion of the phrase can include a bowl of rice, but everything I have read suggests that the rice exists apart from the three side dishes. I would defer to her opinion, as she is Japanese and I am not, but I am almost 100% certain that she is wrong, despite the 15 emails she has sent to me telling me I am wrong. Sai means "plate," for god's sake, and rice in Japan is served in bowls!
That spread probably sounds more elaborate than it is. Often, much of what's on the table are leftovers from the previous night's dinner, and very little cooking is required other than preparing the rice and running a few things under the broiler. (For example, one of my favorite "sides" is shaved raw onion, topped with katsuobushi and soy sauce.) Really, a Japanese breakfast is predicated on improvisation and variation. Beyond the most basic of rules and suggestions—there must be rice, there should be a soup—what appears on the table is entirely up to you.
I prepare a similar breakfast at home most Sundays, as I'm fortunate enough to live near a farmers market with an excellent fishmonger. I try to restrict myself to whatever is in season, so, for instance, at a recent meal the three sides consisted of broiled salted Spanish mackerel, broiled eggplant topped with katsuobushi and scallions and served with some grated ginger, and a simple cucumber and tomato salad dressed with lemon and olive oil. I cart back tubs of miso made by my relatives in Japan, so the miso soup is pretty similar, although my wife prefers dashi made without niboshi (small dried sardines). I also substitute littleneck clams from Long Island for the shijimi—which are close, and almost as delicious, but not exactly the same, as shijimi are less aggressively salty.
Not long ago, Daniel asked me if I'd write up a how-to for making a Japanese breakfast. At first, I thought it was kind of a silly idea, since it's almost as easy as making rice; on further reflection, I realized that to someone unfamiliar with this kind of meal, it may seem daunting. The truth is, with a little forethought, it can be less labor-intensive than cooking up bacon and a stack of pancakes.
A Not-So-Brief Note About Rice and Salmon

The importance of rice to the meal cannot be overstated, as every meal in Japan is inextricably linked to rice. A universal shorthand for the word "meal" in Japanese is gohan—"rice." What you eat in the morning is called asagohan ("morning rice"); in the evening, it's bangohan ("evening rice"). The importance of rice isn't just linguistic; it also determines the portioning of the non-rice components of the meal. Because the main focus of the meal is the bowl of rice, the other dishes on the table are meant to be complementary, which generally means they'll be highly seasoned and relatively small in size. While a typical serving of salmon in a Western meal might be six to eight ounces, for a Japanese breakfast, the standard serving might be two to three ounces.
About that salmon: I came up with and tested a recipe for salted salmon, a dietary staple that goes back millennia in Japan and is about as ubiquitous there as bacon is in the United States. More often than not, when Japanese eat salmon, it's of the salted variety. The relative importance of salted salmon and fresh salmon can be seen in the language: While salted salmon is known as shake (a portmanteau of shiozake, literally "salted salmon") or sake (literally, "salmon"), fresh salmon is known as namazake (literally, "fresh salmon") or by its romanized name, saamon.
This salted-salmon recipe will not produce a facsimile of the shake you can buy in Japan, as making shake involves a rather protracted drying process (if you're interested in that process, I urge you to pick up a copy of Nancy Singleton Hachisu's Preserving the Japanese Way). This is merely an approximation, and it serves in a pinch. If you live near a good Japanese grocery, it will likely have salted salmon for sale, and even though that, too, in my experience, will pale in comparison with the shake available in Japan, it's perfectly acceptable to use. The main difference I've noticed in shake here in the US is that it isn't particularly salty, while shake in Japan is very salty, although different salt levels are now available to accommodate a range of tastes.

I tried out a number of different methods to produce something close to Japanese shake, curing both slabs of salmon and individually cut steaks; using a range of different percentages of salt by weight, from 1% to 6%; using a variety of methods for drying and curing; and, finally, testing out the conventional wisdom that a quick rinse in sake will wash away "fishy" tastes and improve the flavor.
Large slabs of salmon did not sufficiently cure in a reasonable amount of time (48 hours), so I moved on to individually cut portions. Blind tastings done with my family members revealed that the sake rinse is actually beneficial for flavor, but I'm not entirely sure why that is—the difference in flavor wasn't too pronounced, so that step is optional, although still recommended. (I suspect it serves a similar function to the saline solution Daniel bathes his salmon in before making gravlax, rinsing off any juices that may develop off or fishy flavors prematurely.) The final amount of salt I settled on for this recipe was about 3% of the weight of the salmon, which is plenty salty, but not so salty as to put off those unprepared for it. My personal preference, though, is closer to 5%.

In terms of the method, the goal is not to express as much liquid as possible from the salmon, nor to cure it thoroughly. Instead, the goal is to allow it to dry in a controlled way, so that when it cooks it's still relatively juicy, yet deeply salted all the way through. I found that wrapping the portions in plastic or leaving them in a zip-top bag led to extremely salty salmon that remained too wet. I knew that salting the salmon and setting it on a rack in the fridge would dry it out too quickly and unevenly—the outer portions would dry out far faster than the interior of the fillets. The best way I found, taking inspiration from Just One Cookbook, was to salt the salmon and place it in a single layer in a container lined with paper towels to wick away moisture as it's drawn out of the fish, swapping out the paper towels every 12 hours.
The recipe as written is for two four-ounce fillets, which will easily fit in a single layer in a fairly small container (the one I used here is an 8- by 6- by 2-inch glass dish). If you want to double the recipe, you can place the fillets in two layers, with paper towels in between, but you'll want to reorganize them halfway through the curing process to account for the added weight on the bottom fillets, which will press more liquid from them.
Of course, you don't have to use salmon at all; you can cook any fish you like to accompany your breakfast. In fact, I encourage you to find the freshest fish available and use that instead. For example, for the breakfast I mentioned above, I liberally salted both sides of a Spanish mackerel fillet, wrapped it in a paper towel, and placed it on a plastic-wrapped plate overnight. You can also marinate the fish in sake lees, shio- or shoyukoji, or even a miso marinade.
If you choose an oily fish, like a type of mackerel or bluefish, I strongly suggest picking up a daikon radish and serving it grated alongside—you can buy a dedicated daikon grater, or use a ceramic grater, but the side of a box grater with outwardly protruding holes will work just fine. It is a traditional accompaniment for oily fish, and for good reason: It's delicious.
How to Make a Japanese Breakfast
The timeline for the preparations involved in putting out a Japanese breakfast is entirely dependent on what you've decided to serve. If you want to serve salted salmon and are starting with fresh fillets, you'll have to start preparing at least 24 hours in advance; if you've procured salted salmon from a Japanese market, but want to make a very good homemade dashi, you'll have to start at least 12 hours in advance; if you just want to cook a fresh piece of fish and make dashi using instant granules, you can have the whole meal on the table in under 45 minutes. What I'll do is walk you through the way I normally prepare a Japanese breakfast on Sundays for me and my wife.
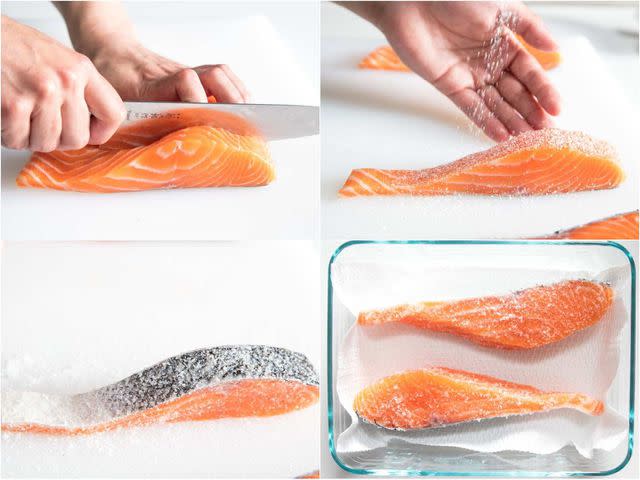
On Friday night, 36 hours before the meal, I bring home an eight-ounce fillet of salmon, preferably cut from the fattier, belly section, and split it in half crosswise. I coat the fillets in about a quarter ounce of salt (which translates to about two teaspoons of Diamond Crystal kosher salt), pressing the salt into the flesh and skin in order to make sure most of it adheres properly. Then I lay the fillets in a glass container lined with paper towels, cover the container, and place it in the refrigerator. Every 12 hours, I swap out the paper towels with fresh ones and flip the fillets over.

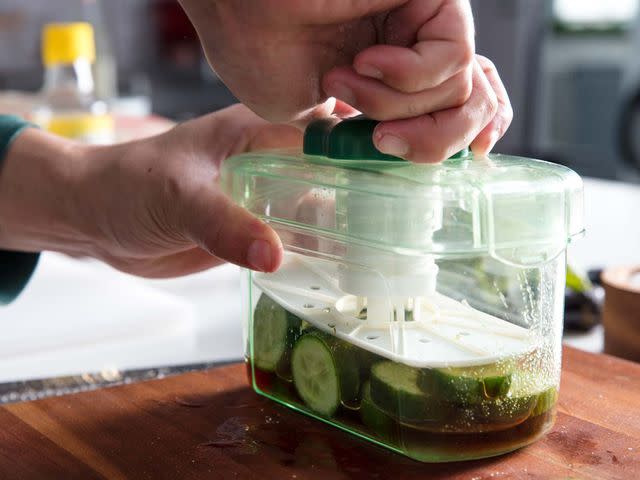
On Saturday night, about 12 hours before the meal, I start preparing the dashi for the miso soup. I put about a half ounce of kombu in a deli container of water, about 450 milliliters, so that it can soak overnight, since cold-soaking kombu overnight results in maximum flavor extraction. (You have to either break up the kombu or let it soak a bit before cramming it into the container.) If I plan on doing some "quick" pickles, I'll slice them and add them to my pickle press at this time, too.
Sunday morning, I take out the kombu and the soaking water, put it in a saucepan and add another deli container full of water to the pot, then turn on the heat. (If you chose to forgo the soaking step, or if you forgot, you'd do exactly the same thing with dried kombu at this point.) While the water comes to a simmer, I rinse my rice until the water runs clear, then place it in my rice cooker. When the water comes just to a simmer, I add about half an ounce of katsuobushi, then let the mixture steep for a couple of minutes, and finally strain it through a fine-mesh strainer. (You can discard the katsuobushi and the kombu, but I hold on to them and either use them as part of the meal—the spent kombu can be slivered and dressed with vinegar and sesame oil, while the katsuobushi can be moistened with soy sauce and used as a topping for rice—or save them for a niban dashi, or "second dashi," later. You can read this other article I wrote to learn more about dashi.)

After the dashi is made, I have about 20 minutes before the rice is ready, and in that time I do all the other prep for the meal. I lay out the salmon fillets on a piece of tinfoil set in a sheet tray so that they're ready for the broiler, which I turn on so that it'll be nice and hot. Any freshly made sides I have planned will be cooked in this time, whether it's blanched spinach (for which you'll want to have a pot of water boiling on the stove by this time) or a broiled eggplant (you'll want to preheat your broiler before rinsing your rice) like the one in these pictures.
The eggplant is very simple: Score the Japanese eggplant (Chinese ones work, too) around its circumference at either end, then score the skin several times down the eggplant's length, which makes it easier to peel after cooking. Broil it for about three minutes per side, until the flesh is giving but not collapsing. Peel, then slice into bite-size portions, top with sliced scallions and katsuobushi, and serve with grated ginger and soy sauce alongside.

It's also time to set the table with any of the prepared ingredients I have on hand, like natto or pickles or sheets of nori (cut into two- by one-inch rectangles), or leftovers that seem appropriate for the occasion, like stir-fried vegetables. For the pickles, you can pick up an assortment at a Japanese grocery store, including bright-yellow takuan, or daikon pickle; fukujinzuke, a medley of pickled vegetables that includes daikon and lotus root; or takana-zuke, a spicy pickle made from mustard leaves. You can also use kimchi of any variety.

At this point, everything is ready to go. If you have a rice cooker, it'll keep your rice piping-hot until you want to eat; if you don't, the rice will remain relatively hot for at least another 15 minutes. You have time, so you don't have to rush. Whatever you need to do—take the dog for a quick walk, put the baby down for a nap, wash some dishes, drink a beer—can be done with very few negative consequences for the final meal.
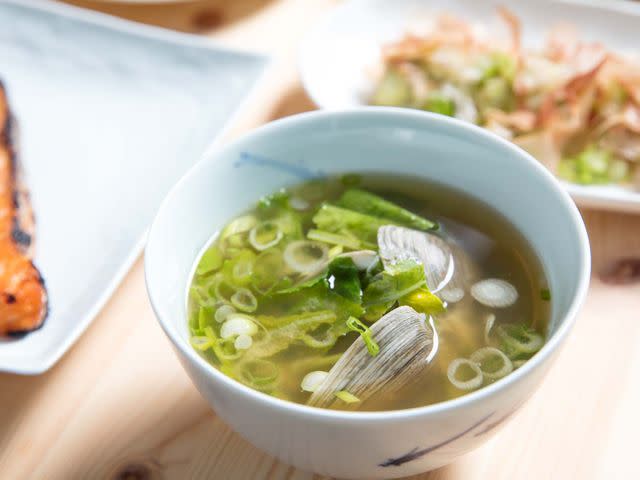
About 10 minutes before we want to eat, I bring the dashi to a boil and add a half dozen littleneck clams. When they open up, I dunk a ladle in the pot and stir a dollop of miso paste directly into the dashi in the ladle, then pour that back into the pot; this helps ensure there are no clumps in the final soup. Then I turn off the heat and add the scallion.
I slide the salmon fillets under the broiler. As the first side of the salmon cooks, I portion out the rice into bowls and set them on the table. After flipping over the salmon, I portion out the miso soup and set that on the table, too. Finally, I plate the salmon and put it out last, hopefully a little charred, its skin crisped, the fat still spitting.

Read More
July 2018

