Tie-Dying Your Old T-Shirts Is Totally Not As Hard As You’d Think
Tie-dyed tops = cute. What's not cute? Dingy, yellow-stained white tees that, while still technically wearable, don't exactly motivate you to get moving.
Instead of throwing out your old T-shirts, it’s worth learning how to tie-dye them to make them feel fresh again. (Promise you can do it!) “I'm a huge advocate of giving your wardrobe a new lease on life, and I think tie-dye is a great way to save an old garment,” says Samantha Jo Alonso, founder of apparel company Sock Sammy Jo and maker of those tie-dyed tube socks you see many a fitness trainer and influencer rocking on Instagram.
Just follow the steps in the tutorial below, and you'll soon be the proud new owner of an on-trend tie-dye top. Choose your pattern, and follow the corresponding instructions to get started.
How To Tie Dye Shirts Like A Pro
Step 1: Gather Your Supplies
While tie-dye kits are available for sale from most crafting stores, you probably have all of the supplies you'll need on-hand already:
White or lightly colored shirts made of cotton (or cotton with 20 percent polyester—other fabrics don't take dye as well)
Dyes from a tie-dye kit or water with food coloring mixed in
A plastic squeeze bottle (something like an old mustard bottle is fine)
Rubber bands, hair ties, or plastic cable zip ties (this last option gives the cleanest lines)
Large resealable plastic bags
Trash bags
Some designs also require a ruler, plastic wrap, and small beads or dried beans (see below for more details)
Step 2: Prep Your Workspace
Lay down garbage bags and/or work outside on the grass (tie-dying can be quite messy!). Alonso also suggests wearing old clothing you don't mind staining, just in case.
Step 3: Soak Your Shirt
Most tie-dye pros suggest dyeing clothing while it's damp. Many tie-dye kits will come with something called soda ash solution for this step, but you can use lukewarm water or a homemade solution that’s one part water, one part vinegar (start with a cup of each). Let the shirt soak for one hour.
Step 4: Dye Your Shirt
Put on your gloves, and follow the instructions below for the pattern of your choice.
Step 5: Let Dye Set
Place your dyed, banded shirt in a large zip-top plastic bag, and leave it to set for at least eight hours. Soaking it for longer will give you more vivid, saturated shades. Prefer a pastel look? Check the shirt after one to two hours.
Step 6: Rinse
Put gloves back on, remove your shirt from its plastic bag, and rinse it in cold water until the water runs clear. Then put it in the washing machine on a cold cycle. Make sure that you wash it separately from all other clothing so you don't stain anything.
Step 7: Dry
Hang dry the item, or throw it in the dryer on the coolest setting. Voilá—your work is done!
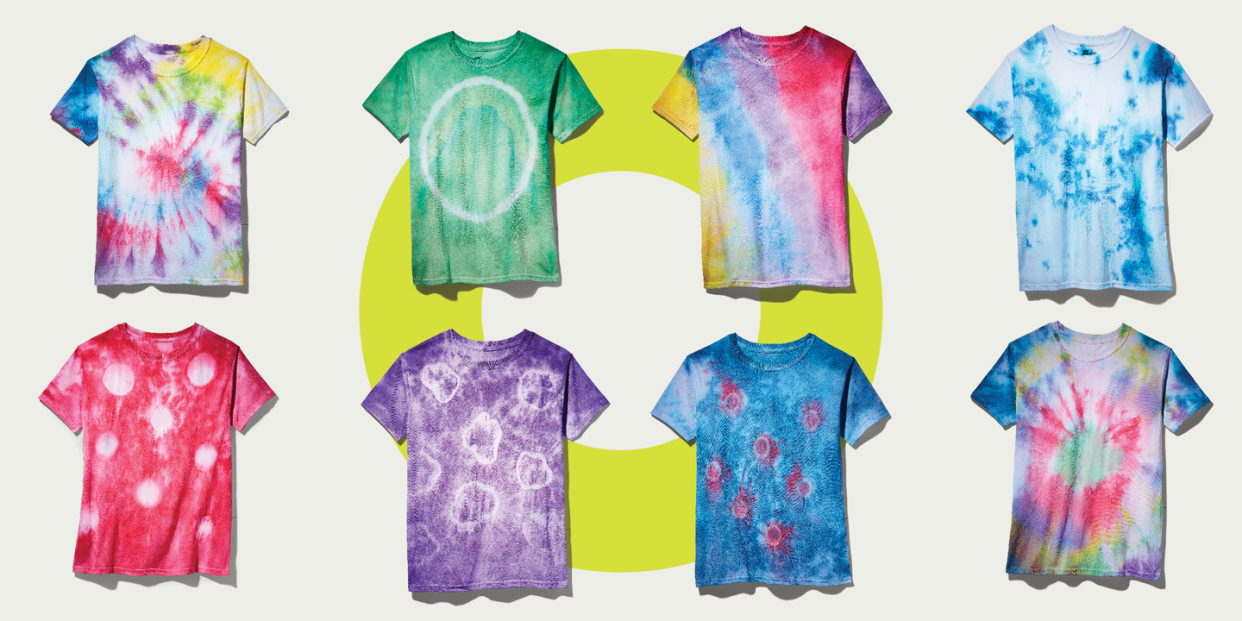
7 Tie-Dye Patterns To Try At Home
1. Crumple
Difficulty level:
Beginner
How to:
Lay your shirt flat on your work surface.
Crumple the shirt into a ball, and wrap the entire ball with six to 10 rubber bands—enough so that it holds its shape.
Photo credit: Hearst Owned Use your squeeze bottle to apply one color of dye to the entire shirt. It should be thoroughly colored but not dripping wet.
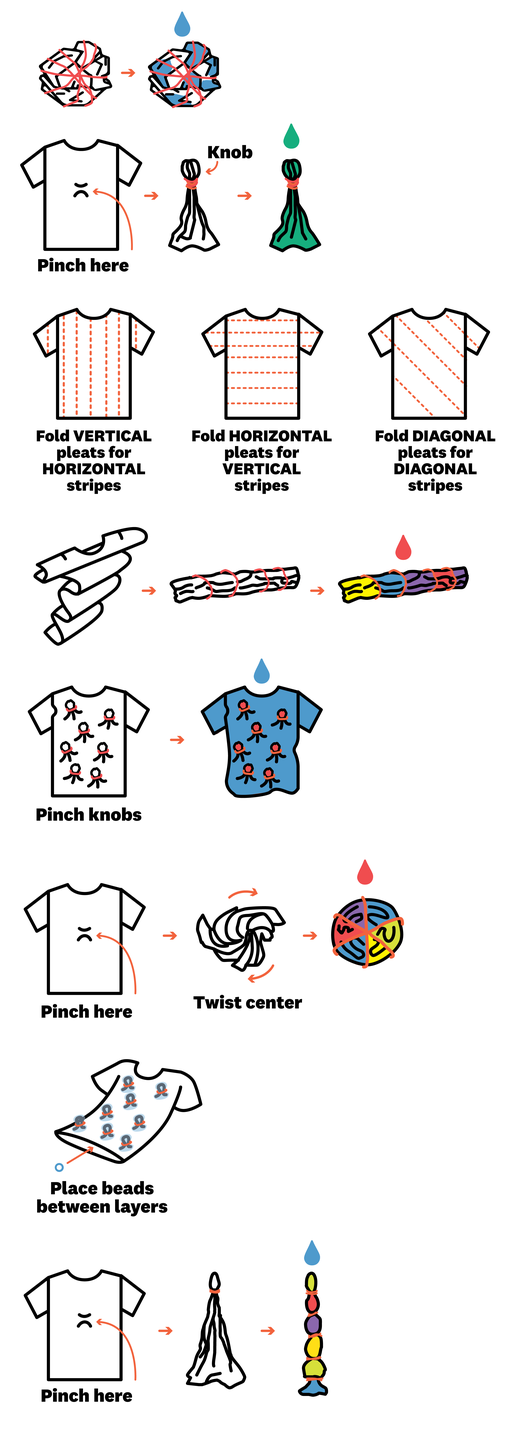
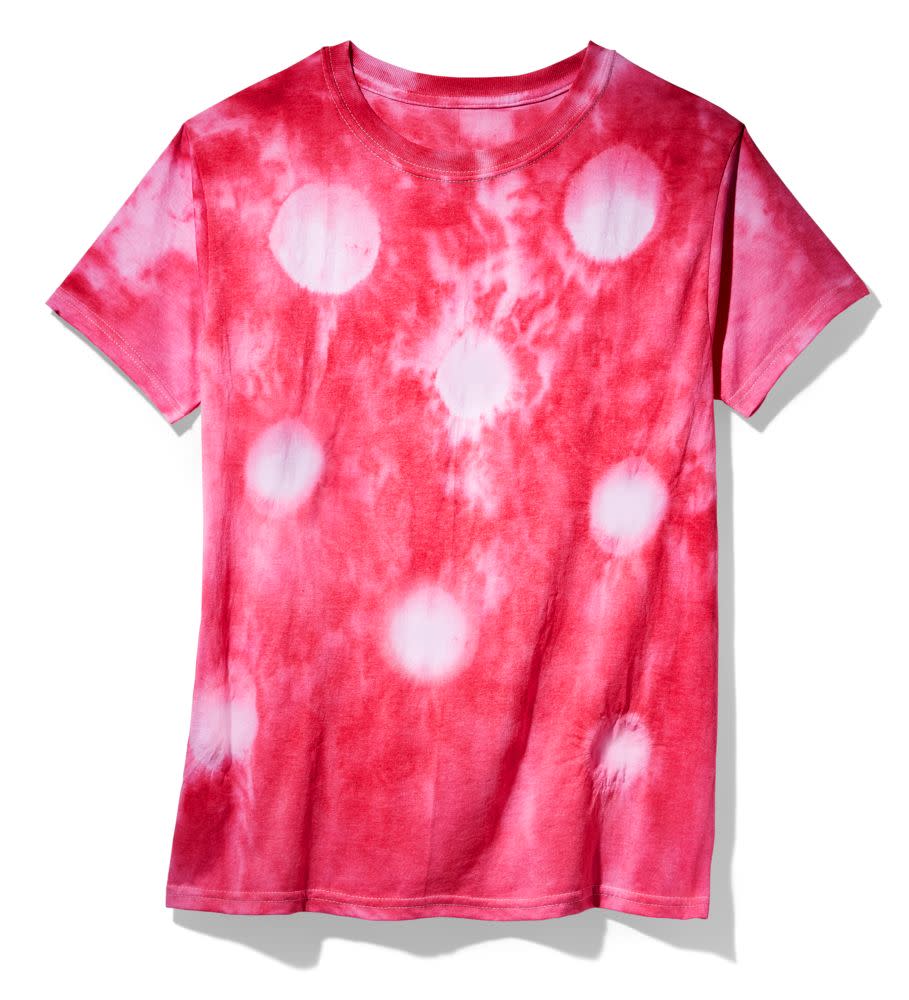
2. Ring
Difficulty level:
Beginner
How to:
Lay your shirt flat on your work surface.
Use a ruler to measure halfway between the armpits, then pinch the top layer of the shirt into a knob about the size of your fist at that point.
Secure a rubber band around the base of the knob. Add three to four more rubber bands in the same spot as the first one to create a thick line for your ring.
Use your squeeze bottle to apply one color of dye to the entire shirt. It should be thoroughly colored but not dripping wet.
Customize it: To create a smaller ring, make a smaller knob in the center of the shirt. You can also use multiple colors of dye if you're not into the monochromatic look.
3. Stripes
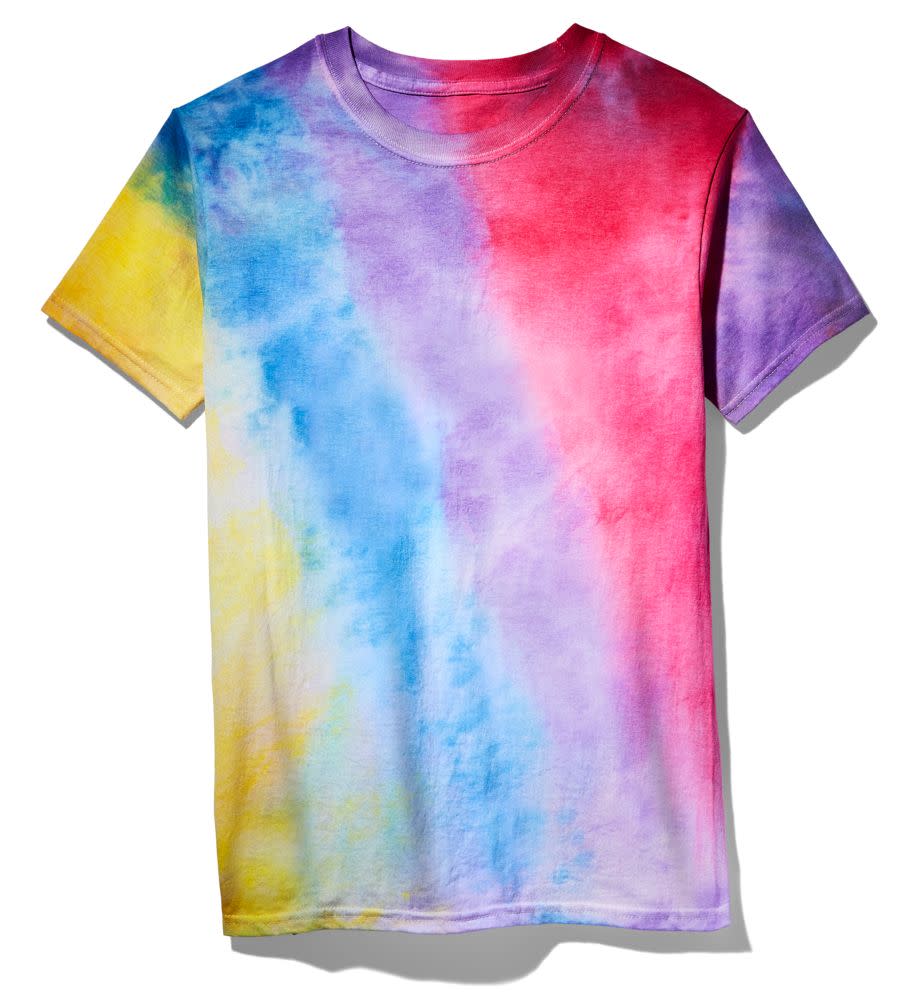
Difficulty level:
Intermediate
How to:
Lay your shirt flat on your work surface.
Starting on the left side of the shirt, create a 2-inch-tall pleat (you should be grabbing both layers of the shirt for this). Continue accordion folding the front and back of the shirt together until the entire tee is pleated like a closed folding fan.
Secure three to four rubber bands around the pleated fabric, placing them about equidistance apart.
Use your squeeze bottle to color in each section with alternating colors, leaving a little space between the bands and the dye to ensure colors don't bleed into each other. Your fabric should be thoroughly colored but not dripping wet.
Customize it: If you want vertical stripes, fold your shirt horizontally, and if you want diagonal stripes (as seen in the image above), pleat it from one corner to the other.
4. Sunburst
Difficulty level:
Intermediate
How to:
Lay your shirt flat on your work surface.
Wherever you want your sunburst design, pinch a section of fabric up into a small three-inch knob, and secure a rubber band around that knob.
Use your squeeze bottle to apply dye all over the fabric—except for the knob. It should be thoroughly colored but not dripping wet.
Customize it: To create a shirt with more than one burst, make multiple knobs in step 2. You can also adjust the size of the knobs and color the knob(s) with a different shade of dye if you want your burst(s) to be a different color than the shirt.
5. Spiral
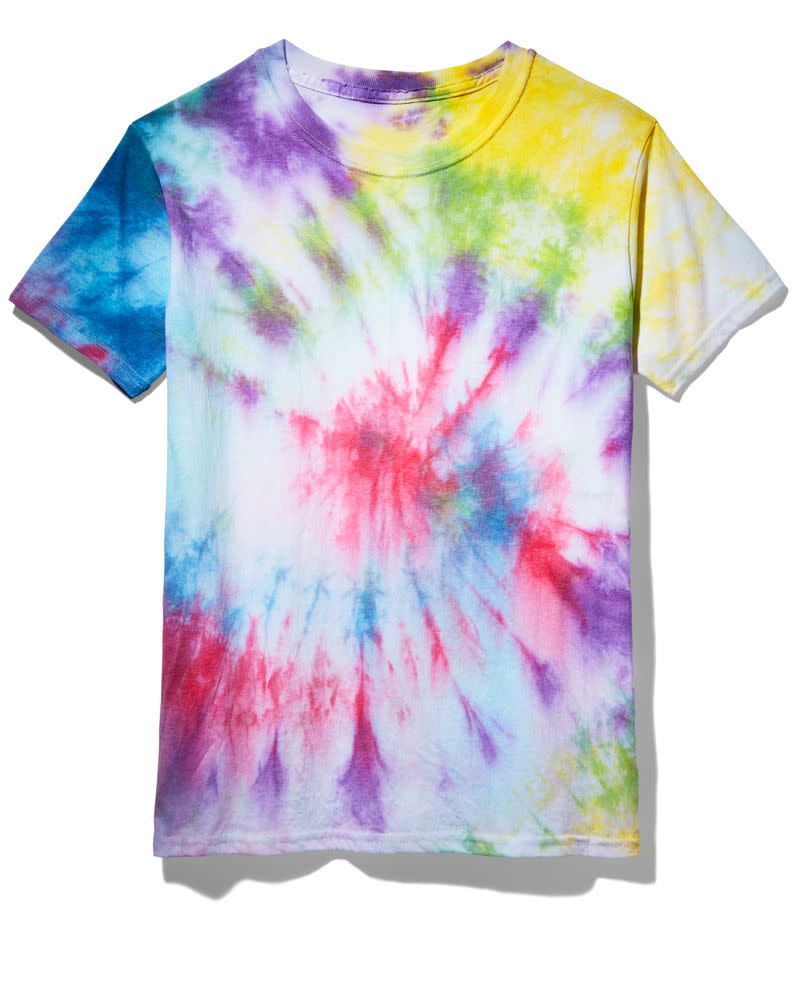
Difficulty level:
Intermediate
How to:
Lay your shirt flat on your work surface.
Use a ruler to measure halfway between the armpits. Then, without picking the shirt up off the table, pinch at that center point with your left hand. Without moving your left hand, use your right hand to twist the tee in a clockwise motion until the entire shirt is gathered around your left hand in a circular, spiraled shape. (You can think of this motion kind of like twirling pasta onto a fork with a spoon.)
Remove your hands, and without picking up the shirt, lock it in the spiral shape in by securing rubber bands across the shirt. Use three bands, and position them so that the shirt is divided up into equal "slices," like a pizza.
Dye each section a different color, making sure the dye doesn't seep across the rubber band lines. The fabric should be thoroughly colored but not dripping wet.
Flip the shirt over, and repeat step 4 on the other side.
Customize it: To create thinner arms in your spiral, use more rubber bands in step 3.
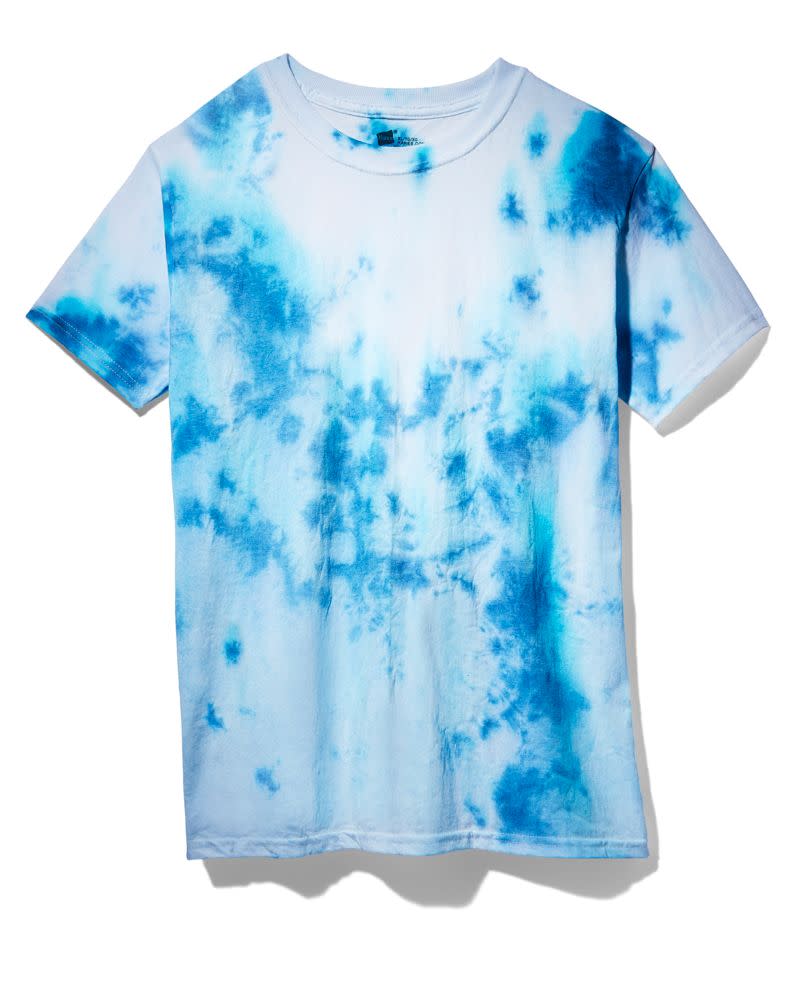
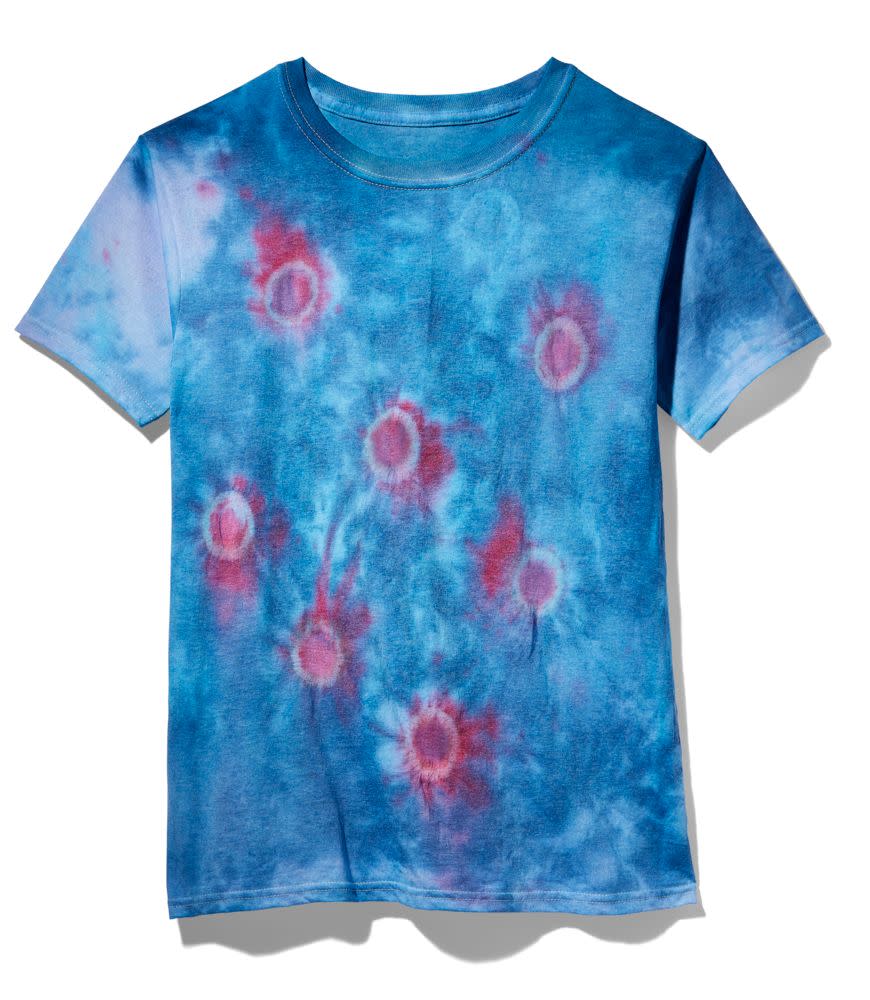
6. Polka Dots
Difficulty level:
Intermediate
How to:
Lay your shirt flat on your work surface.
Place a bead or dry bean between the top and bottom layers of the shirt, and pinch the top layer of the shirt around it. Apply a 4-inch-wide square of plastic wrap on top of the pinched section, and secure it with a rubber band to make a knob.
Repeat step 2 five times in an arrangement on the front of the shirt to create roughly evenly spaced knobs. (Your knobs will be your dots.)
Use your squeeze bottle to apply dye all over the fabric—except for the knobs. It should be thoroughly colored but not dripping wet.
Customize it: Repeat on the back side of the shirt if you want dots there, as well.
7. Bullseye

Difficulty level:
Advanced
How to:
Lay your shirt flat on your work surface.
Use a ruler to measure halfway between the armpits. Then, pull both the front and the back of the shirt into a cone (kind of like pulling a Clorox wipe out of a container), using one hand to pull and the other to hold the base of the cone secure. Stop pulling when the armholes of your shirt are just outside of the hand securing the base.
Secure a rubber band 1–2 inches from the tip of the cone, then continuing adding more rubber bands down the cone in 1–2 inch increments until you place the final one at the base of the cone and remove your hand.
Use your squeeze bottle to apply a different color of dye to each section, leaving a little room around each to ensure the colors don't bleed into each other. Your fabric should be thoroughly colored but not dripping wet.
Customize it: Use the same color on the entire T-shirt for a monochromatic effect.

You Might Also Like

