Three Holiday Makeup Looks That Give You an Excuse to Wear Rhinestones
Hi! I'm Sarah Novio. I've been obsessed with makeup since I can remember (I used to ask my mom if I could wear her red lipstick constantly) and I'll be doing makeup tutorials for Teen Vogue. From looks I'm obsessed with (aka everrrrrything Euphoria) to replicating the craziest makeup some of your favorite celebs have been wearing, I am here to give you the courage to where that blue eyeliner out of the house.
The month of December might be about winding down and restoring for the New Year, but let’s be honest, it’s also about partying. And, who would I be to let you go out partying without a good makeup look to accompany you. Incorporating glitter into your makeup routine has become super popular as of late, but I’m calling it: the makeup trend for 2020 is all about rhinestones, and what better time to start wearing them that right now? So, I created three holiday makeup looks for you to try at-home: one inspired by a Christmas tree, one inspired by disco, and another inspired by Euphoria’s very own, Alexa Demie. Let’s get our sparkle on (and don’t forget to download Kira Kira)!
Shine Bright like a Xmas Tree

Step One: Base
For my complexion, I mix Glossier Perfecting Skin Tint in G5 and Flesh Beauty Pure Flesh in Cookie and apply to my face with my fingers. Glossier’s Skin Tint is incredibly sheer and dewy in the best way! It gives life to my skin while also making it look like I’m not wearing any makeup. Flesh Beauty Pure Flesh Foundation gives a skin-like finish but with more coverage that is more matte. I’m looking for that “fresh off the runway” skin that for me is somewhere in the middle.
Step 2: Brows
I defined my brows with Colourpop’s Brow Boss Pencil in Ash Brown. I always like a naturally defined brow and this pencil does just that. When I do this, I like to start where my arch starts and work my way to the back of the brow. I leave the front of the brow last because if it’s too dark it will look more like blocks than brows!
Step 3: Eyeshadow
I always find the Milk Makeup Flex Concealer in Caramel to be the best primer for my eyeshadow because it neutralizes the color of my eyelids and leaves a tacky texture so the shadow can grab on. For colorful looks, I love to use the Viseart Grande Pro Volume 3 Palette. I applied the two brightest greens all over the eyelid. This is where I decided to improvise from this look and added a lighter green from the palette close to the lash line. To get maximum impact I used my finger to apply and blend. Your ring finger is the softest finger, and I really like to blend with this finger for detailing.
To tie the whole look together, I’m used a metallic green shade from the Rimmel London Magnif’eyes Thunderstorm Edition, applying it to my lids to unify the base green and light green together and then blending it out. This is a way to give your lids some shine without taking away the spotlight from the rhinestones we are going to apply next!
Step 4: The Rhinestones
This is my favorite part of the whole routine! However, this is also the most time-consuming. The shiniest rhinestones I’ve ever used are the Swarovski Shimmer Flat Back Crystals you can get at Michael’s. I use the Duo Adhesive Lash Adhesive Brush On Clear and Benefit Cosmetics Groomer Tweezer & Brush to apply them to my face.
I started recreating this elongated shape by applying the rhinestones in the middle of my eyelid and working my way up to the eyebrow. I continued above the brow, and then I put rhinestones on the lower lashline. This technique is easier than it looks because the lash glue gives you a little bit of time to get the rhinestones on to your skin. If you don’t get the rhinestones exactly in the middle of the spot where the glue is, it still sticks very well and it dries clear!
Step 5: Contour and Blush
Next, I finished the look with contour and blush to bring dimension back to my face. When I was applying the blush, I tried to emulate how Pat McGrath applied it on the model at the Marc Jacobs show, which also emphasizes the vertical pattern of the rhinestones (high up to emphasize high cheekbones).
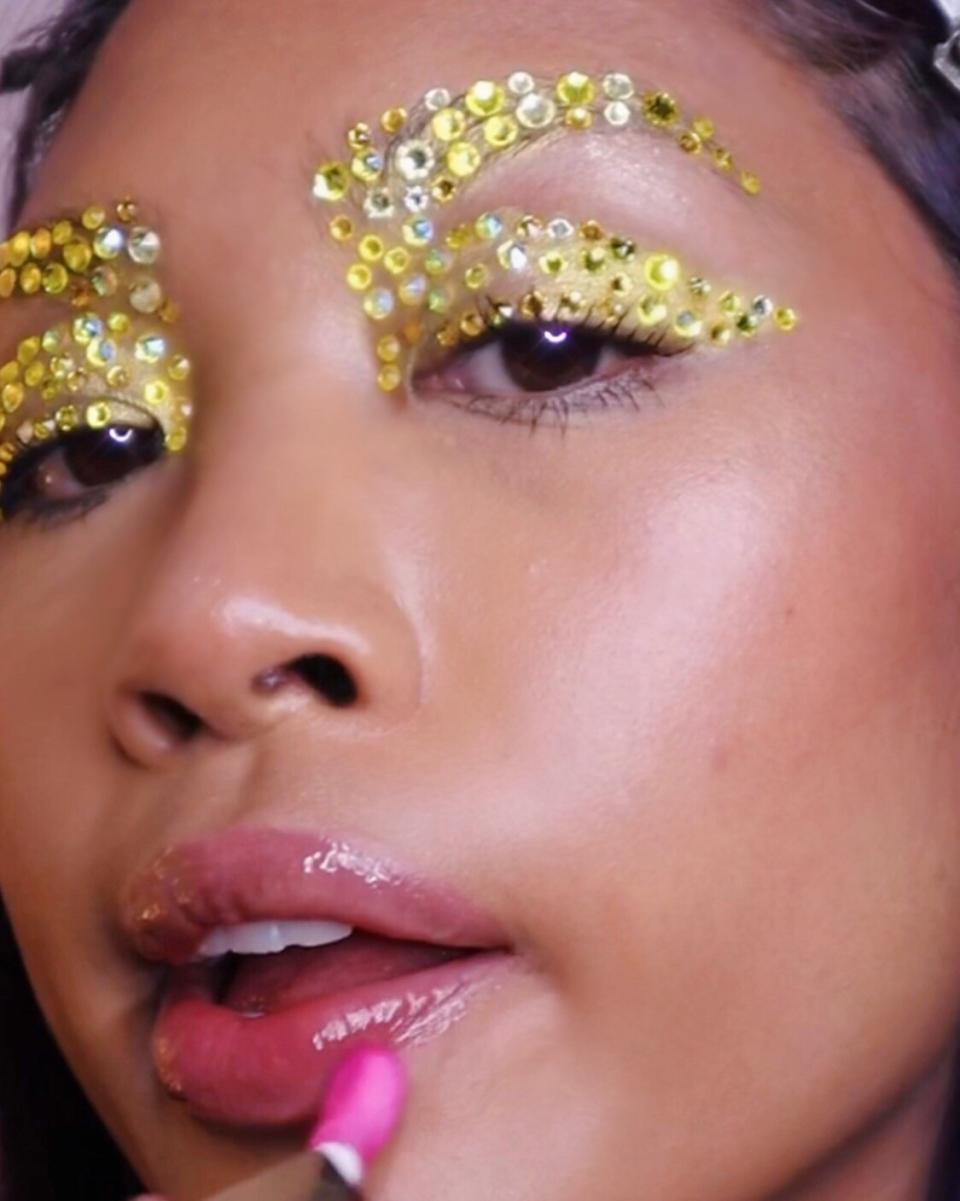
The Midas Touch Cat Eye
Step 1: Foundation
For this look, I want to achieve a more matte medium to full coverage complexion. Since my forehead is darker than the rest of my face, I’m going to use a deeper shade foundation which is Milk Makeup Flex Foundation Stick in Caramel, and I apply the foundation stick on my forehead and on the perimeter of my face. On the rest of my face, I apply the Flesh Beauty Pure Flesh in Cookie, and blend the two shades together and blend into my neck.
Step 2: Concealer
Since the base is a little bit darker, I used concealer to bring out the “lights” back (Milk Makeup Flex Concealer in Caramel and Medium). I use both shades under my eyes around my mouth and on my forehead to brighten those areas. Next, I’m going to cover my eyebrows with the same concealer in Caramel. Yes, I said eyebrows! This is to help create a base for the rhinestones to make them look seamless on the brow area as well as the lid.
Step 3: Powder
To set everything, I use Ohii Beauty Glass Powder (discontinued). A comparable powder that gives a similar effect is the Rimmel London Stay Matte Pressed Powder. This will give the rhinestones a nice base to stick to.
Step 4: Gold Eyeshadow
For the eyeshadow, I wanted to use a metallic yellow gold shade that will compliment the gold rhinestones. The one I’m using is from the KKW Beauty Sooo Fire Eyeshadow Palette and the shade I’m using is Golden Ember.
Step 5: The Rhinestones
This part is really time consuming but the results are well worth it! Like in the previous look, I used the Swarovski Shimmer Flat Back Crystals (different variations of yellow gold), the Duo Adhesive Lash Adhesive Brush On Clear and Benefit Cosmetics Groomer Tweezer & Brush. It may look intimidating to have glue stuck to your eyebrows, but after removing my eyebrows are still intact.
When applying the rhinestones, they should be close together but not touching each other. Also, in order for the rhinestones to look as seamless as possible, make sure the rhinestones don’t touch any creases of your eyelids. If you’re using different shades of yellow rhinestones, try to vary up which rhinestones are next to each other so there is an appearance they belong together.
Pro Tip: The important thing is to make the rhinestones appear to be touching each other. After, every 10 rhinestones, it’s best to take a step back and to see if they are even. It’s also easier to work on both eyes (instead of doing one eye and then trying to match it on the other eye). Even though the rhinestones are close together, it’s best to apply the lash glue one spot at a time.
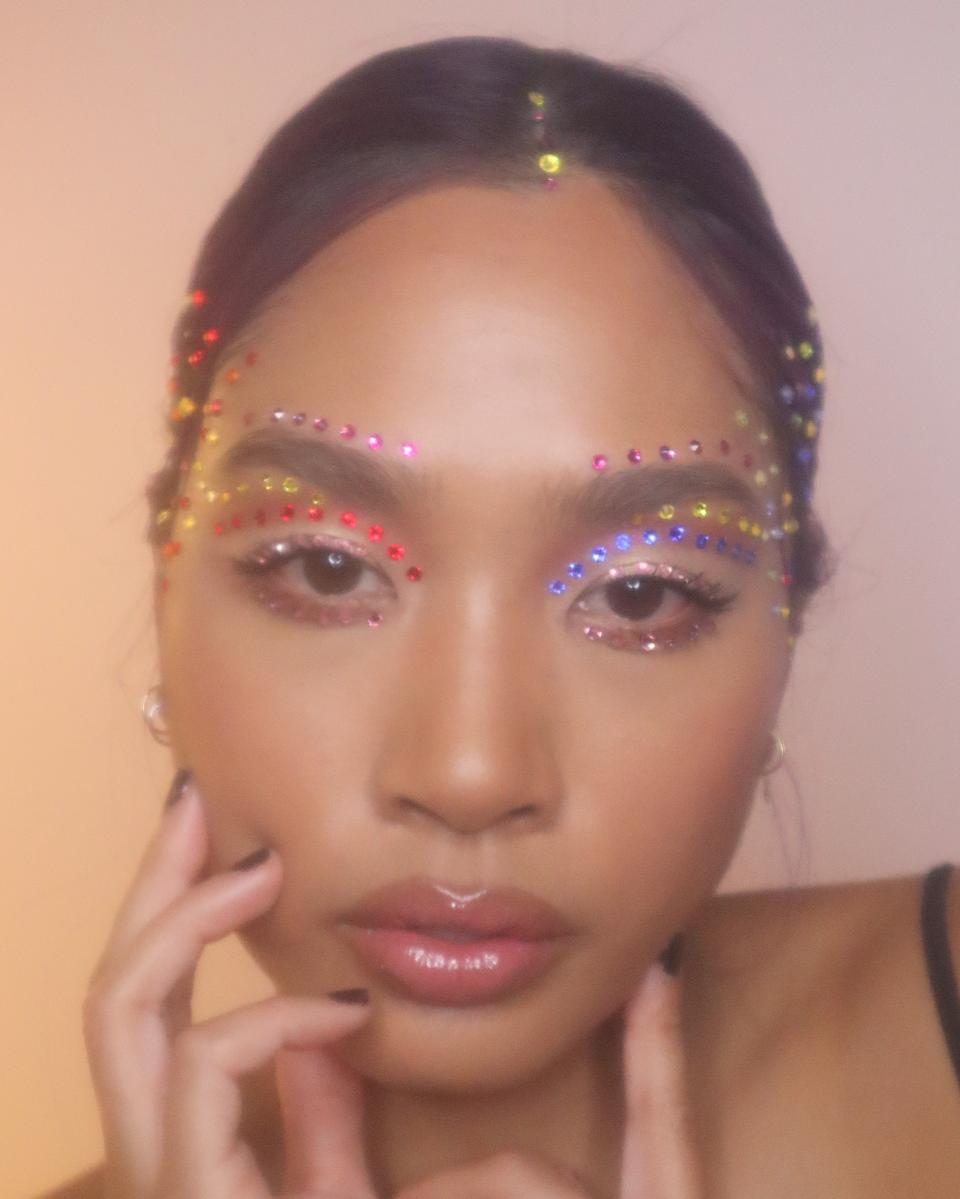
The Raoul Alejandre and Alexa Demie Inspired Look
Step 1: Hair
I really wanted to recreate Raoul Alejandre and Alexa Demie’s first public collaboration on Instagram for the holiday season! It really felt like a Euphoria 2.0 look. I am no hair expert by any means! However, from what I see Raoul pulled Alexa’s hair back in a sleek style and styled some of her baby hairs in the front. I started by creating a middle part in my hair (the best I can with my widows peak), and I pull it back with a hair tie.
Step 2: Foundation Part 1
When I’m doing a matte look like this, I don’t like to use just one foundation shade because my forehead is a few shades darker than the rest of my face. If I use one shade (darker or lighter) all over my face it would either make me look washed out or that “I-don’t-know-how-to-blend-my-makeup” type look!
That is why I am using a darker foundation on my forehead, and I’ve been loving the Milk Makeup Flex Foundation in Caramel. I spread it across my forehead and on the perimeter of my face to blend in with the rest of my makeup. I’m leaving it unblended until I put on the second foundation shade on.
Pro Tip: Moisturize if you’re more on the drier side. My current favorite is Glossier’s Priming Moisturizer Rich.
Step 4: Foundation Part 2
For the next part of the foundation, I matched the bottom half of my face with two different foundations: Revlon Colorstay Makeup for Combination/Oily Skin in Fresh Beige and Flesh Beauty Pure Flesh in Cookie. I use a pump of each foundation and spread it all over my face with my fingers. Then, I blend all of the foundations together so everything is seamless and “natural” looking.
Also, I used the KKW Creme Highlighter on my lids as an eyeshadow primer. I love this over a traditional eyeshadow primer because I have really pigmented eyelids that are susceptible to dryness. It also allows the eyeshadow to hold on to the lids more smoothly.
Step 5: Eyeshadow
The eyeshadow in the photo is the softest cut crease I have ever seen! I went straight into the crease itself and I used a couple shades from the Anastasia Beverley Hills Jackie Aina Palette: Edges, Credit and Ginger (love the shade names!). I don’t have a crease so I am creating one where I would have one (you can feel with your finger where your eyeball meet your brow bone). Then, I’m going to fade out the cut crease outward to create a “wing” effect. Then, I’m reestablishing the lighter part of the crease with KKW Creme Highlighter in Dark. We want these two sides to stay separate.
Next, I’m adding a subtle shimmer in the eye look. I’m going back in the Anastasia Beverley Hills Jackie Aina Palette with the shade Wiggalese (at the base of the crease) and Soleil on the lid.
Step 6: Rhinestone Mania
Maddy from Euphoria was known for her rhinestones and boy did this get revived in the best way in this look! To make sure they shine the brightest in any light, I went with variations of Swarovski Flat Back Crystals. Red is the color story on one side, and blue is the color story on the other. All the other color choices were ones I felt would compliment them (mostly yellow, orange, green and fuschia). Again, I used the Duo Adhesive Lash Adhesive Brush On Clear and Benefit Cosmetics Groomer Tweezer & Brush to apply them, following my eye contour and making sure each rhinestone was evenly spaced out. When applying it to my hair, I applied the glue on the gem itself and placed it with my fingers.
Song: Take It Easy by Ryan Little via Hello Thematic
Originally Appeared on Teen Vogue

