How to Thin Latex Paint
- Oops!Something went wrong.Please try again later.
We may earn revenue from the products available on this page and participate in affiliate programs. Learn More ›
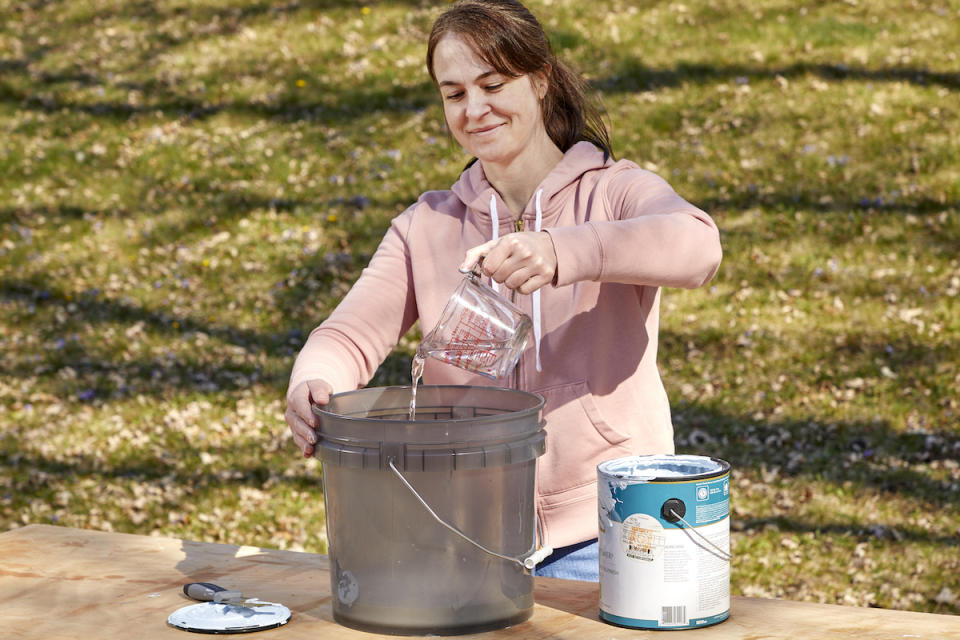
Thanks to its easy clean-up and short drying time, latex paint has a leg up over oil-based paint for easy weekend projects. But the water-based product also has a downside: It tends to thicken when stored without an airtight seal, at below-freezing temperatures, or for an extended period of time. The consistency change–which occurs because heavy paint particles settle at the bottom of the can while the solvent rises to the top–is problematic for two reasons. First, gooey paint won’t readily work with rollers, brushes, and sprayers. Second, it looks uneven and bumpy when applied to a surface. Although commercial paint thinners can help loosen up your latex paint, there’s a quick and easy way to salvage the can yourself with a few household products. Keep reading for how to thin latex paint to the perfect consistency for your next paint job. Tools & Materials Bobvila.com may earn a commission from purchases made through these links. 3-in-1 painter's tool Flathead screwdriver Dust mask Work gloves Paint stir sticks Paint trays Paper plates 5-gallon bucket Empty gallon-sized paint can Step 1: Ready your work area. Ventilation is a must when handling paint due to the potency of the fumes, so carry your latex paint can and supplies into a well-ventilated room or outdoor space. Open the paint can on a sturdy work surface. Take care not to bend the lid so much that it won’t reseal completely—a lid that doesn’t close properly will affect the quality of your paint if you intend to save the excess. The best way to do so is to open using a 3-in-1 painter’s tool. If you don’t have one, though, position the flathead end of the screwdriver between the lip of the lid and the rim of the can. Lever the handle down gently and, rather than pry the whole lid off in one go, turn the can so that the screwdriver can break the seal on all sides and slowly drive the lid open. Remove the lid and set aside. Step 2: Evaluate the paint and determine if it needs to be thinned. Photo: Tom Fenenga for Bob Vila First determine if the paint needs to be thinned. Donning a dust mask and protective gloves, dip a stir stick into the paint for a few seconds, then remove it and hold it over a paint tray or paper plate. If the paint drizzles off of the stir stick in an even flow with the consistency of heavy cream, it’s ready for application. Thinning it further will lead to messy application and inadequate coverage of the surface. If, on the other hand, the paint sticks to the stir stick, or if it comes off of the stick in uneven globs, you should thin it before use. Continue onto the next step. Step 3: Add water. Photo: Tom Fenenga for Bob Vila Pour all of the paint from the can into a clean five-gallon bucket, and add a half-cup of room temperature water for every one gallon of paint. Then thoroughly combine the paint and water with a stir stick, using a combination of upward and downward spiral motions. Step 4: Evaluate the paint’s thickness. Photo: Tom Fenenga for Bob Vila Remove the stir stick from the paint can and hold it over a paint tray or paper plate. If the paint readily drizzles off of the stir stick, it’s ready for application. If the paint still comes off in globs, add an additional ounce of room temperature water to the bucket and then mix the paint again with the stir stick. Keep adding water, one ounce at a time, until the paint reaches the consistency of heavy cream. Perform the stir stick test to check for the desired consistency. Step 5: Pour paint into a new container. Photo: Tom Fenenga for Bob Vila Pour the paint from the bucket into a clean empty paint can, then proceed with your painting project as usual. Step 6: Store the paint properly. Before resealing the lid of the can at the end of your do-it-yourself project, add an ounce of water over the top of the paint to keep it from drying out or forming a skin. Store the can at above-freezing temperatures in a dry place without wild temperature fluctuations, and make sure it’s protected with an airtight seal. Remember that the useful lifespan of an opened can of latex paint is two years.

