The Terrified Beginner's Guide to Deep-Frying a Thanksgiving Turkey
Deep-fried turkey is a delicious, celebratory way to cook your Thanksgiving meal. Other pluses: Fried turkeys cook twice as fast as traditional roasted turkeys and also free up the oven for essential side dishes. And with frying, you get to sit outside and enjoy the brisk autumn air while the turkey cooks.
If the idea of a vat of hot oil has you a little nervous, you’re not alone. Maybe you’ve even heard a horror story about your friend’s cousin (it’s always the cousin, right?) who tried to fry a turkey and burned down the family boat house. But worry not! Together we will walk through all the essential steps for safely deep-frying a turkey at home.
Yes, You Can Deep-Fry a Turkey!
With the right equipment; a thawed, brined, and super-dry turkey; and a safety plan in place, you can make the tastiest, fastest-cooking turkey you’ve ever had. Still feeling nervous? Just remember the three P’s to a successful deep-fried turkey: Be prepared, stay present, and don’t panic.
Here’s what you’ll learn in this guide:
First, Here’s Where to Set Up Your Deep-Fryer
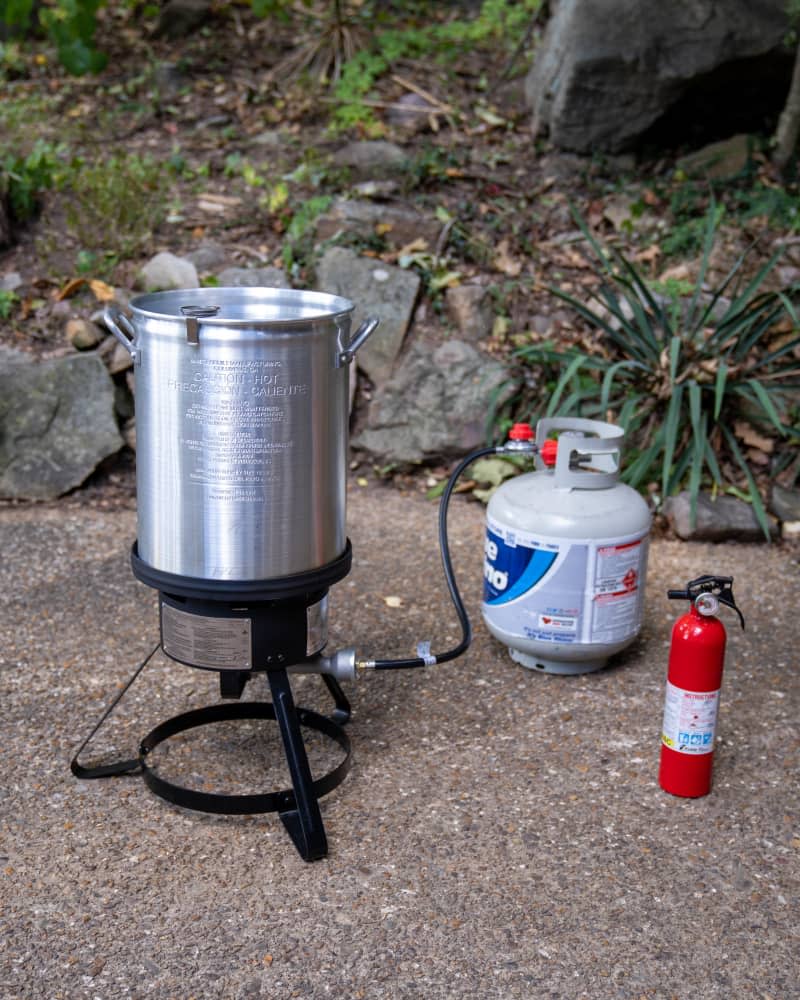
Frying a feast-size turkey (for this recipe, a 12- to 15-pounder) requires that you have both a very large pot and fryer burner, as well as plenty of space to safely fry outside. Choose a generous outside space on level pavement or asphalt at least 10 feet away from vehicles, decks, trees, and structures. Do not deep-fry under a carport or canopy, even if it’s rainy or snowy. In fact, never deep-fry if rain or snow is expected in the forecast.
Essential Tools for Deep-Frying
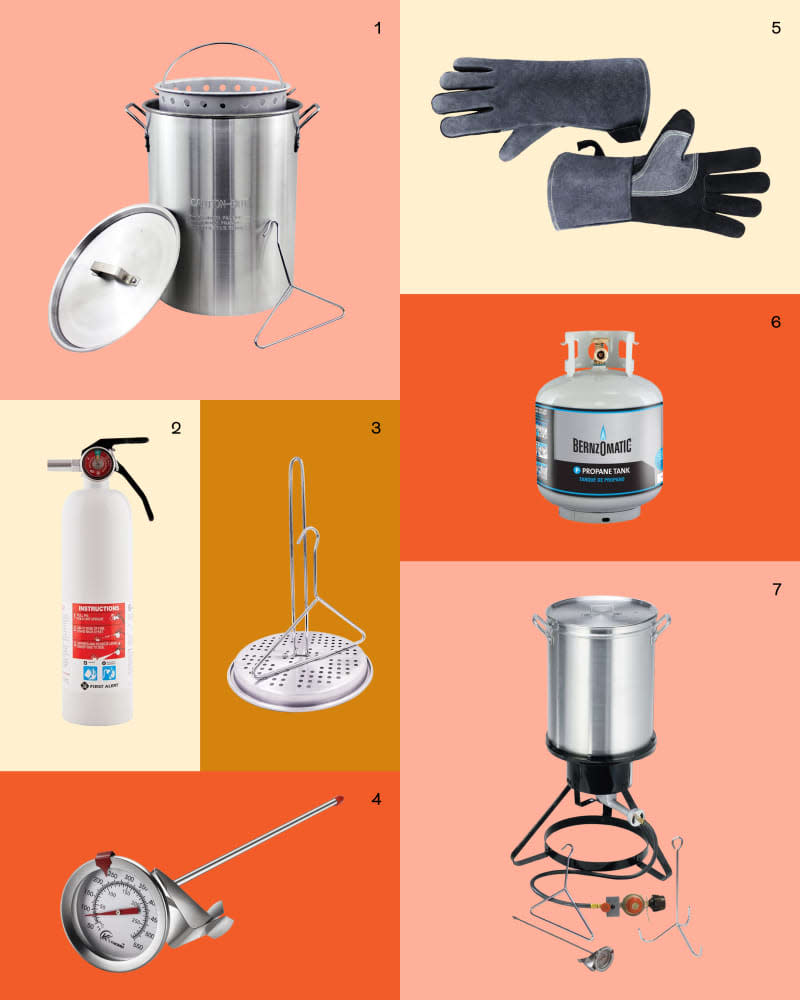
Once you’ve determined where to fry your turkey, you’ll also need to gather the following equipment. Most can be found at home-improvement stores like Ace, Home Depot, or Lowes.
Poultry fry lifter, $23.90
Long-stem fry thermometer, $12.99
Heat-resistant gloves, $20.98
You can order most of the essential fried turkey equipment online. Be sure to unpack your equipment as soon as you can. You don’t want to discover a dented pot or missing equipment on Thanksgiving morning. In addition to the essentials, you’ll use a few things you already have in your kitchen.
Probe thermometer
Long-stemmed lighter
Paper towels
Heavy-duty aluminum roasting pans (for transporting the raw and finished turkey inside and out)
Safety Tips for Deep-Frying a Turkey
In addition to having enough space and the correct equipment for frying, there are a few other watch-outs when deep-frying a turkey.
Don’t overfill the pot with oil.
A 30- to 34-quart deep-fry pot is perfectly sized for a 12- to 15-pound turkey. Too small a pot or too large turkey and you risk hot oil spilling over the sides of the pot and catching fire — this is the primary cause of most deep-fried turkey disasters.
To determine how much oil your specific pot and turkey need, when you take your turkey out of the freezer to thaw, grab the deep-fryer pot and do a little experiment.
Set the turkey in the pot and cover it with water, keeping track of how much water you’re adding. (A quart-sized measuring cup is perfect for this.) If the turkey floats a bit, press it under the water and make sure that the bird is covered by an inch of water and that you have 3 to 4 inches from the top of the water to the top of the pot.
After you remove the turkey from the water, use a Sharpie to mark the height of the water (this will be the oil fill line) and note the total amount of water you needed, which will help you figure out how much oil to buy.
Make sure your turkey is completely thawed and very dry.
Moisture, especially ice crystals, is your number-one enemy when deep-frying a turkey. Be sure to thaw your turkey several days in advance — at least a day in the fridge for every 4 to 5 pounds of turkey, adding an additional day for dry brining. After thawing and at least 1 day before frying, remove the turkey from its packaging and check for ice crystals. Be sure to check the turkey’s cavity. If the turkey cavity is still icy, this is the only time you could rinse out ice safely. After unwrapping, pat the turkey very dry with paper towels inside and out. Season the turkey with kosher salt and then let it absorb the salt for at least 24 hours in the fridge. If space allows, leave the turkey uncovered, which helps dry the turkey even further. Pat the turkey dry again just before frying.
Turn off the burner and lower the turkey into the oil very slowly.
On the big day, when your oil is hot enough for frying (and you’ve taken the chill off the turkey), you’ll want to be prepared to lower the turkey into the oil (wearing your heat-resistant gloves) with control. As an extra precaution you can turn off the fryer burner while you lower the turkey in.
Lowering the turkey into the oil is going to be a bit nerve-wracking if you’ve never done it before — the oil begins to bubble and rise as soon as the turkey is lowered in. It is important to take your time and not panic. If anything seems wrong (oil is spilling over the sides, etc.), don’t drop the turkey and hope for the best — instead pull the turkey out, walk away, and gather yourself. Dropping the turkey can result in splashed oil burns (at best) or fires (at worst).
Always be present and have a fire extinguisher nearby.
An under-appreciated benefit of frying the turkey is hanging out outside from the time you heat the oil until the turkey is done cooking. (This is a good way to get a break from the hot kitchen or to avoid your family if the holidays are stressful!) If you need to run inside, ask another adult to keep an eye on the fryer. And always make sure your fire extinguisher is nearby and that you know how to use it. Avoid drinking until the frying is done, too. A beer after the turkey is done frying is well-deserved.
The Best Oil for Deep-Frying a Turkey
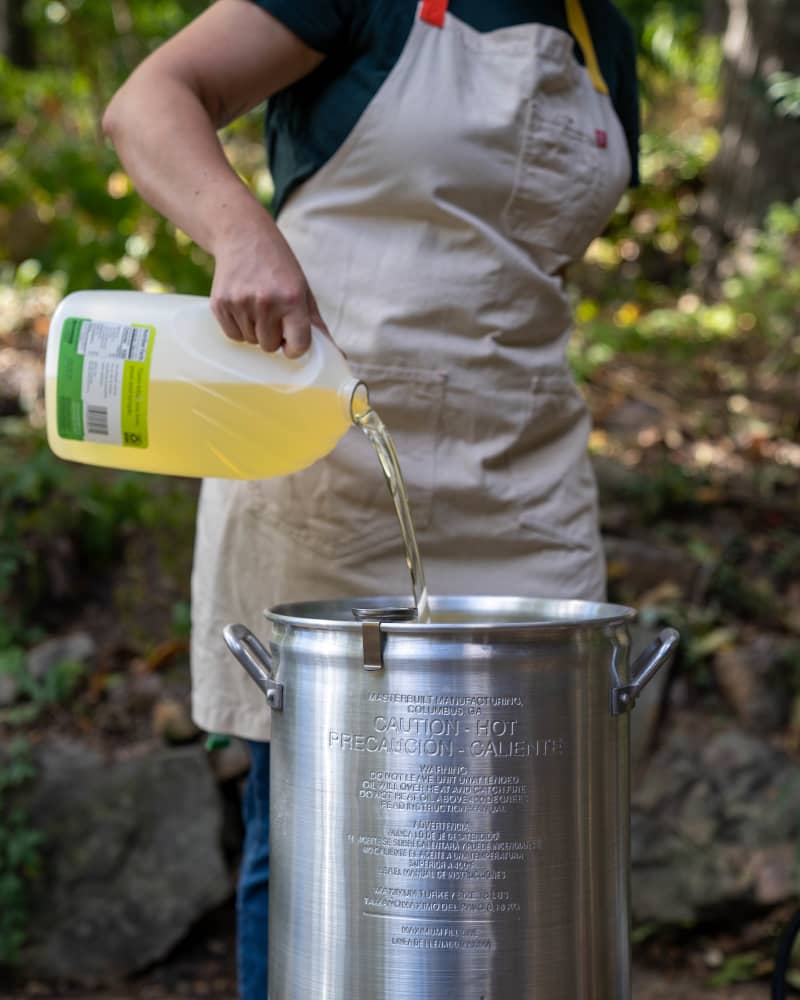
Outside of the equipment, the frying oil is going to be your biggest expense, so you want to be confident that you’ve got the right oil for the job. For deep-frying, peanut or canola oil are the best choices. Both have a high flash point, which means they are less likely to catch fire if they boil over. These oils also have high smoke points, which is helpful if your oil goes above 400°F.
Bonus: Both peanut and canola oil can be found in five-gallon containers for easy pouring. Both oils are easy to find at most grocery stores and even some home improvement stores and cost between $15 and $20 a gallon depending on the brand.
Why You Should Dry Brine a Deep-Fried Turkey
Remember: Moisture is our enemy when deep-frying a whole turkey. Therefore, dry brining is perfect for deep-fried turkeys because it helps dry the skin and lock in moisture. The result? Safer frying, super-crispy skin, and ultra-juicy meat.
Our fried turkey’s dry brine calls for a full quarter-cup of salt, which might seem like a lot. However, this amount of salt is needed to help cut through the oil and help the turkey taste well-seasoned.
How Long to Deep-Fry a Whole Turkey
This is the best part of deep-frying a turkey. Instead of the usual 13 to 15 minutes, fried turkey takes just three and a half minutes per pound. A ten-pound turkey will take 35 minutes; a 12-pound turkey about 42 minutes.
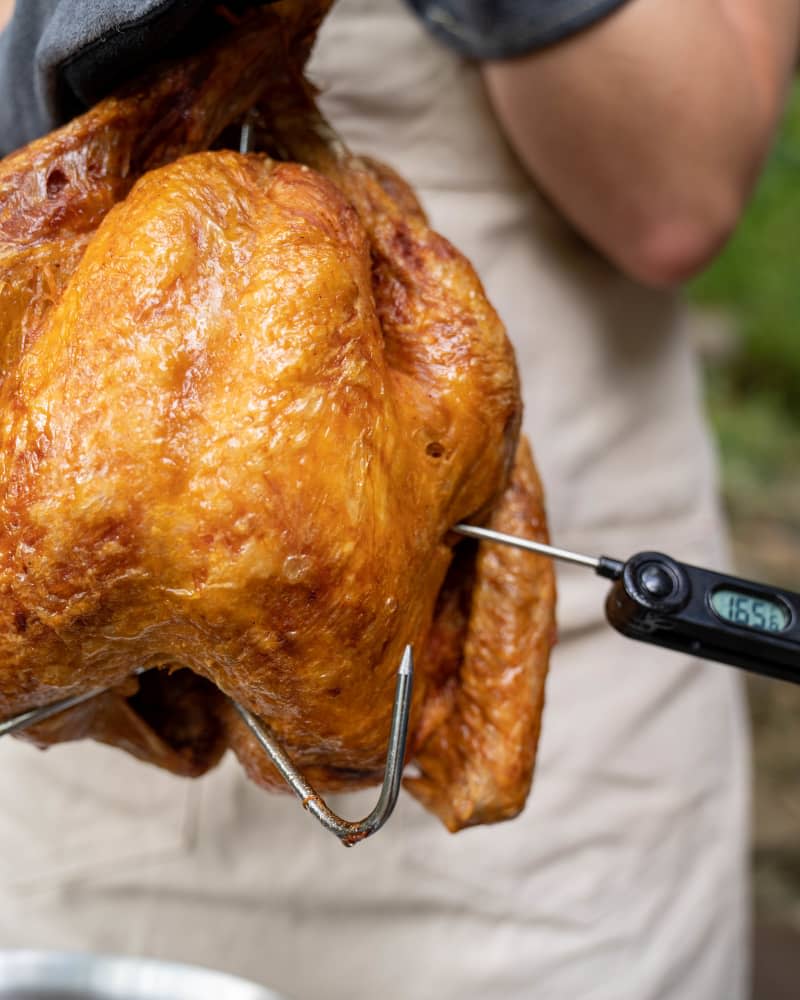
Begin checking the turkey for doneness around 30 minutes. Deep-fried turkey is done when the thickest part of the thigh reaches an internal temperature of 165°F. Testing doneness might require an extra set of hands — one to lift the turkey from the oil and another to use a digital probe thermometer to get a temperature reading. Be sure the fryer burner is turned off before handling the turkey. When your turkey is cooked, let it rest for 20 minutes before carving.

Other Foods You Can Deep-Fry (Besides Turkey)
While the turkey rests, you can turn off the burner, cover the pot, and let things cool down. Or you can have a little fun and fry one more thing. Any of these foods would be delicious after a plunge into your deep fryer.
French fries
Okra
Corn on the cob
Onion rings
Hush puppies
Having fried dozens of turkeys over the years, our favorite thing to fry after are classic french fries. Skip homemade fries (you’ve done enough) and use your favorite frozen fries instead. Just be sure they are also ice crystal free by tossing them in a colander to loosen any ice or small bits of potato that might burn. Fry for 8 to 10 minutes and serve them alongside your turkey.
Deep-Fried Turkey Recipe
Because turkeys cook twice as fast as deep-fried (than when traditionally roasted), you will never eat juicier, tender meat wrapped with delicous crackling skin.
Prep time 1 hour 10 minutes
Cook time 35 minutes to 55 minutes
Serves10 to 12
Ingredients
1
(12- to 15-pound) frozen whole turkey
1/4 cup
kosher salt
4 to 4 1/2 gallons
peanut or canola oil
Equipment
Large disposable aluminum foil pan or roasting pan
Aluminum foil
Disposable latex gloves, optional
Cutting board and chef’s knife
Paper towels
Instructions
Show Images
5 to 6 days before frying, figure out how much oil you’ll need. Before you fill your pot with oil, do a test run with water. Fill a 30-quart pot halfway with water, measuring with a quart size measuring cup if possible. When the pot is half filled with water, place the frozen turkey (still in its packaging) into the water. Add more water if needed to cover the turkey. Note the number of quarts of water you used to fill the pot and cover the turkey by about 1 inch — that’s how much oil you’ll need on fry day (don’t use more than 4 1/2 gallons). After you remove the turkey from the water, you can also mark the outside of the pot with a permanent marker to note the fill line for frying.
5 to 6 days before frying, thaw the turkey. Thaw the turkey in the refrigerator in a pan or lined empty refrigerator drawer to catch any moisture. The turkey must be completely thawed to prevent the oil from boiling over during frying. A frozen turkey needs about 24 hours thawing time for every 5 pounds of turkey.
2 to 3 days before frying, dry brine the turkey. Remove the turkey from its packaging. Remove the turkey's neck and giblets, or save for another use. Use a pair of kitchen shears to remove any excess skin and the turkey’s tail nub. Pat the cavity and the outside of the turkey dry with paper towels and place breast-side up on a cutting board or rimmed baking sheet. Season the turkey inside and out with 1/4 cup kosher salt. Gently pull up the skin covering the breast meat and season the breast and thigh meat as well — you may not use all the salt. Refrigerate uncovered 24 to 36 hours.
1 hour before frying, let the turkey sit at room temperature. Let the turkey sit at room temperature for 1 hour before frying. Meanwhile, prepare for frying and heat the oil.
Prepare the fryer pot and burner. Find a space outside that is flat and has plenty of space around it. Concrete is best if you have a driveway or front walk. Set up a 20-gallon propane tank as far from an outdoor fry burner as the hose will allow. Make sure the hose is connected from the propane tank to the burner and that these are screwed as tightly together as possible. Set the pot on the burner (make sure it is dry inside) and clip on a long-stem fry thermometer. Fill the pot with enough peanut or canola oil to the previously noted level. Make sure you have a probe or meat thermometer for the turkey, heat resistant gloves, fire extinguisher, and pan for setting the fried turkey in.
Heat the oil. Turn on the burner by opening the valve on the propane tank completely and setting the valve on the hose or burner to its high setting. Light the burner and heat the oil to 375ºF. This will take about 1 hour — possibly longer in cold conditions. Someone should be outside monitoring the oil while it heats.
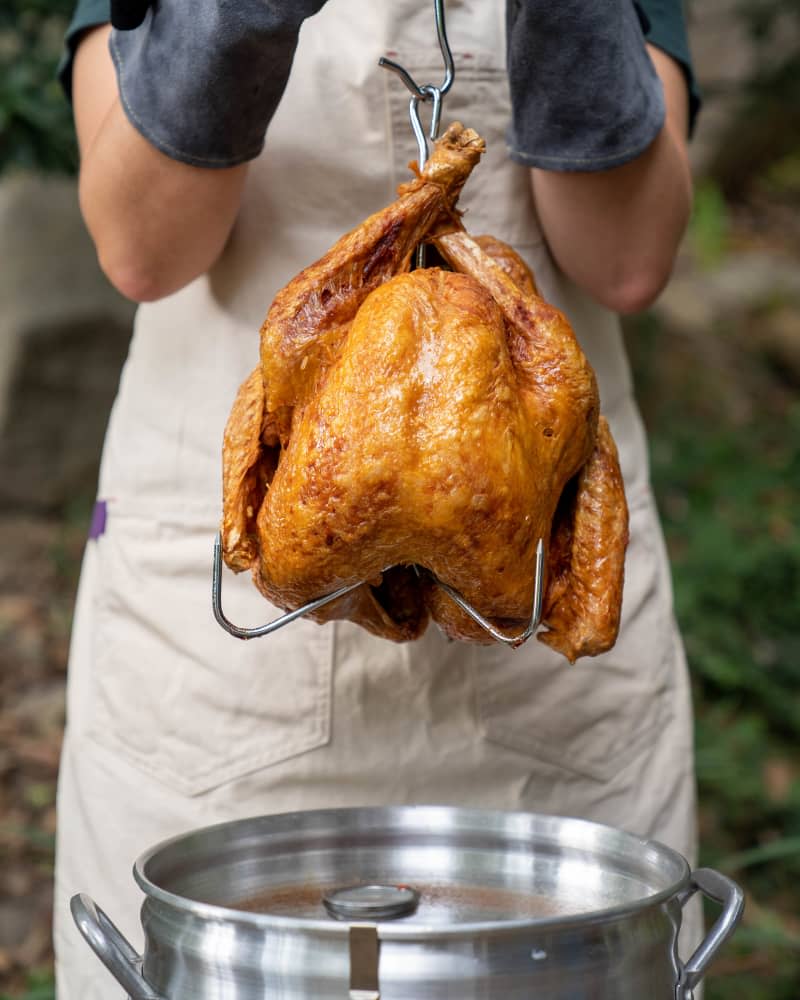
Prepare the turkey for frying. When the oil is almost ready, pat the turkey very dry again inside and out with paper towels. Remember any water or ice on the turkey creates a hazard for frying. Insert the base of a poultry lifter into the turkey — go through the neck opening so that the breasts of the turkey will be lowered into the oil first. If you like, you can tie the turkey's legs together with kitchen twine.
Turn off the burner and lower the turkey into the oil. When ready to fry, turn off both the burner and the propane tank. Put on heat proof gloves and use the poultry lifter hook to carefully and very, very slowly lower the turkey into the hot oil. You want to do this slowly to prevent boiling over, it should take 1 to 2 minutes to lower the turkey. When the turkey is fully covered in the oil, with the lifter touching the bottom of the pot, release the lifter tool from the base.
SAFETY NOTE: If at any point the oil seems close to the edge of the pot — or you see flames under the pot — don’t drop the turkey. Instead, quickly remove it from the oil and move away to access the situation. If there’s too much oil in the pot, use a small saucepan to scoop out some of the oil a little at a time to reduce the amount.
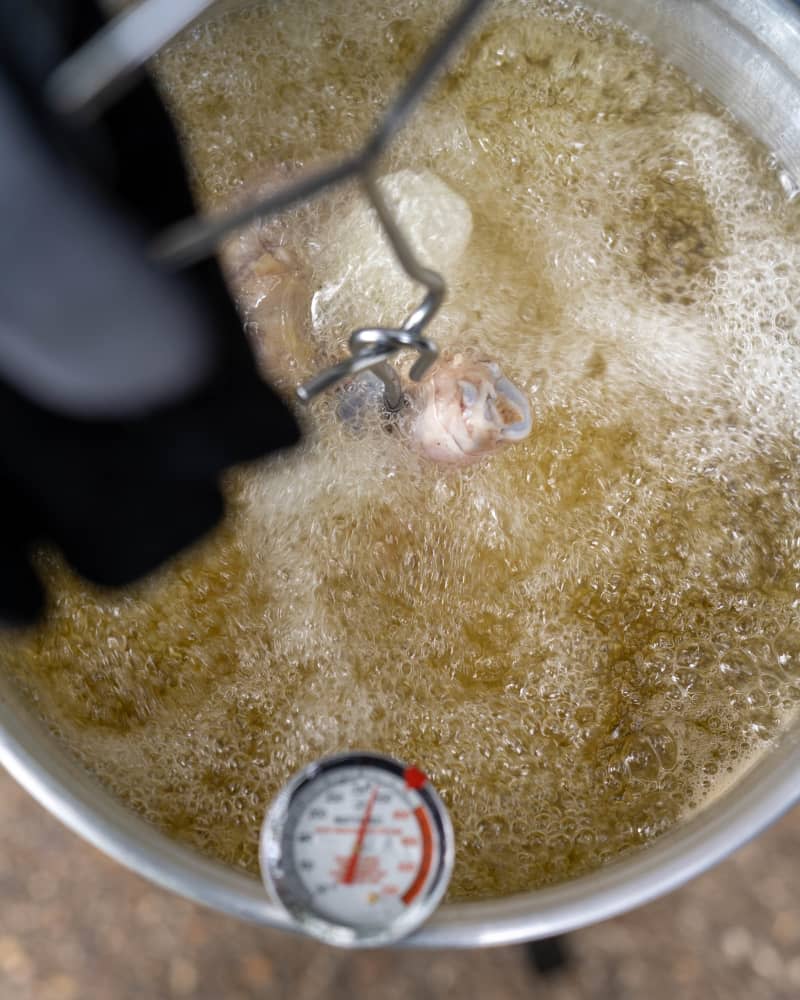
Fry the turkey. Turn the propane and the burner back on to high. The oil temperature will have dropped, so let it come back up to around 350ºF. Adjust the flame as needed at the hose or burner as needed, not at the propane tank. Fry the turkey for 3 1/2 minutes per pound of turkey. A 12-pound turkey will take about 42 minutes, a 15-pound turkey closer to 52 minutes. Again, someone should be present near the turkey at all times during frying.
Check the turkey for doneness and remove it. When the estimated frying time is up, turn off the burner and propane again. Put your heat resistant gloves back on and use the lifter tool to raise the turkey out of the oil. Have a second person insert a probe thermometer into the thickest part of the thigh not touching bone - the turkey is ready when it registers at least 165ºF. (If the turkey is not ready yet, slowly place the turkey back in the oil, turn the burner back on, and check every 10 minutes.) Place on a large disposable aluminum pan or roasting pan. (See Recipe Notes for clean up and oil disposal instructions.)
Rest the turkey for 20 minutes before carving and serving. Loosely cover the turkey with aluminum foil and let rest indoors for about 20 minutes. Carefully remove the turkey lifter as it may still be warm. Carve as desired or by following these directions: How to Carve a Turkey.
Recipe Notes
Cooking additional turkeys: If you plan to fry more than one turkey to feed a crowd, you may need to add more oil to the pot before you turn the propane then burner back on to heat the oil before each turkey. Keep in mind that the oil will take less time to heat up after the first turkey is finished, so have your next turkey ready by staggering its prep time (sitting at room temperature, patting dry).
Clean up and oil disposal: Before you carve the turkey, make sure to turn off the propane tank and burner. Do not attempt to move the pot of hot oil! Cover the pot and allow it to cool completely — this typically takes about 12 hours. After the oil is completely cooled, you can filter the oil through a strainer and return to your oil’s original containers. You can reuse this oil or find a local recycling program for it.
Storage: Leftover turkey can be refrigerated in an airtight container for up to 4 days.

