How to Strip and Repaint Wood Furniture Like a Pro

Use these steps for a freshly painted finish on wood furniture. After removing the existing paint or stain, you can customize it with a colorful new look.
Before you haul that old piece of furniture out to the curb or store it for the next garage sale, consider its potential. If you strip and repaint wood furniture, you can entirely change its look. This easy technique is also perfect for rehabbing inexpensive thrift store or flea-market finds. Removing the existing paint or stain makes way for a fresh finish on top. Go with a bright color for a focal-point accent piece, or update your furniture in crisp white paint for timeless appeal.
Before you begin, it's important to note that paint-stripping chemicals can be dangerous. Be sure to read the manufacturer's instructions carefully before starting this project. Follow our instructions on how to strip and paint wood furniture to make old pieces look new again.
How to Strip and Repaint Wood Furniture
Chemical strippers are not ideal for large projects. For cabinets or large furniture pieces, you might want to consider heaters to remove paint or hire a professional to tackle the project.
What You Need
Wood filler
Chemical-resistant gloves
Goggles
Paintbrush
Paint and varnish remover
Abrasive stripping pads
Mineral spirits
Sandpaper
Sander or sanding block
Painters tape
Stain-blocking primer
Paint
Polyurethane
Step 1: Prep Furniture
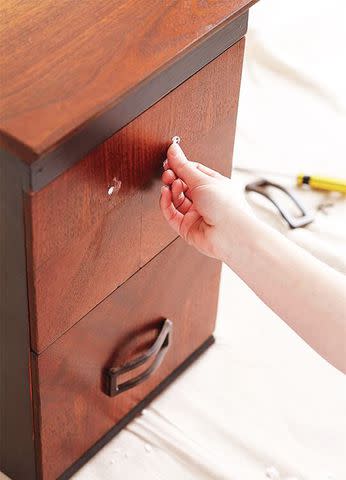
Remove all hardware from your wood furniture piece. Fill in any holes with wood filler, then lightly sand all surfaces that will be painted. You can also add furniture feet if desired.
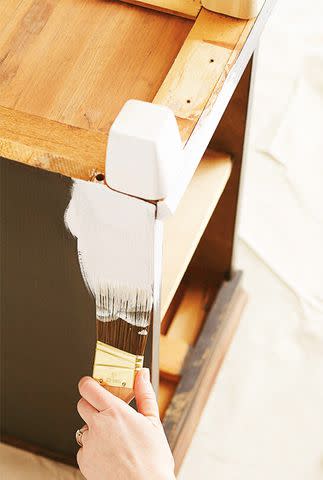
Step 2: Strip Paint from Wood Furniture
Before starting, outfit yourself with chemical-resistant gloves and goggles. Work in a well-ventilated area on a leak-proof drop cloth. Using a brush, apply a paint and varnish remover ($10, The Home Depot) to the areas to be stripped following the manufacturer's directions. To remove varnish from stubborn areas, such as turned legs, use abrasive stripping pads soaked in odorless mineral spirits ($9, The Home Depot).
Step 3: Sand Surface
Vigorous sanding after stripping produces bare wood surfaces. Always sand in the direction of the wood grain. Start with coarse-grit sandpaper to remove most of the paint, and finish with fine-grit sandpaper to achieve a smooth finish. Wipe clean with a tack cloth to attract dust and other debris.
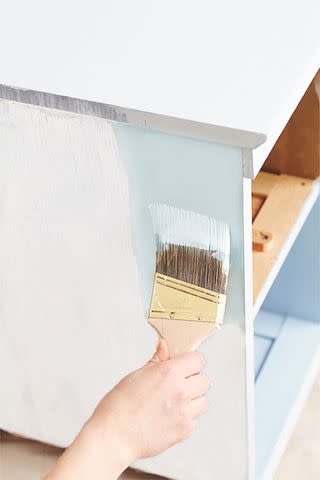
Step 4: Apply Primer
After sanding, use painters tape to protect areas you don't want to cover with color. Apply a stain-blocking primer and let dry before applying any paint. Be sure to apply primer and paint in thin coats and let dry thoroughly between coats. If desired, lightly sand between coats to minimize brushstrokes.
:How to Refinish a Dresser to Bring New Life to an Old Piece
Step 5: Paint Wood Furniture
For the best coverage, apply at least two coats of paint to your wooden furniture piece, letting the piece dry between coats. After the paint is completely dry, apply a coat of clear polyurethane ($37, The Home Depot) for a durable top coat. Finish your furniture makeover by adding new hardware, if desired.
false
