Start With a Dynamic Warmup For Better Workout Results
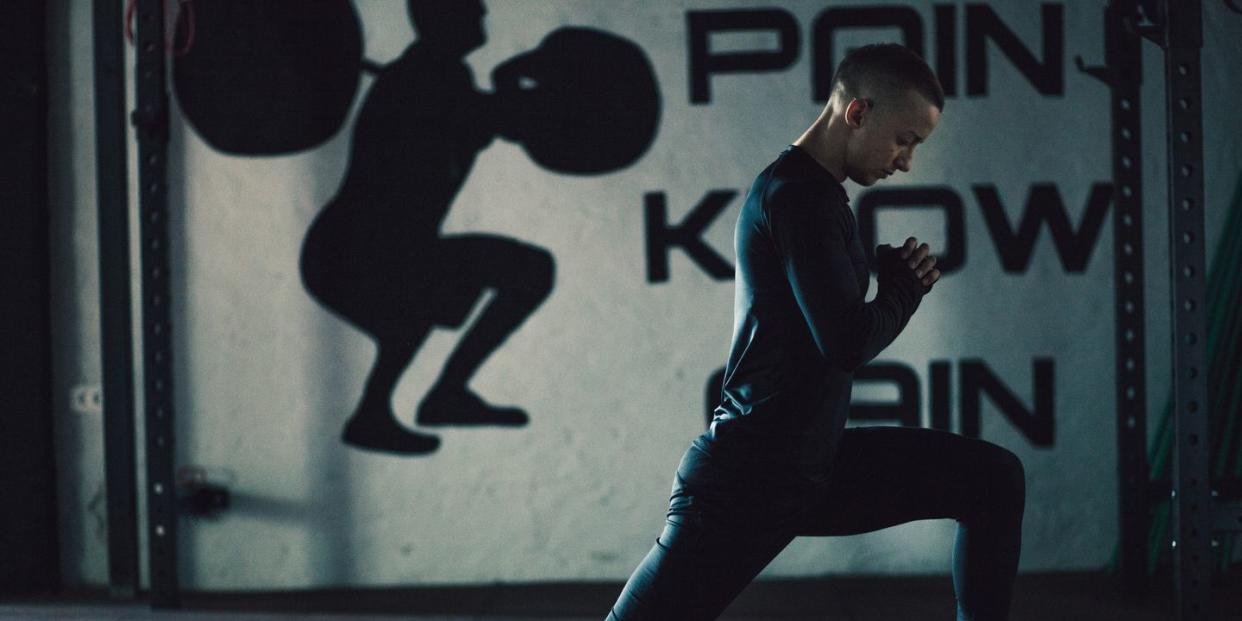
There was a time when a lifter would walk into the gym, do a few shoulder rolls to loosen up, crack his knuckles, and start bench pressing. That time is now past, and, for the record, those lifters probably all have shoulder injuries.
We get it-when you’re anxious to train, you don’t want to do a whole yoga routine before you get to touch a barbell. But, failing to warm up can cost you dearly, both in terms of the safety of your session and its effectiveness.
A dynamic warmup is one that has you moving in similar ways to the exercises you plan to perform, so it prepares you specifically for the tasks ahead. Other means of warming up-such as a light treadmill jog to break a sweat or static stretching (stretch a muscle and hold it)-can raise your core temperature and help you limber up, but they don’t fully prepare your muscles, joints, and nervous system to lift weights. A good dynamic warmup includes aspects of cardiovascular training, strength, mobility, and power, and can be done in just a few minutes-without draining your enthusiasm to lift or making you look foolish.
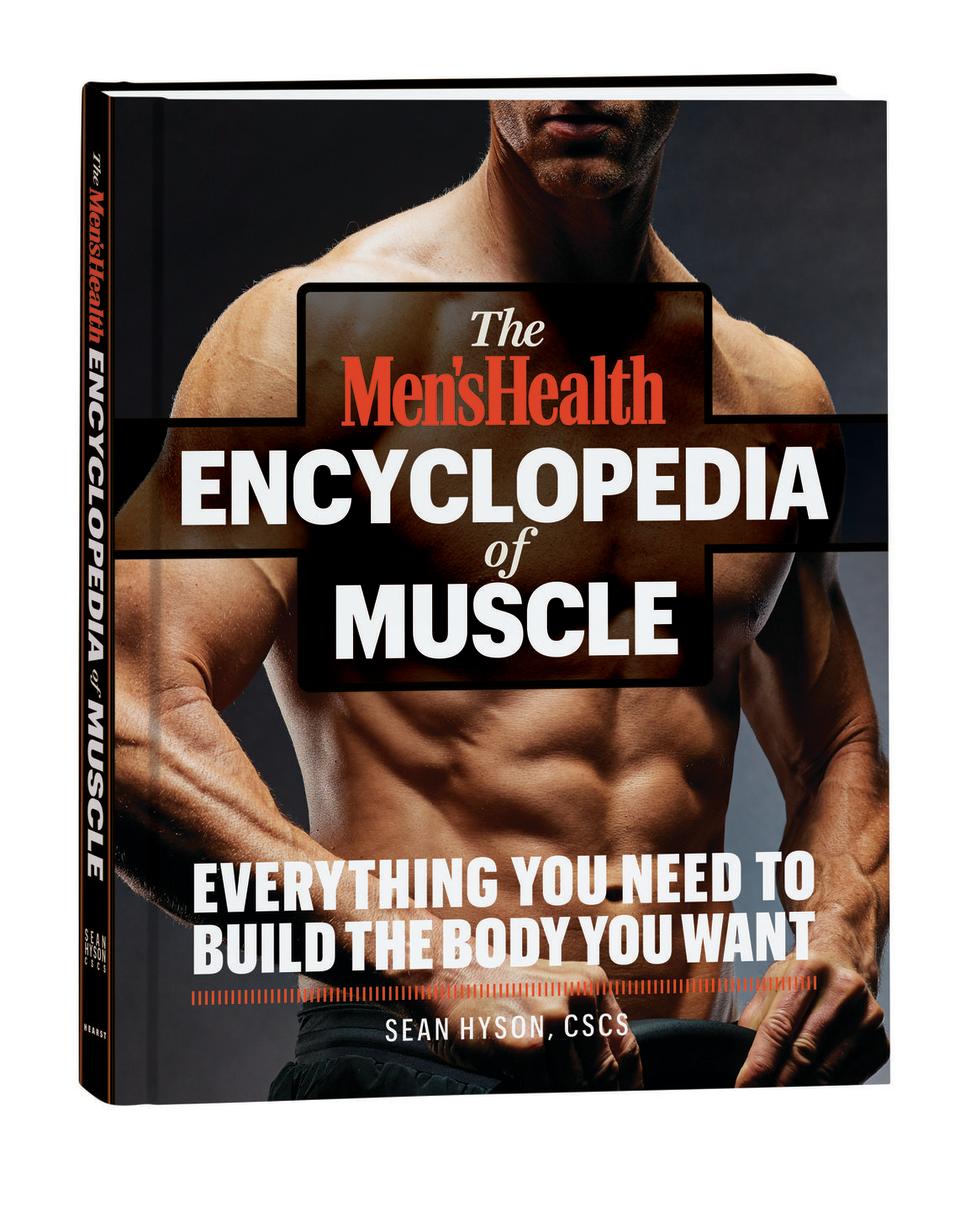
For a full compendium of fitness knowledge, check out the Men's Health Encyclopedia of Muscle. The volume is chock full of workout routines, helpful training tips, and definitions for just about every gym-related term you've ever wanted to know.
How to Do a Dynamic Warmup
If you can spare 5 minutes, go to the treadmill or exercise bike, and walk on an incline or pedal at a moderate pace. This is just to raise your core temperature and help you to sweat. “We have a greater capacity to move through ranges when the body is hot,” says trainer Sam Pogue. This is an especially good idea when you’re training first thing in the morning or on a cold day, but if you don’t have the time, or you want to go straight into warming up your muscles directly, find the stretching area or any other open space and pick up a foam roller or other self-myofascial release tool.
Begin rolling around your hips. Aim specifically for your tensor fascia latae, a muscle that lies on the side of your hip, extending halfway down the side of your thigh, and your piriformis, which lies behind your glutes, roughly halfway between the side of your hip bone and the inside edge of your butt cheek. You’ll know when you’ve found them, because they will be tender (especially your piriformis). According to Pogue, these muscles are “chronically tight” on just about everyone, due to excessive sitting, and they also play a major role in keeping the pelvis in the proper position during exercises, so it’s important to get them to relax and be able to move better before you begin training.
Next, roll out your mid back (thoracic spine). If you sit at a desk all day, it’s sure to be tight, and that restricts your ability to do a variety of movements safely and efficiently, including any pressing, pulling, or rotation you have planned for your workout.
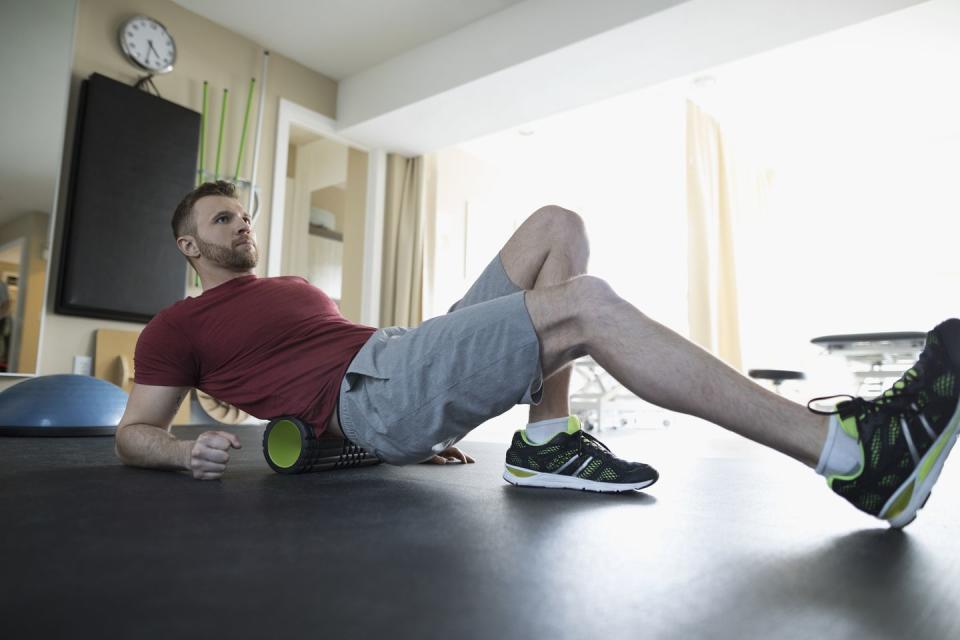
Roll the length of these muscles slowly, up and down, spending 30 seconds on each. Linger over any areas that feel especially tender, taking a deep breath and letting it out slowly, to encourage greater relaxation. If your hamstrings, quads, lats, or other areas are feeling particularly tight, you’re welcome to roll those out as well, but Pogue cautions that rolling has a relaxing effect on the body, down-regulating your nervous system into a parasympathetic state. This is the mode known as rest and digest-the opposite of fight or flight-in which your body wants to recover. In other words, in order to stay alert and amped to train, go easy on the rolling, and use it only to release tension in your tightest areas. Doing too much will take you out of the headspace needed to attack the weights, and can actually make you sleepy.
Move on to Mobility
At this point, you’re ready to move. The term mobility refers to your ability to control your body through the ranges of motion that are available to you in a particular movement pattern. It’s not the same as flexibility, which implies that you can take your joints through a certain range of motion, but not necessarily control your body in that range. Think of it this way: If you can squat down till your butt touches your calves with perfect form, you have great mobility; if your chest falls forward, your lower back rounds, and your heels come off the floor, you merely have some flexibility in your hamstrings. To develop mobility, you need more than stretching; you need exercises that force you to stabilize some parts of your body, while others move.
Pogue recommends the following ultra-minimalist mobility routine found in the Men's Health Encyclopedia of Muscle, which provides one drill per major joint complex. Not only do these exercises prepare you to go through the ranges of motion you’ll use in your workout but also they double as an assessment.

“Think of them as a way to check in, and see how your body feels,” says Pogue. Depending on how you’re moving and which movements feel smooth versus uncomfortable, you can customize your workout on the spot for the best results, while reducing the risk of injury. “It may be bench-press day, but, if you discover that your elbows feel like crap, you may want to use dumbbells instead, or avoid pressing entirely,” he says. You can also use this series before any cardio you do, and on off-days to improve mobility further.
Perform 5 to 10 reps for each exercise, unless otherwise directed. Begin every standing movement from a neutral position: Stand with your feet hip-width apart, a slight bend in your knees, and your shoulders back and down-think proud chest. Stand tall and actively reach for the floor with your fingertips. Tuck your tailbone so that your pelvis is parallel to the floor, and brace your core so that your ribs stay down (not flaring). Retract your neck so that your head is in line with your spine-your chin shouldn’t jut out.
The EOM Dynamic Warmup
Spinal Wave
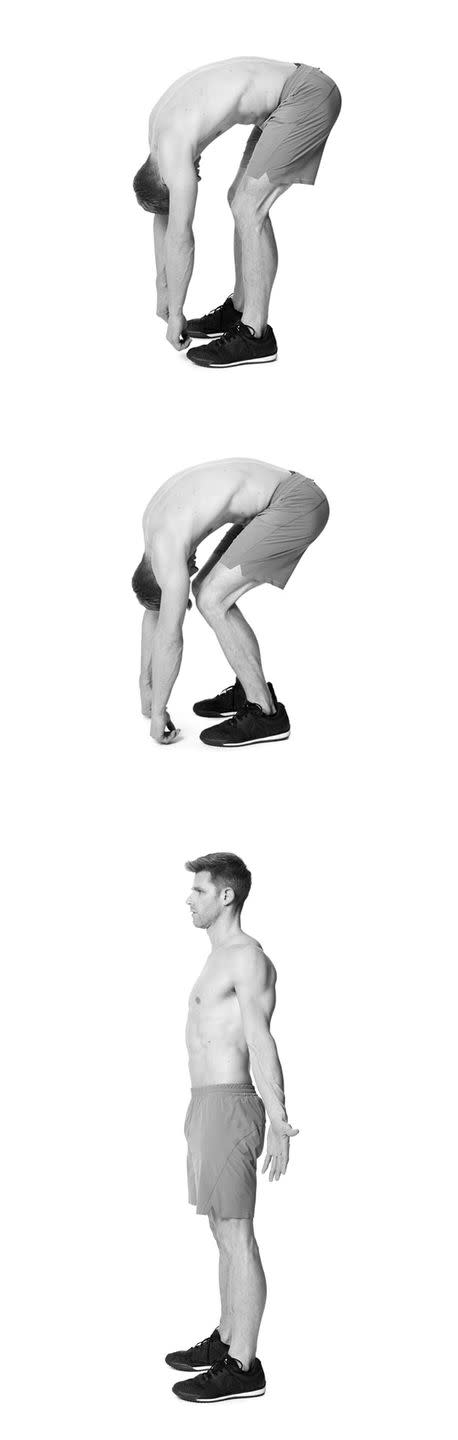
Fold forward at the hips, reaching for your toes. Let your head hang heavy for a moment. Push your knees forward and tuck your tailbone under as you roll back up to standing tall, extending your spine one vertebra at a time. Finish by extending your neck to look up. That’s one rep.
Neck Roll

Roll your head in big circles, being mindful to maintain the neutral position with the rest of your body at the same time. Do all your reps in one direction, and then switch to the other direction.
Overhead Arm Circle
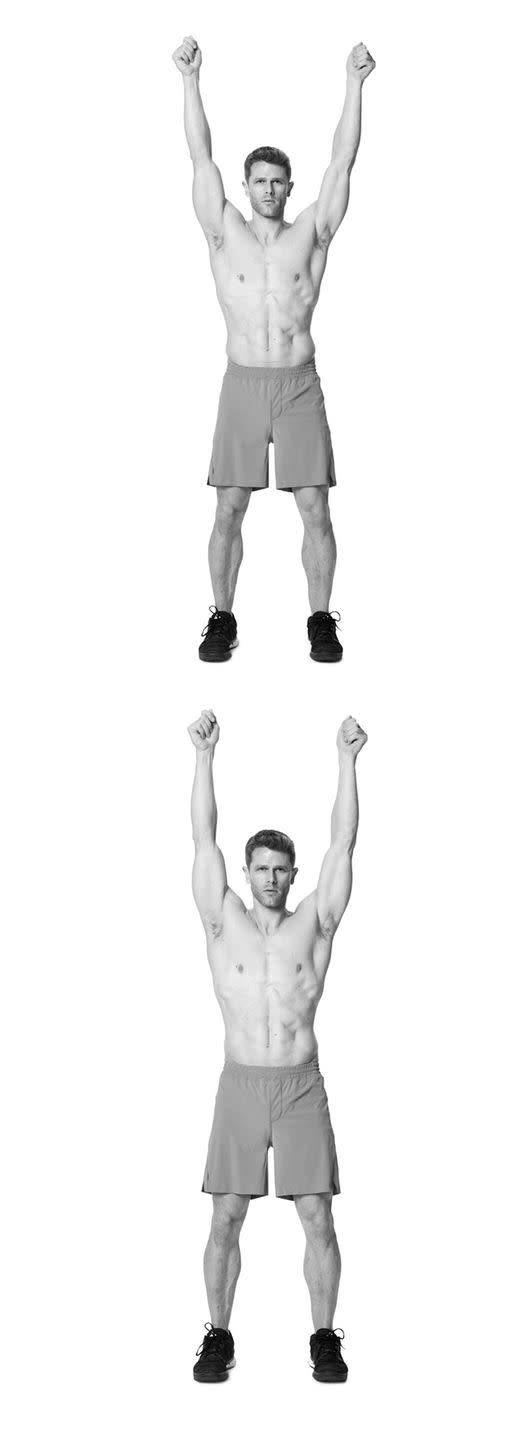
Reach your arms overhead with your thumbs pointing to the ceiling-imagine you have remote controls in each hand. Your ribs will want to flare, so keep them pulled down. Your elbows will want to bend, so keep them extended.
Begin making circles with both arms, as if you were a cowboy swinging a lasso. Spend 30 seconds circling in one direction, then switch directions. “These will burn,” says Pogue, and that’s just what you want. The goal is to tire out your upper traps a bit so that the lower traps, which help to hold your shoulders in a safe, stable position, can better activate during lifting. The upper traps get extremely tight from sitting at a desk and using a cell phone, and the circles go a long way toward restoring balance to your upper back-musculature.
Arm Screw
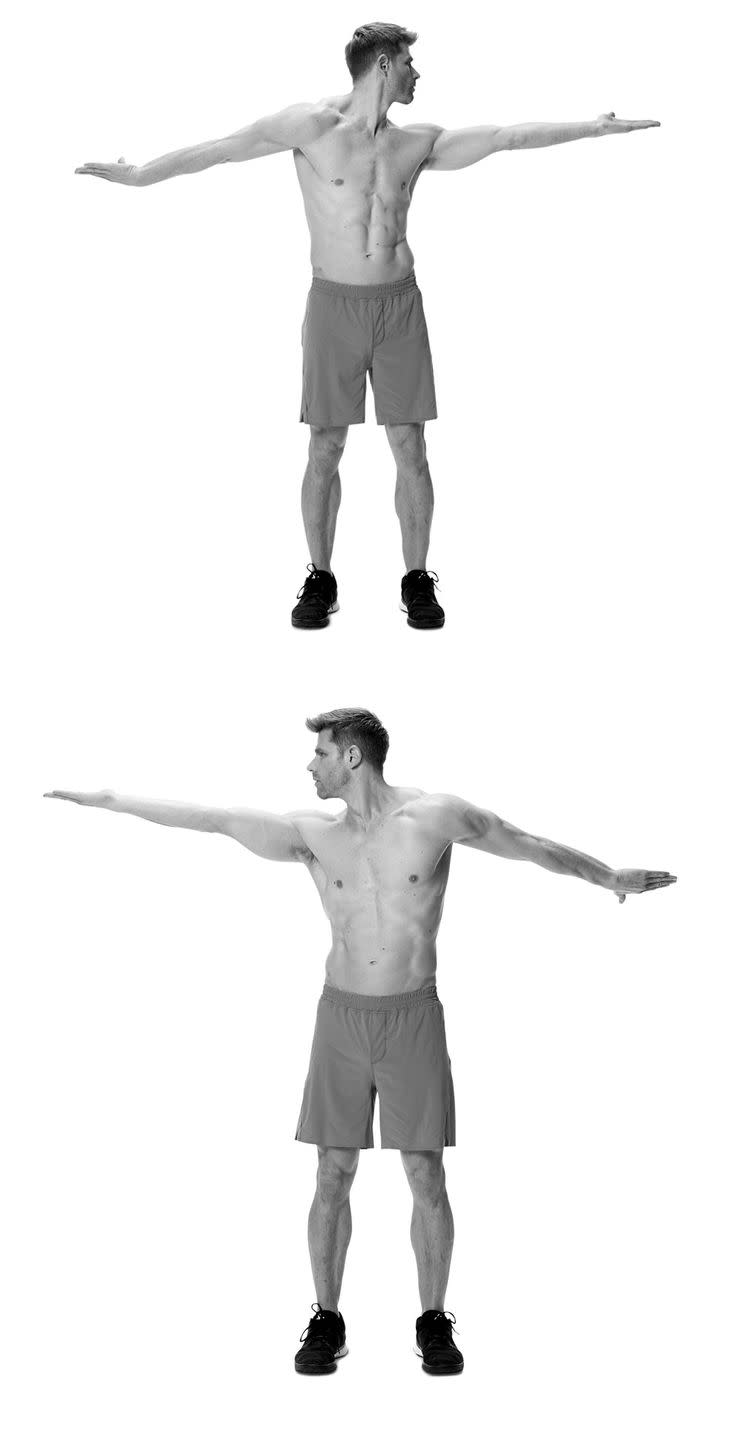
Reach your arms straight out to your sides. Twist one arm forward (counterclockwise), while you twist the opposite one backward, turning your head to look at the backwardly rotating arm. Switch arms. Keep reaching with your hands, imagining that you’re trying to hold two lengths of rope that are pulling you in opposite directions. Take a deep breath as you unwind the arms and change directions, and let it out as you twist. “Think about it like wringing out a towel,” says Pogue. You will feel your rotator cuffs begin to burn.
Elbow Circle
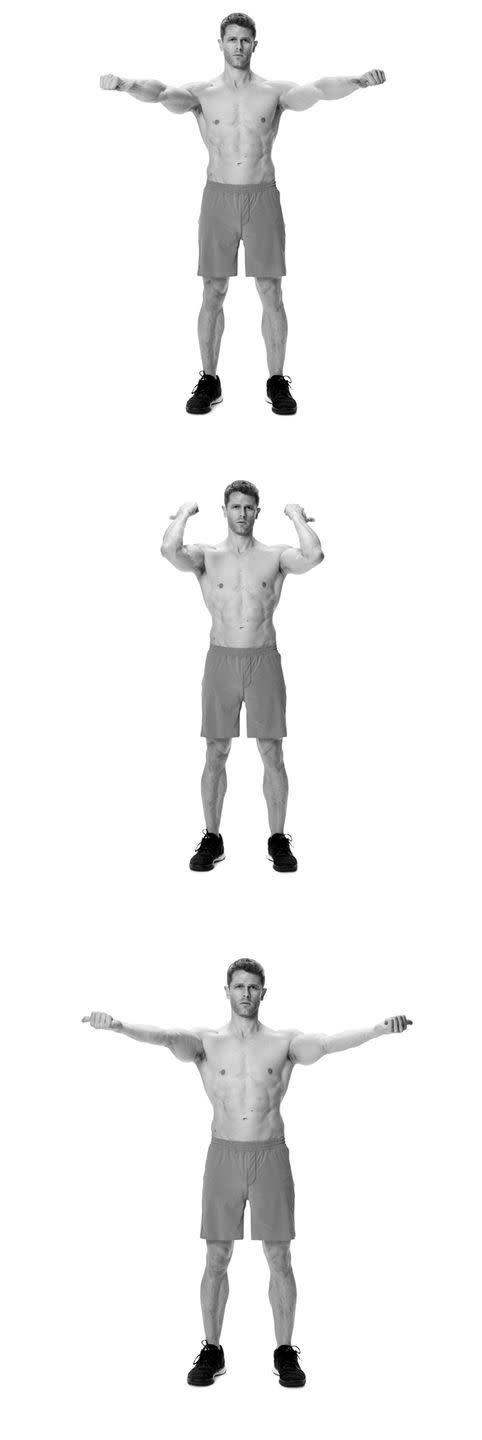
Reach your arms out 45 degrees in front of you while keeping your shoulders pulled back and down. Extend your thumbs as if hitching a ride. Begin making circles with your elbows, bringing your thumbs to point back toward your face, and then out away from your body. Do your reps, and then repeat in the opposite direction-remember to keep your chest proud.
The elbows bend and extend, so we don’t think to make circles with them, but when the fascia that acts on the elbow joints gets tight, as it often does with repetitive pressing, pulldowns, and rows, it can lead to elbow pain. “Your elbow doesn’t rotate, but the fascia around it does,” says Pogue, “and that fascia takes on a lot of load.” If you battle with tennis or golfer’s elbow, elbow circles can provide immediate relief.
Bent-Knee Swing

Hold the support beam of a power rack or some other sturdy object for stability. Keeping your pelvis level, swing one leg forward and back with your knee bent at 90 degrees. Go through your full range of motion in each direction, and keep the movement in one plane-don’t let your leg drift out away from your body. Repeat on the opposite leg.
Straight-Knee Swing
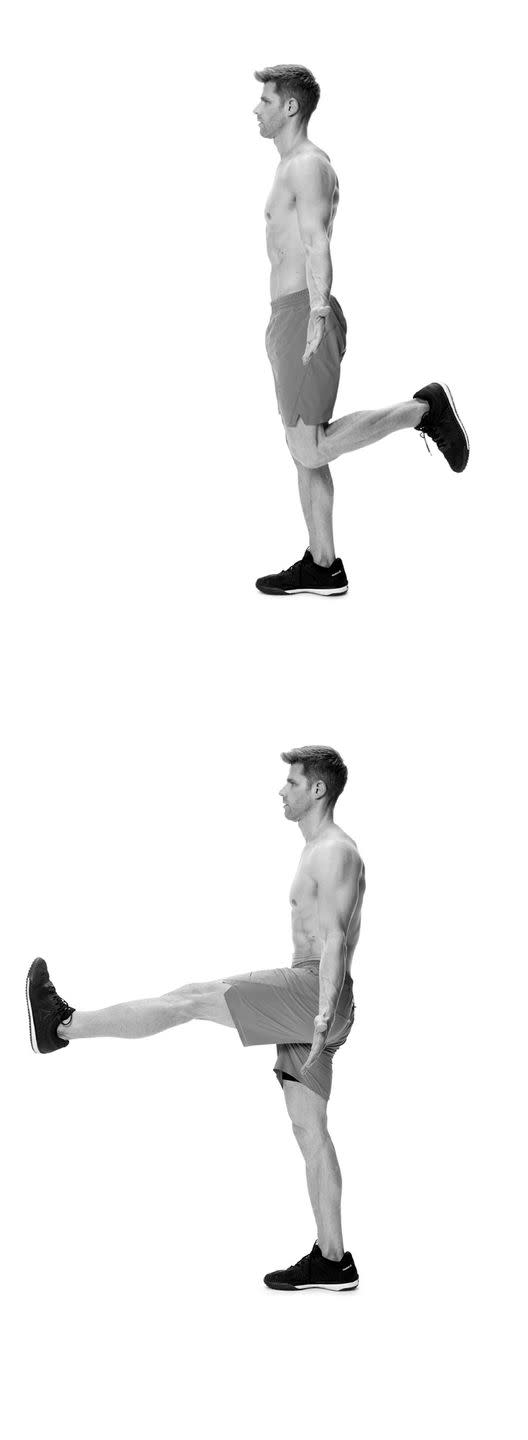
Perform the same motion described above but with your leg straight, so you feel a stretch in your hamstring when the leg goes forward. Bend your knee as if doing a hamstring curl as your leg swings back and comes in line with the opposite leg.
Lateral Leg Lift
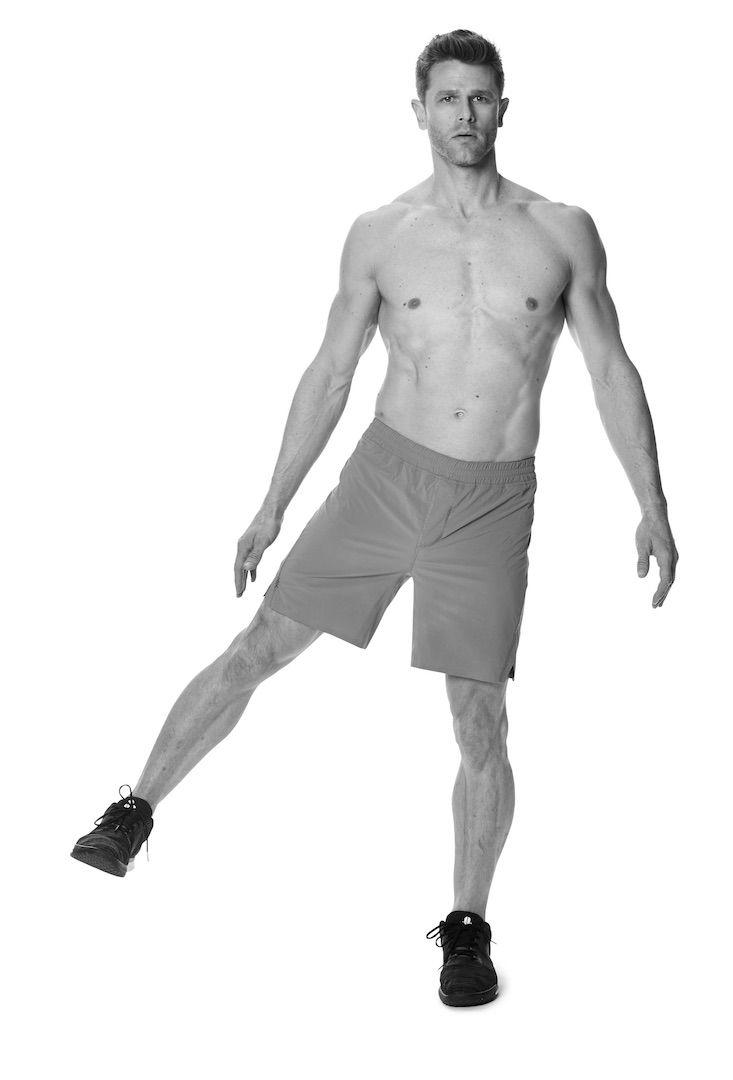
Raise one leg out to the side with your toes pointed forward and your ankle in line with your lower leg. Stand tall, and hold the position for 30 seconds, and then switch legs. It’s okay if your leg begins to fall, but try to keep it up-don’t let it drop completely. Avoid leaning away from the raised leg.
Seated T-Spine Rotation
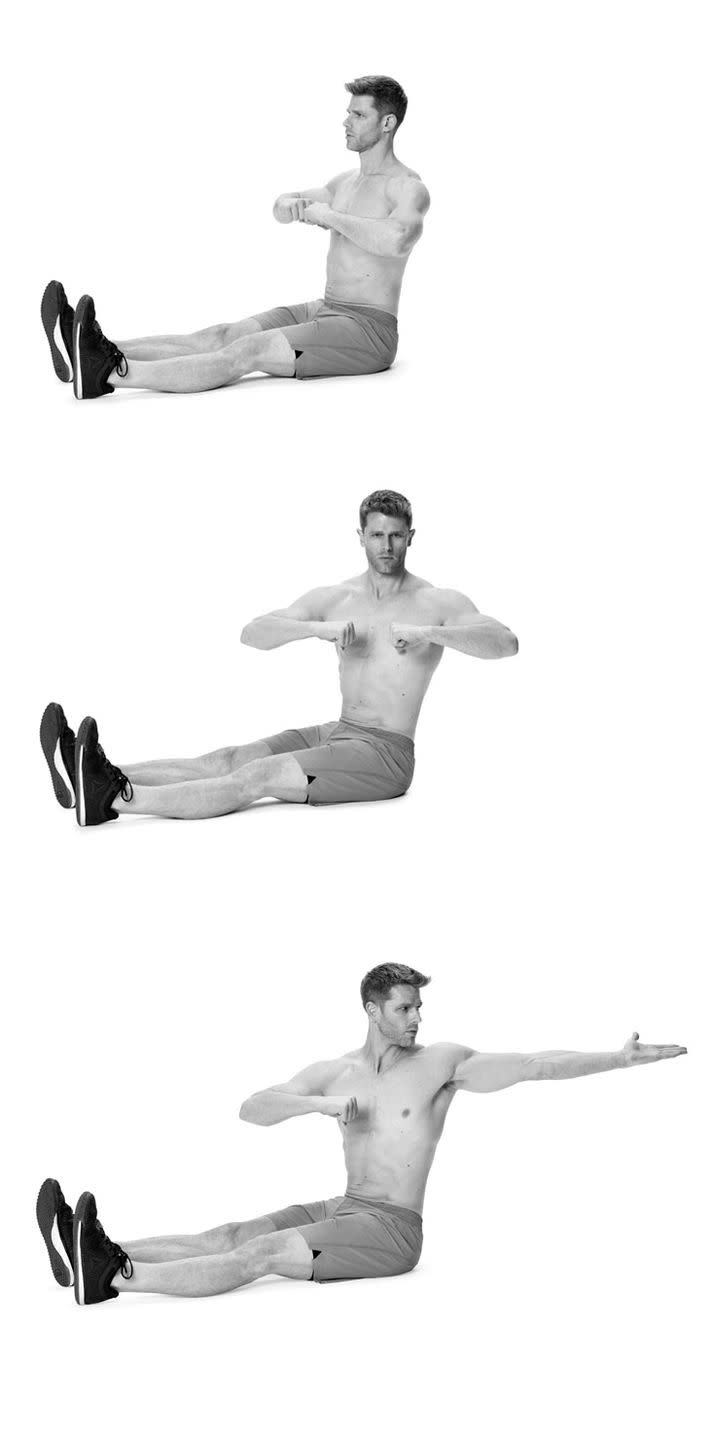
Sit on the floor and extend both legs in front of you. Raise your arms out to your sides and bend your elbows so your knuckles meet in front of your chest. Without bending either knee, rotate your trunk as far as you can to your left. Take a deep breath and then let it out, turning farther. Then, extend your left arm behind you, reaching for the wall. Hold for a second, while sitting up tall, and then return to the starting position. Repeat on the other side. Do three reps per side. “This is a great movement to do last, because it gets the neck, spine, shoulders, arms, and hips involved,” says Pogue.
Prime Your CNS
There’s one more step you should take before you lift weights (hang in there!). Pogue calls it a CNS primer-an explosive movement that excites your central nervous system. “Power exertion gets the body to create tension-producing strength,” he says.
In other words, by doing a throwing or jumping movement, you alert the nervous system, increasing its ability to recruit muscle fibers and coordinate big movements (like plyometric exercises).
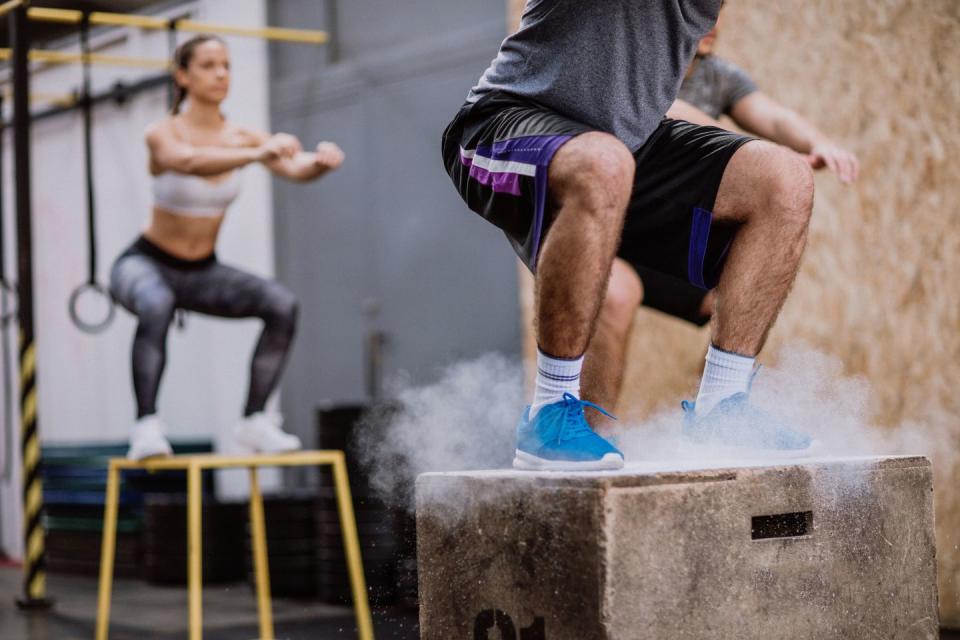
One example is a medicine ball slam. Hold a 10-pound ball with both hands, and raise your arms overhead-throw the ball into the floor as hard as you can. This works well before an upper- or lower-body training session. On a lower-body-only day, you could do box jumps. Use around a 30-inch tall box, or measure it by lifting your knee as high as you can-whatever height your foot dangles at indicates the maximum height of the box you should use. Swing your arms back to gather momentum and jump onto the box, landing with soft knees. You should land in an athletic stance (hips and knees slightly bent, as if ready to jump)-if your knees are in your chest, the box is much too high. Step off the box (don’t jump down), and repeat.
Remember that these moves aren’t officially part of your workout-they’re still part of the dynamic warmup-so don’t overexert yourself. Ramp up the intensity over a few practice sets first. Pogue says to do one warmup set at 50 percent of your hardest effort, then one at 75 and 85 percent, increasing the speed and might you put behind each throw consecutively. Follow these with three “real” sets of three reps done at 90-percent effort.
The entire warmup, from rolling to the mobility circuit to the CNS primer, should take no more than 10 minutes, and can be done in much less time, if need be. Just remain faithful to the components of the warmup, and never skip it entirely. Note that a dynamic warmup does not replace the specific warmup you should do before every lift in your workout. You should still perform a few sets with lighter weights before your work sets begin, especially if you’re training heavy. “Nothing prepares you to do an exercise like actually doing that exercise,”says Pogue.
('You Might Also Like',)

