I spent 3 weeks with a 3D printer, here's what I learned
I've recently entered the world of 3D printing, and I've learned so much over the last few weeks through researching. It may have only been three weeks since I bought my very first Anycubic printer (after I got tempted by a Black Friday deal on the Anycubic Kobra 2 Neo), but I feel like I'm finally getting to grips with how these machines work. But there are a few things that I wish I knew sooner!
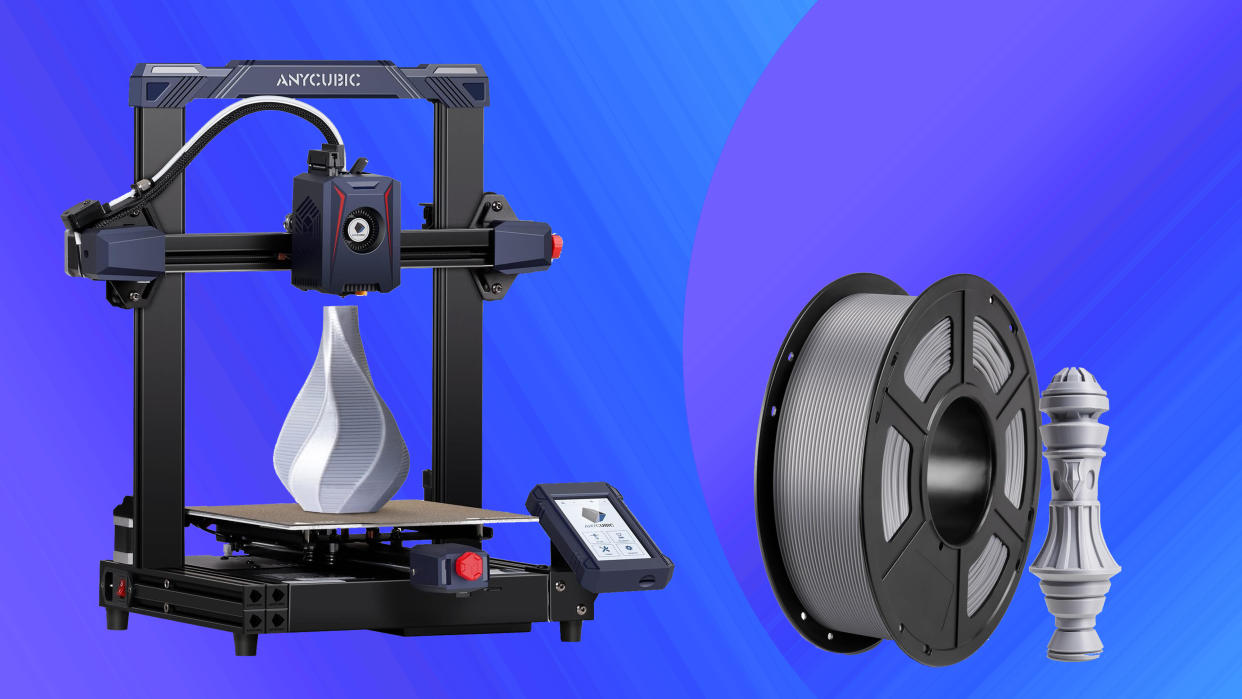
So I've put a few of my hard-earned top tips here, for anyone looking to buy one of the best 3D printers as a gift this holiday season. I do have a small confession. While I did buy the Anycubic Kobra 2 Neo, I cancelled the order from Anycubic the next day and placed one for the Anycubic Kobra 2 instead, as I scoured reviews and felt that for the slightly higher price tag, this machine was a little bit better suited to the builds I wanted to make, and with upgraded printing speeds too.
Anyhow, with that off of my conscience, let's get into the things nobody really prepares you for when getting into 3D printing, and some hot tips I've learned during my first few weeks with the Anycubic Kobra 2 Neo beginner 3D printer.
1. Slicing and Code
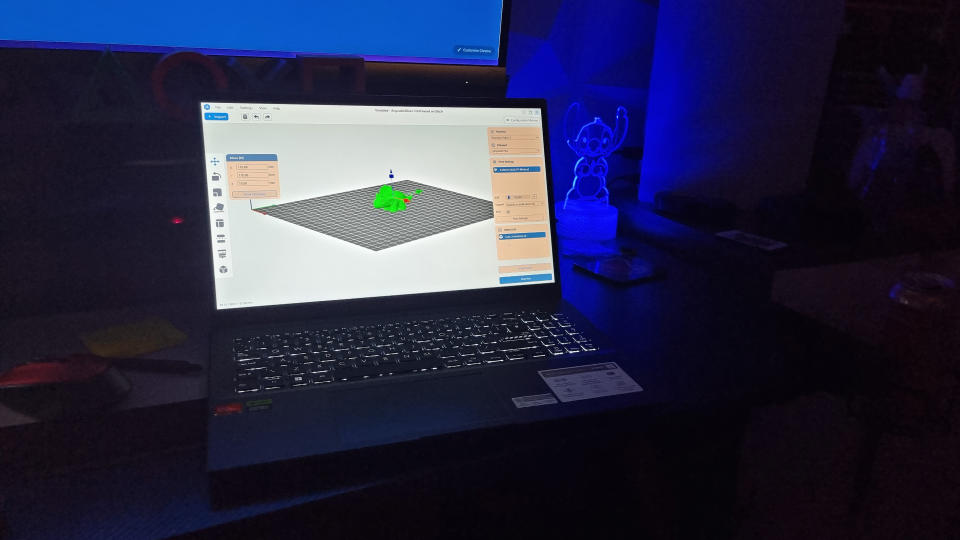
Not all 3D printers operate the same way, and my Anycubic Kobra 2 does not work well with STL (Stereolithography) files – which I found out the hard way.
Basically, when you're searching for an open-source file to 3D print from, using the likes of Thingiverse or Printables, these will usually take the form of an STL file, which is a 3D model file and not often printable on its own.
When using a 3D printer, G-code is the standard language and preferred file type for most 3D printers, used to instruct the printer on precisely what you want it to do involving the extruder heat, nozzle, and printing areas.
Thankfully, it's super easy to convert STL model files into printable G-code format using what is known as a slicing process or using "slicer" software. My Anycubic Kobra 2 came with Anycubic's slicing software on the included MicroSD card, as well as Prusa slicer which is a little more advanced.
This software once installed allows you to see the 3D model in a three-dimensional format and make any changes you like by adding/removing supports (more on this later) and slicing up the print into manageable sections for your printer. You'll need to understand slicing if you intend to create your own designs and original 3D prints, but I haven't got this far yet.
2. Supports
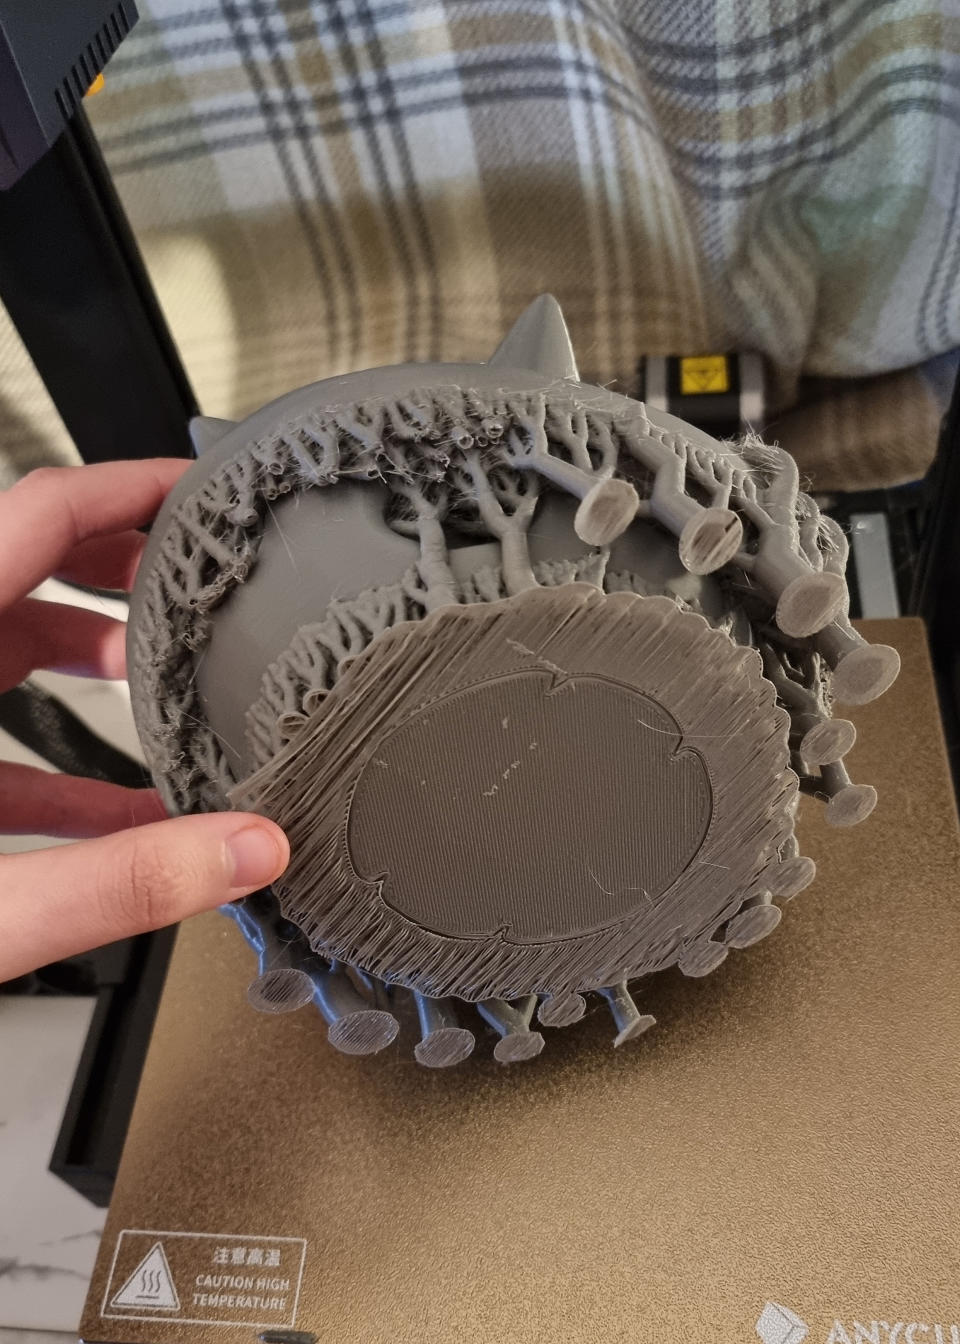
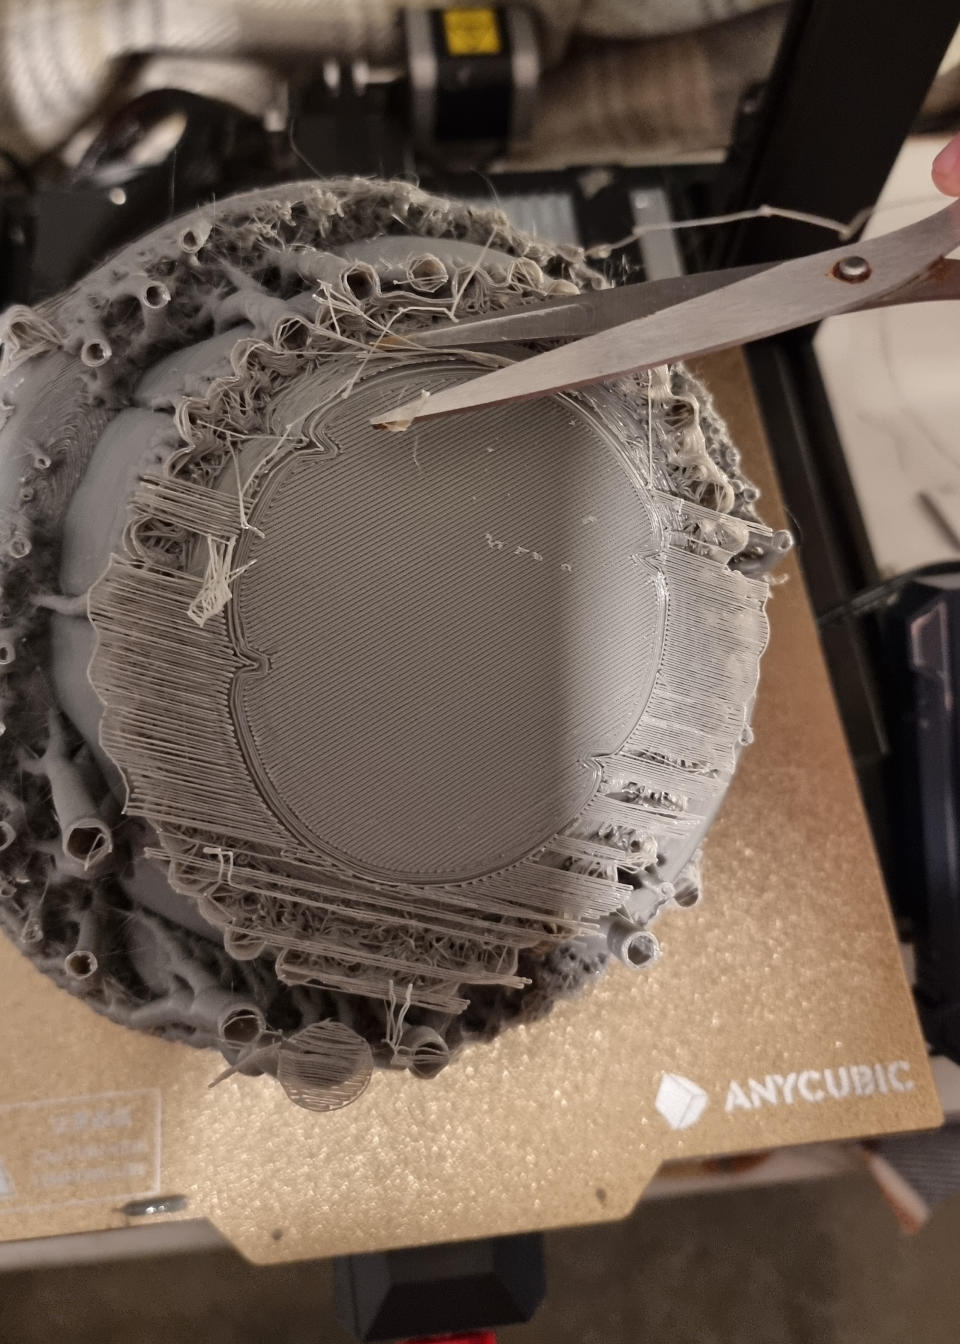
As I've just mentioned above, more often than not you'll need to include supports into your 3D model and 3D prints for them to be solid and stable. You can't print on thin air, so supports are important to ensure that your design prints as it should if there are parts that overhang or extend past a 45-degree angle.
These support structures can take the shape of breakaway supports, tree-like supports, zig-zags, or linear supports made of vertical pillars. You can also get dissolvable supports made from water-soluble materials that disappear, but you'll need a printer with a double extruder to pull this off. Online website All3DP has an excellent guide to understanding print supports if you need more advice.

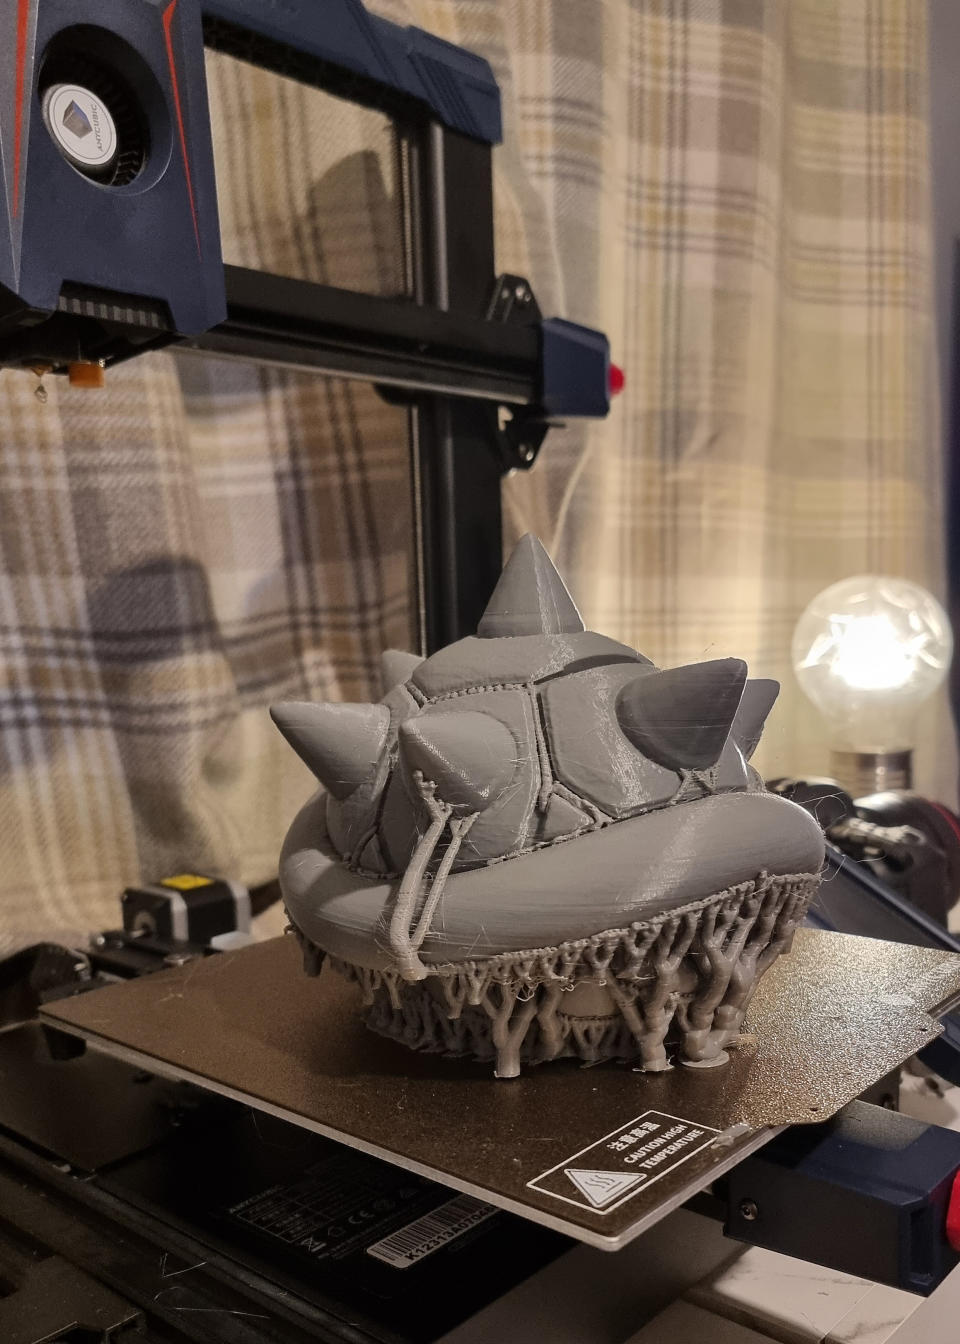
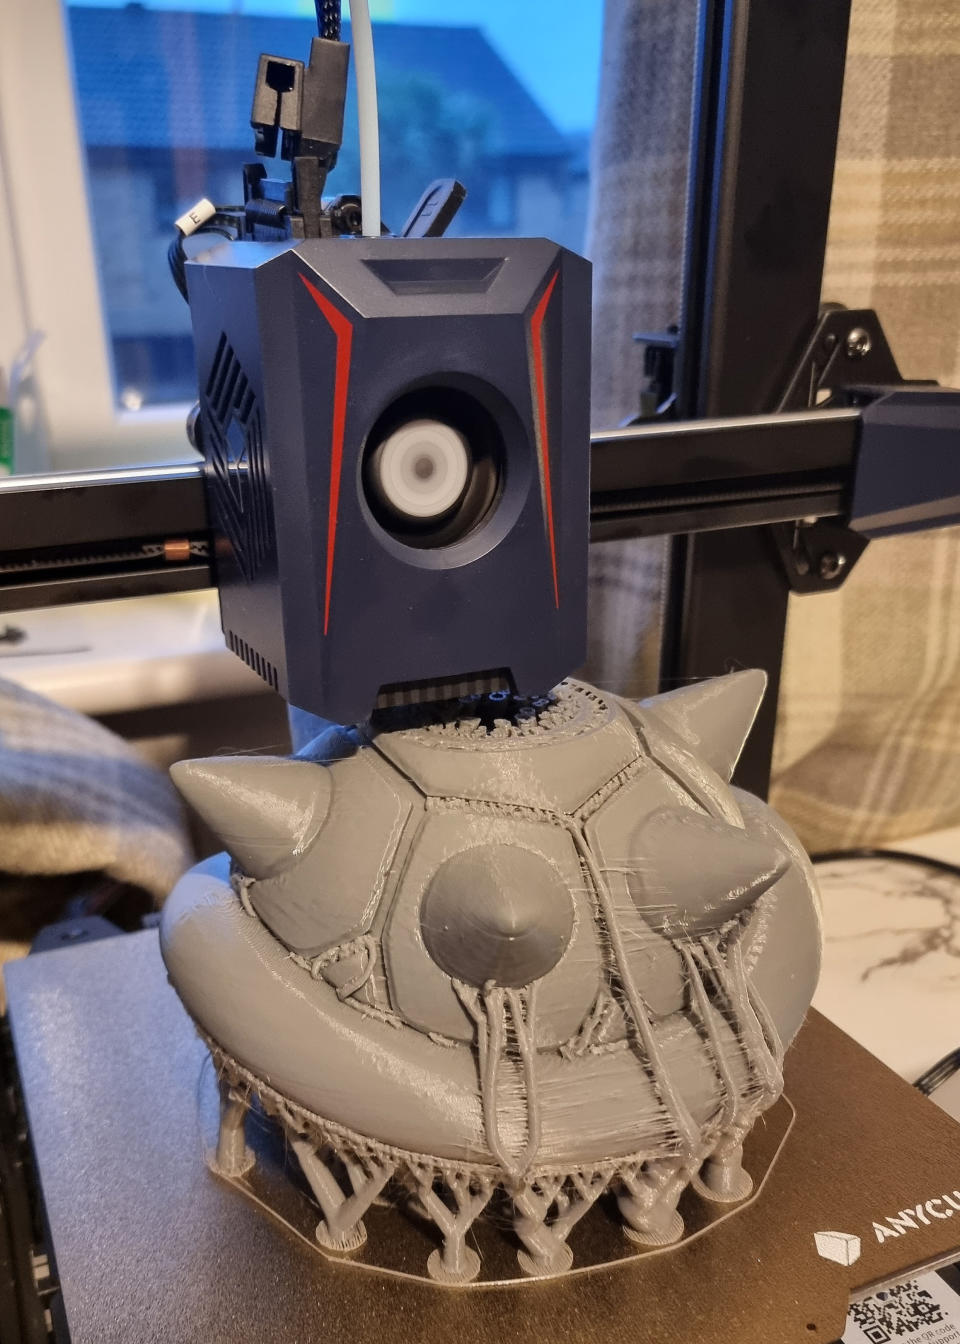
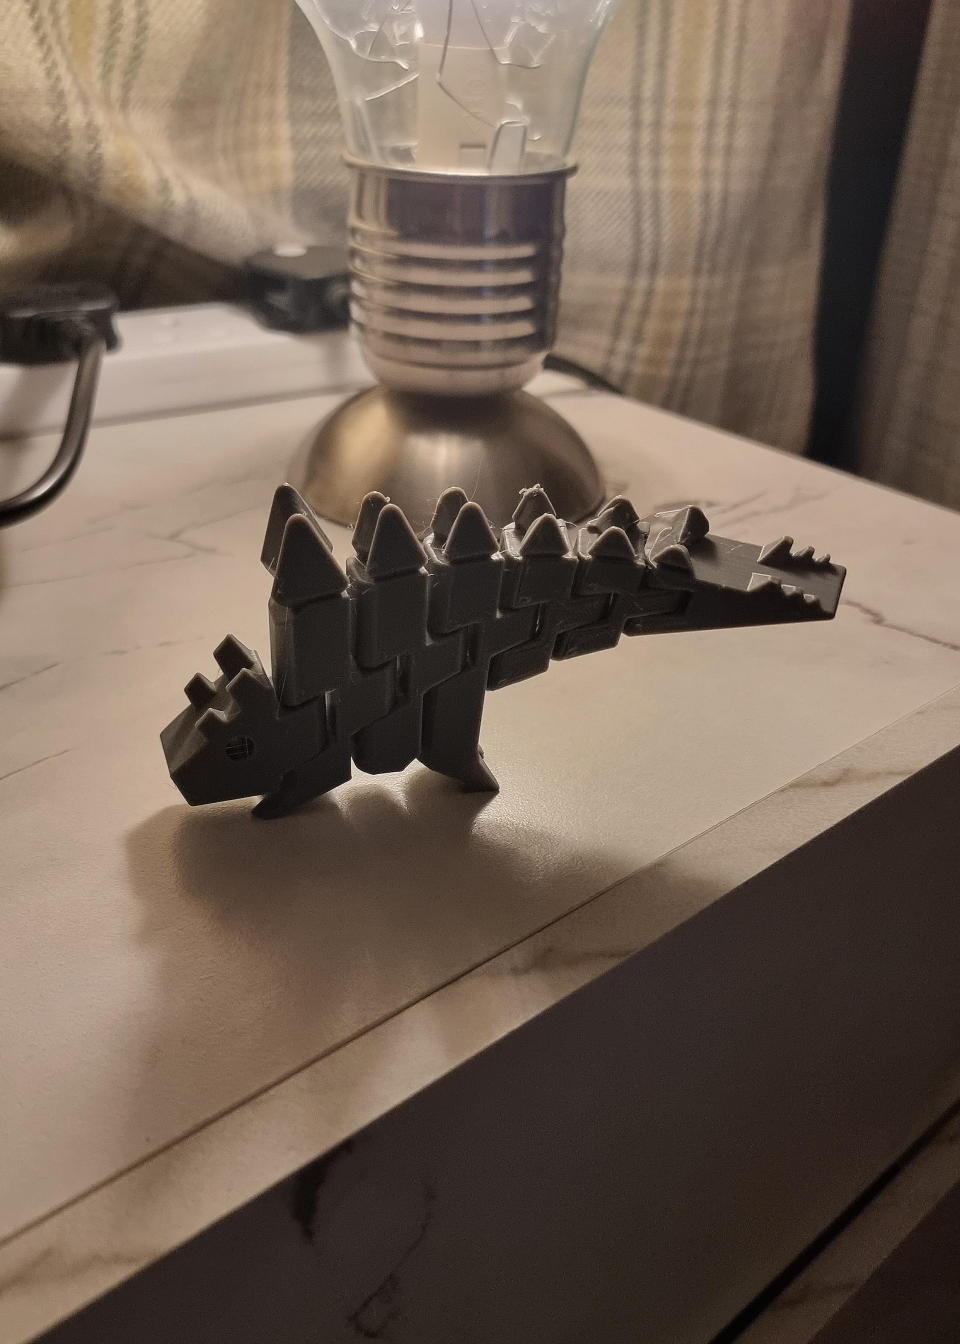
Bowser Spikey Shell courtesy of Peter Farell via Printables
Bowser Spikey Shell courtesy of Peter Farell via Printables
Bowser Spikey Shell courtesy of Peter Farell via Printables
Bowser Spikey Shell courtesy of Peter Farell via Printables
Bowser Spikey Shell courtesy of Peter Farell via Printables

Bowser Spikey Shell courtesy of Peter Farell via Printables
Bowser Spikey Shell courtesy of Peter Farell via Printables
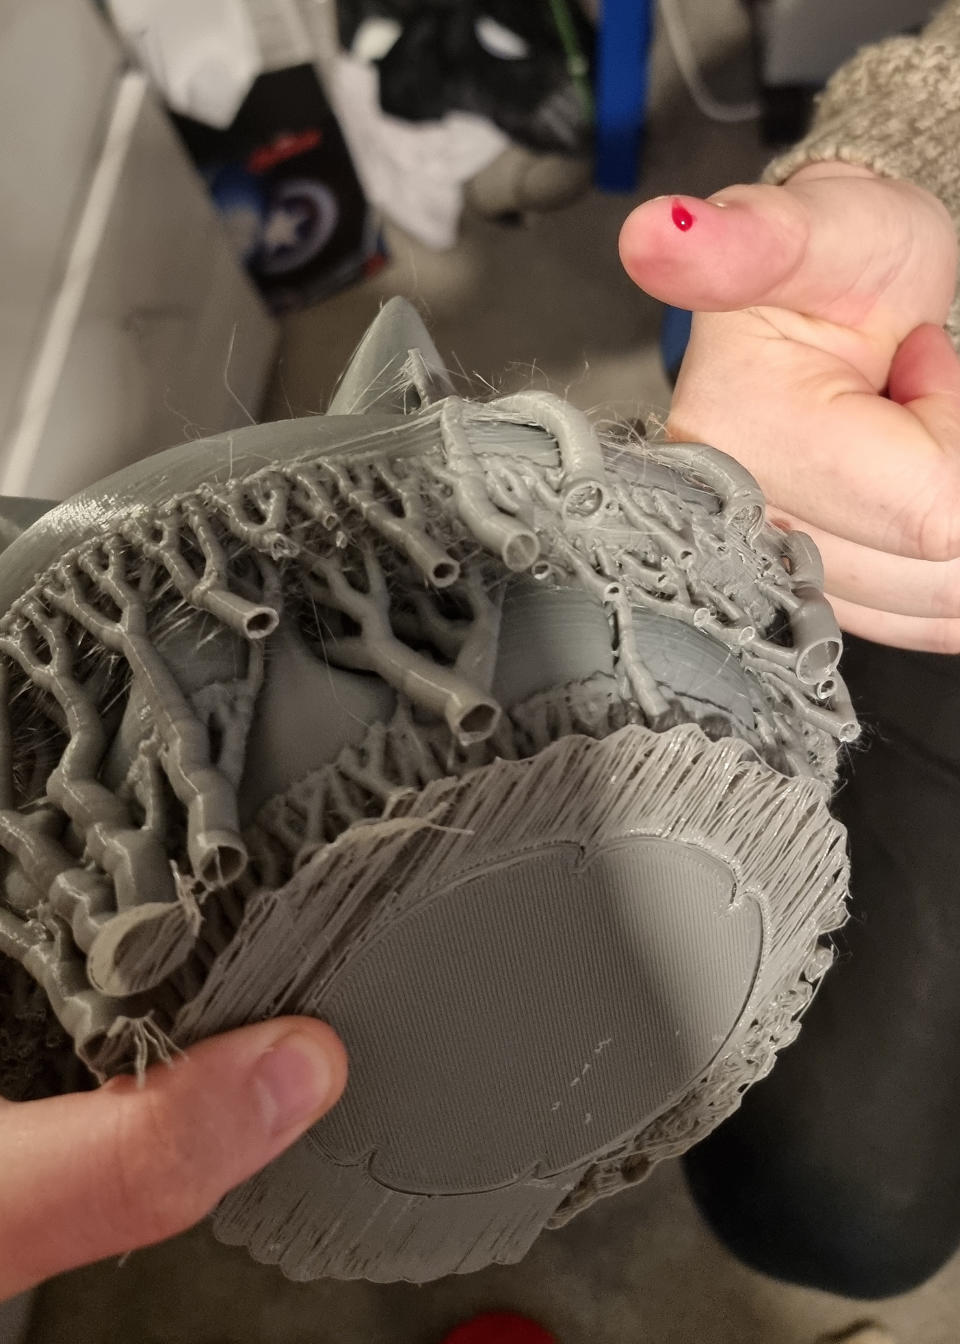
There is a downside to using supports though, as I've recently discovered with my latest large-build, where they can be so difficult to remove, risking damage to your print and the potential to cause minor injury (yes really - see image 5 in the gallery above). I used tree supports with my latest 3D print, courtesy of Peter Farell via Printables, and found the hard way that I needed additional tools to remove them.
Not all print files you find will need added support, as some people are super clever and have remixed other creations to enhance them without the need for supports. But I'm no designer, so I trust the original artists and whatever settings my slicing software recommends. It also flags up warnings if it predicts your print will fail, which is incredibly useful for saving you time, frustration, and materials.
3. Filament options

Speaking of materials, it sounds silly but I've recently learned that you don't need to use the manufacturer's filament (although it is advised) with your 3D printer. I've been using strictly Anycubic's own-brand filament while I get started, and this has been great for helping me learn, but there are plenty of alternatives with excellent reviews that I'm really excited to try out next.
For example, you can get silk filament, glow-in-the-dark filament, and even dual-colour rainbow filament from Amazon sellers such as ERYONE, and ISANMATE which have each had thousands of positive reviews and have been used by others with my exact same printer without any issues reported.
4. Pausing
Another one that might sound obvious to some but was a complete learning curve for me was understanding how to stop a 3D printer mid-print without losing your masterpiece. My Anycubic Kobra 2 is pretty noisy when the fan speed is set to 100%, and our gaming room is only meters away from our bedroom which means we'd be up all night if I left a print running throughout the night.
The solution I found to this was to pause the print (there's a button on my printer's display screen) and then once the progress seems to have stopped, head into the printer settings and change your fan speed to 0, and the bed heat and extruder temperature to 0 as well. Next, leave your printer on – do not press stop or unplug your printer - and there ya go.
A quick search online told me that it's okay to press pause on a print and then proceed to turn your printer off for the night, but ONLY if you've initiated the McroSD card that your G-code file is stored on (which I hadn't yet). I didn't want to risk losing the 30+ hours of progress on my print, so I'm yet to test this theory but I definitely will on a smaller print without wasting filament.

