How to Sous Vide Anything

Ready to get on the sous vide cooking train? Welcome, friend: We’ve been expecting you. You’re about to experience the closest thing to actual magic that ever happens in the kitchen. Below you’ll find everything you need to get started, from the necessary equipment to a step-by-step guide to the process, along with Bon Appétit Test Kitchen-developed recipes and a basic time and temperature guide for when you’re ready to do your own thing. This is going to be fun.
The Equipment
A Joule Sous Vide Machine (More on why we love this unit here)
A Foodsaver Vacuum Sealer or Heavy Duty Freezer Bags
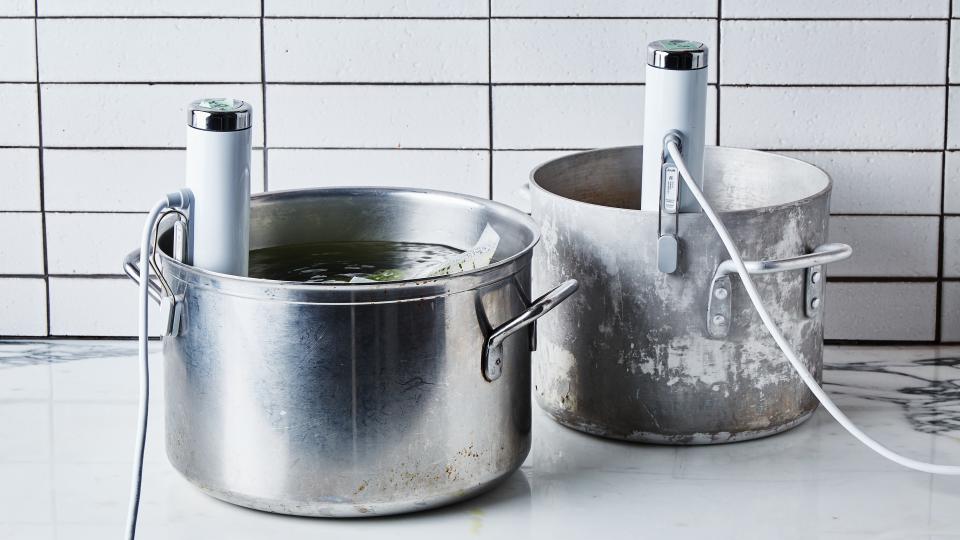
A Large Pot
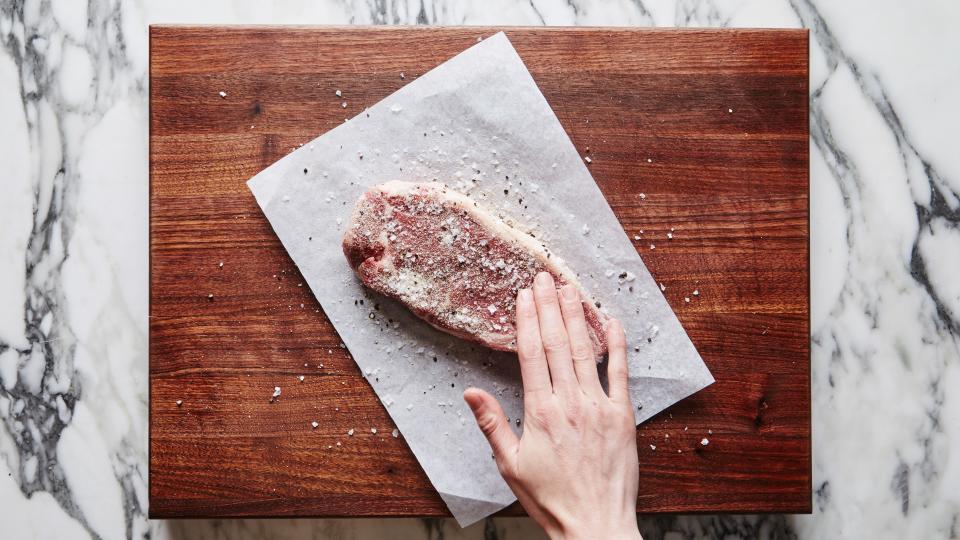
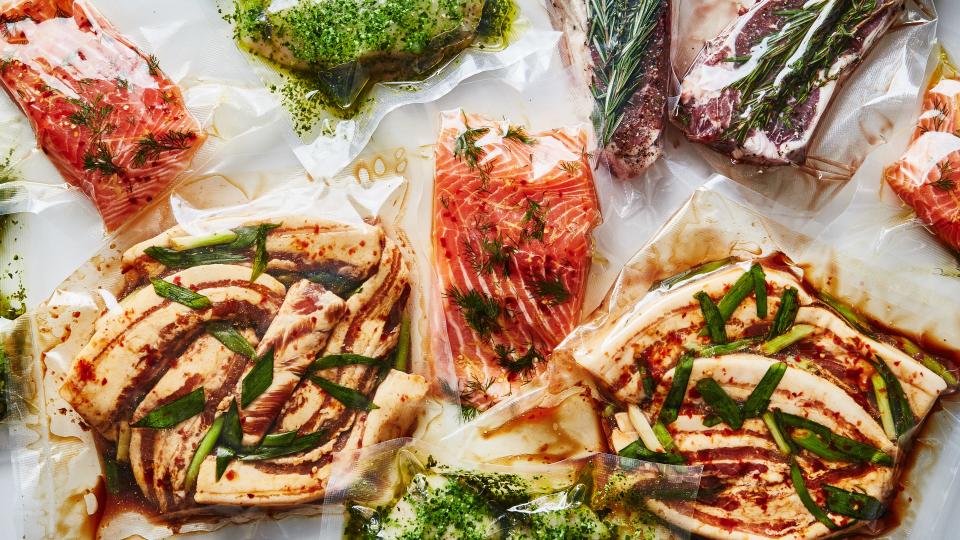
1. Season Your Meat
As with all successful meat cookery, the first step is to season your protein, and season it well. Give it a thorough rub down with plenty of kosher salt, along with any dried spices or pastes you like—freshly ground black pepper, chile powder, curry, harissa paste, whatever you want. One of the advantages of sous vide cooking is that those seasonings get sealed right up against the meat, and have plenty of time work their way in, leading to big flavor.
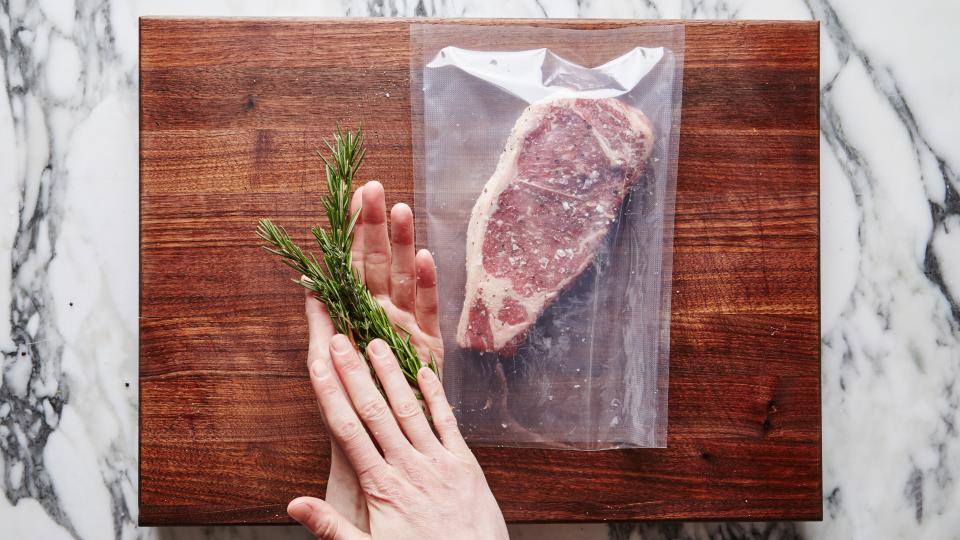

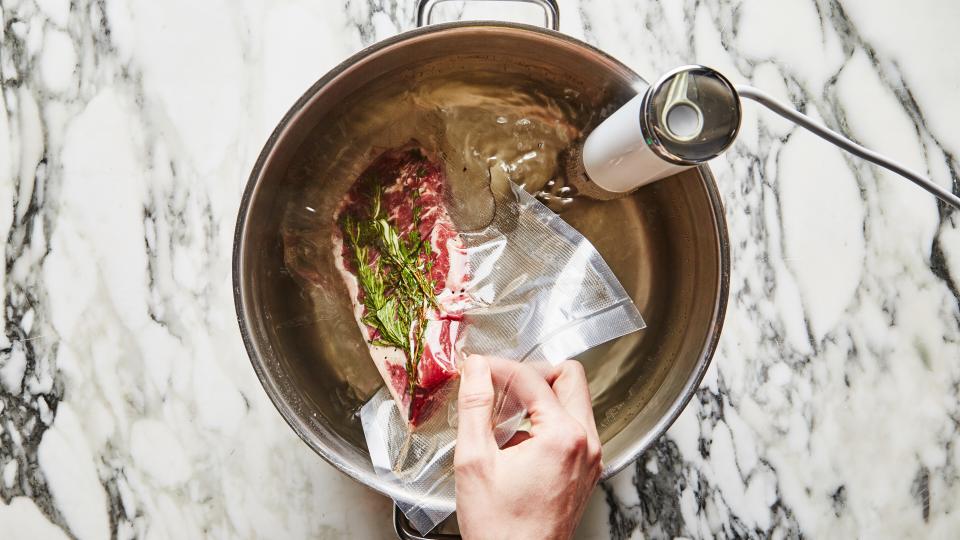
2. Bag It (with Aromatics)
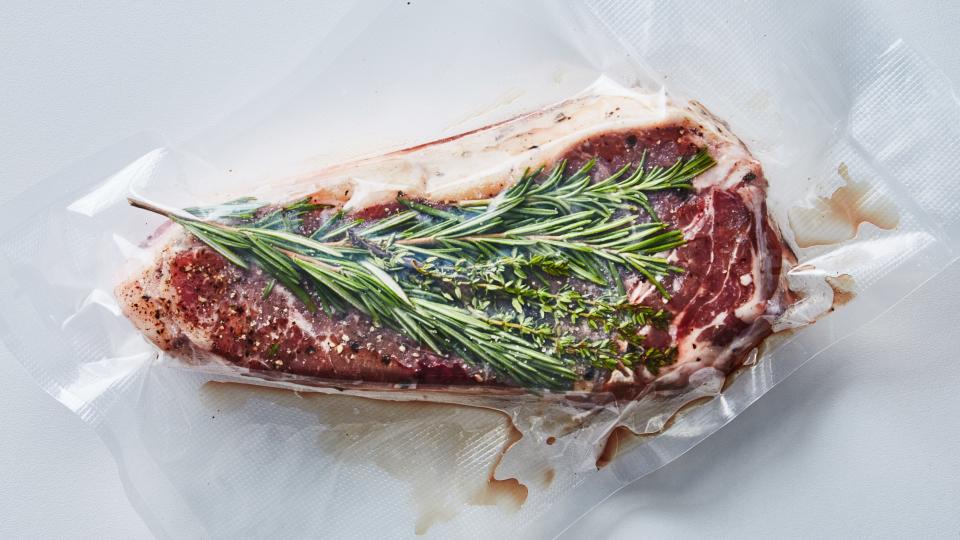
Once your meat is good and seasoned, slide it into either a food-grade vacuum sealing bag (the gold standard, and what most restaurants use) or a sturdy resealable freezer bag (the best grocery store-available option). At this point you can add any larger aromatics—sprigs of hardy herbs like rosemary or thyme, bay leaves, whole dried chiles—positioning them in direct contact with the meat so that when the bag is sealed, they're locked in place. (A pat of butter, a dollop of coconut oil, or a spoonful of ghee wouldn’t hurt either, but try to avoid anything too liquid-y as it could interfere with the sealing process.)
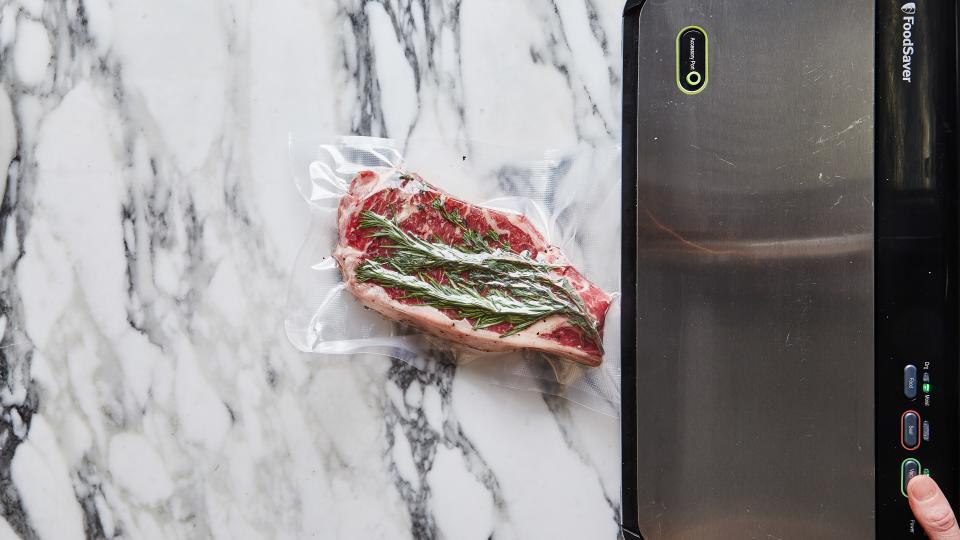
3. Get a Good Seal
If you’re going the vacuum sealer route, follow the manufacturer’s instructions. (We like to double or triple the seal in case one of the seals fails.) If you’re working with freezer bags, we’ve got a good hack for getting as much air out as possible. Press out as much air as you can and seal your bag almost all the way, leaving a little gap for air to escape. Holding the corners of the seal, slowly lower the bag into a pot of water—like the one you’re about to cook in—until the water comes right up to the seal, then close it completely. The pressure of the water helps to displace any air you weren’t able to press out on your own. Cool, right? If you need a visual aide, check out this video.
4. Set Your Temperature, Set Your Time, Start Cooking
Time to get cooking! Fill a big pot with water, set your sous vide machine (aka immersion circulator) up in it according to the device’s specifications, and set the desired time and temperature based on what you’re cooking. Some brands (like the Joule by Chefsteps, our preferred model) have proprietary apps that make it super easy—you simply plug in what you’re making, and the software will determine the appropriate cooking temperature and time. If you’re free-styling, consult our time and temperature guide below based on the official one from Chefsteps. Once the water comes up to temperature, add your bags to the water. Vacuum-sealed bags can be dropped directly into the water and allowed to float around, but when we’re working with jerry-rigged freezer bags, we like to use a binder clip or clothes pin to secure them to the edge of the pot, seal-side up—a little extra insurance that the seal won’t break.
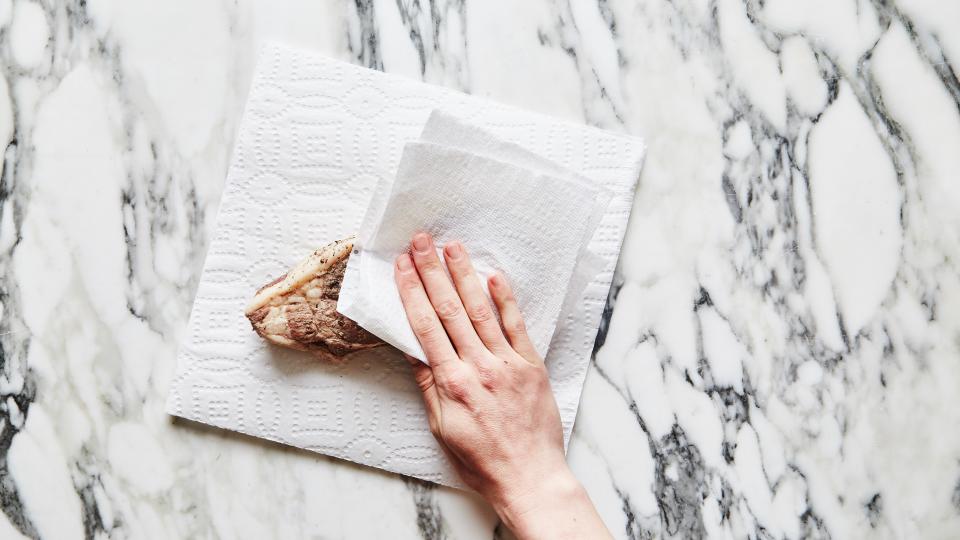
5. Rest, Dry, and Sear (If You Need to)
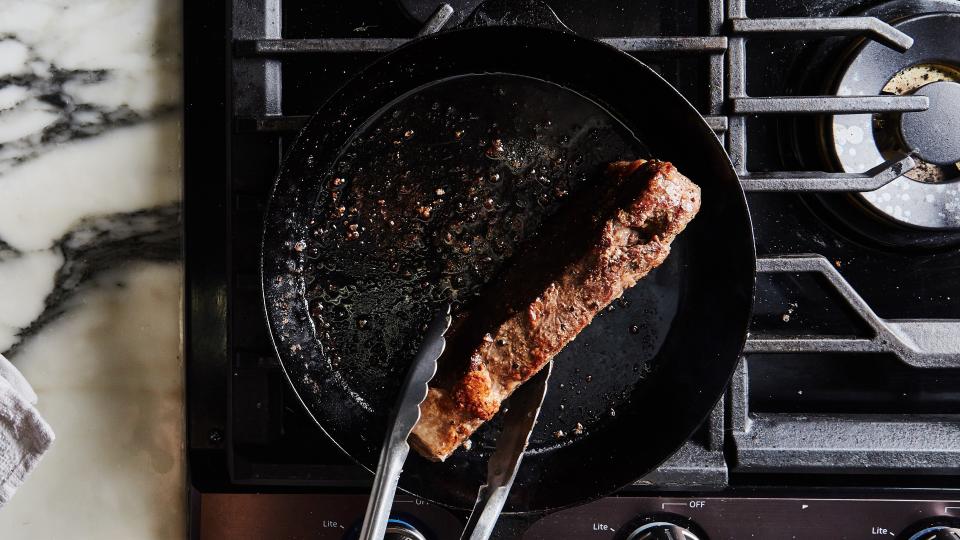
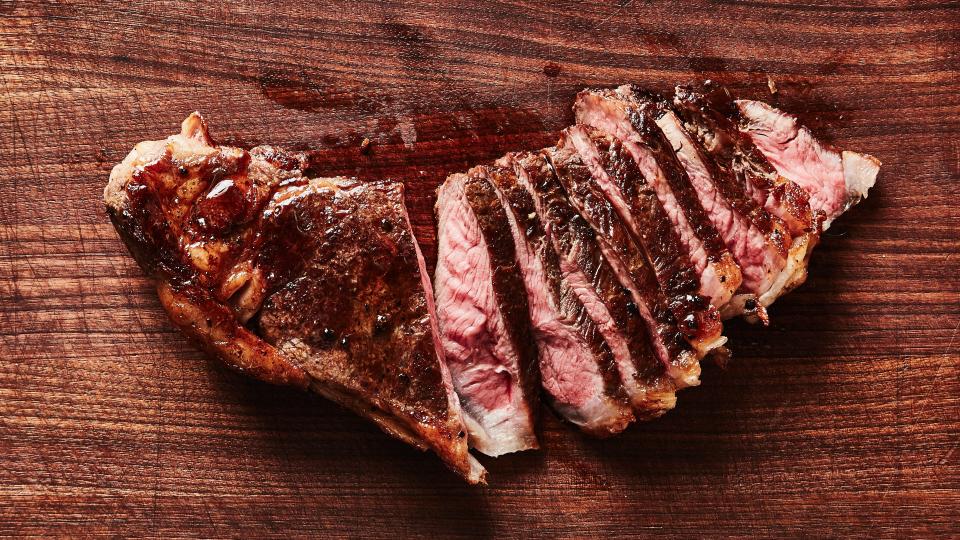
Once your steak/chicken/salmon/whatever is cooked to the desired temperature, take it out and let it rest, in the bag, for 15 to 20 minutes. (To be honest, we’re not sure if this actually does anything, but we’re hoping it gives the protein a chance to soak up any of the seasoned juices in the bag.) At this point your meat is fully cooked, and is safe to serve. Some proteins are delicious served as-is—boneless, skinless chicken breasts, say, or a delicate fillet of salmon are ready to be sliced, plated, and served. But others, like a perfectly medium-rare steak or a slab of tender pork belly, want to be crisped before serving for optimum deliciousness. In that case, remove the meat from the bag, dry it off as thoroughly as possible with paper towels, and sear it off on all sides in a ripping-hot pan until a beautiful, crackling crust forms—since the meat is already fully cooked, this should only take a minute or two on each side.
6. Serve (or Save)
Et voilà! Dinner is served. But the real beauty of sous vide cooking is in the possibilities for meal planning and prep that it opens up. If you aren’t serving your sous vide creation right away, dunk it in a bowl of ice water to cool it down as quickly as possible, and then transfer it (still in the bag) to the fridge, where it should stay good for up to 7 days, or to the freezer where it will keep for up to a year. Cook up four or five chicken breasts and bring them for lunch all week. Get a bunch of steaks to a perfect medium-rare on Thursday night, and all you have to do is give them a quick sear on Friday night for a nearly hands-off dinner party. The possibilities are endless—go forth and sous vide!
Basic Cooking Times to Keep On-Hand
Below is a quick guide to the time and temperatures recommended for different types and cuts of meat, courtesy of the fine folks at ChefSteps, the company behind the Joule. As you get more comfortable with the technique, you may find that you like things cooked to a slightly different time or temperature—totally fine—but this is a good place to start. A note on the time ranges: The first number reflects the ideal time as determined by the company for that particular meat, while the second number is the maximum time that item can remain the water bath without having its texture suffer. You can find a more comprehensive guide on their website. Happy cooking!
Beef: Steak Rare
54°C/129°F, 1 hour to 2 hours
Beef: Roast Medium Rare
60°C/140°F, 6 hours to 14 hours
Beef: Tough Cuts Well Done
85°C/185°F, 8 hours to 16 hours
Pork: Chop Medium Rare
62°C/144°F, 1 hour to 3 hours
Pork: Tough Cuts Well Done
85°C/185°F, 8 hours to 16 hours
Chicken: Light Meat Juicy and Tender
65°C/149°F, 1 hour to 3 hours
Chicken: Dark Meat Juicy and Tender
75°C/167°F, 45 mintes to 5 hours
Fish: Tender and Flaky
50°C/122°F, 40 minutes to 1 hour and 10 minutes
Your Sous Vide Essentials
Find out what even is sous vide, anyway?
Pick up the BA Test Kitchen's favorite sous vide machine
Read about how sous vide cooking will overhaul your meal prep game

