Skip the Dye Job with Our Easy Easter Eggs
Laurey W. Glenn
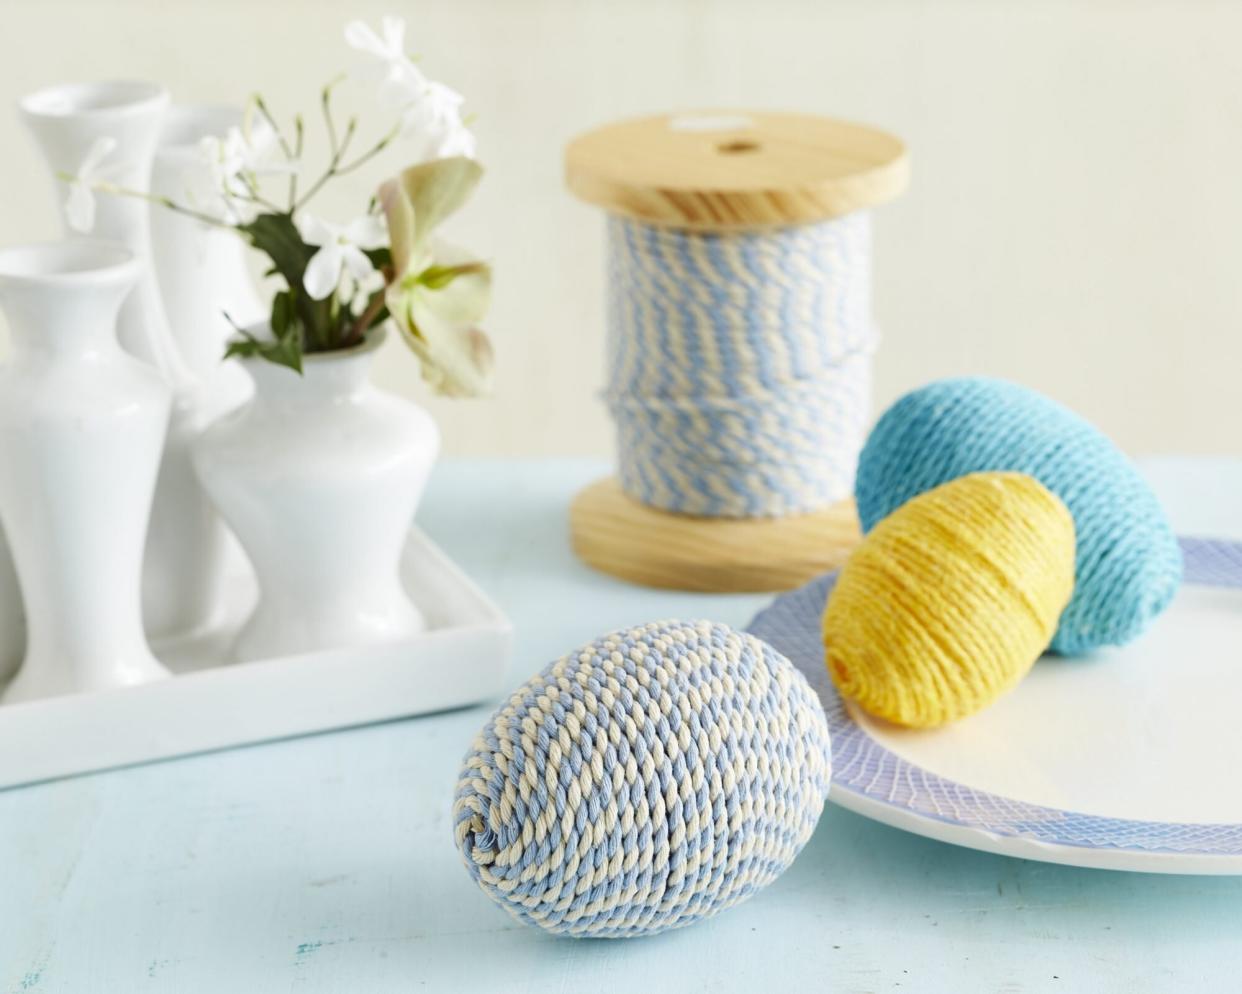
Listen, we love dyed eggs as much as the next gal (as evidenced here and here), but Easter eggs that we can make once and store away for next year? Now that's something our make-ahead, efficient fans will love. Our string-wrapped eggs only require four materials and will be ready for display in minutes.
Here's what you'll need:
Plastic eggs (various sizes)
Mod Podge
Foam brush
String (we recommend a variety of complementary colors)
Start with plastic Easter eggs in various sizes. Using a foam brush, apply a coat of Mod Podge to the top of the egg. Take the yarn and place the end at the very top of the egg, using your finger to hold it in place. Begin to wrap the string around the egg, making sure the string touches without overlapping as you go. Apply more Mod Podge as you work your way down the egg. Snip the end of the string once you reach the bottom of the egg. Apply a small dollop of Mod Podge to ensure the end of the string stays in place. Hold it with your finger for a minute or two until it's secure.
Now, for the fun part: how to display. You can keep it simple by placing your string-wrapped eggs on pretty Easter plates scattered throughout your home. These eggs will be the perfect nod to the season whether on a table in your foyer, on the sideboard, or kitchen counter. You can also attach a nametag to each egg and use them as place settings on your Easter lunch table. If you're really looking to make an impact, pile them high in a clear glass hurricane. You may need to enlist the help of some of your favorite crafters to make enough to fill your container.

