How to set up a Minecraft server in 2023
Knowing how to set up your own Minecraft server is a useful skill for anyone keen to have a more personal Minecraft experience with their friends.
While there's a near never-ending supply of different servers to connect to, using your own gives you full control of the in-game world along with the backend so you can use admin commands to spawn items, change the time of day, and almost everything else you can think of. If you're looking for something slightly different then using one of the best Minecraft server hosting services could be a better bet as each one of these services will streamline the process for you - for a price.
Anyway, making your own server is indeed a more involved process than simply knowing how to install Minecraft mods or shaders. This means you'll need to be comfortable with using the command line prompt on Windows, as well as be ready to troubleshoot some issues that may spring up along the way.
Set aside an hour of your time and ready to delve into the world of server setup? Here's how to set up your own Minecraft server.
How to set up your own Minecraft server in 2023
To set up a Minecraft server, you need to have the latest version of Java installed on your PC. You can check what version you have installed by opening a command prompt and entering 'java -version' to see the version number. The quicker method is to simply head to the Java site and install the latest version to be sure.
Once Java is up-to-date, download the Minecraft server software from the official site. Place the file in a folder that you dedicate solely to the Minecraft server setup. It'll work in any folder but it's neater and more convenient if you set up a specific place for it and its files.
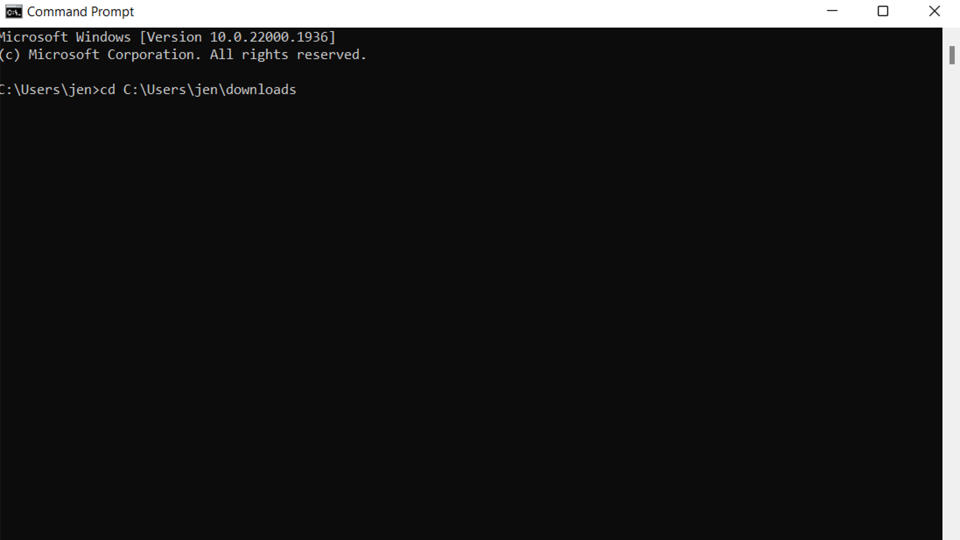
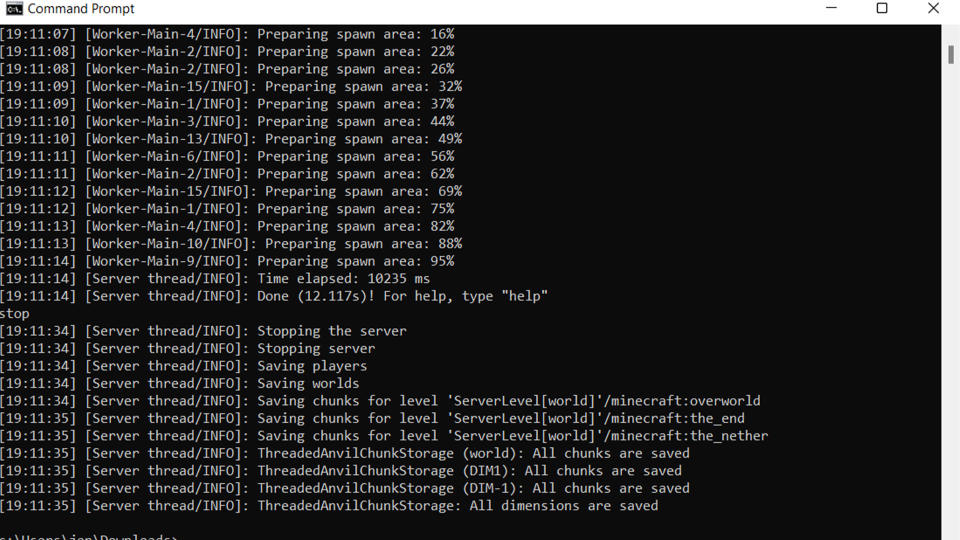
In some cases, you can simply double-click the server.jar file to open it. A better method is to open it via the command prompt. Open a command prompt window then browse to the folder the Minecraft server files are by typing cd C:\Users\username\ followed by the name of the folder. Once you've browsed to that location, type java -jar server.jar -nogui to open the file.
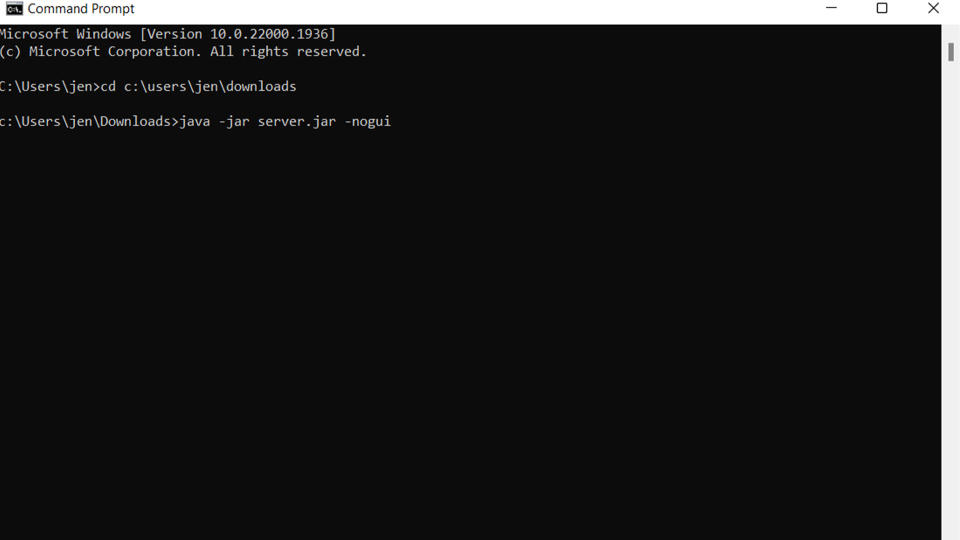
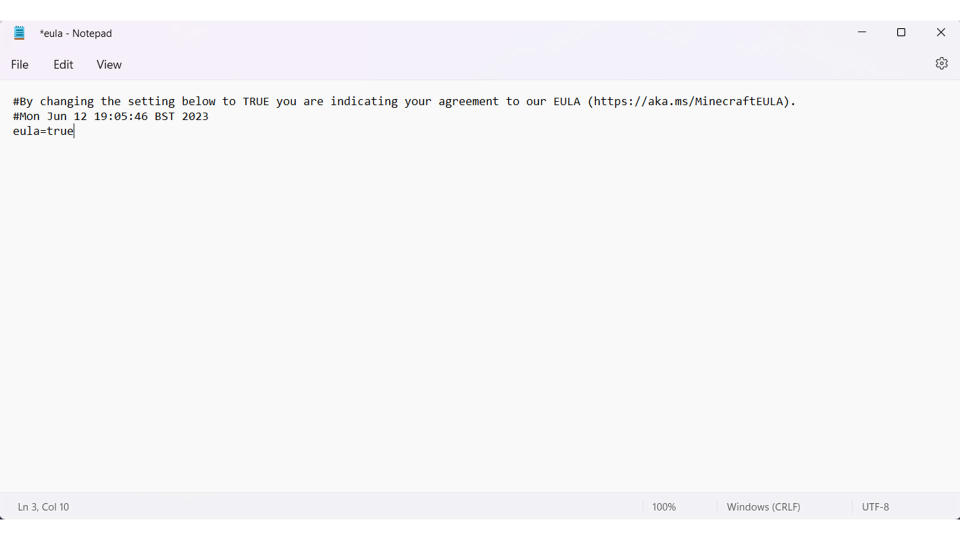
The first time the Minecraft server is loaded, it won't work fully. Instead, it'll expand to include all the server files in your chosen folder. To make it work, open the eula.txt file that's now available in the folder and change 'eula=false' to 'eula=true'. Close and save the file before relaunching the server by typing 'java -jar server.jar'.
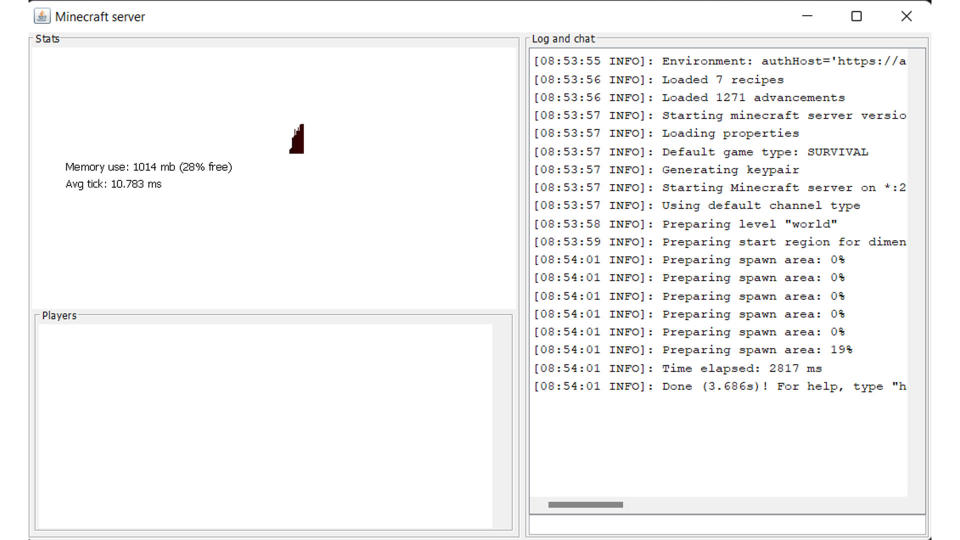
The server will now launch with a basic graphical user interface allowing you to see how much memory is being used, how many players are currently logged on, and other details.
Tips on starting your Minecraft server
It's always possible to launch the Minecraft server by following the steps above but in the long term, a better solution is to create a batch file to have it launch in a more efficient way.
Here's what you need to do to create the batch/bat file:
Right-click on the inside of your Minecraft server folder then hover over New and click Text Document. Name the file something you'll remember like Startup or Start. Right-click the file and click edit to open a Notepad window.
On the document, type ' java -Xmx1024M -Xms1024M -jar' Minecraft server name nogui where Minecraft server name is the name of the file. By doing so, you're setting the minimum/maximum amount of memory for the file, and using nogui stops the graphical user interface from opening which saves resources. Add pause on a line after this so that the command window is kept open so you can spot any errors.
Save the file and close it, before clicking the name of the file to rename the extension to .bat instead of .txt. Click yes to the warning from Windows. Run your server by double-clicking the bat file.
How to configure your Minecraft server
Now you've got the basics sorted for your Minecraft server, you'll want to configure it. Check the server.properties file for your options.
Here's a look at the key components. Most are fairly self-explanatory but it’s useful to know how to make quick differences easily.
Gamemode: The game mode setting allows you to change between either survival or creative modes.
Spawn-protection: This defines the radius of blocks in the server spawn that can't be broken. It can be changed to 0 if you want them all to be broken.
Allow-nether: This allows or disallows the use of Nether on your server.
Difficulty: Self-explanatory but your options are either peaceful, easy, normal, or hard.
PVP: If you want players to be able to attack each other, enable this setting.
Max-players: This number sets how many people can join your server at any one time. You may wish to tweak this as you go along, decreasing the number if you have less RAM dedicated to your server.
Level-seed: Allows you to insert a Minecraft seed for a world to generate from if you wish.
Motd: This sets a message that all players will see on their Minecraft server browser before they connect. It's the ideal place to add any rules or comments you wish to make about the server.
Query-port: The query-port setting is where you enter a port that has been forwarded on your local router to allow access.
How to set up port forwarding
Port forwarding settings on your router varies depending on your router brand. The default port number for your Minecraft server is 25565 unless you change it under server.properties.
You don't need to set up port forwarding if you're solely setting up a server for players on the same local network as you. For playing online though, you'll need to forward TCP port 25565 on your router to allow other players to join. You will also need to enter your server's local IP address as the server IP for the forwarded port. To find your local IP, open a Command Prompt and type 'ipconfig'.
Once you have your public IP and have port forwarding set up, it's recommended to not share it publicly. Only share it with people you know and trust as it can potentially be a security risk for your home network. That's another reason why some people prefer to use dedicated Minecraft server hosting services.
How to join the Minecraft server
Once your Minecraft server is set up, joining it is as simple as joining any of the best Minecraft servers.
Choose multiplayer from the Minecraft menu. Click add server then enter the server name. Enter the public IP address of your server then click done.
You're now connected to the server as a player. If you're using the graphical user interface on the server configuration, you can check you're connected by looking at the players' list.
Looking for more on Minecraft? Head on over to our pages on the best Minecraft seeds, the best Minecraft shaders, the best Minecraft texture packs, and the best Minecraft servers to help your block-filled experience go up a few levels.

