See How Epoxy Paint Turned This Bathroom into a “Tiny Sanctuary”
When creative designer Kara Lauren Kirchhoff moved into their colorful home in St. Louis, Missouri, the bathrooms had already been updated, but it wasn’t exactly what they were looking for.
“I didn’t like it. The tiles weren’t horrible, but they were sort of a cream color with little speckles in them. The sink was itty bitty and intruded into the space,” Kirchhoff shares over email. “My bathroom is really small and really narrow, so any intrusion into the space was a problem for me.”
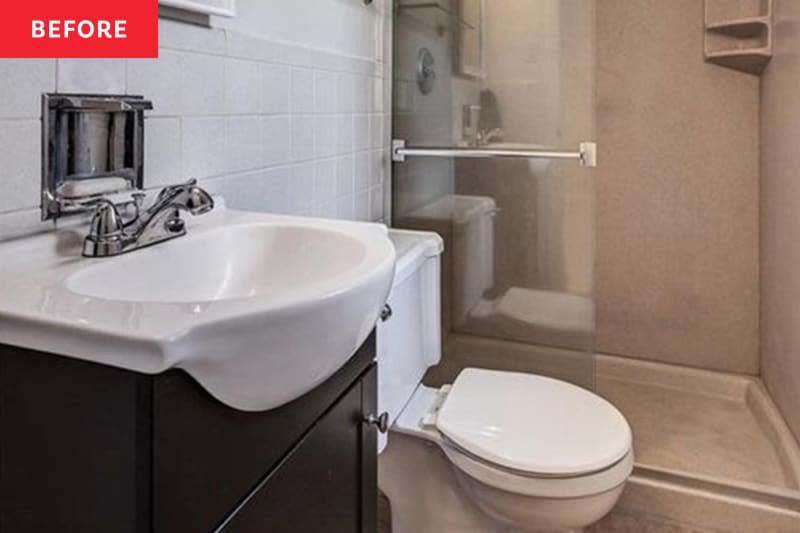
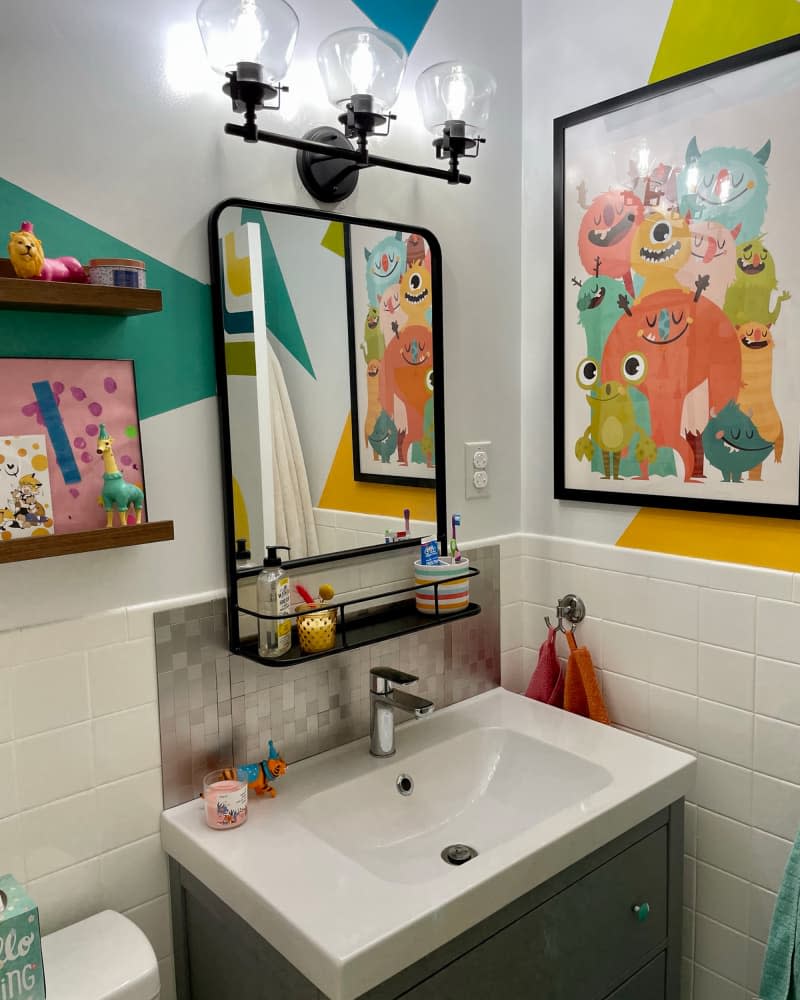
The primary bathroom’s limited square footage was only made to feel smaller because of the existing color scheme. The sink vanity was dark brown, and the tiles were a light terracotta shade, making the room feel smaller. Their kids’ bathroom tiles were blue, but Kirchhoff had strong feelings about it. “The one that was there is a shade that I loathe and needed to be changed for my eyeball’s comfort,” they explain.
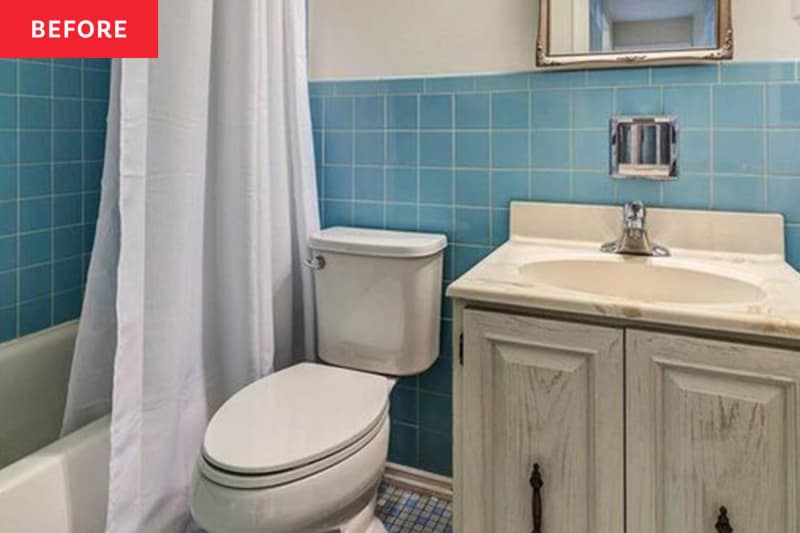
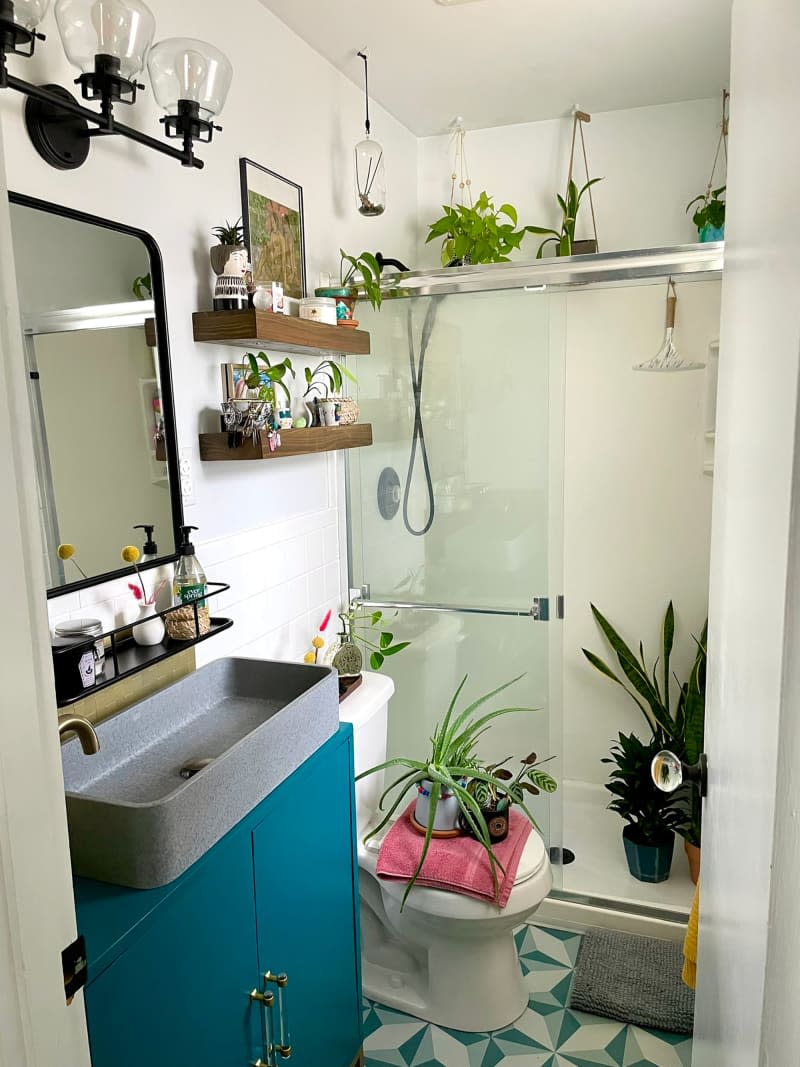
Kirchhoff also wanted to make both bathrooms feel more personalized. “I wanted my bathroom to feel more like a sanctuary, and I wanted my kids’ bathroom to be super fun,” they share. I also wanted both spaces to be brighter. The wall colors were sort of a beige-yellowish, very common in almost every apartment I have lived in. So, for me, when I want something brighter, I start with a bright white base and then layer in my colors.”
Because Kirchhoff had taken on a lot of DIY projects in their home (and claim they have a “DIY heart”) and the renovation budget was limited, they decided to take on the project themselves. An easy way to make the room feel spacious and brighter was by giving the tiles a makeover. Kirchhoff looked at their options, like whether it’d be best to use vinyl stick-ons or tiling over the original tiles.
“Ultimately, based on my budget and also the type of work, and longevity I opted for the epoxy paint because it seemed like the easiest and most affordable option and it comes in white which I can work with,” Kirchhoff shares.
Kirchhoff used around five cans of Rustoleum Tub and Tile epoxy paint (they were working on two bathrooms at the same time), which cost around $250 total. Even though there’s ‘paint’ in the name, it’s not like the version you’d apply to your walls. Kirchhoff says to follow the instructions very carefully and, ideally, use it during warmer months so you can open a window and clear little ones out of the house as it “stinks really, really bad,” they say.
Before starting the project, Kirchhoff had to round up additional materials, like PPE (personal protective equipment), a respirator, gloves, eye protection, sandpaper (or an electric sander!), brushes, and rollers. Prior to painting, Kirchhoff sanded down the existing tiles to get rid of the coating but make them porous so the epoxy paint can cling to it.
One thing Kirchhoff wishes that they did was remove the caulk around the shower or bathtub as the epoxy won’t stick to it and reapply it after the paint had dried. The main thing they stress is following the directions to avoid bubbling and cracking. However, Kirchhoff thinks epoxy paint is a great solution to reimagining a bathroom.
“I super duper recommend the epoxy paint because like all paint (which I love) it is the cheapest and easiest way to make a huge difference,” they write.
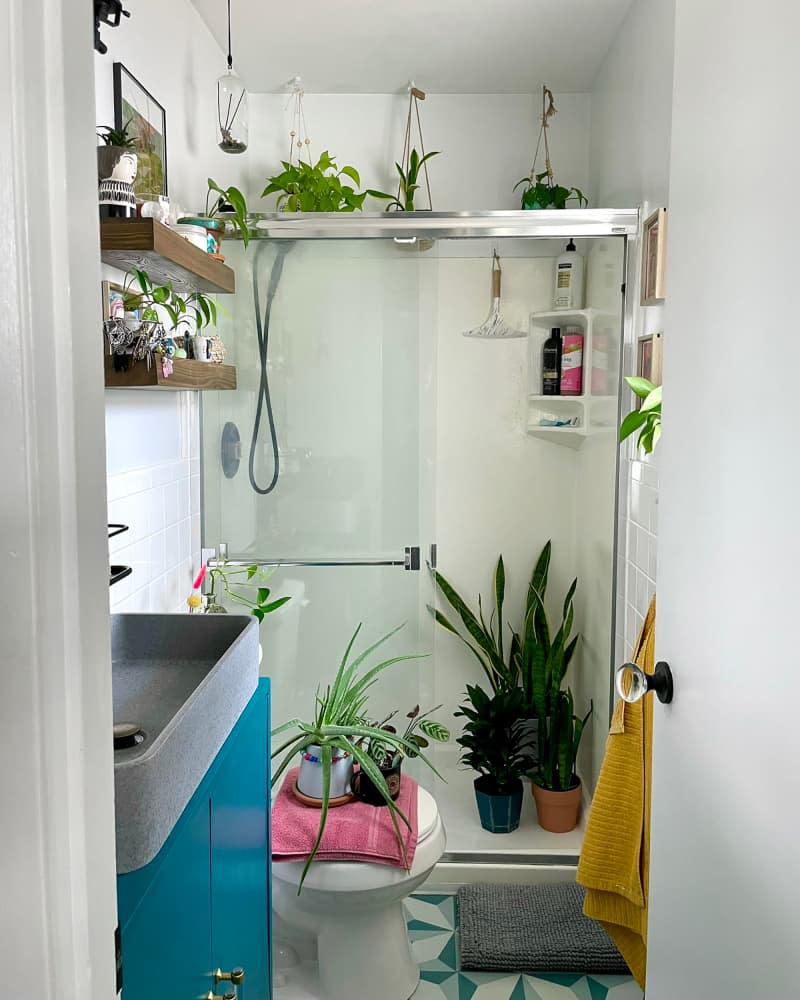
However, painting over the tiles wasn’t the only change in the bathrooms. Kirchhoff added Wall Pops peel-and-stick floor tiles, a new light fixture (which they flipped upside down), created a custom vanity from a cabinet, replaced the mirror, purchased a new sink and toilet, among several other changes. Both bathroom updates cost around $2,500, but Kirchhoff feels confident knowing they gave the space a refreshing makeover without doing a full gut renovation.
Kirchhoff says the new bathrooms feel more spacious, happier, and just overall better. “It’s a tiny sanctuary for me,” they say. Plus, they aesthetically flow with the rest of the home, which is their “jam.” But the overall project is a testament to Kirchhoff’s “DIY heart.”
“The only thing that I have to say is that I want people to GO FOR IT,” they write. “You don’t need to be an expert to make dramatic changes in your home. And you don’t need to be super wealthy either, you can make huge differences without having to completely gut a space. Changing out fixtures and using paint goes a long way.”
If this makeover intrigues you, you’ll want to see the rest of their home. Visit the full home tour to see more.

