How to sculpt and paint a warrior beast in ZBrush and Photoshop

In this tutorial I’m going to share how to sculpt and paint a warrior beast in ZBrush. I will reveal how I will adapt an elephant sculpt to design a warrior creature, eventually creating a realistic final image.
The bulk of my work will be done in ZBrush, as I create the foundation to paint over in Photoshop. This is an intermediate-level tutorial, so a basic knowledge in ZBrush and Photoshop will be required. (Read our ZBrush review for more on this 3D sculpting software.)
Before I begin the sculpting and painting stages, I’ll sketch out my ideas to have a clear guideline of what I’m working towards. It’s also important that I have an animal anatomy book and other reference images handy. I’ll be using these references regularly throughout the sculpting and painting stages to give the final image that extra level of believability.
I’ll sculpt and pose my elephant creature in ZBrush while paying close attention to elephant anatomy. Taking the time to make sure the structure of the body and the muscles are in the right place will add to the believability of the final image.
In ZBrush, I’ll also polypaint the elephant and set up the final lighting on the model. I’ll render out different material passes and composite everything together in a Photoshop file. This will create a realistic-looking creature that I can paint over and add my finishing touches. I’ll also paint in the background, atmosphere and any other details to the elephant to create the final image of a war beast on the rampage!
Sculpt and paint a warrior beast: my brushes
Once we load up Photoshop, here are the main brushes we're going to be using for the painting segment of this workshop.
Custom brushes: Sampled Brush 7 4
This brush enables me to create soft gradients between colours.
Kyle Ultimate Brush Pen

I use this brush for finer details, or anything that requires a sharper edge.
M@_SMOKE_BRUSH_05
I use this brush to create atmosphere and fog.
Sampled Brush 17 3

Ideal for painting softer or blurry areas: light rays, dust or motion blurs.
Sculpt and paint a warrior beast in ZBrush & Photoshop
I hope this tutorial is helpful to you. If you'd like to learn more about the software we'll be using, see the ZBrush tutorials roundup for more advice, and Photoshop tutorials list for more digital painting workflows. Read on for the step-by-step and look out for the finished piece at the bottom of the page.
01, Generating silhouettes that clearly convey the design

(Image: © Rob Brunette)
I want to depict a zombie elephant controlled by robotics. I start by sketching an elephant body in Procreate and try many different variations of the robotic implants. I'm focusing on the big general shapes because I want the design to read on this simple silhouette level. (Read our Procreate review for more on this iPad app.)
02. Sketching the pose
(Image: © Rob Brunette)
I sketch my idea for the final painting in Photoshop. The scene will take place in a misty gladiator ring. I want it to feel like the elephant's charging towards the viewer and about to swing its trunk. The camera is placed at a low angle so that the elephant feels big and intimidating. The lighting is dramatic and casts large, dark shadows on the elephant's body and ground.
03. Blocking in the anatomy
(Image: © Rob Brunette)
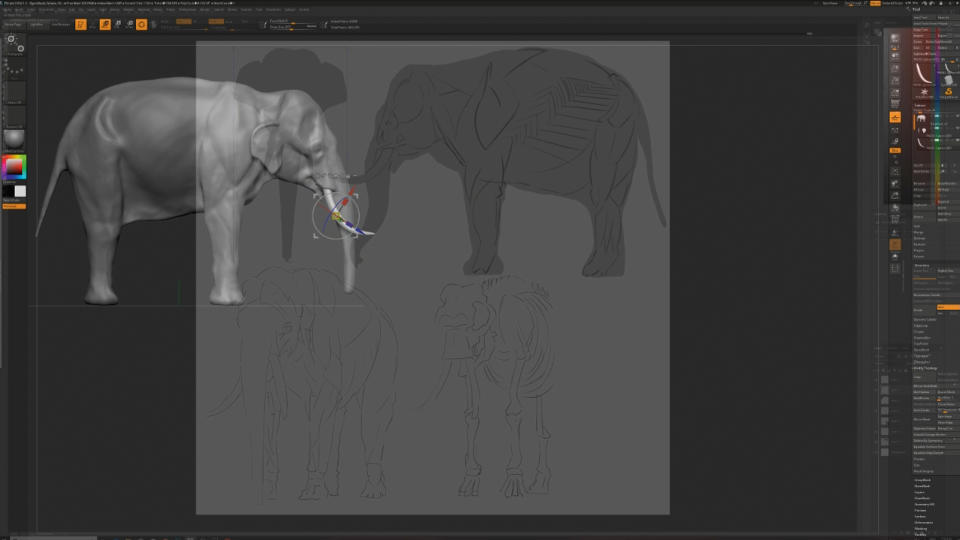
I launch ZBrush and use the Scale tool to shape the basic body. I lower the Opacity of the ZBrush window because I have an image of elephant anatomy underneath, enabling me to match the proper proportions. I use the Mask tool to select the parts I want to use as the trunk and legs. I Dynamesh the clay and continue to sculpt the body using the Clay Buildup and Move brushes.
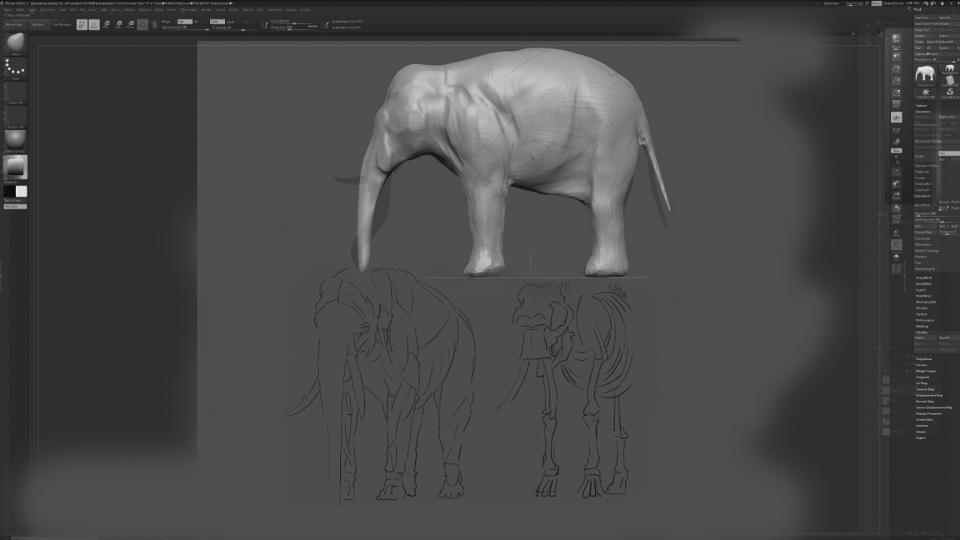
04. Refining forms to reinforce the storytelling
(Image: © Rob Brunette)
I have a page of images of elephant anatomy and emaciated elephants on a separate screen, which helps me to focus on the skeletal structure and the major muscle forms. I sculpt the landmark points such as the elbows, shoulders and cheekbones in the proper place. I want this character to resemble an emaciated zombie, so I make the skeletal structure visible in the shoulders, ribs and hips.
05. Adding robotics that would work around the creature’s movements
(Image: © Rob Brunette)
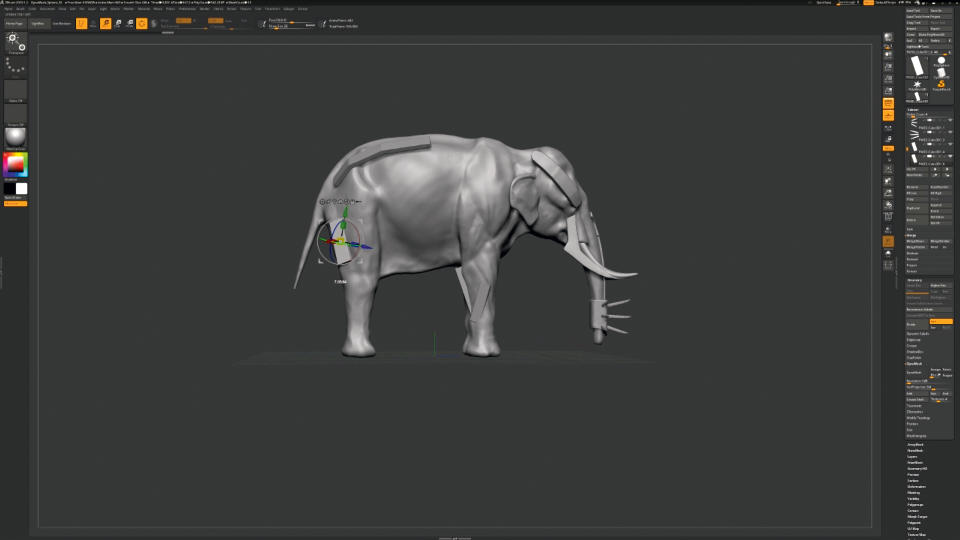
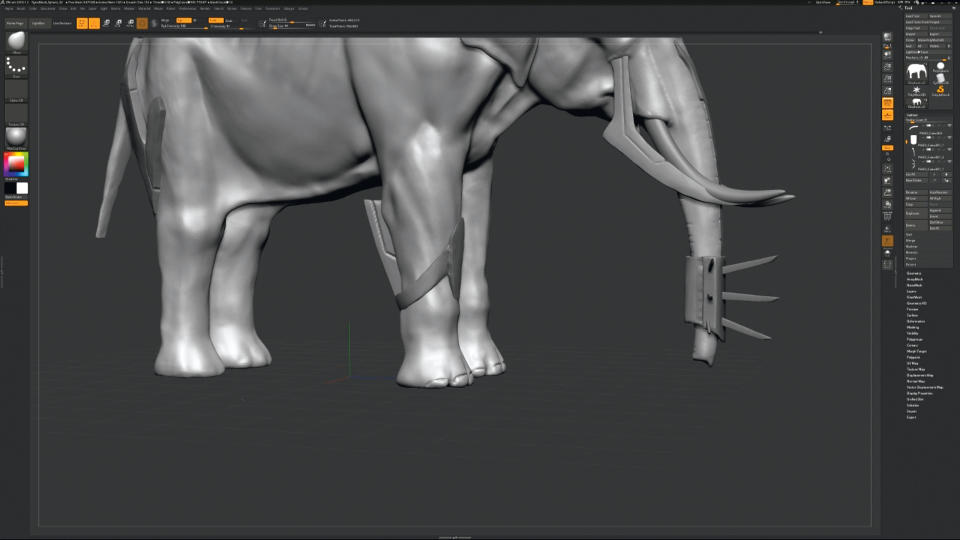
I add the robotic elements as separate tools so that they can be sculpted without affecting the rest of the model. I still want to block in my major forms so there's no point in focusing on any details just yet. I also want to make sure that the robotics could realistically move according to the elephant’s anatomy. I don't want any pieces to stretch over major joints such as the elbow or neck.
06. Further refining the forms
(Image: © Rob Brunette)
I continue to refer back to my reference images to make sure that the anatomy is correct. I notice that the weighting looks off and that the elephant's shoulders feel too far forward. I adjust the shoulders without moving any other parts of the body. Pulling back the shoulders help the legs feel straight and elongates the neck. I refine the feet – now the elephant appears more balanced.
07. Posing the model
(Image: © Rob Brunette)
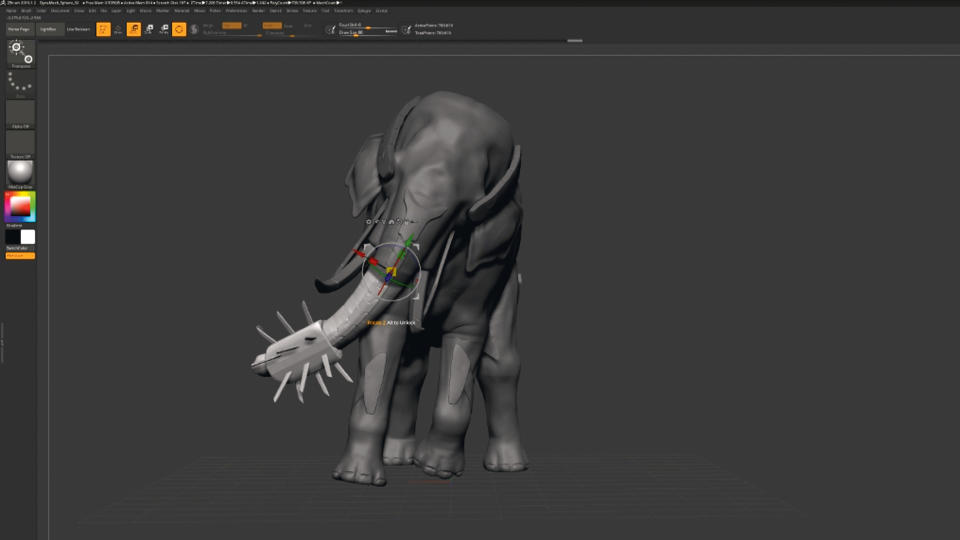
Once the anatomy feels correct, I go to ZPLugin > Transpose Master > TPoseMesh to pose the elephant and the robotics. I isolate the areas I want to pose using the Mask tool and pay close attention to the elephant’s anatomy to only move body parts at the proper joints. I click ZPLugin > Transpose Master > TPose SubT when ready and do additional sculpting to correct the anatomy.
08. Subdividing the elephant's body
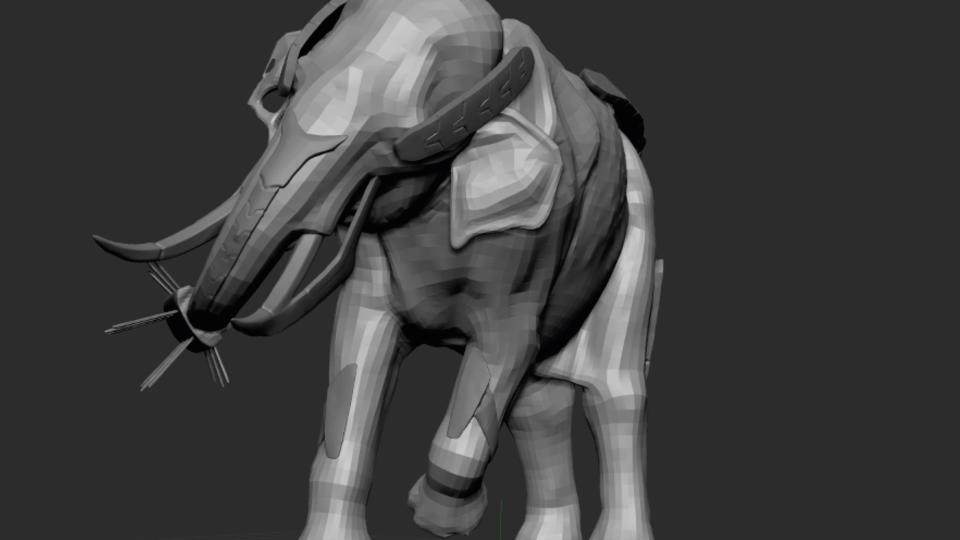
(Image: © Rob Brunette)
My subtools are all Dynamesh models. To add more detail to the elephant body I duplicate my elephant Subtool. I go to Geometry > ZRemesher > ZRemesher. I Subdivide the ZRemeshed body once, then click Subtool > Project > Project All so that the Subdivided elephant projects on to the Dynamesh elephant below it. I subdivide the top elephant again, Project All again, and repeat until I reach four to five subdivision levels.
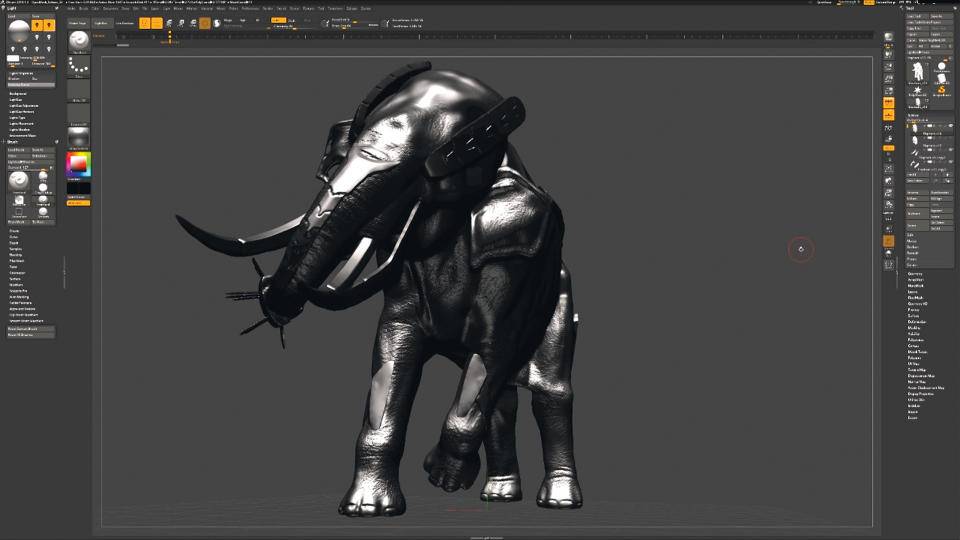
09. Adding textures and colour

(Image: © Rob Brunette)
I choose Standard brush > Stroke setting DragRect and select an Alpha to pull on to the Subdivided elephant’s body. I look to my reference images to make sure the proper cracks and wrinkles are in the right place. Then I paint the model by selecting the RGB box on the brush and turning off Zadd or Zsub. I select the colours and paint in the details to match my reference images.
10. Rendering the beast
(Image: © Rob Brunette)
I go to Draw > Camera Icon and select the focal distance I want to view my final image; 28mm will exaggerate the scale of the elephant. I go to Movie > Timeline > Show and click the timeline to set the view that I want to render. I set up lights similar to my original sketch, then press BPR and save renders of my beast.
11. Compositing in Photoshop
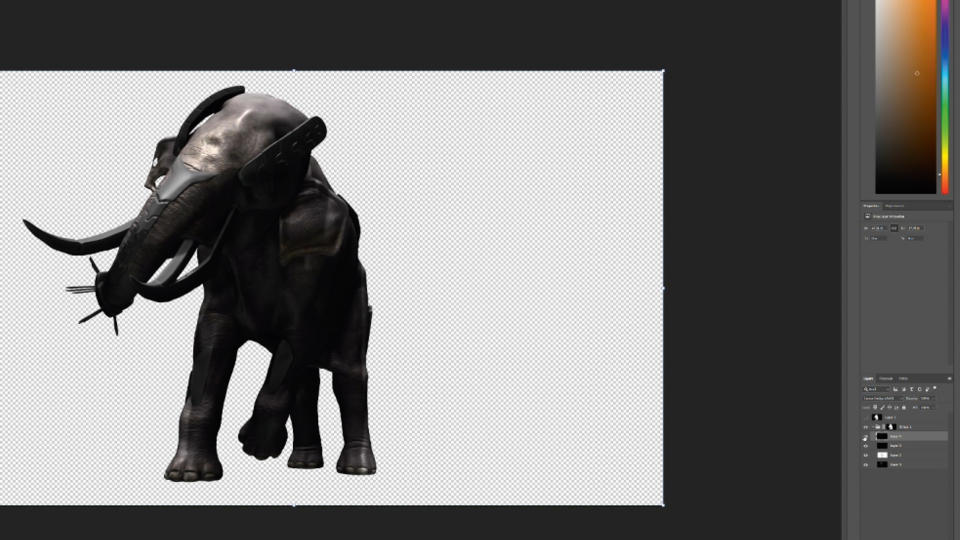
(Image: © Rob Brunette)
I bring all my renders into Photoshop to composite them together in one image. I copy and paste them on top of the main colour elephant, then set the layers to adjustment layers like Multiply or Color Dodge to achieve the right lighting effect on the body. It helps to separate the robotics from the skin so that I can use the adjustment layers to create different-looking materials.
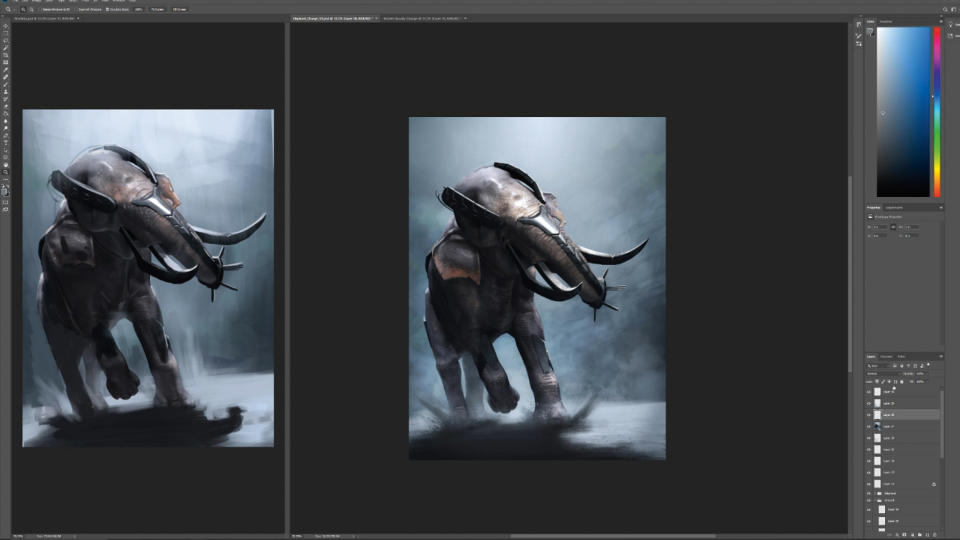
12. Painting over the composite
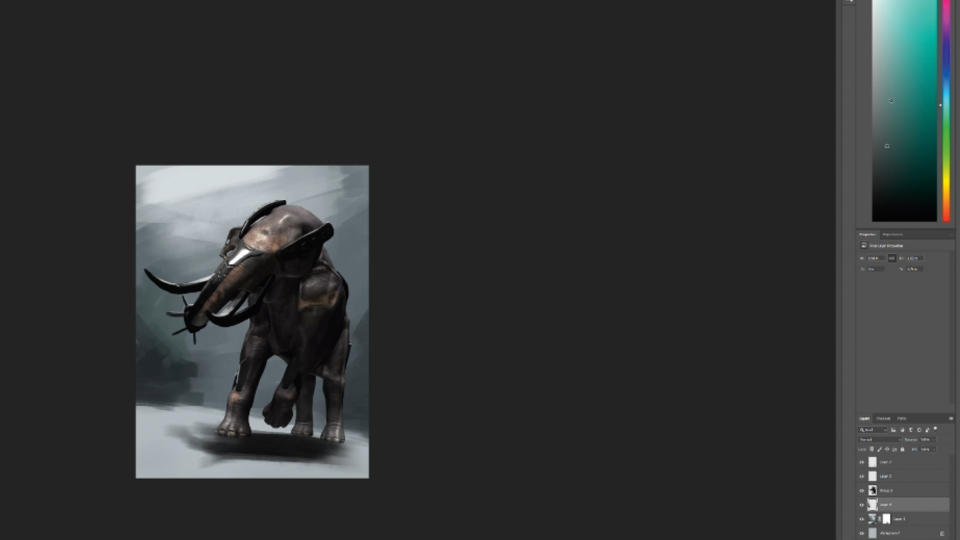
(Image: © Rob Brunette)
I create a file that's the dimensions of my final image. I do a quick paint-over of my composited image, to act as the guideline for my final painting. I only spend 30 minutes on this painting. I add dust clouds to imply that the elephant's charging. I also angle the back leg inwards to make the movement feel more dynamic.
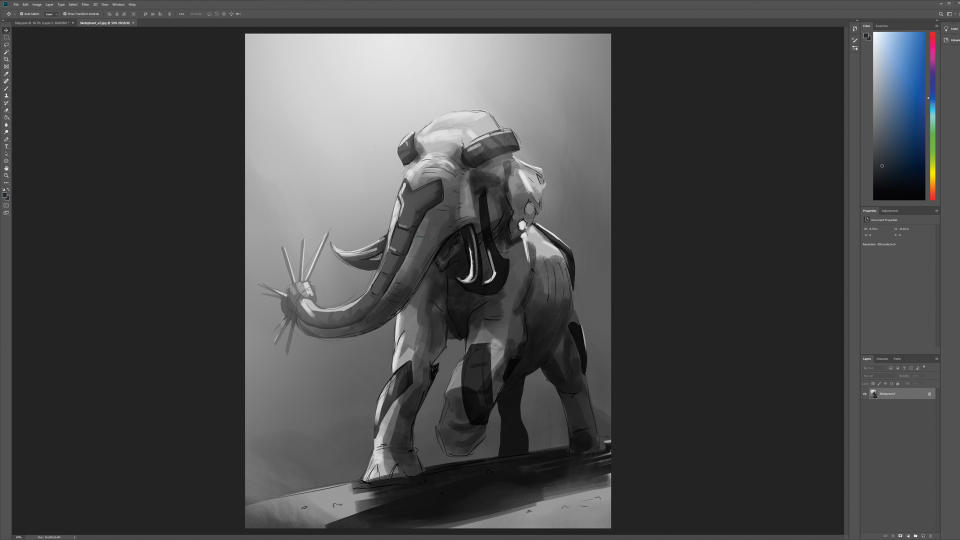
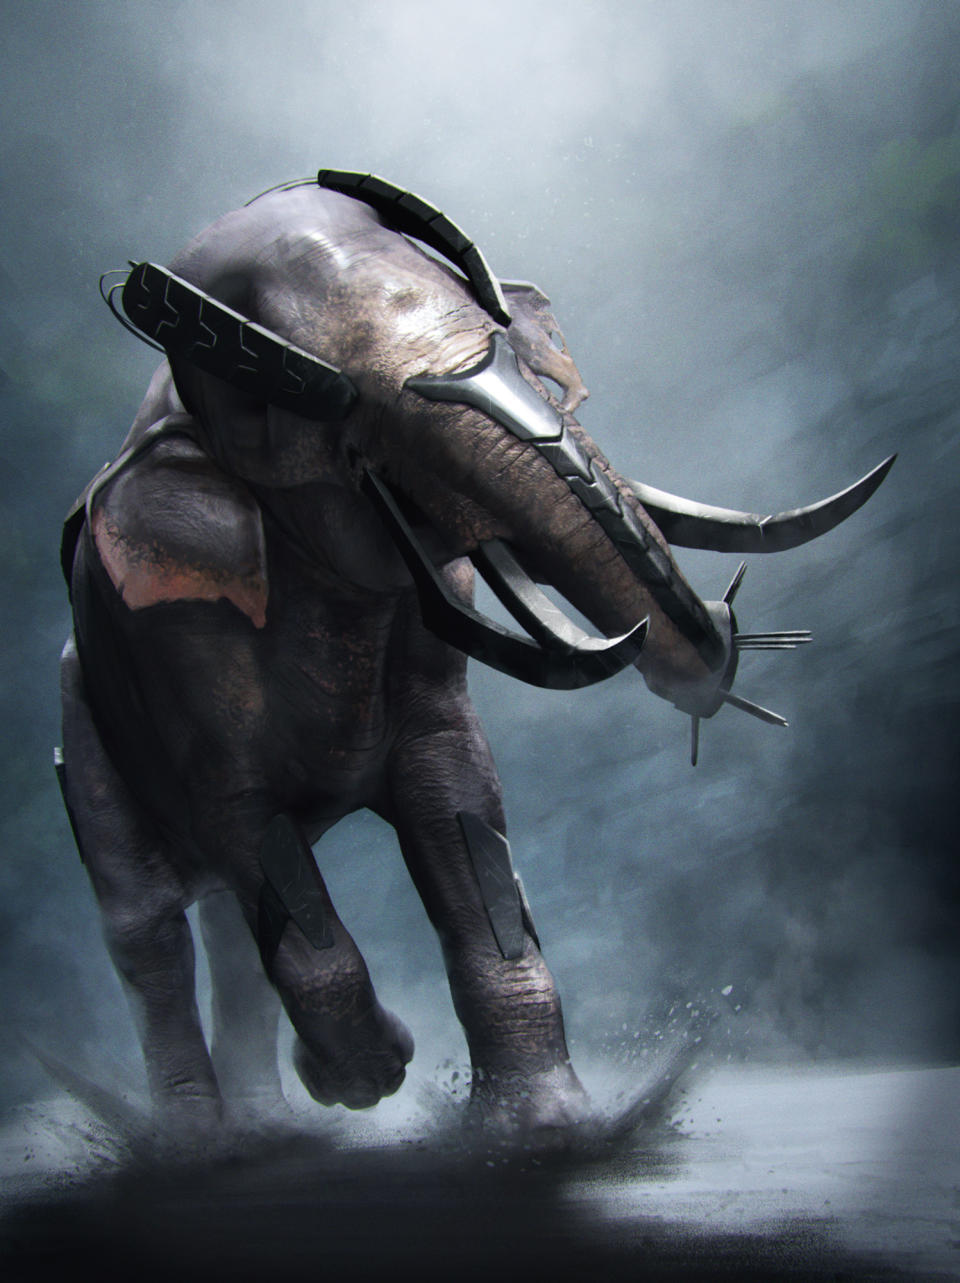
13. Creating the final painting
(Image: © Rob Brunette)
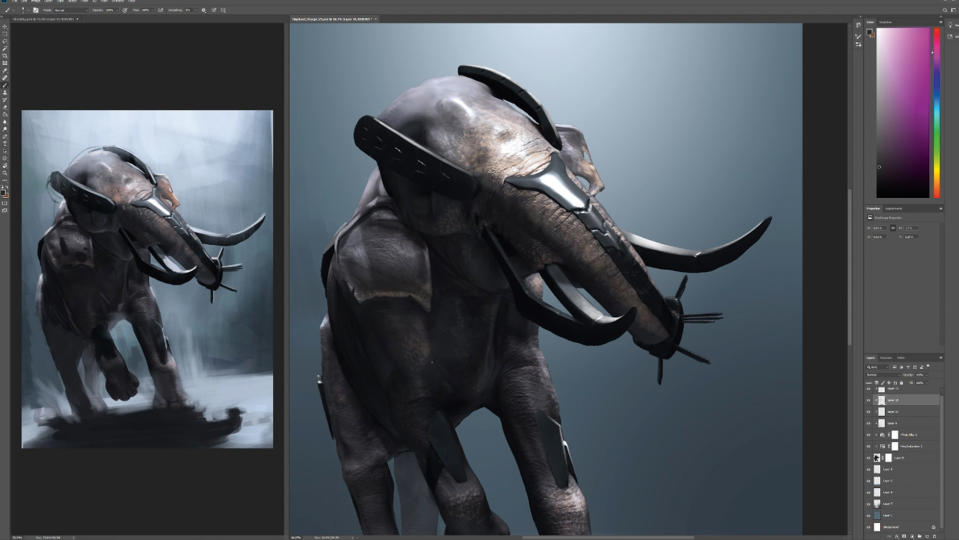
I create a new Photoshop file and bring in my composited image again. I refer to my rough paint-over, but take more time painting in the details. I also use my references to make sure the patterning on the elephant's trunk and body is correct. A stronger white light on the top of the tusks and the robotics helps with readability
14. Adding atmosphere and finishing touches
(Image: © Rob Brunette)
I want the gladiator ring to feel foggy and misty, so I use cloud brushes to create atmosphere. I also use Soft light or Overlay adjustment layers to push parts of the elephant and environment back in space. I merge all the layers together and blur it by one per cent. I fill a layer with 50% grey and select Filter > Noise > Add Noise to make it feel like a real photograph.
Get more Procreate tutorials in ImagineFX
This content originally appeared in ImagineFX magazine, the world's leading digital art and fantasy art magazine. ImagineFX is on sale in the UK, Europe, United States, Canada, Australia and more. Limited numbers of ImagineFX print editions are available for delivery from our online store (the shipping costs are included in all prices)
Alternatively, you can access us instantly through our digital options:
• Apple app (for iPad or iPhone)
• Pocket mags (multi-platform app, great for Android users)
• Zinio (multi-platform app for desktop or smartphone)

