How to Make Rustic Rosettes
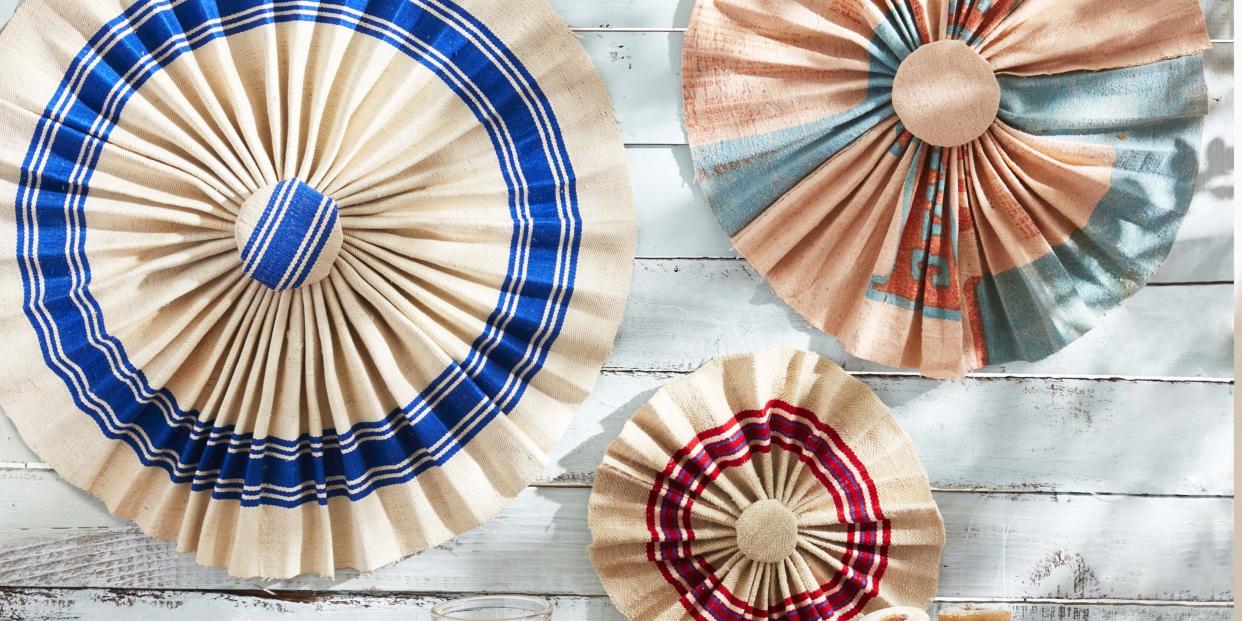
Vintage grain and feed sacks create a colorful and festive focal point above a backyard buffet station.
Step 1: Cut a strip of fabric to 48 inches long (you can sew two strips together if your fabric isn’t long enough). The finished diameter will depend on the width it’s cut: A 5-inch-wide strip will create a rosette that is approximately 11-inches across, and a 6-inch-strip will create one that’s about 13 inches in diameter.
Step 2: Next, fold the strip in half, with the right sides facing in, and sew the two short ends together, creating a loop. Turn the loop right side out. Use heavy-duty quilting thread to sew a running stitch, about ¼ inch from the edge, all around one side of the loop. When you get back to where you started, gently pull the thread to gather the fabric as tightly as you can; knot. Stitch around the center, close to the edge, catching a few tucks at a time, to help secure the center of the rosette.
Step 3: To create the center button, cut a piece of cardboard into a round that is the desired size. Cut a round of fabric that is about a ½ inch larger than the cardboard. Place a small piece of Poly-Fil on top of the cardboard then top with the fabric round. Gather the fabric at the back and hot-glue in place.
Tip: If your rosette is floppy and won’t stay upright when hung, you can hot-glue a piece of cardboard to the back to provide additional support.
You Might Also Like

