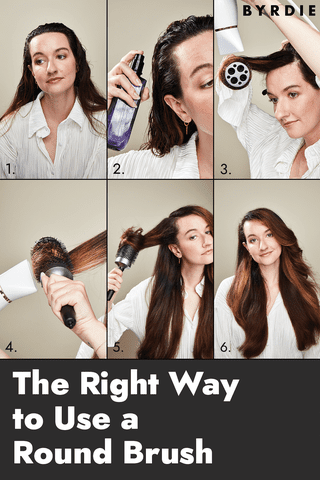
How to Use a Round Brush to Achieve the Blowout of Your Dreams
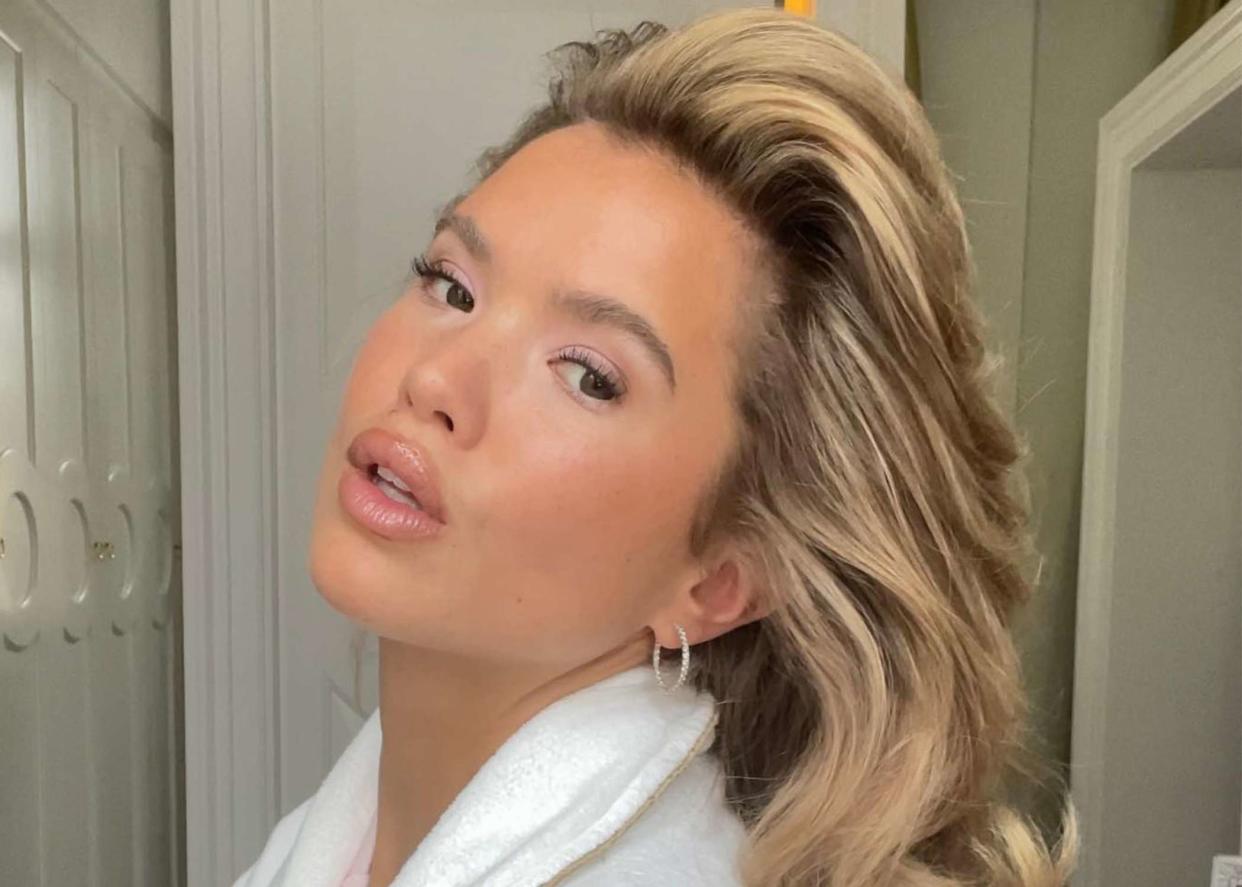
@matildadjerf / Instagram
Reviewed by Sky KimFact checked by Anna Harris
For many of us, the struggle to master the at-home blowout is real—and it tends to involve lots of tangled strands and tired, sore arms. While hair tools like two-in-one hot hair brushes certainly can simplify the task at hand, sometimes a good, old-fashioned round brush and blow dryer duo do the job best. To assist in your hair styling efforts, we went directly to the source, tapping hairstylists Monaè Everett and Kelly Macedo, for their best tips and tricks for the most effortless round brush blow-drying experience. Keep reading for a step-by-step tutorial on achieving a salon-quality blowout at home with a round brush.
Meet The Experts
Monaè Everett is a hairstylist and the founder of the Texture Style Awards.
Kelly Macedo is a hairstylist and the owner of the Interior Hair in Los Angeles.
How to Pick a Round Brush
Not all round brushes were created equal, and not all promise the same results. The material and density of the bristles and the size of the brush are all factors that play into the end result. While vented metal round brushes are suitable for heat reinforcement while styling, according to Macedo, boar bristle brushes are usually firmer and denser and create more tension when pulling the hair, producing more volume and lift.
As far as diameter, round brushes follow the same concept as your curling irons: The bigger the diameter of the brush, the bigger the curl. "Use a large one for a classic 90's big-bodied, bouncy blowout and a medium-sized one if the goal is simply to smooth and add a more obvious bend or curl," Macedo says.
If you're a blowout beginner, avoid using too-small brushes, as it tends to be easier to get your hair tangled in the bristles of a smaller brush rather than a larger one.
How to Use a Round Brush to Blow-Dry Your Hair
Start With Clean Hair

Dee Mills / Byrdie
According to Everett, how dry your hair should be when you start styling depends on your texture. "For example, if you have pretty straight hair, you can let it air dry, or you can rough dry it with a blow dryer until it's 80 percent dry before you then use a brush to dry and style it," she says. "If you have coily hair, you will want to pull it straight with a brush while it’s soaking wet."
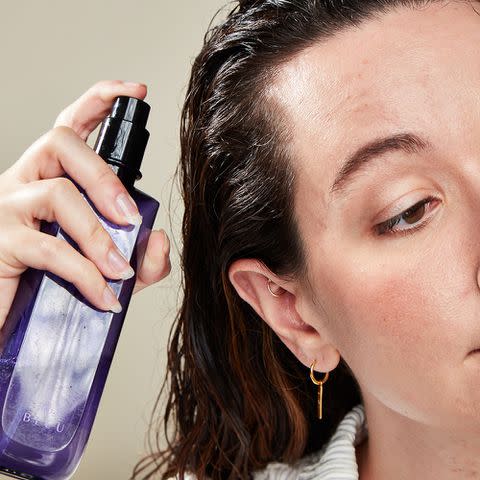
Apply Heat Protectant and Section the Hair
Dee Mills / Byrdie
"In order to keep the hair as healthy as possible, you want to use a heat protectant to block it from too much heat as well as to help avoid frizz," says Everett. When it comes to selecting a heat protectant, look for something "that protects the hair up to 450 degrees, minimizes frizz, and is keratin-based," says Everett. "Your hair is mainly composed of protein, and keratin is a protein that increases protein retention."
After you've applied your heat protectant, you can section your hair. Start by separating it into four parts. You'll want to work on one segment at a time, clipping the others up and out of the way.
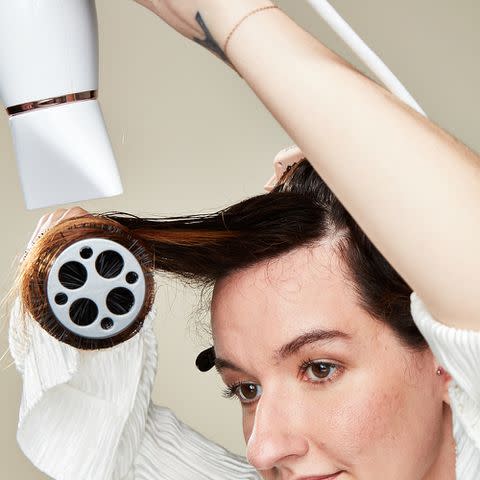
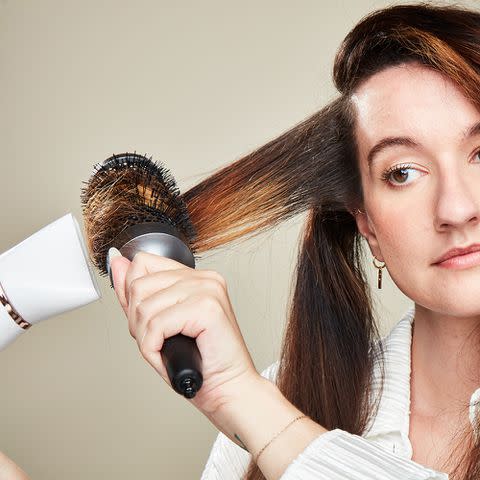
Start Drying, Working Your Way Down From the Roots
Dee Mills / Byrdie
As you start drying, begin with the round brush at the base of your roots, then roll it down to the ends, following the brush with the heat from the blow dryer. "While the way you hold a round brush depends on the section of your head you are working on, a general rule of thumb is to direct the brush away from your face while also holding the blow dryer toward the brush," says Everett.
If you have curtain bangs, which are notoriously easy to style with a round brush, Macedo says, "You'll want to position the brush on top of one of the sides of bangs and over-direct forward towards the face and then quickly move away from the face. This will allow them to fall with volume and enhance the bend that a curtain should have."
Design by Zackary Angeline
Switch Up Your Angles—and Your Settings
Dee Mills / Byrdie
As you reach the ends of your hair, switch up how you angle the brush. Instead of always holding the blow-dryer horizontally, after you’ve lifted the root, flip your brush vertically. Give it an extra twist of the wrist or twirl as you go to add a soft, natural-looking wave at the end. One important thing to note: No matter how you’re moving the brush, always keep the nozzle of the blow-dryer parallel and angled downward so you’re evenly dispersing the heat across the section of hair and not fluffing it up.
The other thing that needs to change consistently throughout the process is the heat setting on your blow dryer. High heat and high air may seem like the best choice, but unless you’re a professional, using only that combination can leave you with a frizzy, tangled mess.
To Speed Up the Process, Slow Down
Dee Mills / Byrdie
As contradictory as this might sound, the fastest way to blow-dry your hair with a round brush is to take your time. Wrapping sections that are too large around the round brush won’t save you any time in the end because you’ll most likely have to go back and redo them. The smaller the section, the more evenly you can dry and style the hair and the faster you can move on.
Once you complete a section and while the hair is still wrapped around the brush, turn your heat setting down for a cool blast of air. This will help your hair hold its shape, according to Macedo. Although this might seem like an added, unnecessary step, skip it, and your results may not last as long.
Final Look

Dee Mills / Byrdie
And there you have it—a voluminous, bouncy blowout, achieved without setting foot into a salon.
Read the original article on Byrdie.

