How to Repot a Houseplant the Right Way
TABLE OF CONTENTS
On This Page
How Often to Repot
Signs It's Time to Repot
When to Repot
Choosing a Container
Choosing Soil
Repotting Steps
Half the joy of tending to houseplants comes from watching them grow. It's a sign you've given your greenery the care it needs to thrive. But with new growth comes a gardening task that's often seen as a nuisance—repotting.
Repotting your houseplants gives them more room to grow and prevents the soil from being depleted of moisture and important nutrients. Avoiding this maintenance step can lead to wilted leaves, stunted growth, and dry soil. Although it can feel challenging, repotting your houseplants is manageable when you have the necessary tools and a plan in place.
How Often to Repot Your Houseplants
Luckily, repotting your houseplants doesn't need to be done frequently. "On average, repotting should be done every one to two years, depending on the size of the plant and how quickly it is growing," says Katie Dubow, president of Garden Media and QVC garden guest with Cottage Farms. "However, for plants that are growing very quickly, it may be necessary to repot them more often."
Let your plants take the time to grow into their existing pots rather than rushing to give them a new container. "Moving them into a larger pot before it's necessary can slow growth, stop or delay flowering, and increase the risk of root rot as there is more soil than needed so it retains water longer," says Melinda Myers, gardening expert and host of the Great Courses How to Grow Anything DVD series.
GETTY IMAGES
Signs It's Time to Repot Your Houseplant
The longer you tend to your houseplants, the easier it will be to tell when they're ready for a new home. In general, there are a few universal signs it's time to repot your greenery.
It Needs More Water
A change in your plant's watering schedule may mean it needs to be repotted. "The number one sign that it is time to repot your houseplant is watering frequency," says Matthew Peterson, west conservatory manager at Longwood Gardens. If your plant is drying out constantly—which may lead to yellowing leaves or brown tips—and needs multiple drinks a week, it may be time to bump it to a larger container.
It's Sinking
You may also notice that your plant has begun to sink in its container as the potting mix begins to break down over time and become more compact. "This prevents good drainage and leaves the container with less media for your houseplant's roots to grow in," says Peterson.
It Has Become Root Bound
Roots showing through the drainage holes of your container is a telltale sign your plant is ready to be repotted. "Houseplants that become root bound—roots spiraling at the bottom of the pot, or trying to escape through drainage holes—will need to be repotted in order to provide the roots with more space to grow," says Dubow. When this happens, you'll need to be extra careful when repotting as the roots can become easily damaged.
Related: 10 Plants That Can Thrive in and Even Improve Compacted Soil
The Best Time to Repot Your Houseplant
Give your plant the best chance at adapting to its new environment by choosing the right time to repot it. "Spring through early summer is the best time as the growth usually improves as the days get longer and sunlight is more intense," says Myers. "Indoor plants benefit from these outdoor conditions and will recover quickly from transplanting and tend to put on more growth at that time of the year."
Choosing a New Container for Your Houseplant
When selecting a new vessel for your houseplant, it's important that you slowly increase the size over time. "Just as you wouldn't take an infant and dress them in clothing for a 6-year-old child, it is also important that the container selected is only slightly larger than your houseplant's current container," says Peterson. "You only want to increase your pot size by no more than a third each time."
In addition to being slightly bigger, you should also choose a container that has drainage holes. "This will help to ensure that the soil does not become waterlogged, which can lead to root rot," says Dubow. "Plastic, terra cotta, and ceramic containers are all fantastic options."
Choosing the Right Potting Soil for Your Houseplant
You will need fresh potting soil when adding your plant to its new vessel, and the one you choose can dictate how well your plant thrives in its new home. "When repotting houseplants, it is important to use a potting mix that is specifically designed for indoor conditions," says Dubow. "This type of soil is formulated to provide the right balance of nutrients and moisture for houseplants."
A loose, porous media that contains bark, charcoal, and perlite will aid with drainage and water retention, which is essential to avoid root rot. To achieve these conditions, use a ratio of 50 percent orchid potting mix with 50 percent regular potting mix. "The orchid mix contains bark, charcoal, and perlite that will help promote drainage and proper air circulation around roots," says Peterson. Mix the two together in a separate container and then water slightly, which will ensure there are no hydrophobic areas hidden in the pot.
How to Repot Your Houseplant
Now that you have your container and soil picked out, it's time to repot your houseplant. Water your plant generously right before removing it from its pot. "This will help leech out any accumulated salts that have built up over time," says Peterson. Once the soil is moist, you can gently remove your plant from its container and begin the repotting process.
Slide the plant out of the pot. If it won't budge run a knife along the inside of the pot to loosen the roots.
Carefully remove any excess soil from the roots.
Trim off any dead or damaged roots and gently loosen any circling roots.
Pour a thick layer of potting mix at the bottom of the new container.
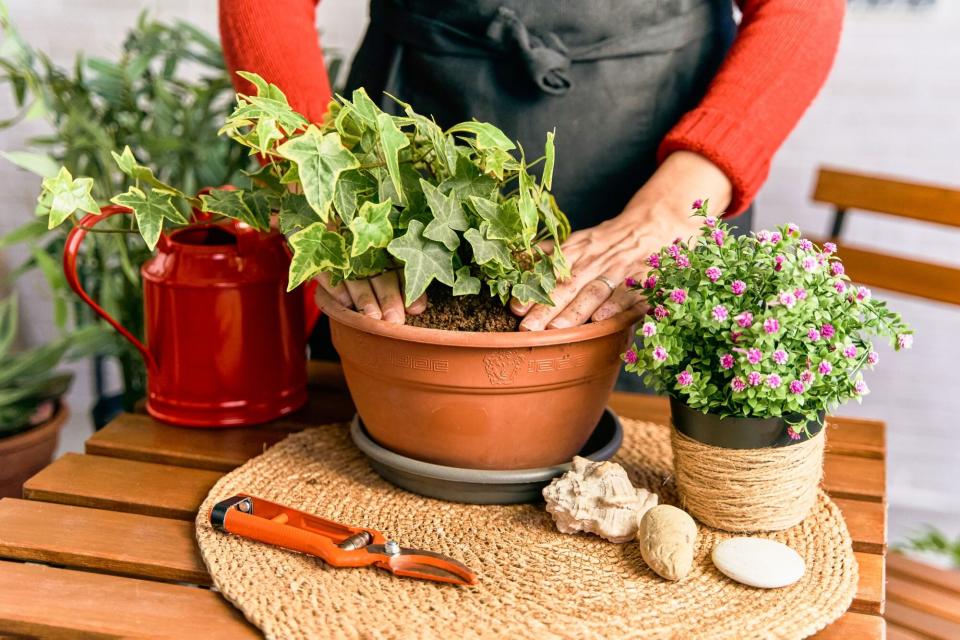
Place the plant in the pot and fill in around the edges with potting mix.
Gently tamp the soil to remove air pockets.
Water the plant thoroughly and let the excess water drain out.
Place the pot in a well-lit area.

