How to Replace a Wooden Fence Post
In most respects, it's inevitable: A wood fence post will rot over time. Even pressure-treated lumber isn't impervious to breakdown and decay. If you've begun to notice that part of your fence is leaning or a post wobbles easily, take the time to replace the post before it causes damage to the entire fence. It might seem like a frustrating chore, but knowing how to replace a broken fence post will save you time and money in the long run.
Materials and tools you'll need
Post hole digger
Replacement post
Gravel
Concrete mix
Level
Trowel
1. Assess the Damage
Inspect the post. Take a closer look at the entire post for signs of rot, decay, or damage caused by pests or weathering.
Check the area. Make sure there are no underground utilities or obstructions that may interfere with the replacement process. When replacing a post in the same location it isn't likely that you'd hit a utility line, but if you're changing the fence location at all, you should call 811 to check before you dig.
2. Remove the Old Post
Detach the fence panels. Remove any fence panels or sections attached to the damaged wooden post. Store them safely to the side so they can be reattached to the new post when you're done.
Dig around the post. Use a post hole digger to excavate the soil around the base of the wooden post. You'll need to extract the soil slowly and reserve it in a wheelbarrow or in a pile to the side. Depending on your region and its codes related to the freeze-thaw cycle, remember that the post may be as deep at 48" below ground level. And remember, to remove a post in concrete, you'll need to get all the way to the bottom to expose the concrete footing or post base.
Extract the post. If it hasn't already broken off, carefully remove the old wood post and any remaining concrete or debris from the hole. If you are dealing with a broken-off fence post, widen the hole sufficiently so it's easier to dig to the bottom of the concrete base.
3. Prepare the Hole
Dig a new hole. Use the post hole digger to widen a fresh hole for the fence post, ensuring it is slightly wider and deeper than the previously damaged fence hole. A maximum 12" diameter hole will be sufficient.
Add gravel. Fill the hole with gravel. Aim for a 3"-6" base to support good drainage and prevent water accumulation around the wooden post.
Compact the gravel. Plunge the new post into the hole to help tamp the stone base so it's level and compact.
Emily Fazio
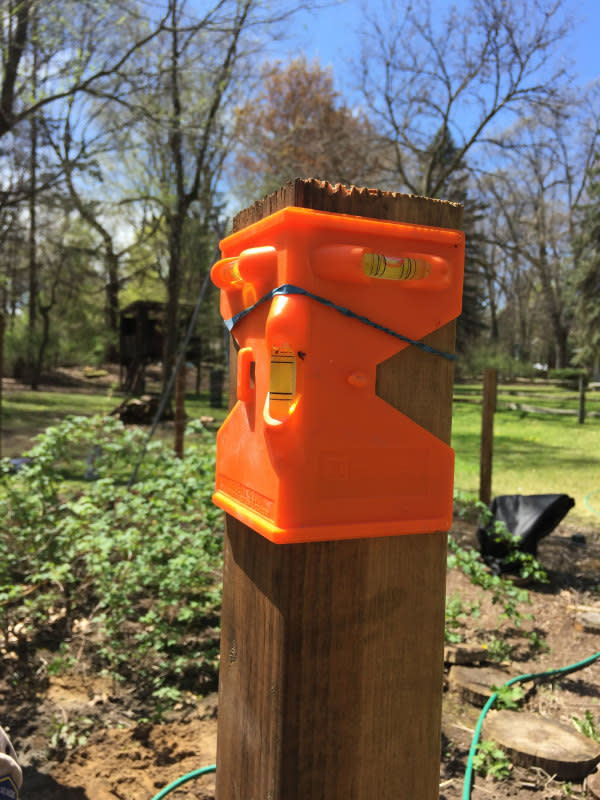
4. Position the New Wooden Post
Use a post level to position the new lumber post. Insert the post into the hole, and make sure it's level and plumb using a level tool. Using this time to get it properly angled to align with the other posts is important. Once concrete is poured, you won't have as much play with its positioning.
Emily Fazio
5. Secure the Post
Backfill the area around the wooden post with concrete. Pour concrete mix or quick-setting cement around the base of the wooden post, letting it fall deep into the hole. Make sure it's evenly distributed around the entire fence post.
Check for level. This is your last chance to make sure the alignment of the new post is perfect.
Support the post. Use braces or stakes to hold the wooden post in place while the concrete sets. This will help prevent it from twisting or shifting if knocked as the concrete cures.
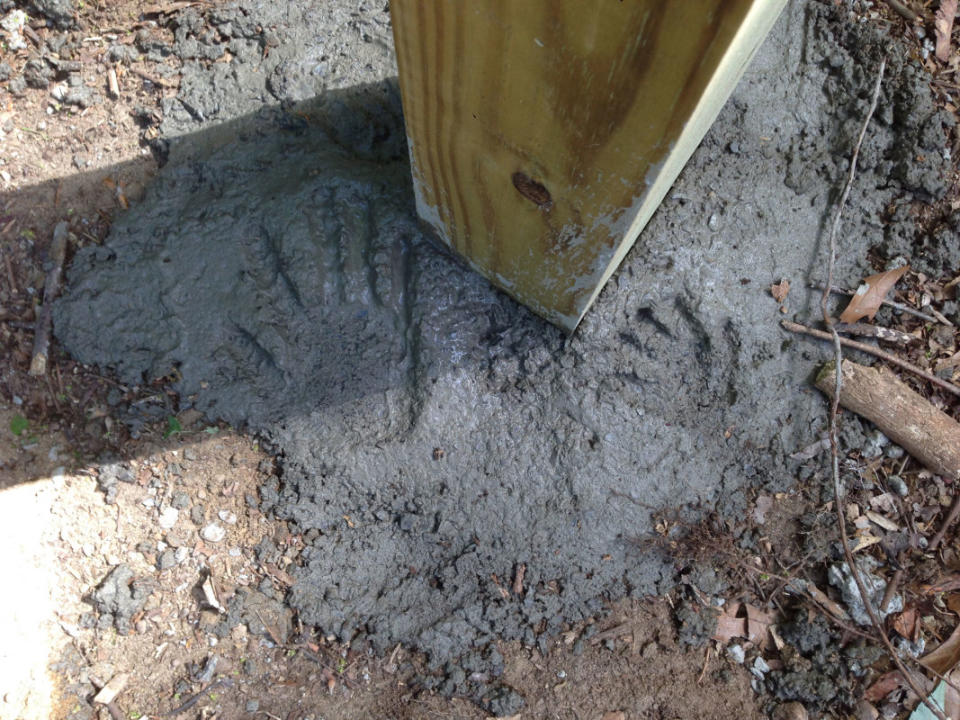
Grade the top of the hole with concrete to promote runoff. You'll need enough concrete to come to the surface of the hole, but you also want to make sure moisture grades away from the post. Use a trowel to shape the soft concrete so it slopes away from the base and promotes good drainage. (Go ahead, some handprints in for memory's sake.)
Allow enough time for the concrete to cure. Allow the concrete to cure fully according to the manufacturer's recommendations before reattaching fence panels. Most products recommend 24-48 hours.
Emily Fazio
6. Reattach Fence Panels
Secure panels. Once the concrete has cured, reattach the fence panels or sections to the new wooden post using appropriate hardware or fasteners.
How long does it take for concrete to set around a wooden fence post?
The setting time for concrete posts around a wooden fence depends on factors such as temperature, humidity, application, and type of concrete used. In general, quick-setting cement may be set in 30-60 minutes, while a traditional concrete pier may take 24-48 hours to cure sufficiently for light use.
Related: Should You Use Pressure-Treated Wood for Garden Fence Posts?
Are there any special considerations for maintaining wooden fence posts?
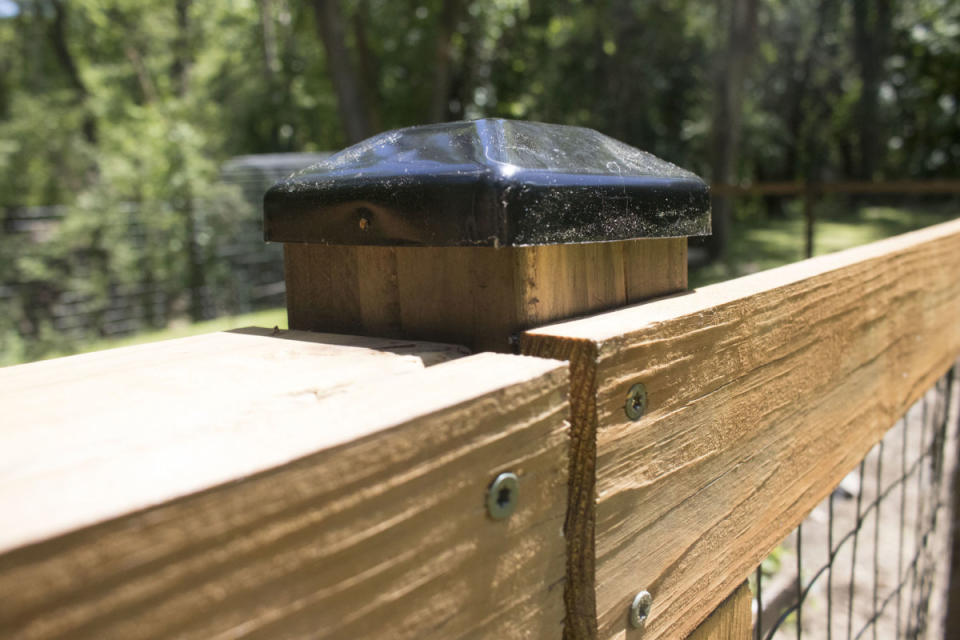
Regular fence posts do require maintenance to prolong their lifespan and prevent decay—even cedar fence posts! It's best to apply a wood preservative or sealant to protect the top of the post from moisture and UV damage. You can also install copper or plastic fence post tops to fully cover the raw cut end of the wood and limit contact with rain and moisture.
Can I reuse the existing fence panels when replacing a wooden fence post?
In many cases, you can reuse the current fence panels when replacing a wooden fence post, especially if they are still in good condition; however, if the panels are damaged or weakened, it's best to consider a fence replacement.

