The Number One Secret to Always Getting Your Security Deposit Back
"Hearst Magazines and Yahoo may earn commission or revenue on some items through these links."
When there's a hole in the wall, whether you’re a renter or homeowner, it may be tempting to cover the hole with a piece of art. But that can actually end up causing even bigger issues. like mold or structural damage, down the road. So learning how to repair drywall is easier than it looks, and most times, you can do it yourself without hiring a pro. We decided to talk to Sweeten, a match-making service for home renovation projects, with vetted general contractors for advice. "Drywall has a long lifespan and can last as long as 50+ years but it’s not indestructible," advises Sweeten Contractor Frank. "Cracks and holes can develop over time. It's also susceptible to water damage from leaks or flooding which can lead to mold." We’ll share with you the three-step DIY process to repair drywall. As well as tips from Sweeten about when it's time to call in the pros.
Supplies to Repair Drywall
Before starting the project, confirm that the material you're working with is drywall. Sweeten contractor Frank describes it as "A composite made of gypsum, paper, and other compounds. It’s softer and less expensive than common alternatives like wood and plaster." Next, gather all of your materials to execute the project. Below we created a list of the essential items to complete the task by yourself.
Materials:
Putty Knife
Mesh Patch (Fiber or Aluminum)
Sandpaper
Spackle
Color-matched Paint
Step 1: Apply Mesh Patch to Wall
Cut your mesh to fit. Layer the mesh on top of the hole to see how much extra to remove. There should be about an inch around the hole. Apply a bit of spackle to the back of the mesh patch and adhere it to the wall, pressing it on, and then let it dry.
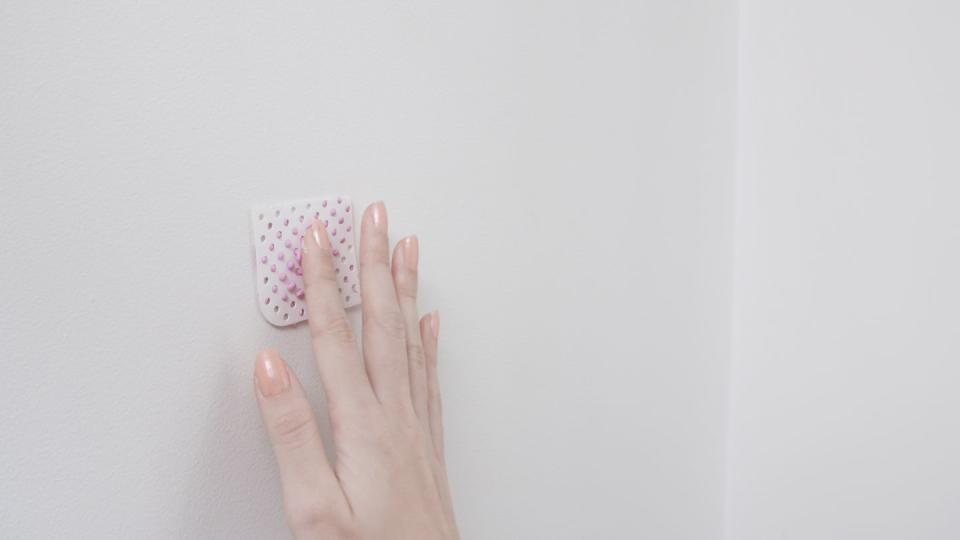
TIP: We used DryDex spackle for it's color-changing marker. Once dry, the spackle turns from purple to white.
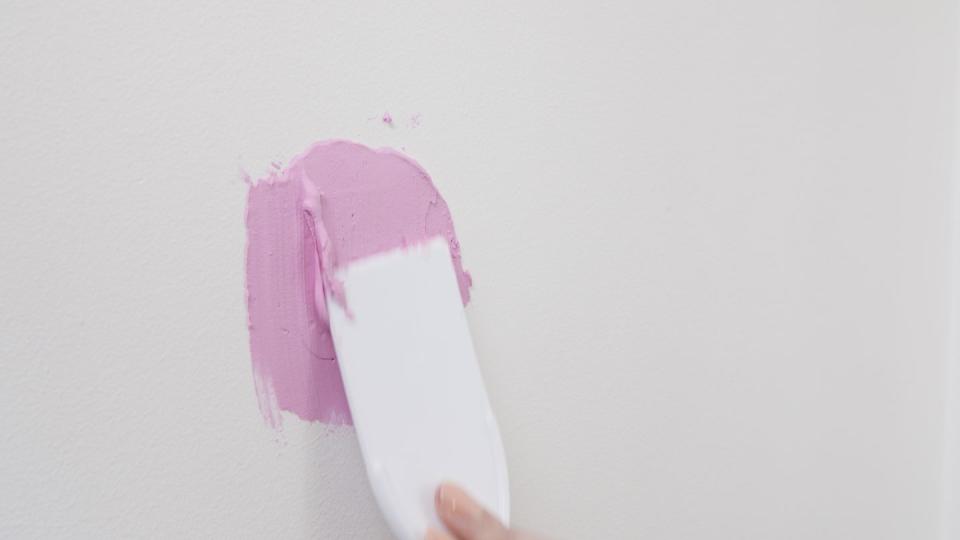
Step 2: Spackle the Wall
Generously apply spackle to the patch with a three-inch circumference around it. Apply the spackle like you would when spreading peanut butter or jelly on a sandwich. Use the putty knife to spread it onto the wall for a smooth finish. Since the spackle dries and hardens quickly, keep the putty knife clean by dipping it in water and cleaning it with a cloth. Once you’ve smoothed the spackle on the wall, let it sit and dry. You’ll know when it’s dry because it won’t be tacky to the touch.
Step 3: Sand & Paint Wall
Next, sand the spackle lightly until smooth with sandpaper or a sand sponge. Blend the edges into the wall, careful not to go down to the patch. Repeat step two as needed. Lastly, wipe down the wall with a damp cloth once dry to remove debris from sanding. Paint over the area with matching paint.
TIP: For easy color-matching cut a small piece of paint near the hole. You're going to repair it anyway! You can bring the chip with you to the paint store and match it directly to samples in-store.

When to Call In The Pros
As with any DIY project, sometimes you have to know when to throw in the towel and bring in an expert to fix the damage. Some signs to notice when making that call is after going through the three steps, the wall still feels malleable, or if you notice more cracks beginning to form on the wall. You want to call in an expert to avoid further problems like mold or structural damage.
The contractor will have a different approach to each repair process based on the size of the damage. When a large area needs to be fixed, we cut out the damaged sheetrock area and replace it with a new piece and apply tape and plaster,” said Sweeten contractor Frank. “Another method is using Plaster of Paris and joint compound. Either method is sanded down in preparation for primer and paint. Large fiber fabric tape can mend medium-sized breaks while smaller areas only require joint compound and drywall tape."
Repeat as many times as you need to refresh your space and get back that security deposit. Next time, a stud finder can help you anchor your heaviest pieces without sacrificing precious drywall.
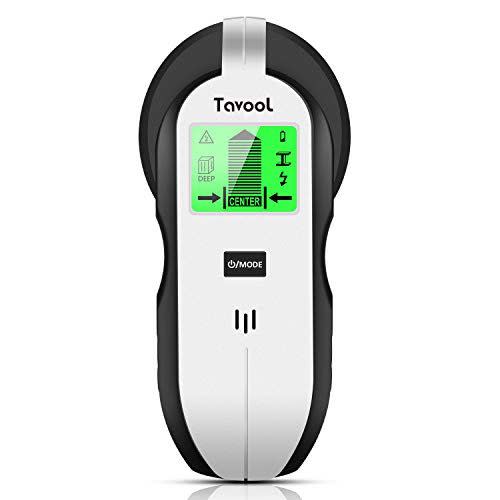
Stud Finder Sensor Wall Scanner
$18.99
amazon.com
Amazon PrimeFollow House Beautiful on Instagram.
You Might Also Like

