How to Properly Install a Car Seat
Car seats are important for safety but they aren't always properly installed. Here's a guide to help you with that.
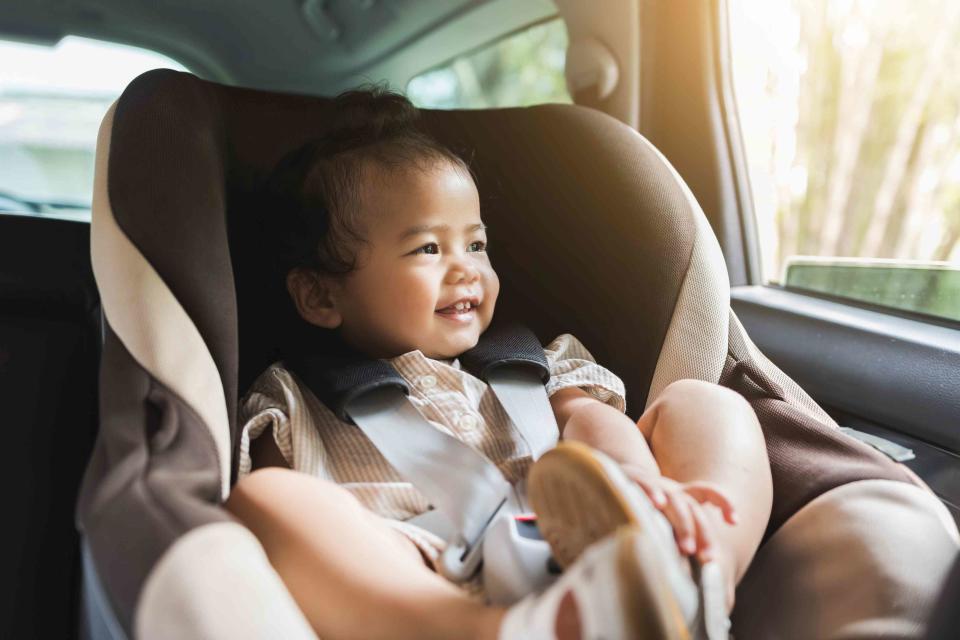
Getty Images/chanakon laorob
Fact checked by Elizabeth Brownfield
When it comes to raising children, parents purchase a steady stream of products to see their young ones through each phase of growth and development. But few of those products are likely to be more important to your child’s safety than car seats.
Hundreds of children’s lives are saved each year by car seats, according to the National Highway Traffic Safety Administration (NHTSA).
And here’s an even more revealing statistic for parents everywhere: about 46% of car seats and booster seats are used incorrectly and as a result, the seat’s effectiveness is reduced, according to the Centers for Disease Control and Prevention (CDC). When booster seats are excluded from that measurement, incorrect usage increases to 59%.
“Motor vehicle crashes are a leading cause of death for children in the United States and not only do we have the challenge of children not riding in car seats, but those that are riding in child seats are often using them improperly,” says Gina Duchossois, injury prevention manager for Children’s Hospital of Philadelphia and chair of the Safe Kids Southeastern Pennsylvania coalition.
Installing a child’s car seat can admittedly be daunting, if not downright unnerving. But accomplishing this task correctly is critical to maximize your child’s safety when riding in a car.
All the Car Seat Options
The first step in ensuring the safest ride possible for your child is picking an appropriate car seat for each phase of life.
There are three primary types of seats: rear-facing seats (which include rear-facing only, convertible seats, and all-in-one seats), forward-facing seats (which include convertible seats, combination seats, and all-in-one seats), and finally, booster seats for older children.
Each seat manufacturer provides height and weight limits for their car seats (often listed on a sticker on the side of the seat). This information may also be included in the seat’s instruction manual. In addition, several government agencies offer usage recommendations for each seat type including the NHTSA and the CDC. The American Academy of Pediatrics (AAP) also provides helpful guidelines regarding size and age limits for each seat.
Keep in mind, car seats expire, so make sure to also check the expiration date if you aren't using a newly purchased one.
When To Use Each Car Seat
Rear-facing only seats
Designed for the youngest of passengers, the AAP recommends that rear-facing only seats be used until a child is 22 to 35 pounds and 26 to 35 inches, depending on the seat model. In addition, the NHTSA offers a general age range for this type of seat: birth until about 3 years old.
Rear-facing convertible and all-in-one seats
These seats are meant to be used initially as rear-facing for your baby and can later be turned around and used in the forward-facing position as a child grows. Often, convertible seats can be used for a longer period of time in the rear-facing position, until your child is as much as 40 to 50 pounds, according to AAP guidelines. Similarly, all-in-one seats may be able to accommodate your child in the rear-facing position until your child is 40 to 50 pounds.
Once a child reaches the size limit indicated by the seat manufacturer, convertible and all-in-one seats should be transitioned to the forward position. That means the transition for these two types of seats is typically based on weight, rather than being a specific age. Additionally, all the organizations mentioned stress the importance of using rear-facing for as long as the seat’s height and weight limits allow.
“Rear-facing seats are designed to absorb impact and protect the child’s head, neck, and spinal cord, so you want to leave them in a rear-facing as long as possible,” says Cassandra Herring, director of child occupant protection for Safe Kids Worldwide, a global non-profit organization focused on protecting children from unintentional injuries, including traffic injuries. “It used to be the recommendation that children stay in a rear-facing seat until they were 2 years old. But the current recommendation is that they use a rear-facing seat until they have outgrown it by height or weight.”
"It used to be the recommendation that children stay in a rear-facing seat until they were 2 years old. But the current recommendation is that they use a rear-facing seat until they have outgrown it by height or weight."
Cassandra Herring of Safe Kids Worldwide
Forward-facing seats
Children who have outgrown the rear-facing weight or height limit for a convertible seat should use a forward-facing seat, according to the AAP. And these seats too should be used until the highest weight or height outlined by the car seat manufacturer.
The CDC specifies up to 5 years of age for front-facing seats, while NHTSA says they may be used until a child is 7. But the key is paying attention to height and weight limits provided by the seat’s maker.
Rear-Facing Seat Installation
Seats made by different manufacturers may include their own requirements or specifications for proper installation. In addition, every vehicle is different, which may also impact the steps for proper installation. For these reasons, you should always begin by reading both the child seat manual and your vehicle’s manual carefully about child seat installation.
Once you’ve done that, there are general steps that can be followed to install seats properly. The NHTSA website provides step-by-step installation guides and videos for each type of seat.
The steps to install the base for a rear-facing only car seat using your vehicle’s seat belt include:
Placing the child car seat base in the back seat of your car.
Threading the car’s seat belt through the rear-facing child seat’s belt path. (And be sure to inspect the seat belt to see that it hasn’t twisted as you complete this step.)
Once the seat belt has been threaded through the seat belt path, buckle the seat belt into the vehicle.
Follow your vehicle’s instructions for “locking” the seat belt in position. This step is critical to prevent seat movement.
Press down on the car seat base to tighten it in the vehicle.
Ensure that the angle of the car seat base is correct. Babies must ride sitting in a semi-reclined position in order to keep their airway open. Many child car seats have a built-in angle indicator on them to help ensure the seat is reclined properly. Additionally, as your child gets older, the angle may need to be readjusted per the seat manufacturer’s instructions.
The final step is attaching the infant carrier seat to the base you’ve just installed in your car.
Forward-Facing Seat Installation
When it’s time to transition your child to forward-facing, installation instructions can vary slightly based on the type of seat you purchased—convertible, all-in-one car seat, or combination. However, there are a few general installation approaches: using your vehicle’s seat belt and tether to secure the seat or alternatively, the car’s lower anchors and tether (which is known as the LATCH installation).
Seat belt and tether installation
Before starting, read your vehicle’s instruction manual regarding the location of tethers and how to use them. Here are instructions outlined by NHTSA:
Place the child seat in the back seat of your car in its forward-facing position.
Next, thread the car’s seat belt through the child seat’s forward-facing belt path. (Again, when completing this step, ensure there are no twists in the seat belt.)
Buckle the seat belt into the vehicle’s buckle.
Read and follow your vehicle’s instructions about how to “lock” the seat belt.
Firmly press the seat down to ensure it is tight. The key here is that the seat should not be able to move either side-to-side or front-to-back more than one inch.
Finally, connect the tether from the child safety seat to your car’s tether anchor and pull this tether tight. This step is especially important as it will limit the seat from moving forward in the event of a crash.
Lower anchor and tether (LATCH) installation
Before you begin installation, read your vehicle’s manual regarding the location of lower anchors and tether anchors and how to use them.
Put the car seat in the back seat of your car in its forward-facing position.
Find the lower anchors in your car. Connect the lower anchor attachments on the child car seat to the lower anchors in your vehicle. When completing this step, make sure the straps are not twisted in any way.
Firmly press the child car seat down and also tighten the straps. Here too, the child car seat should not be able to move side-to-side or front-to-back more than one inch.
Now it’s time to connect the tether on the child car seat to the tether in your vehicle and pull tightly. This step is also very important, as a tight tether will prevent the child car seat from moving forward in the event of a crash.
How To Install a Booster Car Seat
The final phase of child car seat usage is the booster seat. And here too, there are important safety and usage guidelines to keep in mind.
“Booster seats are important because the adult seatbelts in a vehicle typically do not fit a child until the child is 4 feet and 9 inches tall and that can happen anywhere from 8 to 12 years old,” says Duchossois. “Booster seats are designed to boost a child up and make the seatbelt fit.”
In many cases, a child will not be big enough to be sufficiently protected by a vehicle’s seat belt without a car seat until they are at least 10 to 12 years old, says the AAP.
There are also a few different booster seat styles, including high-backed seats and backless. No matter which option you choose, the seat’s purpose is to raise a child high enough that both your vehicle’s lap and shoulder seat belts fit properly.
“The lap belt should hit them on their upper thigh and the shoulder belt should be in the middle of their shoulder,” explains Herring. “In addition, the child’s knee should bend over the vehicle seat and their feet should be flat on the floor. That’s really important because otherwise, they could slide forward.”
The NHTSA advises that the seat belt should fit snugly across your child’s shoulder and chest in order to properly restrain them in an accident. What’s more, it should not rest on the stomach area or across a child’s neck or face.
"In many cases, a child will not be big enough to be sufficiently protected by a vehicle’s seat belt without a car seat until they are at least 10 to 12 years old, says the AAP.
"
Should a Car Seat Be Behind the Driver or Passenger?
It’s a question so many parents ask: Where in the car should a child seat be installed? Unfortunately, the answer to that question depends on a range of factors specific to you, your family, and your vehicle, say experts.
“The best place to install is where you get the best fit,” says Duchossois. “But really what happens when we ask that question is that you have to consider a lot of other factors. For instance, we want to know where other car seats are installed in the vehicle and whether there are other passengers that ride in that vehicle, as well. It’s also important to consider whether the driver is really tall, which doesn’t leave much room for the car seat. There’s no exact safest seating position.”
A 2007 study of seating patterns and injury risk, however, found that children in car seats that were positioned in the center of the rear seat of a vehicle have a 43% lower risk of injury when compared to those who were seated on the right or left side of the back seat.
What Are the Common Mistakes When Installing a Car Seat?
Even the most experienced parents can inadvertently make errors during car seat installation or during use of the seat. Some of the most common mistakes include:
Loose installation
A properly installed car seat will not move more than one inch in any direction—side-to-side or front-to-back. To test this, pull on the car seat near its belt path to determine how far it’s able to move.
Too much winter clothing
Putting thick winter coats on a child creates distance between their body and the car seat’s harness or buckle that’s designed to hold the child in place. The best way to keep a child warm in the winter, while ensuring the buckle or harness is snug to their body, is by putting the child in the seat first and then laying a warm coat (or even blanket) on top of the child and seat.
"You don’t want to put on a thick coat,” says Herring. “Extra layers create space and in a crash that could lead to injury."
Layered clothing, such as a onesie and a hoodie are OK, adds Herring, but take them out of the coat and lay it over them.
Incorrect belt path
When using a convertible-style car seat, you first use the seat in a rear-facing position and later in a forward-facing position. These types of seats have more than one location through which your vehicle’s seat belt can be threaded based on how the seat is being used. That makes it critical to ensure that you are using the correct belt path for forward versus rear-facing usage.
Harness clip not positioned properly
The harness strap should always lie flat on your child and not be twisted. In addition, this strap should be placed through the slot that’s either at your child’s shoulders or below them in a rear-facing seat. In a forward-facing seat, this strap should be coming from the slot that’s at or above a child’s shoulders. Finally, the harness should be very snug so that extra material cannot be pinched at your child’s shoulder, according to NHTSA.
These are just some mistakes to avoid. Often car seat manufacturers have videos on their websites demonstrating how their car seats should be properly installed and used. “You want to make sure when you’re searching for these videos that you’re going to the seat manufacturer’s website, instead of a general website,” advises Herring.
How To Get Help To Install a Car Seat
If you’re not confident about a seat’s installation (which is totally OK!), consider hiring an expert to come help. When doing this, look for a certified child passenger safety (CPS) technician. The National CPS Certification Program maintains a searchable geographic database where you can find such professionals.
There are also inspection stations around the country where you can take your vehicle to ensure the seat is as it should be. Safe Kids Worldwide maintains a state-by-state list of these inspection stations on its website.
For more Parents news, make sure to sign up for our newsletter!
Read the original article on Parents.

