How to Propagate a Rubber Plant Successfully
This step-by-step guide explains how to propagate rubber plants through cuttings and air layering.
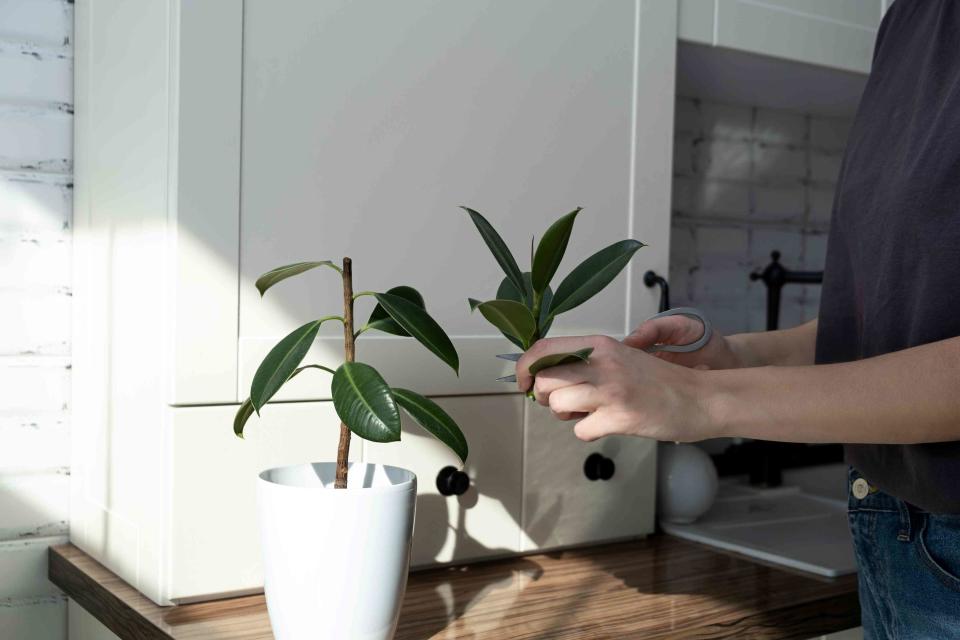
Irina Zharkova / Getty Images
A rubber plant (Ficus elastica) is an easy-care houseplant that can be propagated by air layering or stem cuttings. In only a few weeks, you can make new plants to give away to friends or keep to create the indoor jungle of your dreams. Rubber plants of all sizes, shapes, and color patterns can be propagated, but the techniques in this guide are especially helpful when you've got an overgrown plant you'd like to cut down to size. Use these step-by-step instructions to get started with propagating your rubber plants.
When to Propagate a Rubber Plant
Spring or early summer is an excellent time to propagate rubber plants because that is when they typically put on new, vigorous growth. Make sure the rubber plant you want to propagate is healthy and free of pests and diseases.
Air Layering
While air layering might sound like flight terminology or something weather-related, it is a plant propagation technique used for plants with stiff stems, like rubber plants. Air layering involves removing an outer layer of a stem, which spurs the plant to develop roots in that area. After the roots develop, the newly rooted stem can be snipped off and planted, creating a brand-new rubber plant.
Don’t let the multiple steps involved in air layering intimidate you. This propagation method is simple and highly successful when you follow these steps.
Tools and supplies: Sharp knife, rooting hormone, sphagnum moss, clear plastic wrap, container, and potting soil.
1. Choose the stem.
Select a point on a vigorously growing stem about 12 to 18 inches from the shoot tip. Remove any leaves in the immediate area.
2. Wound the stem.
Using a sharp knife, cut completely around the stem, penetrating to the woody center of the stem but not severing it from the plant. One inch below the first cut, make a second cut completely around the stem. Make a third vertical cut connecting the first two cuts. Finally, remove the ring of bark between the first two cuts.
3. Prepare the stem.
With the edge of a sharp knife, scrape the exposed woody surface, removing any soft tissue remaining. Dust a small amount of rooting hormone powder on the exposed surface. Rooting hormone powder is available at garden centers.
4. Wrap with sphagnum moss.
Thoroughly moisten a handful or two of sphagnum moss. Wring it out and wrap it around the wounded area of the stem.
5. Cover with plastic wrap.
Wrap a piece of clear plastic, such as a cut-up food storage bag, around the sphagnum moss, making sure all the moss is enclosed in the plastic wrap. Secure the plastic wrap to the stem with twist ties at both ends of the sphagnum moss.
6. Monitor moisture.
Check the sphagnum moss every couple of days to ensure it stays moist. If it dries out, it will appear lighter in color and feel dry to the touch. If the moss dries out, remove the top twist tie and sprinkle water on it until it is moist again. Then, replace the plastic wrap cover and twist tie.
7. Look for roots.
Roots should be visible in the sphagnum moss about four to six weeks after air layering. Allow the roots to continue developing in the sphagnum moss wrap until they are several inches long, which can take anywhere from four to eight weeks.
8. Prepare for potting.
When the new roots are several inches long, cut the stem off the plant just below the bottom twist tie using a sharp pair of pruners.
9. Pot the new plant.
Remove the twist ties and plastic wrap, and plant the new rubber plant in a container filled with potting soil. Leave the sphagnum moss in place around the root system; the moss will decompose over time.
Related: The 7 Best Potting Soils of 2024
Stem Cuttings
Stem cuttings are fast and easy. This propagation method is not only effective for a rubber plant but also for begonia, geranium, poinsettia, and coleus, among many other plants that can be replicated by stem cutting.
Tools and supplies: sharp knife or pruners, rooting hormone, container, soilless potting mix.
1. Select a stem.
The best rubber plant stem for propagating is a vigorously growing branch. Look for a branch that has several leaves and flexible new growth at the tip.
2. Cut the stem below a leaf.
Use pruners to snip a 6-inch or so length of stem, cutting just below a leaf.
3 Remove some leaves.
Using pruners, snip away the leaves on the lower half of the stem.
4. Dip in rooting hormone.
Dip the lower 2 inches of the stem in rooting hormone. The rooting hormone is not necessary, but it speeds the rooting process.
5. Pot the cutting.
Fill a small container with soilless potting mix and gently pot the cutting. Water it well and place it in a warm, bright location. Water when the top of the soil is dry to the touch. Expect roots to form in about three weeks.
Frequently Asked Questions
Can I air layer several stems on one rubber plant?
Yes, one vigorously growing rubber plant can likely support two or three stems being air layered at the same time. Air layer only one time per stem.
Can I root rubber plants in water?
Water propagation is rarely successful with rubber plants. Often, disease sets in before the plant has rooted in water.
Can I propagate my rubber plant in a season other than spring or early summer?
Yes. Rubber plants are usually actively growing in spring and early summer and will quickly form new roots during the propagation process. Air layering and stem cuttings outside this window will likely be successful, but it will take more time to produce new roots.
For more Better Homes & Gardens news, make sure to sign up for our newsletter!
Read the original article on Better Homes & Gardens.

