Procreate Dreams tutorial: making a Disney-style 2D animation
- Oops!Something went wrong.Please try again later.
Prcreate Dreams is the hottest new art app for iPad, one that breaks down the barriers to classic 2D animation. You can read our Procreate Dreams review to see why this new iPad app really impresses, read Ian's first impressions of Procreate Dreams, and catch up with animator Havtza who shares her advice for getting started in Procreate Dreams.
Havtza was one of the first lucky animators to get early access to Procreate Dreams to create a short for the app's launch, another was former Disney animator and Brother Bear director Aaron Blaise (he's worked on Beauty and the Beast, Aladdin and The Lion King), and you can read how he got started in Procreate Dreams below, in his own words, as well as a breakdown of his workflow using the new iPad animation app.
If you want to discover more about Aaron Blaise's work and process, follow his excellent YouTube channel for pro insights, you can find links from the Art of Aaron Blaise website, including some fantastic animation tutorials.
Procreate Dreams tutorial by Aaron Blaise
Back in the early part of the year I was contacted by the folks from Procreate and asked if I would be interested in talking to them about a "secret project" they were working on that they thought I might be very interested in. Intrigued, I said yes.
Soon after we scheduled a meeting and they informed me that for several years they had been working in secrecy on a brand new animation app for the iPad called, Procreate Dreams. They said that it was not ready yet but wanted to know if I would be interested in trying it out and perhaps creating a demo bit of animation for them? Once again the answer was a resounding yes!
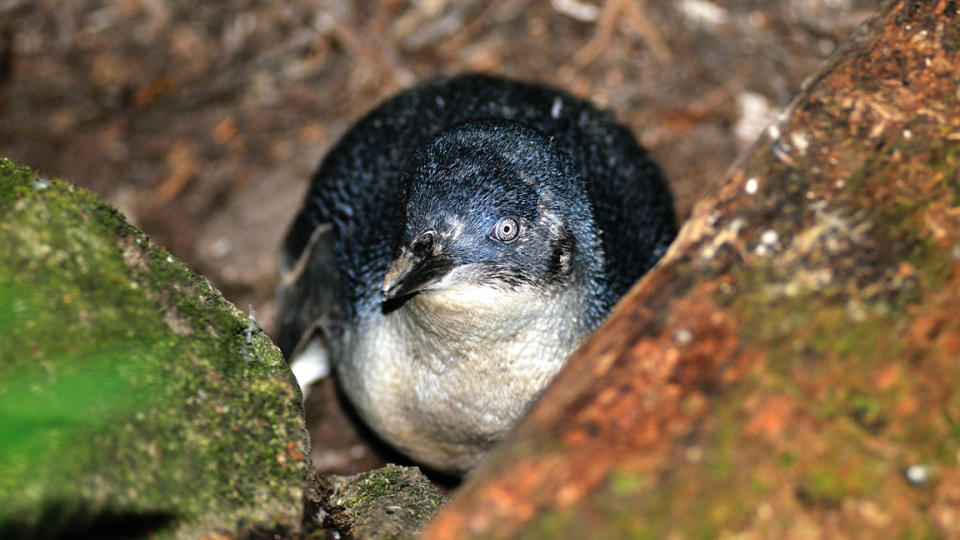
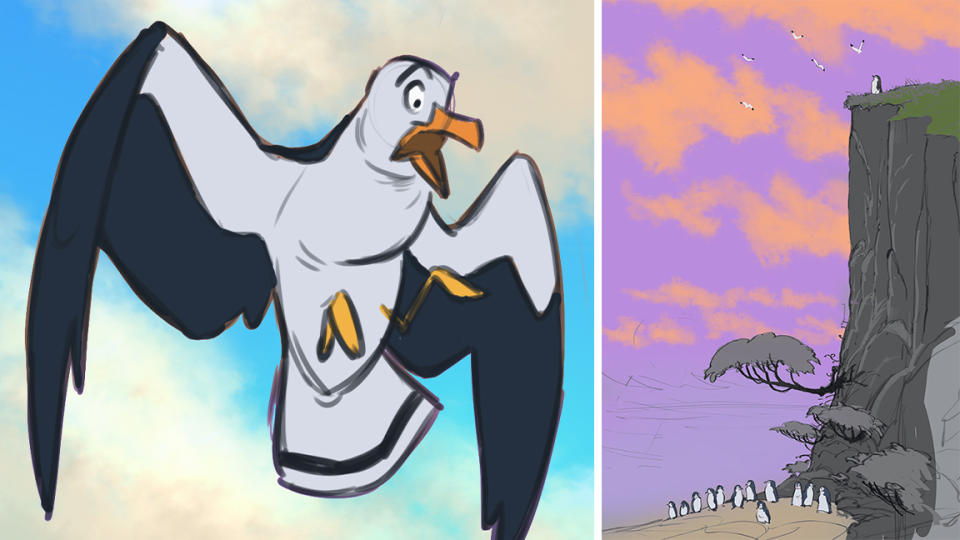
They gave me full reign to start developing a concept. Given my Disney background, I settled on creating something that was story based and that I could likely animate in a few weeks. The fact that they are based in Tasmania was on my mind so I started doing research on the area and learned that the region is home to one of the smallest penguin species in the world known as 'fairy penguins' or also 'little blue penguins'. I also discovered that the island of Tasmania has some simply breathtaking cliffs. These facts coupled with the name of the software quickly sparked a concept of this little penguin that dreams of being able to fly.
Before the software was even available to test, I storyboarded it out and gave them them pitch for the piece that was to be about a minute and a half. I have found Procreate Dreams to be a very artist friendly company. They loved the pitch and added a few notes that made the concept stronger.
A few days later, they got me an early build to start working with and I was off. Being an alpha build there were a number of features not yet in place but, even in this early stage I found it super easy to use. I spent about 12 weeks in total doing the project. That includes full animation, backgrounds, colour, sound and music. All done on an iPad by one person. (With some help later on from two assistants to do the character colouring.)
Think about it, 12 weeks to create a full short… this still blows my mind! Back in my Disney days a shot of approximately the same time on a film like Beauty and the Beast would take a team of 65 people many months to complete.
By the time I finished the project Procreate had delivered several follow up builds to me. Each added more features and more stability. Most of which I didn’t really need to use. See, I approached the project the same way I would any other. I’m a frame-by-frame character animator, so I used Procreate Dreams the same way I might have used a stack of paper and pencil many years ago. One drawing at a time, one frame at a time. I did also use some of the built in key-framing tools for things like the panning of clouds as well as the opening shot where we vertically pan up the tall cliff. By and large I drew it one drawing at a time.
Think about it, 12 weeks to create a full short… this still blows my mind!
That’s the beauty of this software to me. It has so many features that it can apply to numerous workflows. Want to make a classic cartoon? You Can! Want to draw over live action video and use it as a replacement for After Effects. CHECK! Want to create anime style sliding backgrounds with broad acting on top? Go For It!
Once I finished up the little penguin animation I was asked if I could attend to announcement of the software in London this past September. Once again I said yes, and I was completely taken by surprise when Procreate CEO, James Cuda used my animation as the climax of his keynote. It was such a cool experience seeing how well the audience responded to the short.
Then he announced the price and the place went bananas! Just $19.99 (USD) for a game-changing bit of software. No Subscription, no AI… just quality tools.
I believe that with the affordable price point we are gong to see an absolute explosion in 2D animation. After November 22nd (when Procreate Dreams released) there won’t be any excuses not to try your hand at animation. I’ve already been contacted by friends at animation studios asking if the software is 'legit'? It is. I am convinced that you could make a feature in it if you are so inclined.
There is no one size fits all answer on how to animate. Something like Roger Rabbit is approached entirely differently than something like Akira and both are valid. So, with that all that in mind, I wanted to share my approach to getting started in Procreate Dreams.
Procreate Dreams tutorial: the process
1. Do your Research
(Image: © Getty Images / mlharing)
If you are trying to tell a story it is imperative that you do your homework, It is essential to make the world of your story believable. I guarantee you that the crew of SpongeBob Squarepants know everything there is to know about sponges and Coral reefs.
2. Storyboarding and thumbnails
(Image: © Aaron Blaise)
In Procreate Dreams open up a new document. Set your desired resolution and then start roughing out your storyboards. What’s great about Dreams is that you can do this all right in the App. You can rough out your boards on the timeline and essentially create an animatic right there. This is a great time to work out things like cuts, shot staging and timing.
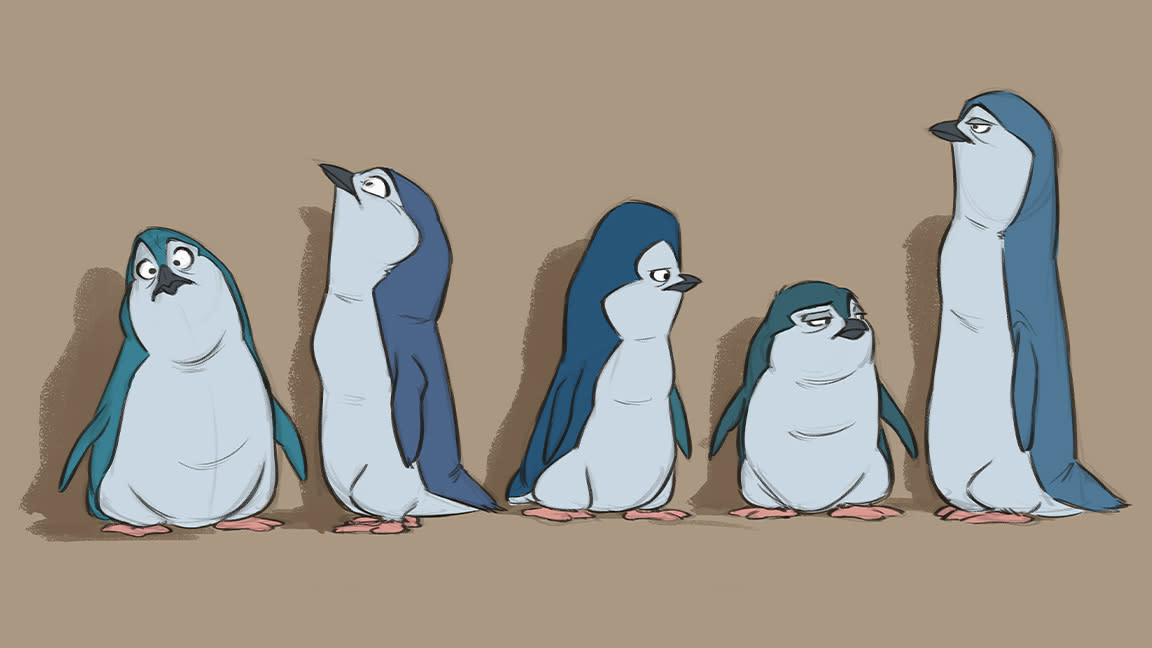
3. Character design
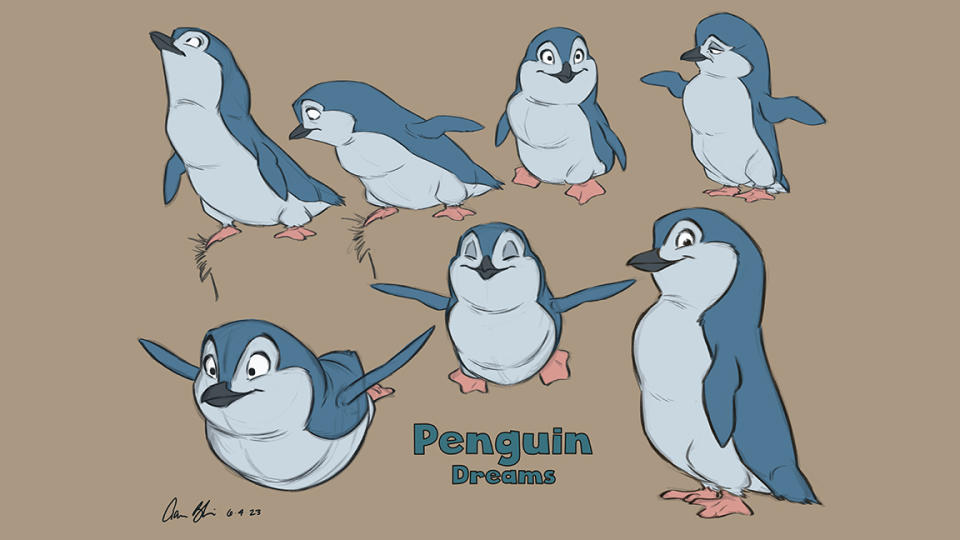
(Image: © Aaron Blaise)
Once you have your story down it’s time to design the characters. In the case of animation, it is important that the characters are appealing designs and that they are also not overly complex. Remember, you will have to re-draw them a lot! So, get those designs down to something that is easy to read and easy for you to draw over and over again.
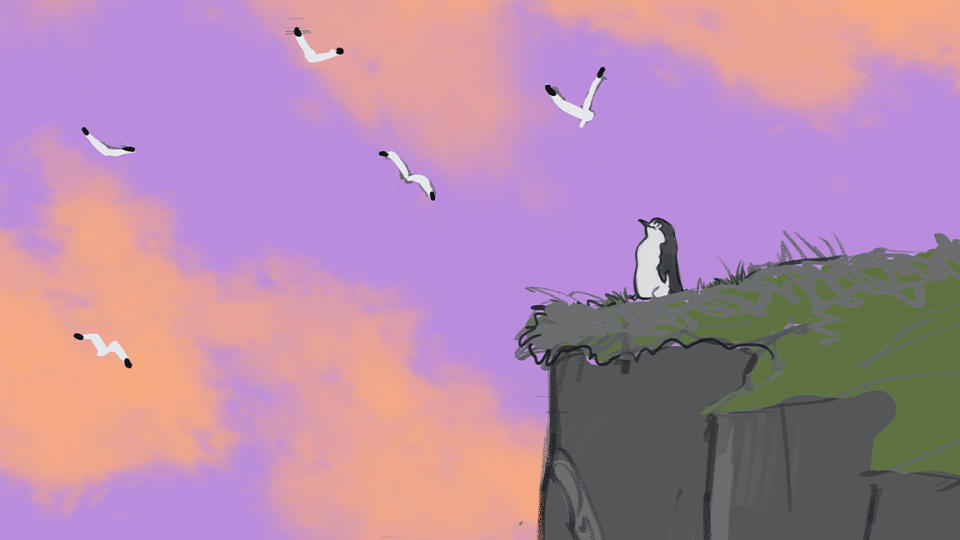
4. Creating backgrounds and layouts
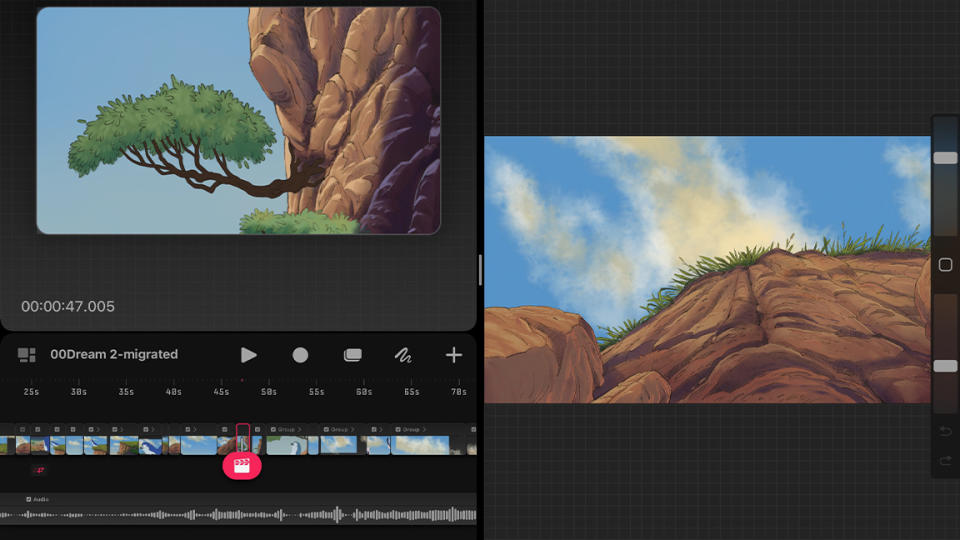
(Image: © Aaron Blaise)
In Procreate Dreams the area that is visible to the viewer in the final movie is called the stage. Anything outside of this viewer window is called 'back stage'. While the drawing tools in Procreate Dreams are quite capable, what I elected to do was create my backgrounds in Procreate and then import them to Dreams.
Each layer can be brought in individually to the timeline or you can bring in the entire file. Typically for the penguin short I had the ground plane on one layer with the sky layer behind it and the cloud elements on a sparse layer eaten those two.
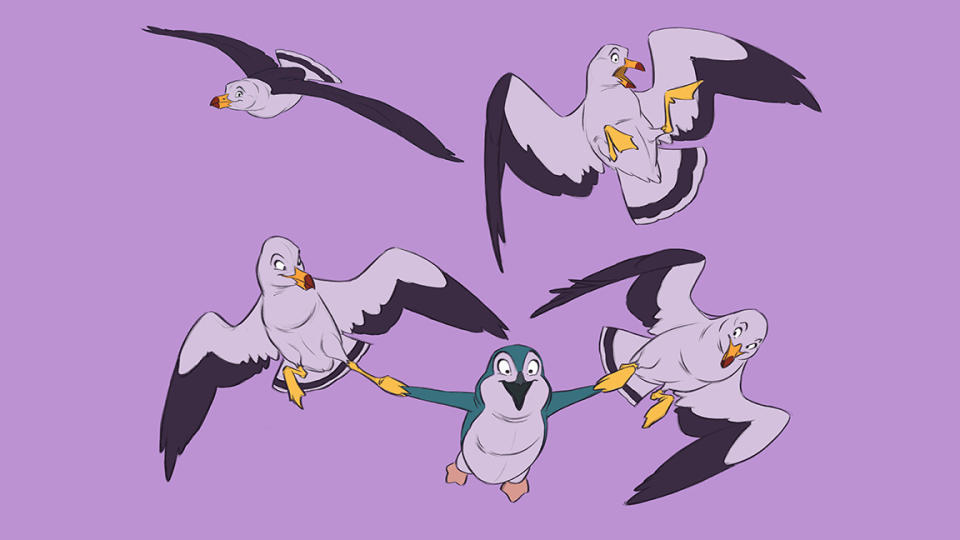
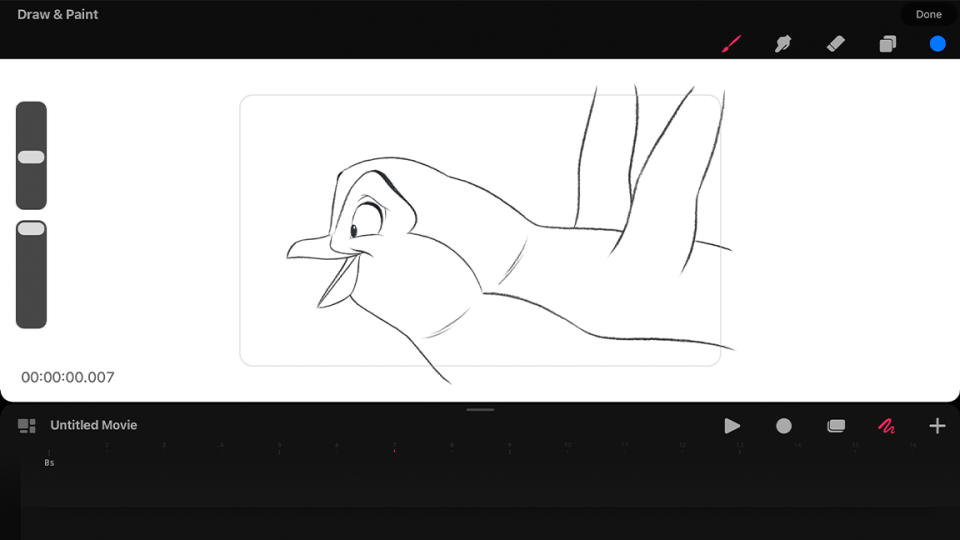
5. Roughing key animation
(Image: © Aaron Blaise)
If your storyboard is detailed enough you should know exactly how long each shot will take. Use this as your guide and create a new layer in your timeline. On this new layer start to rough in your key animation poses at the time they should occur. You are trying to get the essential 'key' poses of an action. This is known as 'pose-to-pose animation'.
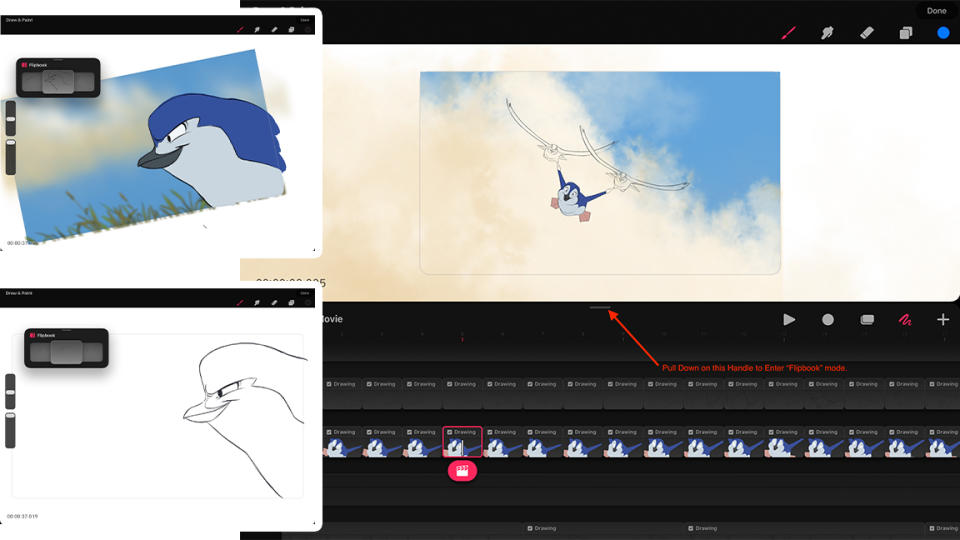
Pro tip If you click the drawing mode icon and then drag down on the flipbook handle you can enter 'Flipbook' mode. This mode allows you to have a much larger drawing area, You can also flip back and forth to see the motion. While in flip book mode if you click the timecode in the lower left of the screen you can toggle on the “onion skin” and adjust its parameters.
6. Drawing the breakdowns and in-betweens
(Image: © Aaron Blaise)
This is an animation term for what essentially boils down to, 'do all of the rest of the drawings'. Your key pose drawings should be placed on your timeline in a way that tells you how long an action will take. During this step you go back in and add all of the additional drawings required to make it look smooth.
Pro tip A movie typically runs at 24 frames per second. In may cases for slower action you can get away with holding each drawing for 2 frames. This is called animating on '2's'. For fast action action you will generally do one drawing for every frame. This is called animating on '1's'. If you animate over video you will need to work on 1’s or the motion will appear to stutter.
7. Adding motion elements and SFX animation
(Image: © Aaron Blaise)
This particular short did not have a ton of effects so that I could handle it in a relatively short period. But this phase is typically where you would animate things like smoke or water splashes, etc.
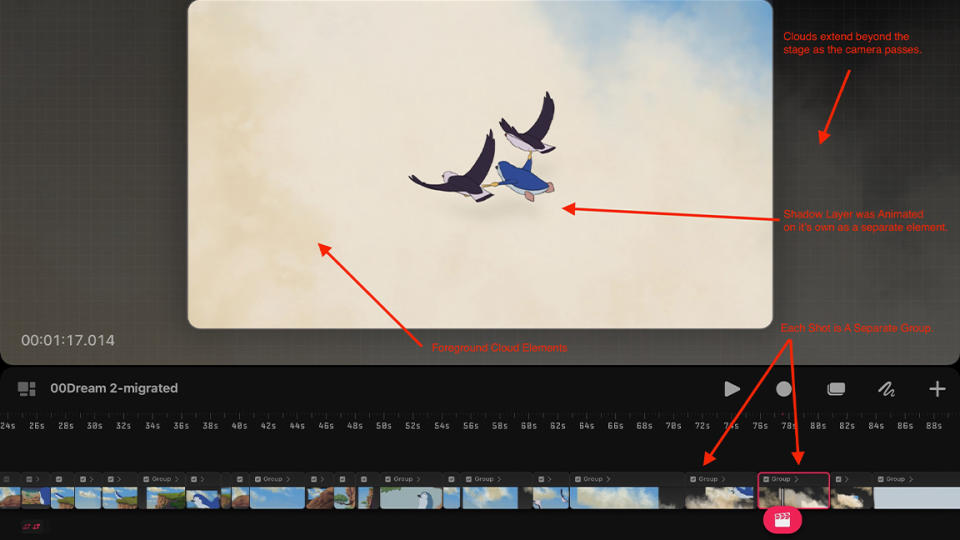
In my case, I used the keyframe tools in Procreate Dreams to animate the clouds as they moved across the sky in the background. This is done by going to the frame where I want the move to start and tapping on the playhead icon. Then click 'Move'. Now I simply dragged the clouds where I want them to start. Next I went to the frame where the move to stop and repeated the process.
In the final shot to give a sense of speed I had multiple layers of clouds. The clouds closet to the camera move fatter than those further away. This layered effect gives a sense of speed and depth.
Pro tip By default Procreate Dreams will often put an 'Ease in' and 'Ease out' on the motion. In this case I change this to 'Linear' move so that the motion rate is constant.
8. Adding colour to my character
(Image: © Aaron Blaise)
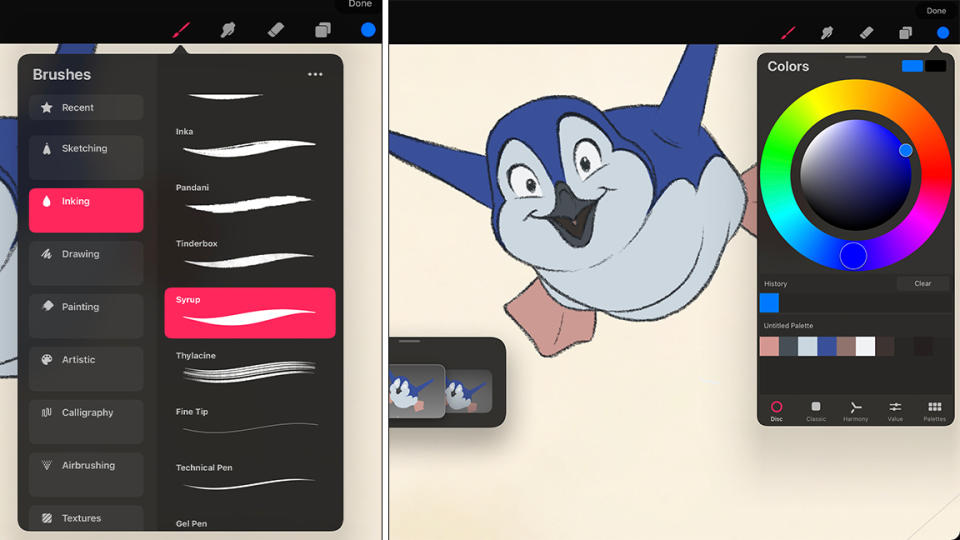
In the early version of Procreate Dreams I worked on there was no colour fill option. So, the approach that I used was to create a colour layer that appeared behind the line layers.
I would colour the first frame of each shot and then pass it on to my assistants Claudia and Nick. We used the 'Syrup' brush for colour as it gives a nice flat texture. This is just like the method of painting cels back in the old days of Disney Animation.
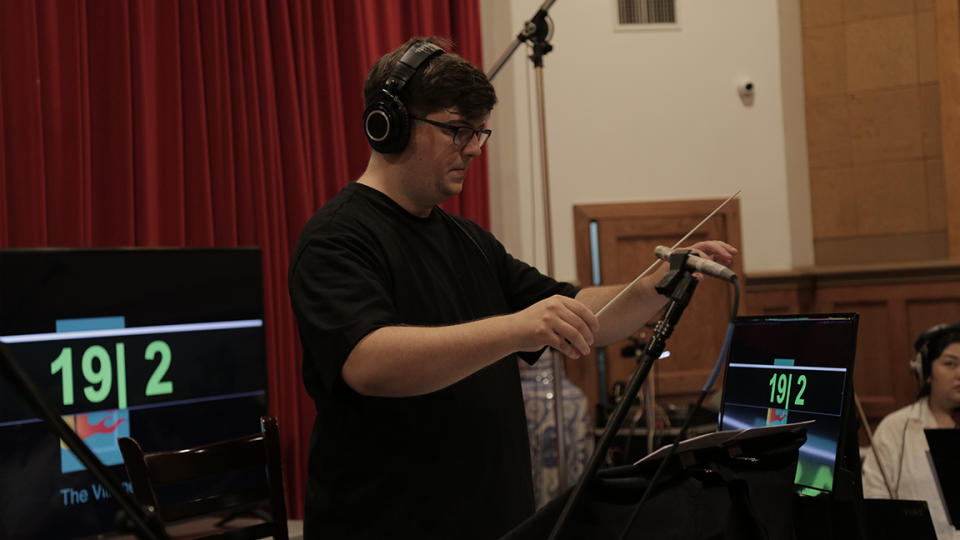
9. Adding music and sound effects
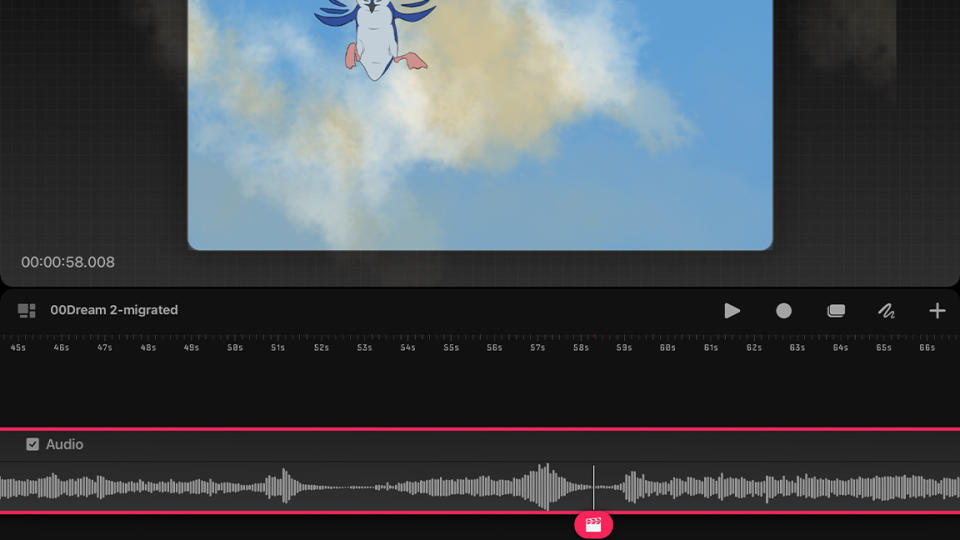
(Image: © Aaron Blaise)
I was fortunate enough to be able to wok with a composer by the name or Max Mueller. He created an original composition specifically for the 'Dream' short. He was able to work on the music while I was doing the animation. This is because I had my storyboards timed out to the exact time of the final animation.
In the animation industry this is called 'locking the reels'. With the reels locked Max could work out all of his music timing and cues and it would all match up in the end. The best part was that he got it recorded by a live orchestra. I cannot stress enough how much good music will help the emotional beats of a story, especially a piece with no dialogue.
Once Max gave me the final music I was able to import it directly into Procreate Dreams. From there, I then create a sound FX track where I add the additional sound such as water, sea gull noises, etc. All of this can be mixed and adjusted right with Procreate Dreams.
10. Exporting the file
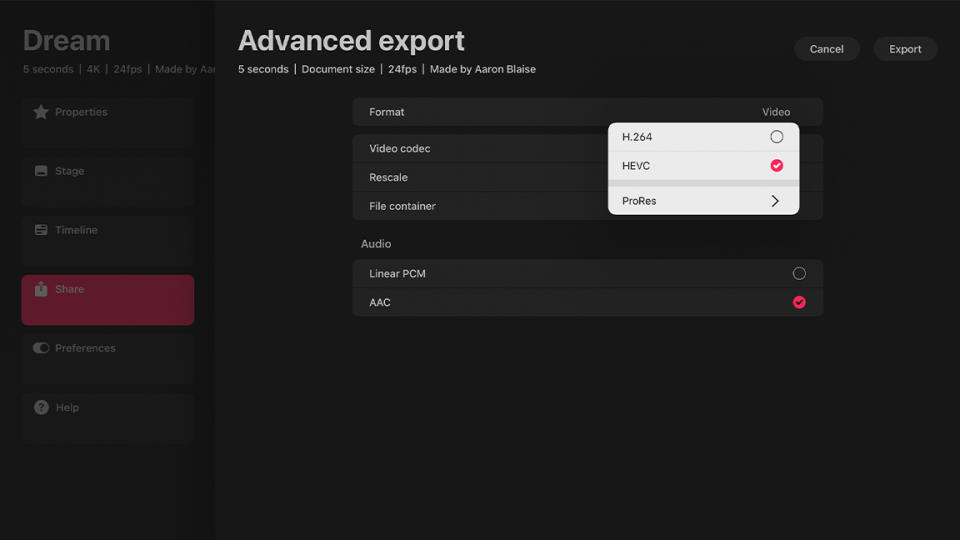
(Image: © Aaron Blaise)
With all of my shots, music and sound effects finalised on the timeline it is just a simple matter of hitting the export button. I choose to export as a movie file with 'Best' quality. This only took a few seconds and the final movie appears as a video file right in the camera roll on my iPad. From here I deliver the final video to Procreate who add the titles and that was a wrap!
Pro tip Under the Export menu, if you click 'Advanced Export' and select 'Custom Settings', then you can choose different video and sound formats.

