Use Procreate to create a fantasy character

In this Procreate tutorial I’m going to give you an overview of my creative process, from coming up with an initial idea, all the tools I use in Procreate, and how they can help speed up the illustration process. I want to show you how I’m able to create artwork that could be used in a children’s book, for example.
ImagineFX has kindly given me the freedom to choose the subject for this workshop. The first thing that I do is close my eyes, and let myself go to where I want to be and what I want to do.
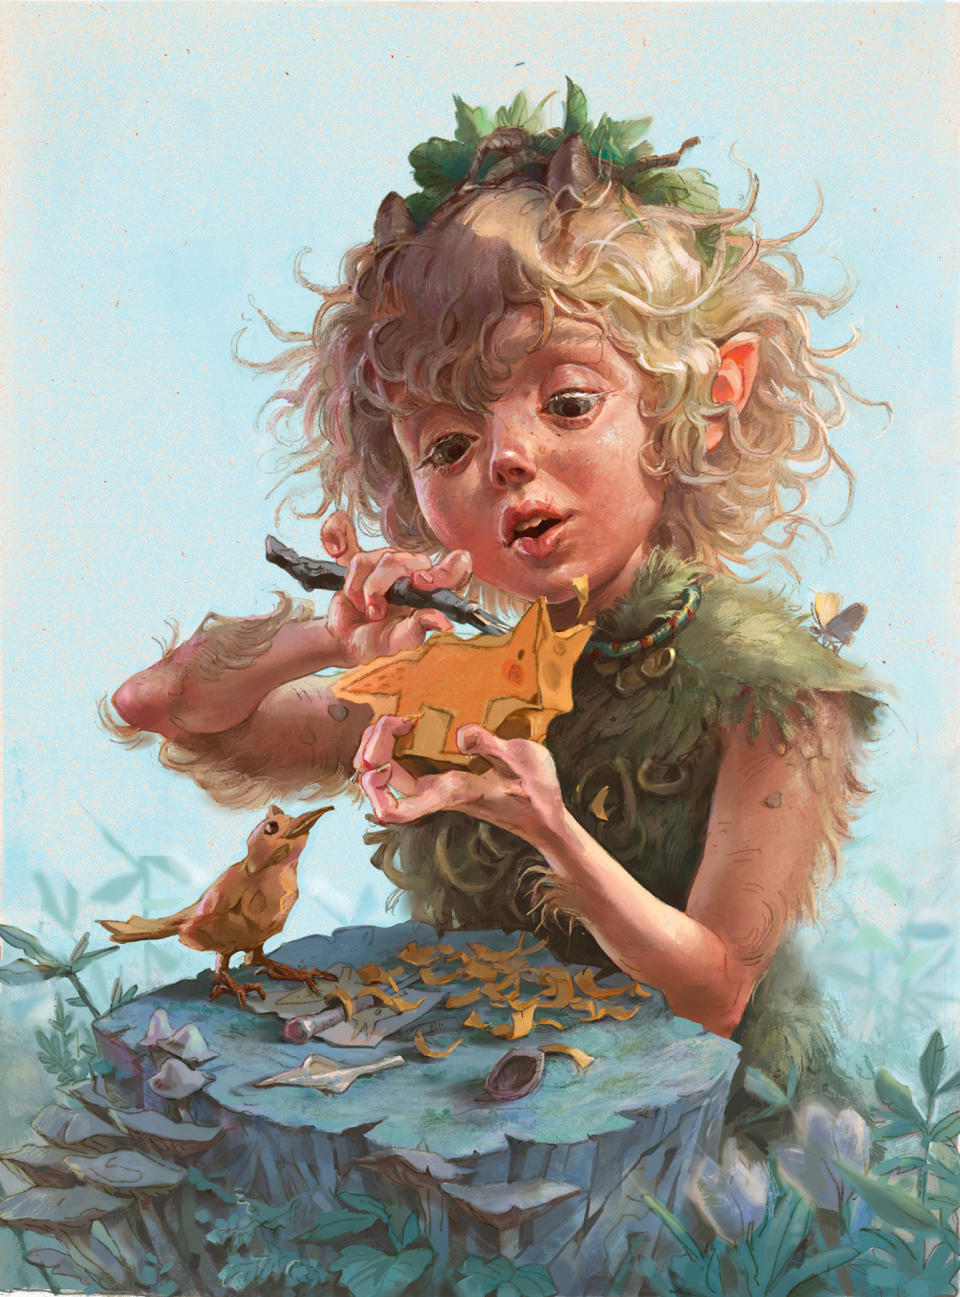
I love to see my characters come to life in their own world. For this illustration I’ve decided to draw a sweet faun boy spending his afternoon making dolls that he can bring to life with his breath. With this idea in mind, I pick up my pencil and start sketching…
Procreate tutorial: my brushes
Here are the brushes I'll be using in this tutorial.
Default brushes: Stucco
I use this brush for adding texture throughout the artwork.
Narinder Pencil
This brush is perfect for helping me to get the initial line work down.
Polygons
For smudging certain areas of my art, this brush is very handy.
Procreate tutorial: create a fantasy character
Procreate allows me to bring my creations and imaginings to life. Read the Procreate review for more on how the app works. I hope you enjoy the tutorial – the finished fantasy artwork is at the bottom of the page.
01. Take your small ideas seriously
(Image: © Fatemeh Haghnejad)
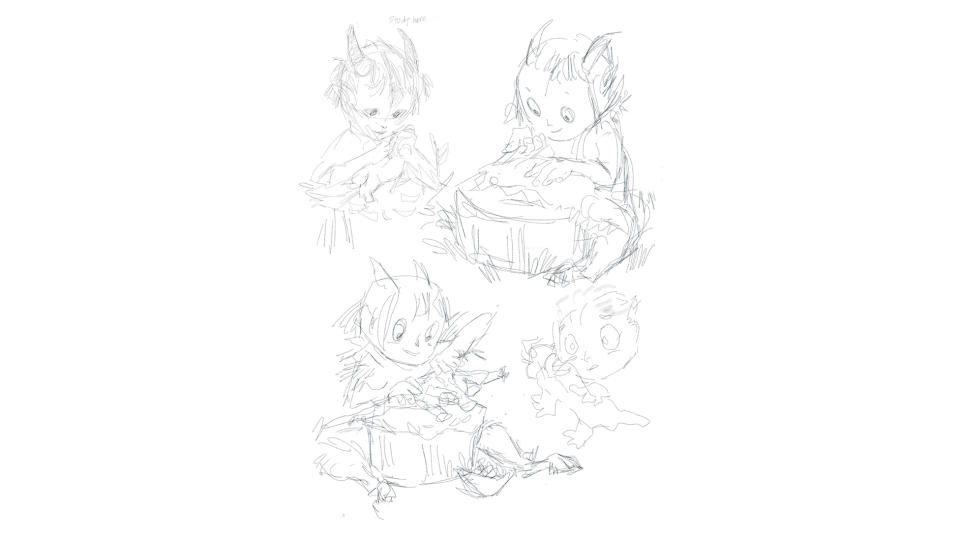
If it’s a portfolio piece and you’re free to choose a subject, then even throwaway ideas are worth considering. For both personal and commissioned pieces, I start by listing the things I need to see in my image. This is because I can easily become distracted when I start a painting, and end up either drawing something else or miss out the key points in the original idea.
Furthermore, it helps me to pare back the story that I want to tell with my illustrations. Here are the words that I write down for my idea: faun boy, about 10 years old, warm colours, afternoon, wooden toys, mushrooms. I make these quick digital sketches to visualise my ideas.
02. Getting a feel for the character
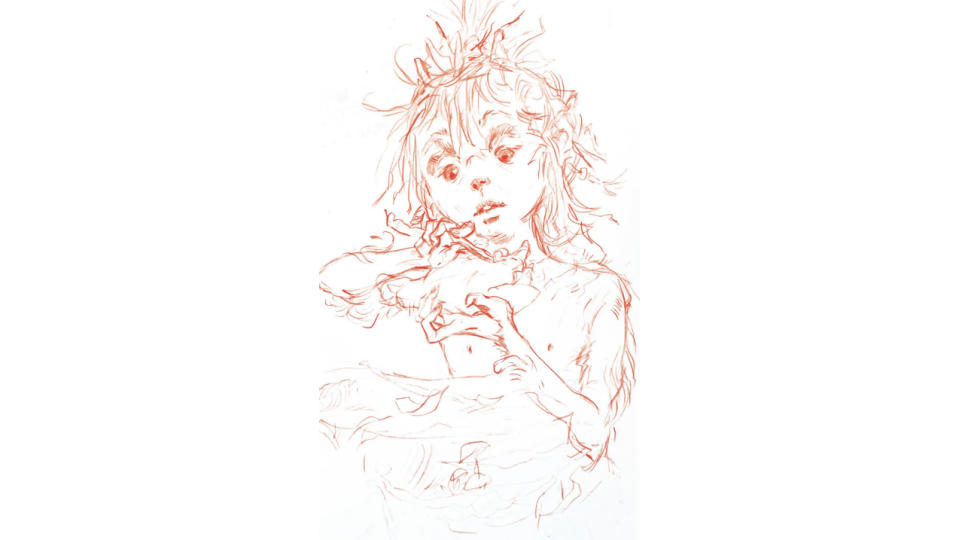
(Image: © Fatemeh Haghnejad)
Once I’ve chosen a design, I start sketching on paper using a red pencil. I think that the lines come easier and more naturally if I use a real pencil. This is the stage where I try and get a sense of who the character is, using some of the keywords from Step 1 as a guide.
03. Switching to Procreate
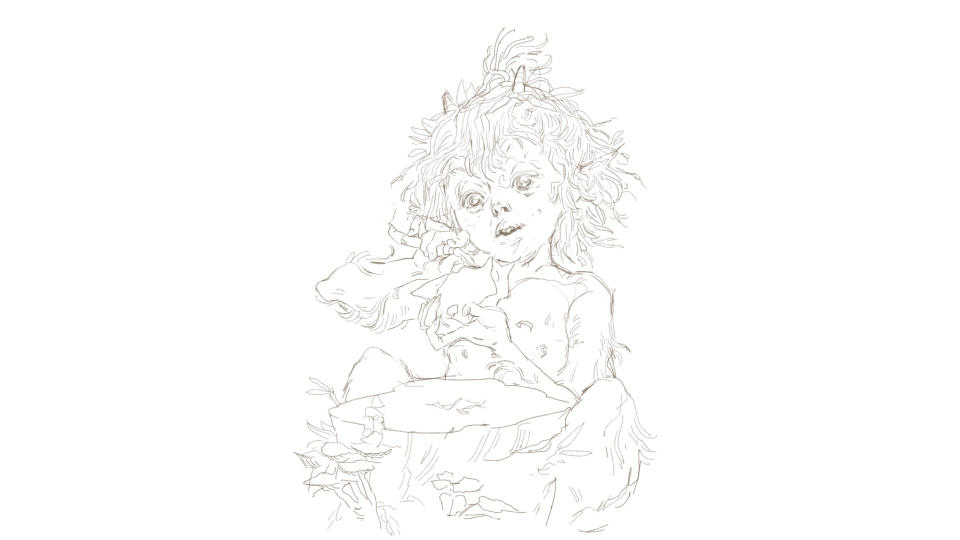
(Image: © Fatemeh Haghnejad)
I usually ink the line art before scanning it into either Procreate or Photoshop, because this will give me clean lines to work with. However, there’s no scanner in the log cabin that I’m staying in at the moment, so I decide to transfer the traditional sketch into Procreate and create the line art digitally. Thinking laterally, I take a photo of my sketch and open it in Procreate. Then I reduce the Opacity of the sketch and trace over it, making a clean drawing on a new layer. The first drawing that I made of the faun wasn’t quite right; he was a little chubby and messy.
04. Initial detailing
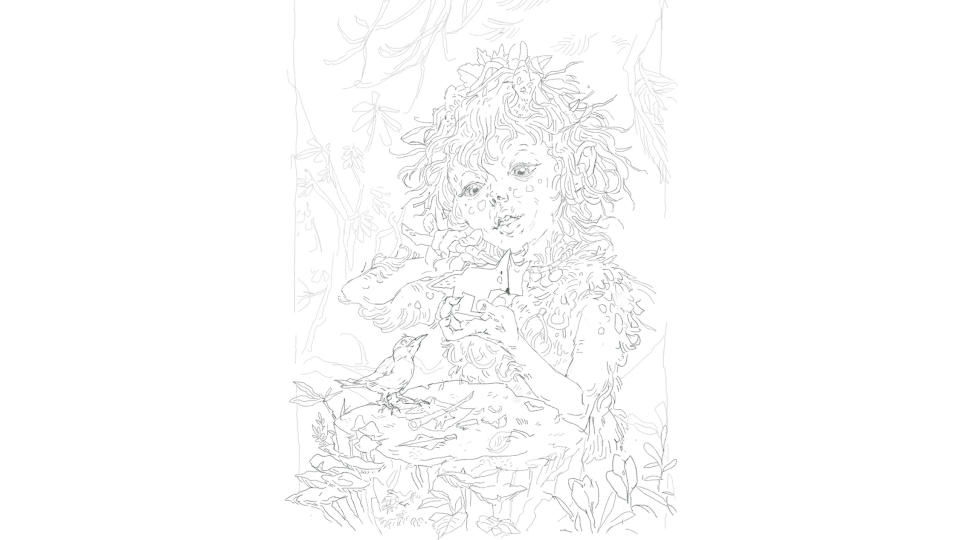
(Image: © Fatemeh Haghnejad)
I create a second layer and pay more attention to my details while avoiding putting down unnecessary lines. My go-to Procreate brush for this stage is the Narinder pencil.
I put my efforts into showing the faun’s level of concentration and the pressure in his fingers as he grips the wooden toy. I also make his work area look more interesting by adding wood shavings and a friendly bird. I keep the background line art on a separate layer because I’m not sure if I want to have a background yet.
05. Starting on the colours
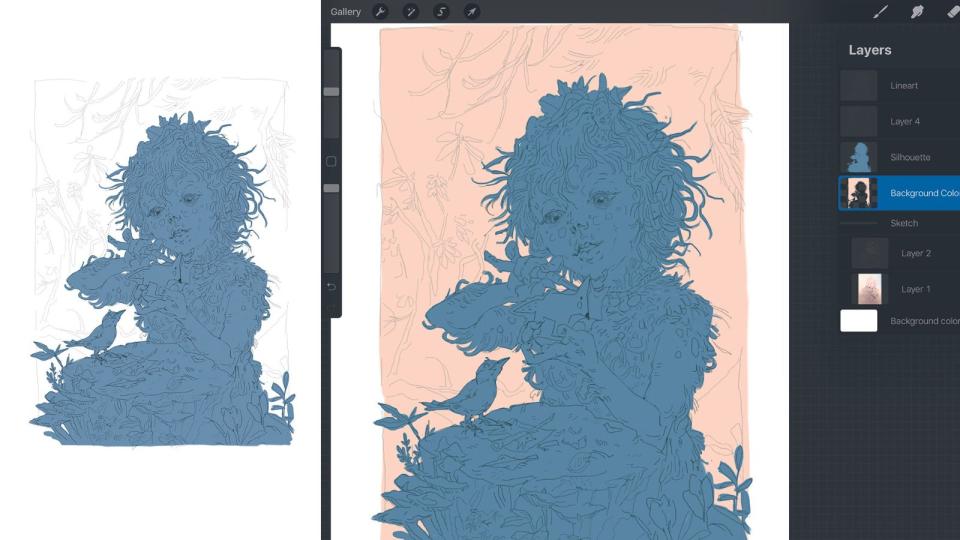
(Image: © Fatemeh Haghnejad)
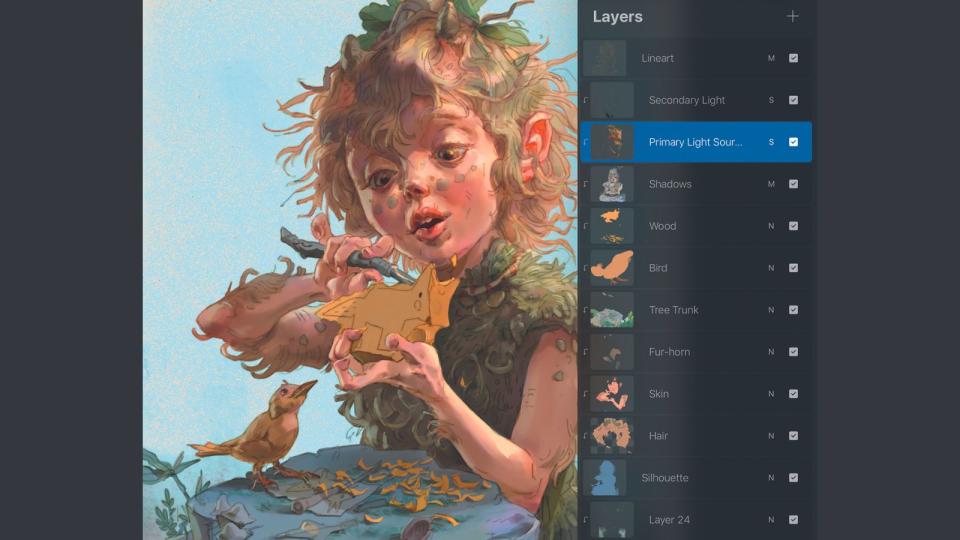
I keep the line art layer on top for almost the whole of my painting process. Next, I open a new layer and colour the silhouette of my characters. To create a simple coloured background I select the silhouette layer and invert it, before filling it with my chosen colour.
06. Laying down base colours

(Image: © Fatemeh Haghnejad)
I create a new layer for each coloured element. They’re all Clipping Masks attached to the silhouette layer. This approach helps me to add the shading and also makes it easier to select certain areas for colouring.
07. Solve the mystery of light and shade
(Image: © Fatemeh Haghnejad)
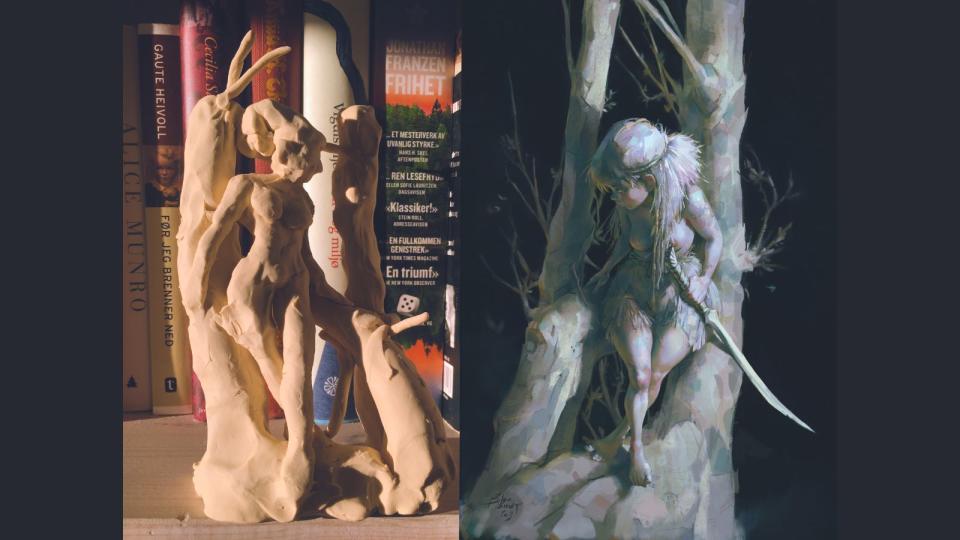
I’ve worked out a method that enables me to easily light an object or figure, which I’d love to share with you. I make the form of my character using Super Sculpey (a clay that doesn’t dry out), then photograph it under different lighting conditions, such as bright sunlight, indoor lights or candle light.
I also use the light of my iPad or different colours created using my phone screen. Because so much of my work is from the imagination, it’s great to know that I can control environmental elements within each piece, such as the lighting.
As long as you remain consistent with your choices you can achieve anything! I also find it helpful to draw the direction of different light sources using arrows on their own layer.
08. Decide on the type and direction of the light
(Image: © Fatemeh Haghnejad)
I almost have the base colours in place, and have decided that the scene will feature natural daylight under a treetop canopy. Next, I work out where the sun is located and where I can add reflection.
Now that I’ve chosen the direction of light, I use a medium Hard brush to add all the shadows on a Multiple layer. I paint the shadows with a light grey-yellowish colour, sometimes going either a little darker or a little lighter. I also use different tones such as blue and purple, for variation.
Now, on the same layer I add blue shadows from the canopy light and a yellow-green lighter shadow down the left-hand side of the piece, which is reflected from the greenery around the young faun.
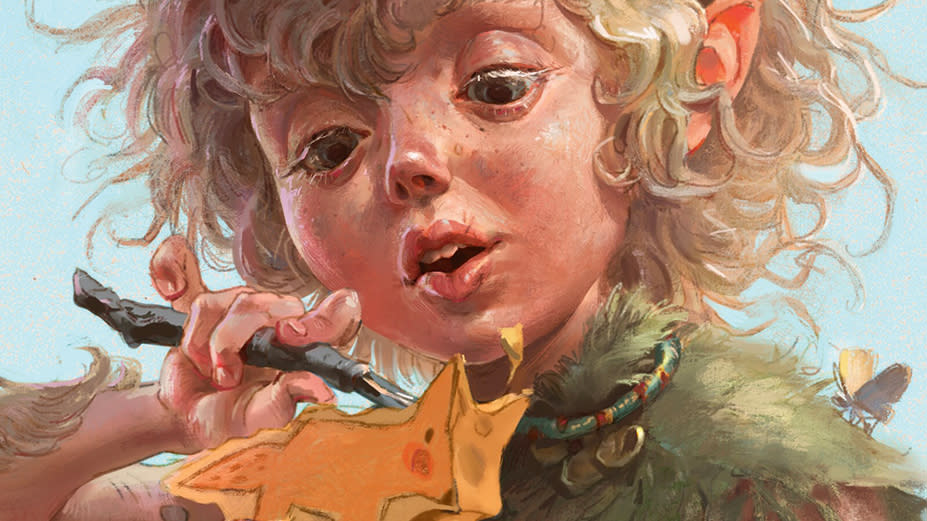
09. Introducing colour tones
(Image: © Fatemeh Haghnejad)
Once I feel that I’m almost done with the shadows, (although I usually need to revisit this layer a few times to fix things), I go back to specific object layers such as the hair or skin and add some colour tones.
10. Enhancing the sunlight
(Image: © Fatemeh Haghnejad)
I chose a Screen layer for the sunlight, and paint with different colours such as purple and orange, which helps to generate different, interesting shades of light.
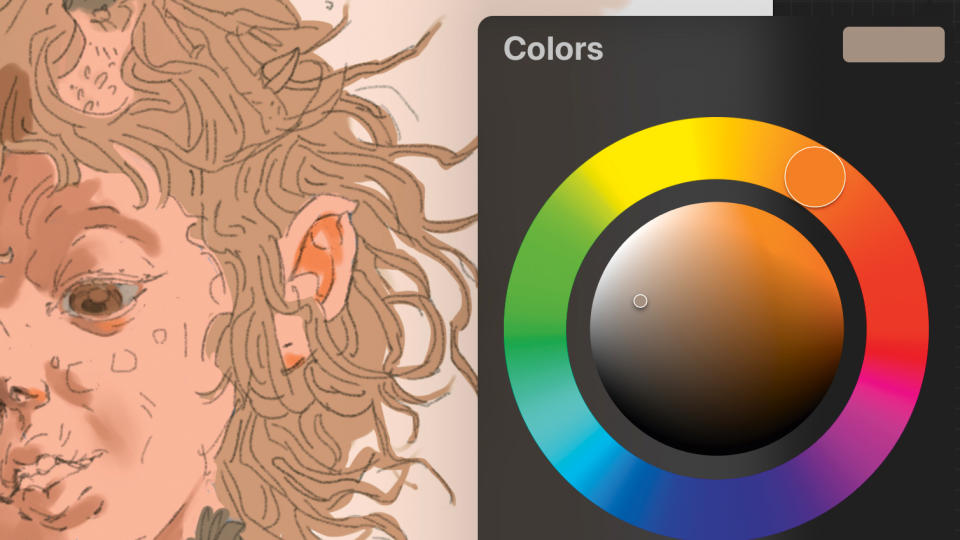
11. Altering the colour of the line art
(Image: © Fatemeh Haghnejad)
Now I want to change the colour of my line art, to make the appearance of the lines closer to the colours around them. I alpha-lock the line art layer and make my changes. For example, I lighten the lines that describe the faun’s hair.
12. Pushing the traditional painting look
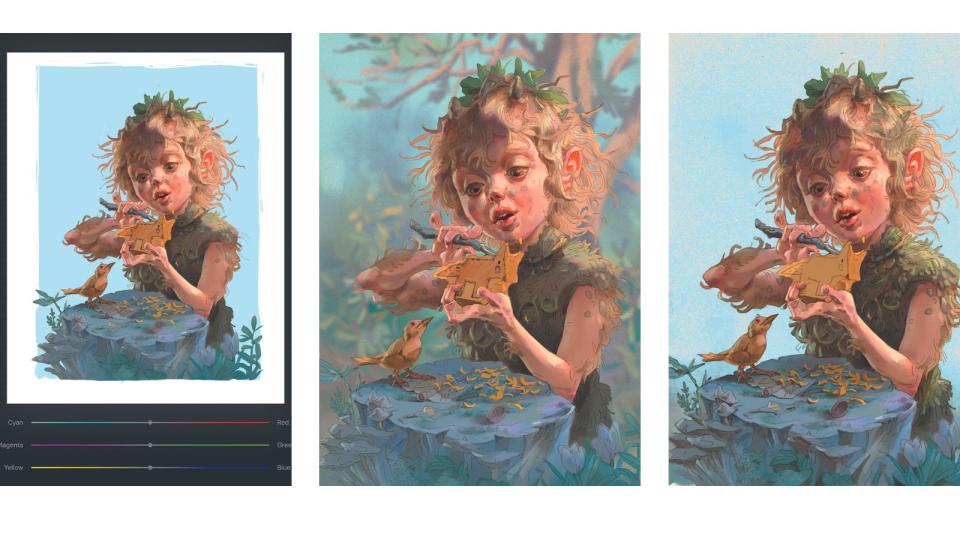
(Image: © Fatemeh Haghnejad)
I change the background colour using the Color Balance tool to make the character stand out more. Then I add a texture under my background layer and then set this to Multiply (the texture layer can be any texture that you like – I found this one by doing a quick search online).
Next, I add some branches and a tree in the background, although I’m not entirely happy with the result so I decide to keep the texture layer and the blue background layer, which is on a darker Color layer. It adds a traditional look to my painting, which I really like.
13. Solving some light and shadow problems
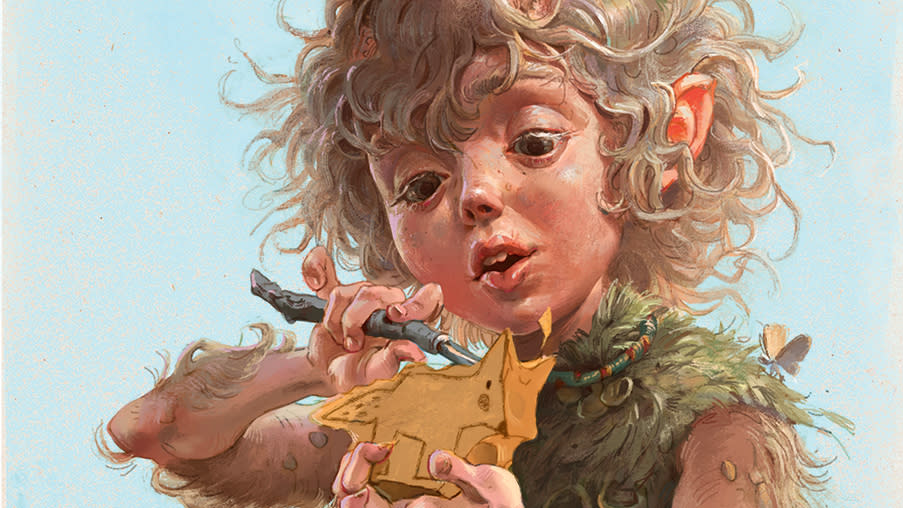
(Image: © Fatemeh Haghnejad)
Although I’ve finished working in layers, my illustration isn’t done yet. To do the rendering I usually copy my entire canvas, paste it all on to one layer on top of everything and paint over the whole thing in a Normal layer.
I can use the layers below to quickly select edges for and work on them cleanly on my new layer. I work across the composition to pull the whole image together.
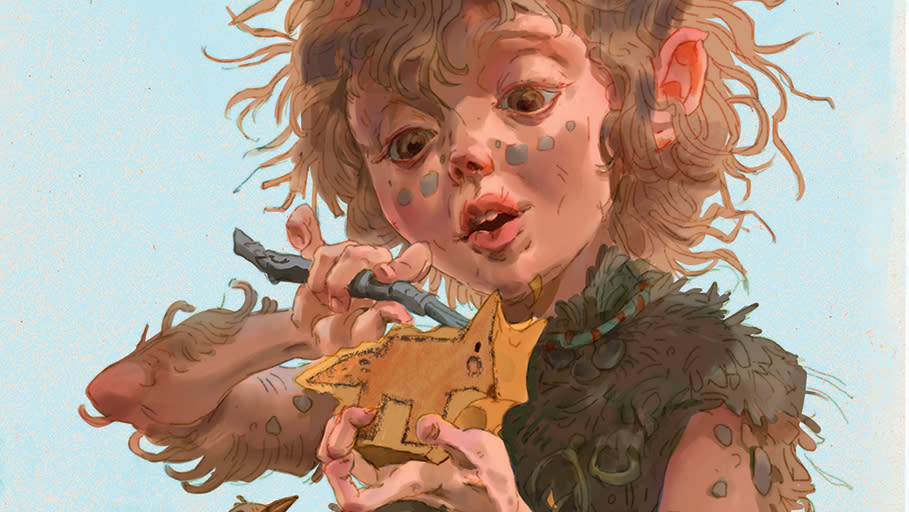
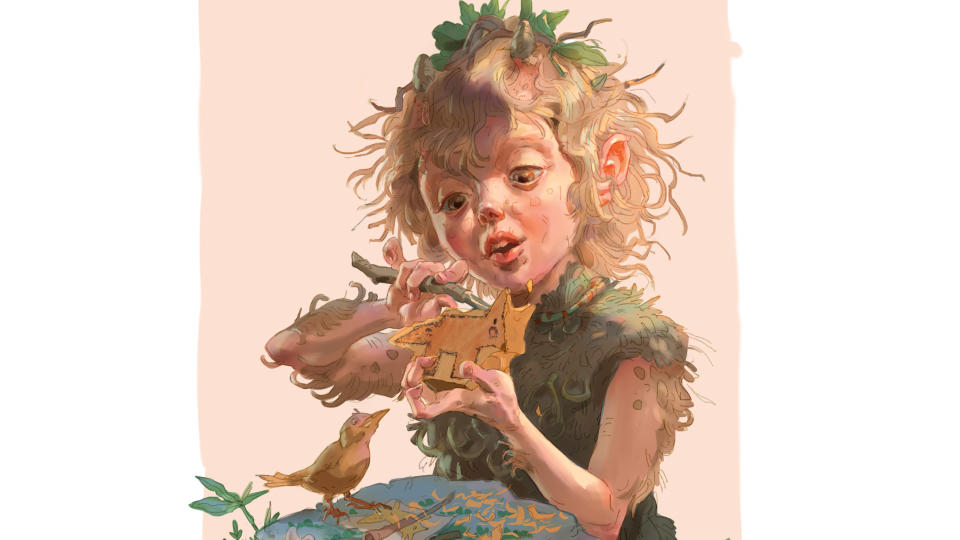
14. Putting in the finishing touches
(Image: © Fatemeh Haghnejad)
At this point I’m happy that everything is in the right place and I can start noodling away. I add more texture with the Stucco brush, and paint in some details such as plants in the background and hair strands. Now my faun is finished!
Get more Procreate tutorials in ImagineFX
This content originally appeared in ImagineFX magazine, the world's leading digital art and fantasy art magazine. ImagineFX is on sale in the UK, Europe, United States, Canada, Australia and more. Limited numbers of ImagineFX print editions are available for delivery from our online store (the shipping costs are included in all prices).
Alternatively, you can access us instantly through our digital options:
• Apple app (for iPad or iPhone)
• Pocket mags (multi-platform app, great for Android users)
• Zinio (multi-platform app for desktop or smartphone)

