Use Procreate with 3D reference models
You can use Procreate with 3D models to create incredible drawings faster. For most of my career I’ve been creating 2D drawings that will eventually be transformed into 3D. In this tutorial, I’m going to use 3D blockout from a program called Nomad Sculpt, which you can find on the iPad, then taking that as my reference to work up a painting in Procreate for iPad.
If you still don't have an Apple table to create art with, take a look at our guide to the best iPads for drawing as well as our deep dive feature into the iPad generations to see which is right for you. Also, read my Procreate review to find out why this app is so good. Finally, take a look at our guide to the best free 3D apps to try out (though I recommend Nomad Sculpt).
Use Procreate with a 3D modelling app
I love this 3D blocking approach because I can take simple primitive shapes and use them to define the look of my character very quickly. In this case, it’s going to be a Gundam-style mech design. I can then use that 3D blockout to try things like lighting and composition before I ever turn to my preferred painting program.
Being able to work out all the complexities of perspective and overall composition before even starting to sketch means that I can start detailing my design quite quickly. Once I have the design locked down I then start using a very reliable method of layer management that I use in almost all of my work, and it was a system I was using with Photoshop well before the iPad came along.
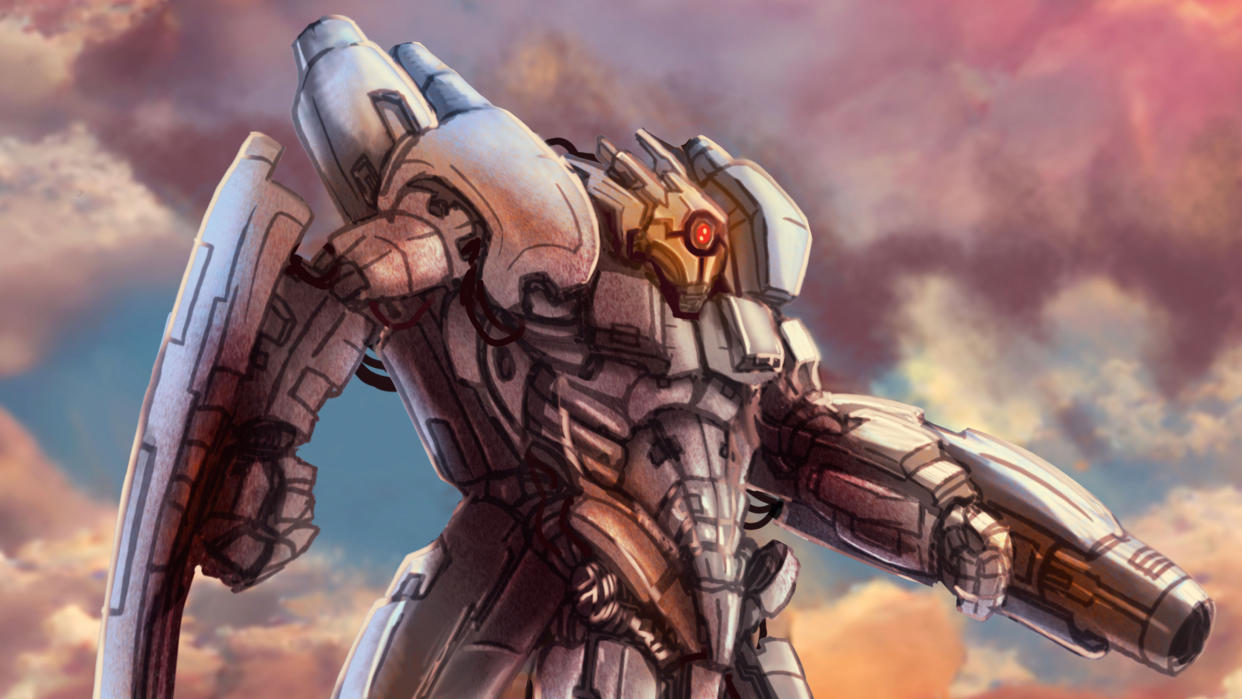
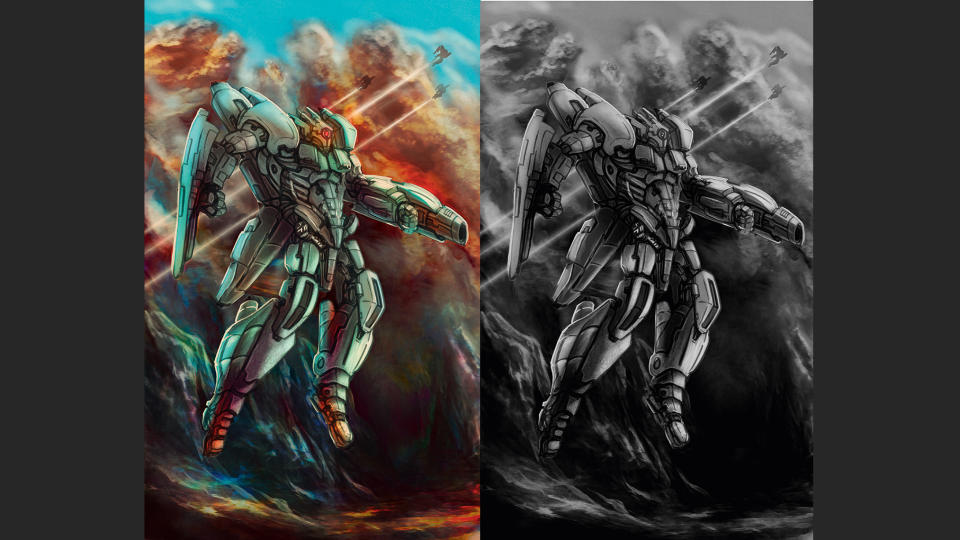
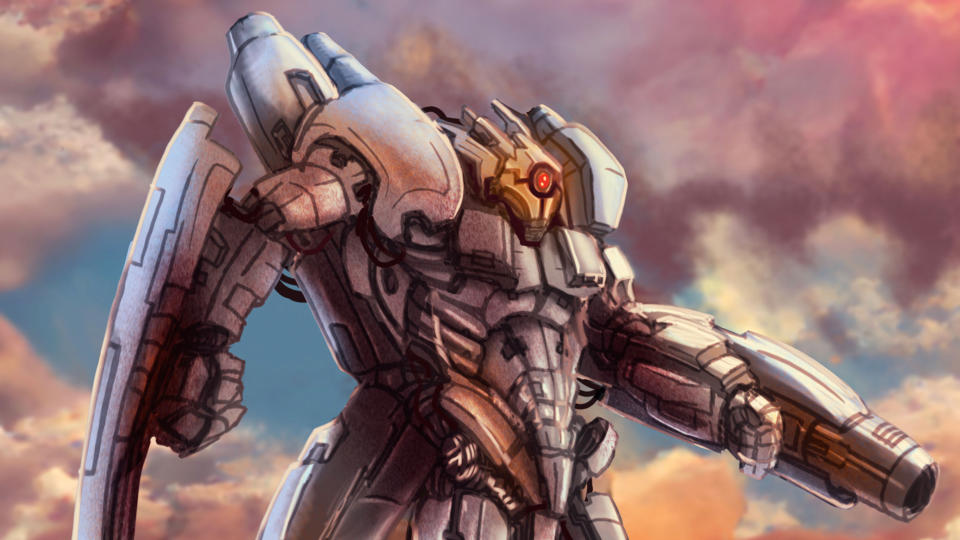
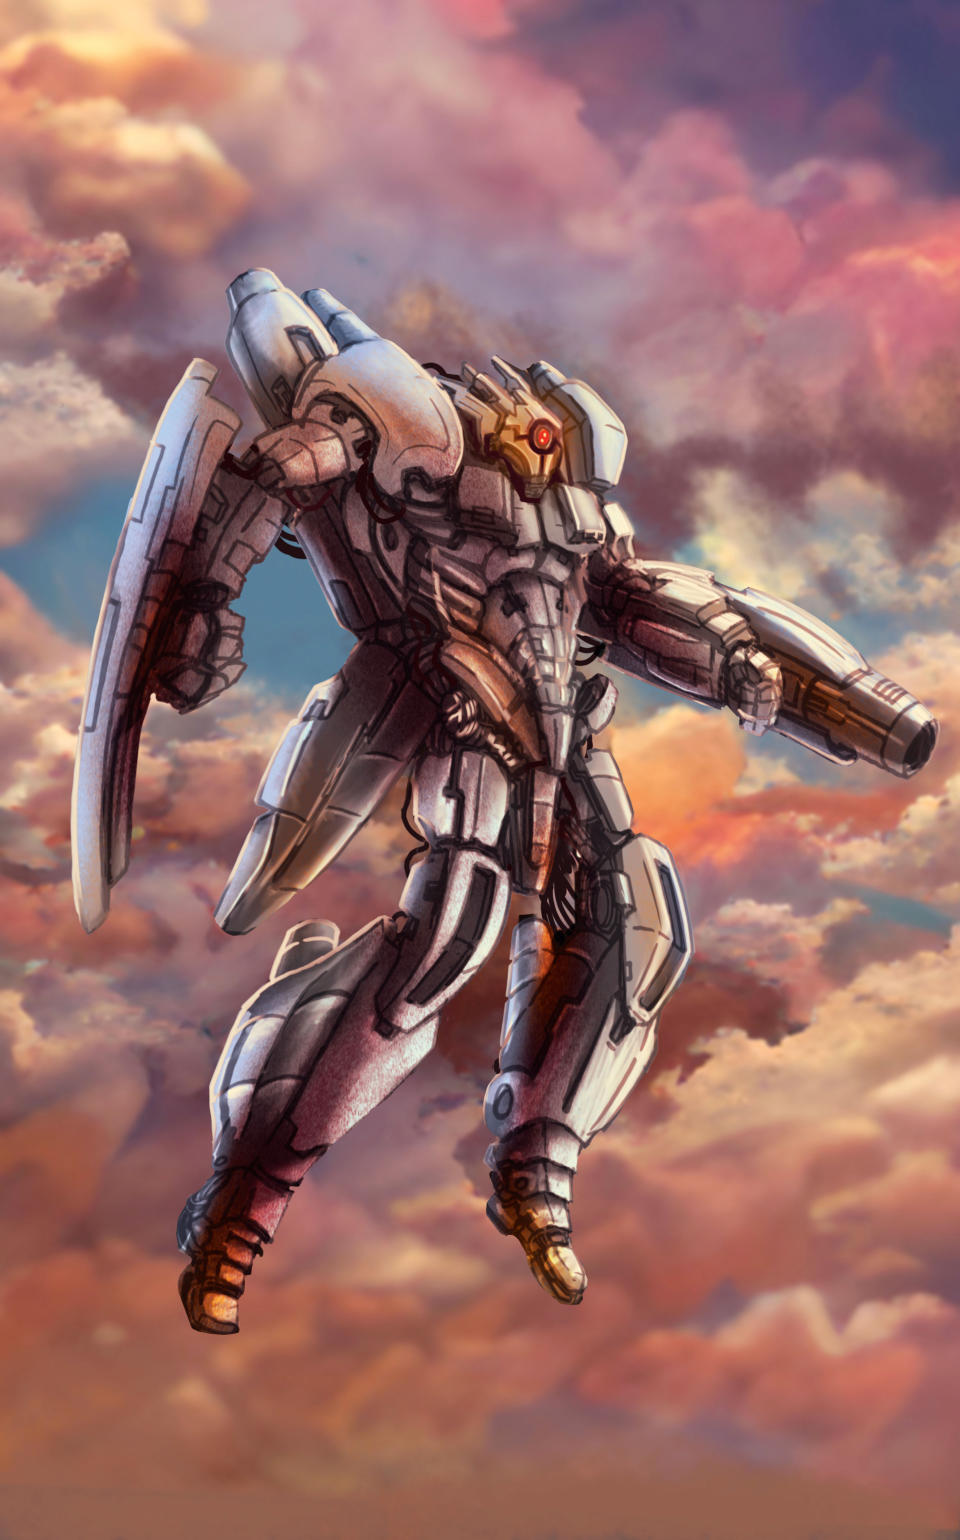
Having the hard stuff worked out with a 3D program allows me to relax and enjoy sketching and painting even more. Plus, the good thing about having a 3D blockout is that you can pose it and try different angles and lighting styles with relative ease. See the bottom of this post for the full completed image, and read on for a step-by-step Procreate tutorial on using 3D reference models.
01. Blocking out with Nomad Sculpt

(Image: © Glen Southern)
Any 3D sculpting package can be used for this part of the process, but I like to use Nomad Sculpt on the iPad. It’s cheap and flexible, with lots of different tools to create the kind of shapes we would want for this project. I find some great reference for Gundam mechs, then proceed to block out my ideas. (Read my tutorial on how to 3D sculpt on an iPad to get up to speed.)
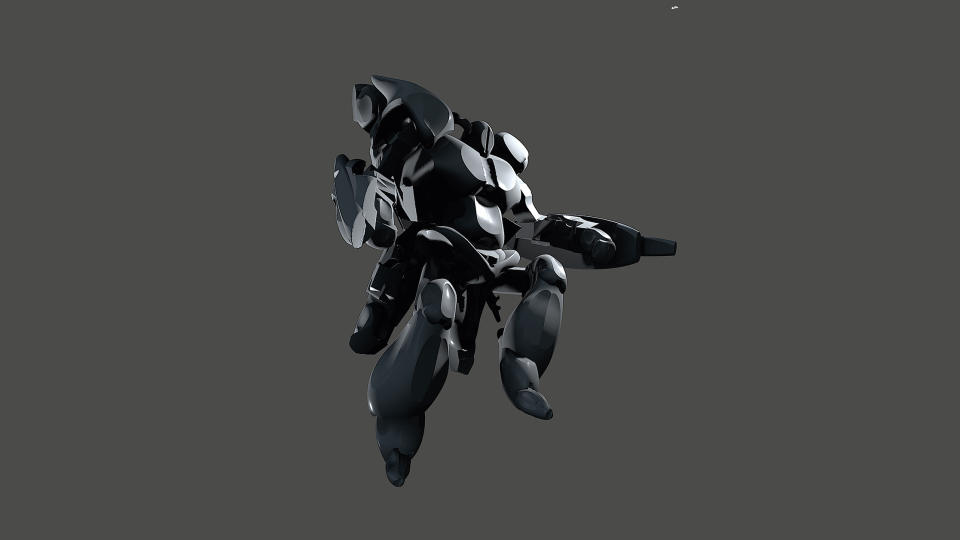
02. Posing with primitives
(Image: © Glen Southern)
Next I focus on the pose; the actual shapes of each individual body part are not so important at this stage. I use spheres, cubes and a few pyramid shapes and block out the body, arms, legs, and a basic head. I use the Knife tool to trim off parts of each of the primitives to get some nice chamfered edges that might catch the light. Where needed, I merge the parts together – for example, the forearm.
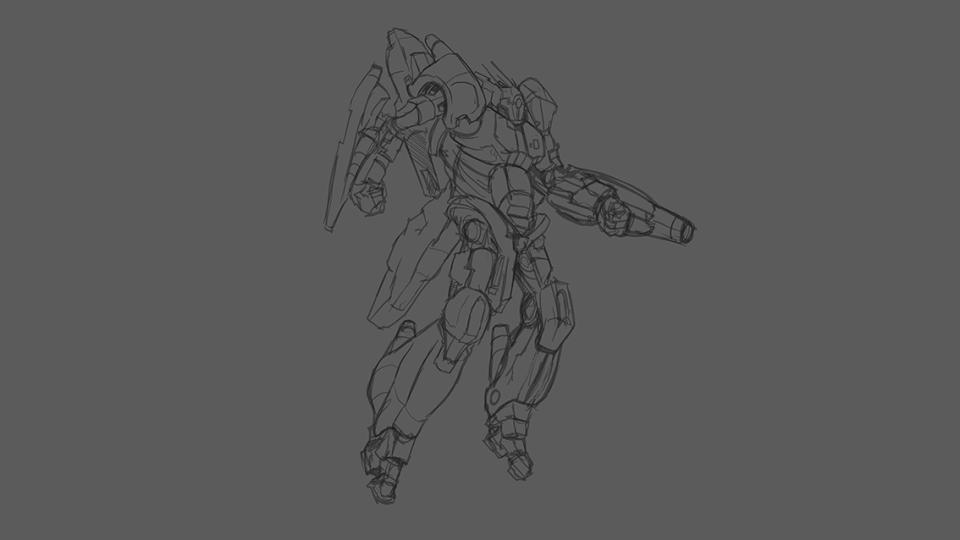
03. Sketching the design
(Image: © Glen Southern)
I start in Procreate with a fairly large document (4,000 pixels high). I add a screen-grab of the mech design on a layer. I often use the Procreate 'Reference' feature, but for this project it was simple enough to have the reference in a layer. I make a layer for sketching and I draw out the basic sketch based on my design. I use the Technical pencil set to 50% opacity for this stage.
04. Inking a layer
(Image: © Glen Southern)
I create a new layer and set the sketch layer to about 50% opacity so I can barely see the lines of the sketch underneath my new layer. I then take the Technical pen with a 90% opacity and I begin to do a more detailed line drawing over the top of my own sketch.
I always take my time with these lines as I need to make sure they’re quite accurate and everything is joined up, as I may need to flood fill parts at a later stage. Remember you can drag and drop colour into an image and auto-fill it, but making sure your lines are connected means you only fill set areas.
05. Cleaning lines, creating a silhouette
(Image: © Glen Southern)
Once I have a really clean line drawing of the mech, I create a new layer underneath this one and then proceed to draw out a silhouette. It doesn’t matter what colour this silhouette is at this stage, as it will be used for a few things in later stages and will be changed as needed. I use a mid-grey to start with as it's simple and clean, and not too overwhelming.
06. Making use of an Ambient Occlusion layer
(Image: © Glen Southern)
I decide the light was going to be coming from the top right. I make a new layer above my silhouette layer and below the ink sketch. I set this to ‘Multiply’ as a blend mode and also set it to ‘Clipping Mask’, so that it used the silhouette to constrain any painting into the shape from the lower layer. I then paint in dark areas where I want occluded shadows – this is mostly in the lower areas and in cracks.
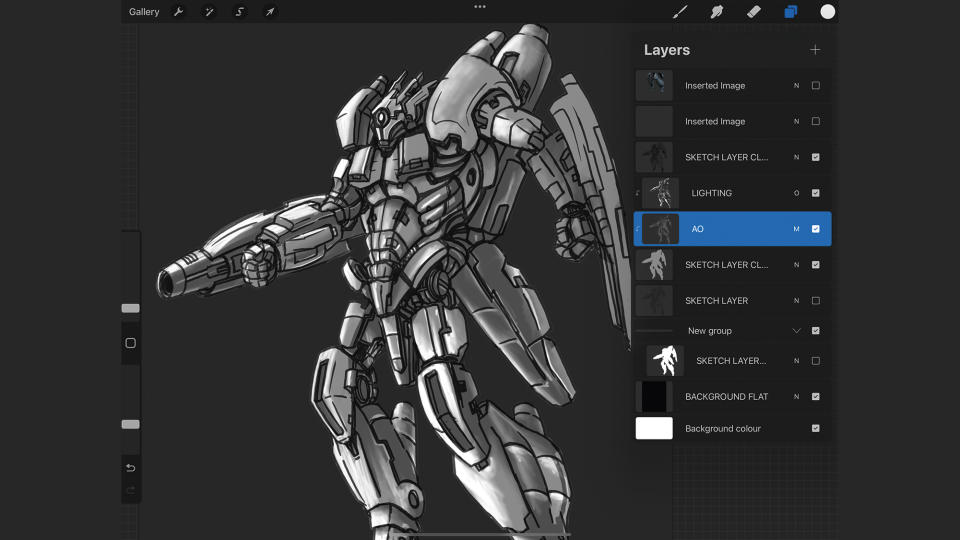
07. Creating the first lighting pass layer

(Image: © Glen Southern)
I make a new layer and set this one to ‘Overlay’ and also to ‘Clipping Mask’. I place it above the silhouette but below the sketch layer. This layer is where I add the main lighting details, and as I had already set it to come from the top right it is almost a reverse of the Ambient Occlusion layer in terms of placement. I use the Basic brush and smudged it where needed to create soft blended shadows.
08. Understanding layer management
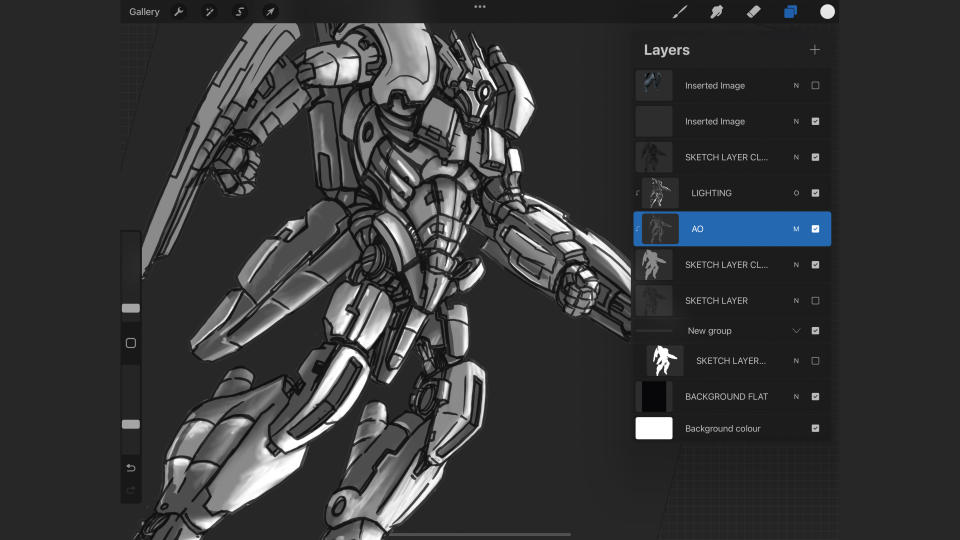
(Image: © Glen Southern)
It’s really important to understand this type of layer management in programs like Procreate and Photoshop. Having a good understanding of blend modes and how to use tools like Alpha Lock and Clipping Mask means that you can work in a non-destructive way, and if you want to make tweaks later it is simply a case of changing something on a layer, not on a merged document.
Read our Procreate tips feature for a beginners guide to what are, and how to use, Clip Masks, Gaussian Blur and more.
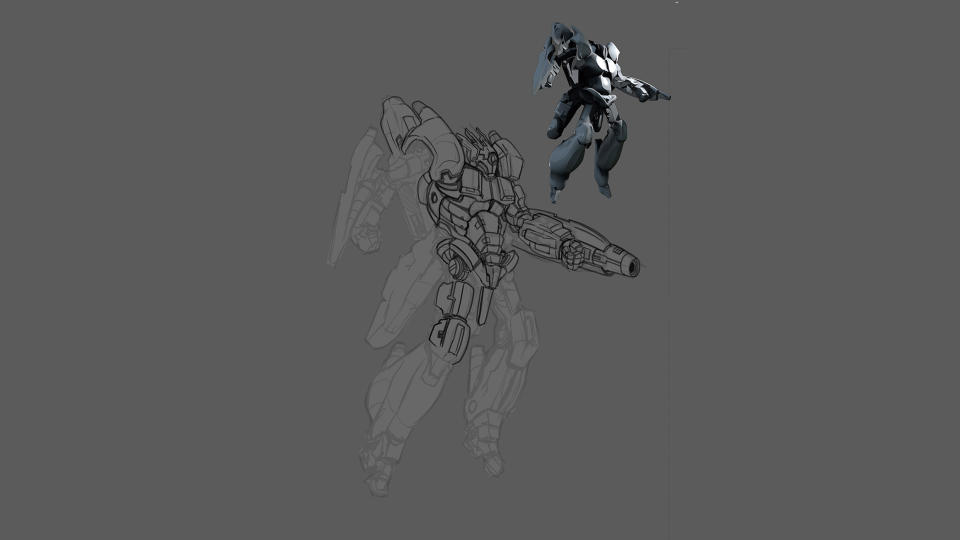
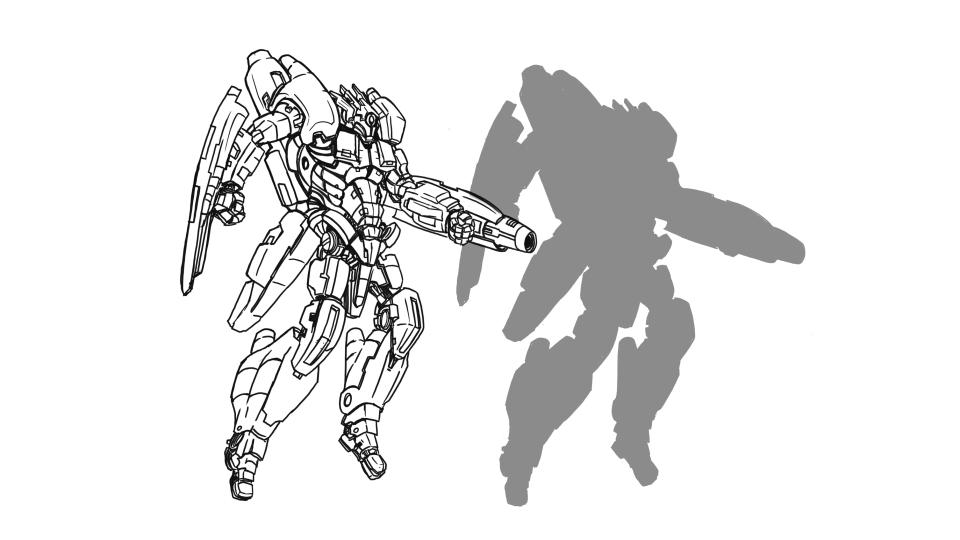
09. Flipping the image
(Image: © Glen Southern)
The reason we flip this kind of image is to see what it looks like from the reverse angle, as you can sometimes spot problems before you go further into the process. I flip the mech and I am pleasantly surprised that most things seemed to work, and I attribute that to the fact we started with a 3D reference.
Usually I would recommend flipping you image regularly and at an earlier stage to this image. Because here I'm using a 3D model as a basis for the image some of the issues that can arise in looser sketching are no longer a problem - yet another reason why using 3D models works so well.
10. Creating a monochrome background
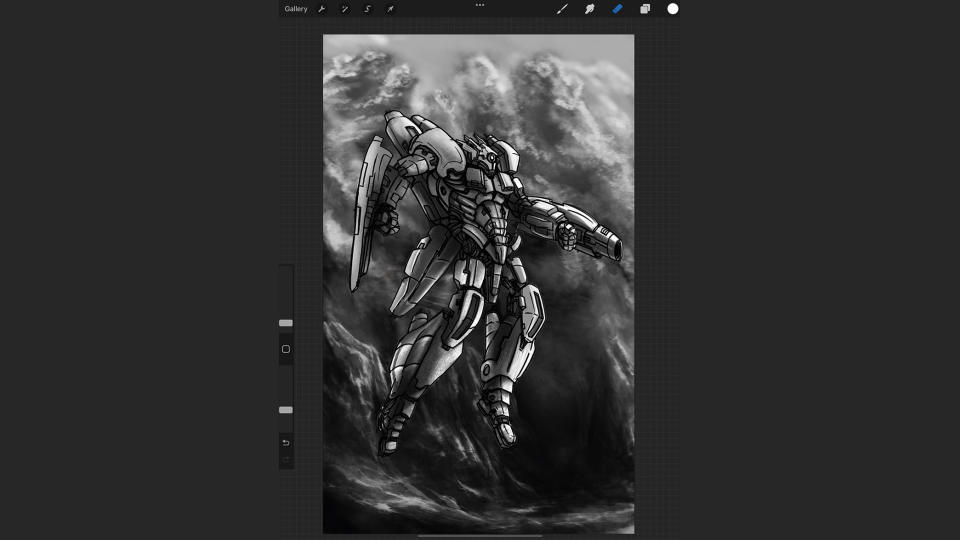
(Image: © Glen Southern)
I make a new layer below all the current layers and use a cloud brush to block out a rough scenery and some clouds. I only use greys, blacks and whites as I want to play with the value of the overall sketch and I know that this will change at a later stage. Using monochrome tones for art like this is a common tip for digital art as it reveals where the image's values need improving as well as being easily coloured in most art apps…
11. Creating the colour wash
(Image: © Glen Southern)
When I was happy I add a new layer and set it to Multiply over the top of the background. I block in some of the basic colour washes, which were reds and blues initially. I paint some basic colours into the silhouette layer and take a look at this colour version compared to a desaturated, value-only version.
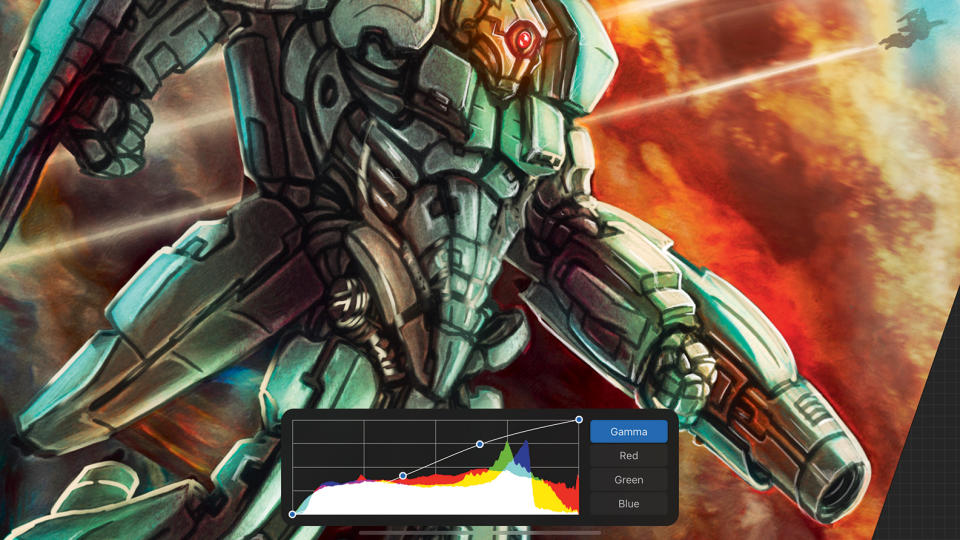
12. Adjusting hue, brightness and using Curves
(Image: © Glen Southern)
I want to explore the colour layers a little more so I use the Curves tool in Procreate and adjust the hue, saturation and brightness until I am happy with the colour balance. Procreate doesn’t have a contrast option so I use the Curves feature to play with the range to push the contrast up and down.
13. Making use of texture layers
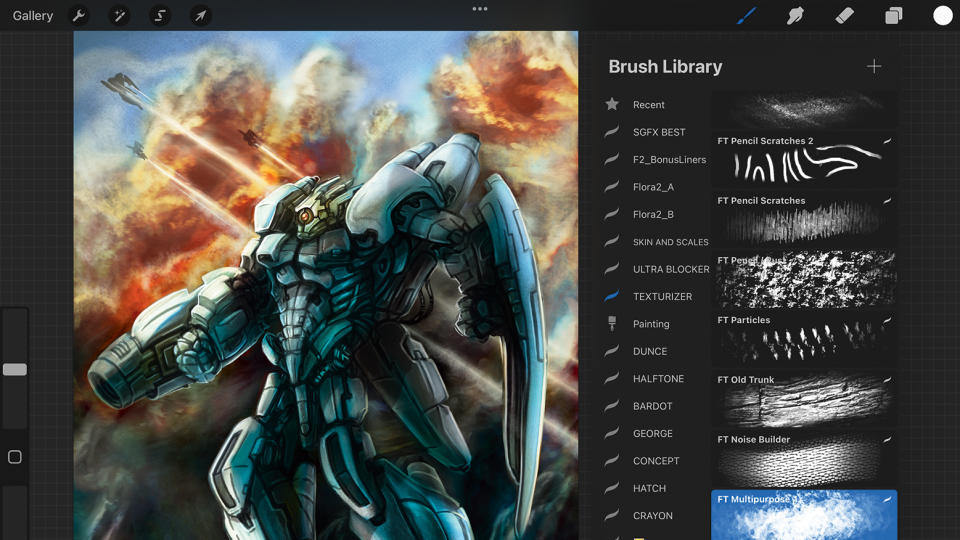
(Image: © Glen Southern)
One of the last steps I do is to create some texture over the top of the colour layers. I make a new layer and set it to Multiply and then use a wide range of built-in brushes to add speckles, scratches, dust and damage.
It doesn’t really matter which brushes you use, just find ones that have some really nice visual interest. I'd recommend playing with opacity and brush size and layering textures to get some nice effects. I purchase a lot of extra brushes and added them to my own packs, take a look at our guide to the best Procreate brushes to see what's available. Also, read our tutorial to experiment with Procreate brushes for more detail.
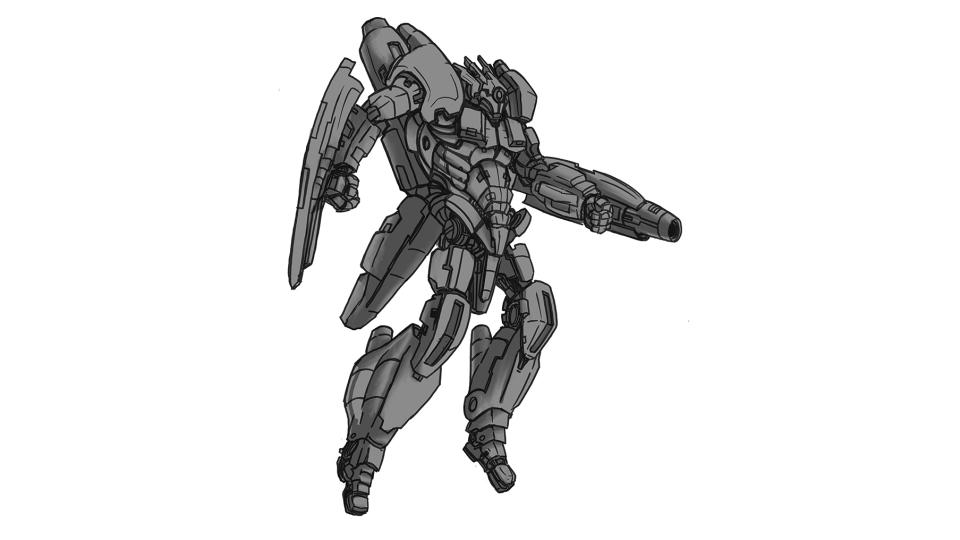
14. Merging the layers
(Image: © Glen Southern)
When I’m happy with the composition, I merge all the layers down and then carry on working on the image with Smudge, Blur and adding more lighting as needed. I change the background a few times before the final image, so make sure that before you begin making final tweaks like this tick the 'cross' on the layers you are happy with, which ensures these are affected by changes.
Get more Procreate tutorials in ImagineFX
This content originally appeared in ImagineFX magazine, the world's leading digital art and fantasy art magazine. ImagineFX is on sale in the UK, Europe, United States, Canada, Australia and more. Limited numbers of ImagineFX print editions are available for delivery from our online store (the shipping costs are included in all prices)
Alternatively, you can access us instantly through our digital options:
• Apple app (for iPad or iPhone)
• Pocket mags (multi-platform app, great for Android users)
• Zinio (multi-platform app for desktop or smartphone)

