A Pro Organizer’s No-Fail Method for Organizing Closets Is the Only One You Need

If there’s one place I know my way around, it’s a closet. Over my years spent working as a professional organizer, I’ve worked in hundreds of closets of varying shapes, sizes, and volumes of stuff. Closets and their contents are unique, and so are the habits, routines, and preferences of their owners.
While every closet organization project I’ve ever done has been different and there are dozens of ways to organize one, the process that I (as well as other organizers) use to get it tidy is pretty universal. So if your space is begging for a makeover, even if it’s a small closet, take some notes because this is exactly how to organize a closet — no matter how cluttered it currently is.
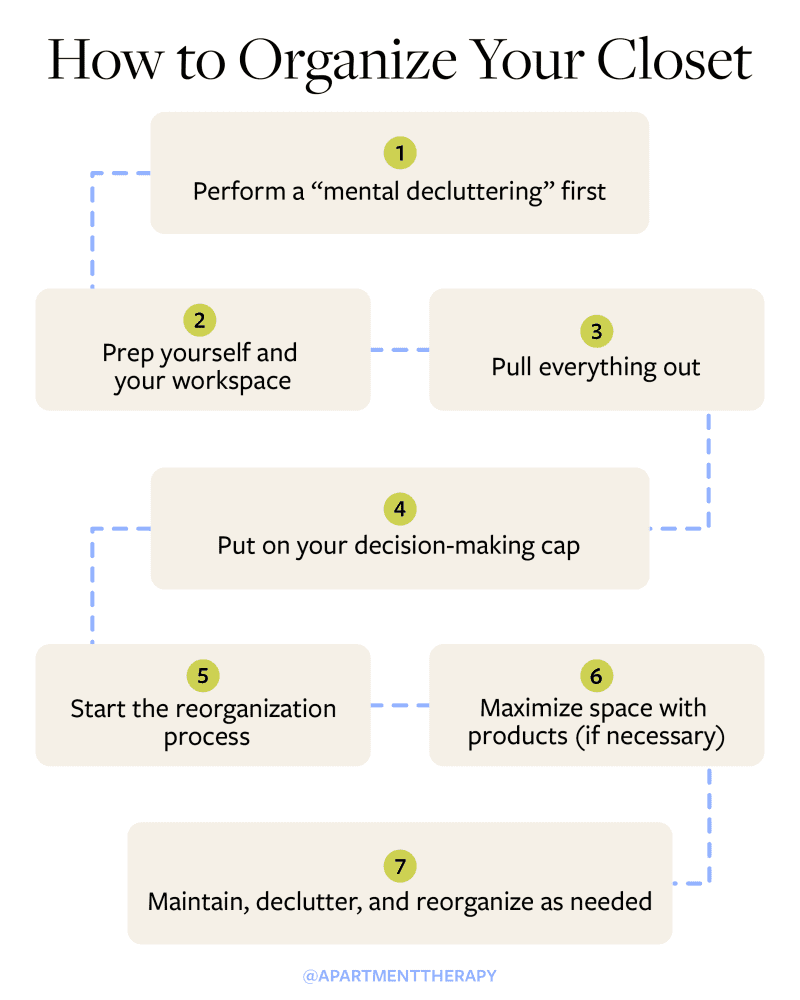
Table of Contents
Step one: Perform a “mental decluttering” first.
This is one piece of advice that is often missing from the home organization puzzle, but it’s also the most important. If the underlying issues of why your closet gets disorganized in the first place aren’t acknowledged and dealt with, then it will always default back to that state — whether that’s because of an impulse shopping habit, the inability to let go of sentimental things or items that no longer fit, an illness, or busyness, among other things.
The bottom line is, if your closet is chronically cluttered, it’s wise to try and work through “why” before you put time, money, and effort into getting it organized so it has a better chance of staying that way.

Step two: Prep yourself and your workspace.
Next, you’ll want to prepare yourself. This will significantly increase the likelihood that you’ll actually follow through and finish the project. Here are some tried-and-true ways I get myself ready to organize and declutter the closet.
Find (or make) the time to do it. Add it to your calendar like an appointment so you’re less likely to blow it off.
Start it at a time when you tend to have the most physical energy and mental focus.
Make an upbeat playlist and splurge on a fancy coffee to motivate yourself during the session.
Make your bed and lay down old sheets or towels to protect your bedding while you sort your stuff.
Have trash bags (or boxes) readily available for garbage and donations.
If you need help lifting things or making decisions, have a trusted friend or family member on standby.
If you have to break it into different days due to time constraints or physical limitations, that’s OK. Doing a little at a time is better than not doing anything at all.

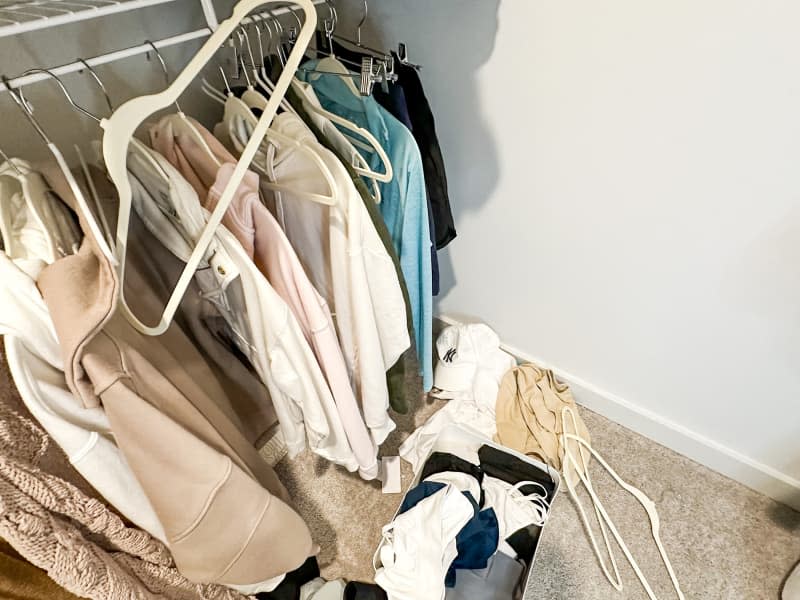
Step three: Pull everything out.
I know what you’re thinking: You just said it’s OK to not do it all at once. And you’d be totally right. Ideally, you should aim to organize the whole closet in one day, but if you can’t, focus on pulling things out in small categories instead. Either way, as you pull everything (or some things) out of the closet, sort them by type. Put together piles of jeans, sweaters, and so on so you can see the entirety of what you own. You might be shocked to learn you have 13 pairs of nearly identical leggings or two of the same shirt in the same size (trust me — I’ve seen it happen, and much to my client’s surprise). If you’re doing the project in a few different sessions, only pull out the categories you’re going through on that particular day.
Step four: Put on your decision-making cap.
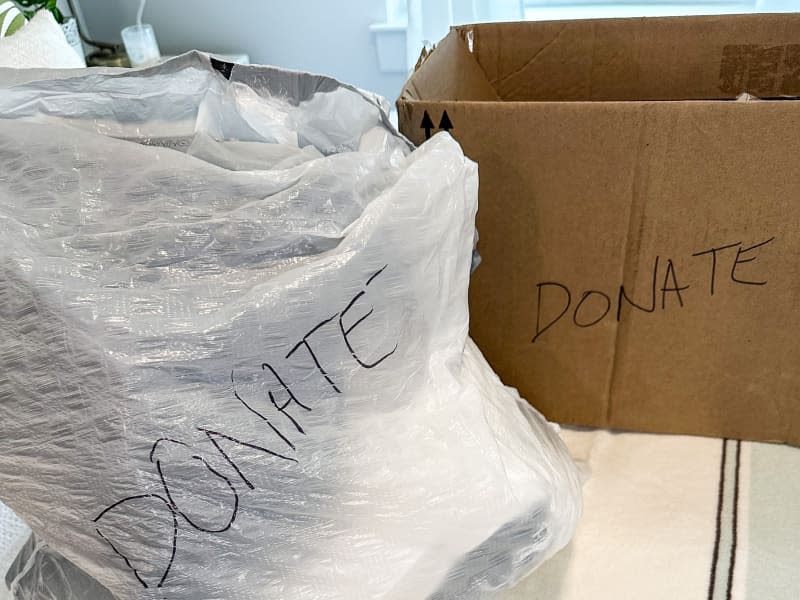
This is where I see many people get stuck, and I don’t blame them. I, too, have struggled with letting go of things that I loved or that fit me at some point but that point has long passed. While this can be a nuanced topic, the general rule of thumb is that if you haven’t worn something in the past year, it should be decluttered. Decide what to donate or keep, and, if an item needs to be mended or dry cleaned, commit to getting it taken care of in the immediate future.
Here are some questions to ask yourself when you’re having trouble decluttering clothes/shoes/accessories.
Do I actually like this item?
Have I worn this in the past year?
Can I put together at least five outfits with it?
Does it still fit? Will it realistically fit in the near future?
Does it still match my style?
Is it damaged/stained beyond repair?
If I was shopping right now, would I buy it?

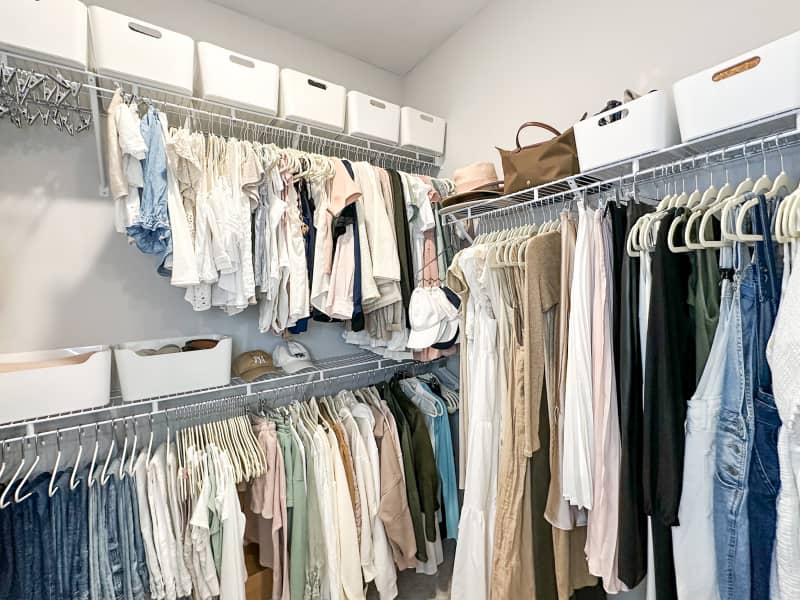
Step five: Start the reorganization process.
I say “start” because this is often an ongoing process with a lot of trial and error. I think the misconception that a space can magically go from cluttered to perfectly organized in a matter of hours comes from social media and TV depictions of professional organizers. You know, those of us with years of experience and expertise who usually have a team of organizers getting the job done? Exactly, so don’t beat yourself up over taking your time!
Decide where certain items should go, keeping in mind that the things you reach for most often should be at eye level, while less-worn things, like off-season clothes, can go onto high shelves. Store all like items together and separate work or formal wear from more casual clothing. Continue this process until everything in your closet is more or less where you want it to live.

Step six: Maximize space with products (if necessary).
You might luck out and not need to purchase anything new to whip your closet in shape. If you have enough empty hangers or can use bins you already have around the house, you’re saving yourself time, money, and potential future clutter. However, if your closet is small, lacks adequate storage, or has a lot of wasted space, it is time to get creative and use products to maximize it. Slim hangers, double hang rods, and stacking boxes are just a few examples of supplies you can implement into your closet to get the most out of it and keep it better organized.
Step seven: Maintain, declutter, and reorganize as needed.
Want to know the good news? Once your clothes, shoes, and accessories are easy to find, you’ve already won half the battle of putting them away. The other half lies in finding the motivation or time to do it. If you tend to toss things in the corner or, more likely, a “clothes chair,” make a point to sort through them weekly and tidy up the closet.
I suggest going through the decluttering process at least twice per year or leaving a bag in a corner of the closet to add donations to over time and, once full, drop it off to your charity of choice. If your lifestyle significantly changes and, therefore, so does the contents of your closets (for example, you go from working in a corporate office to working from home), then it’s time to reorganize your things to fit your new needs.

