How to make a podcast in GarageBand

Podcasts have become incredibly popular since evolving beyond the iPod from which they get their name. Now, you can listen to a podcast anywhere, streamed to your phone while on the move or even on your smartwatch or one of the best TVs.
The variety of subjects they cover ranges from global politics to the very niche and that’s because with a little time and the right equipment, almost anyone can create their own podcast. Here's how to get started using software that anyone who owns an iPad or Mac will already have, GarageBand. For more audio options, see our best audio editing software guide.
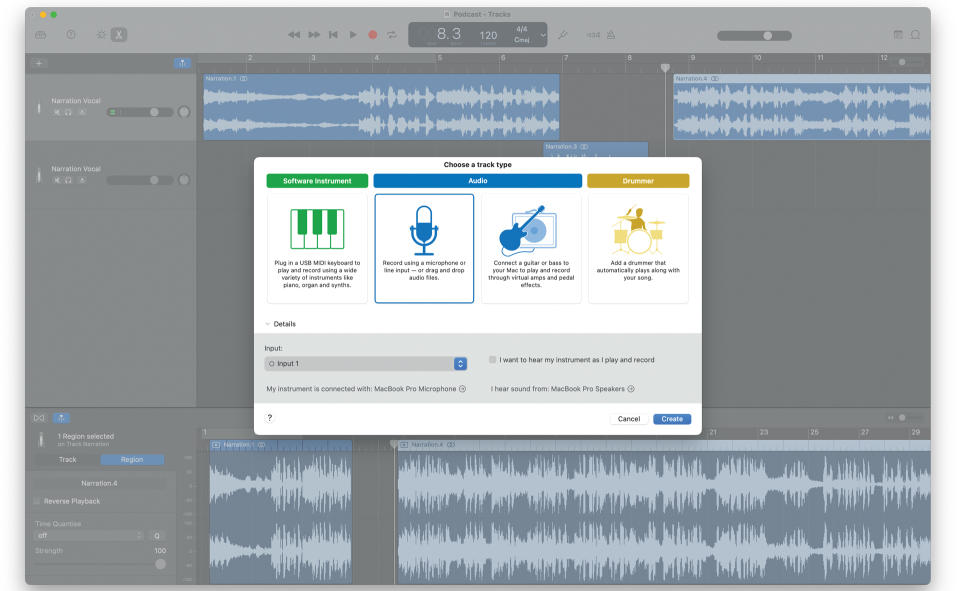
01. Create a project
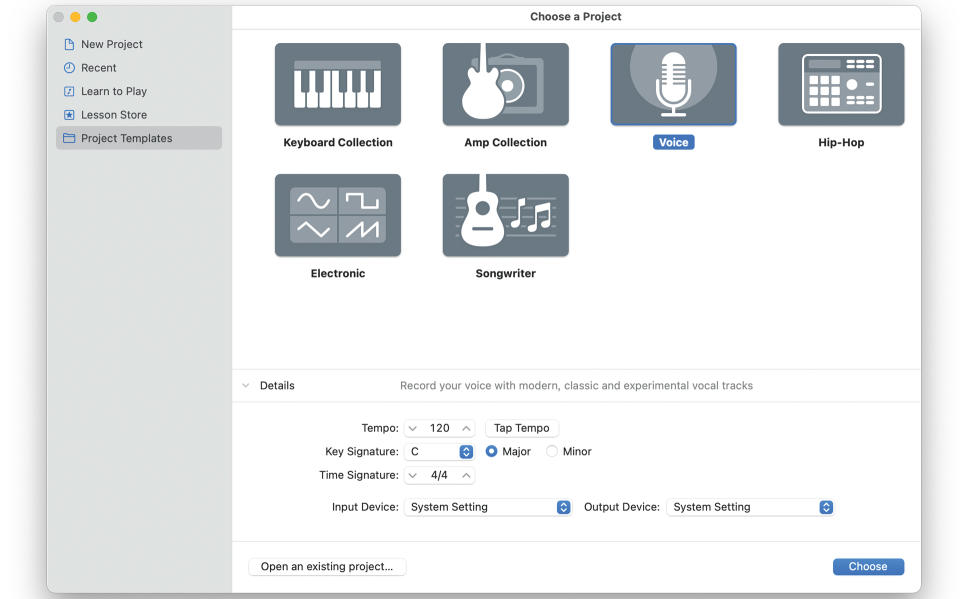
(Image: © Apple)
With your mic connected, open GarageBand and make sure it appears in the Input Settings menu. Then double-click on the Voice template to open a new project. It has four channels but you may not need them all yet.
02. Check your signal
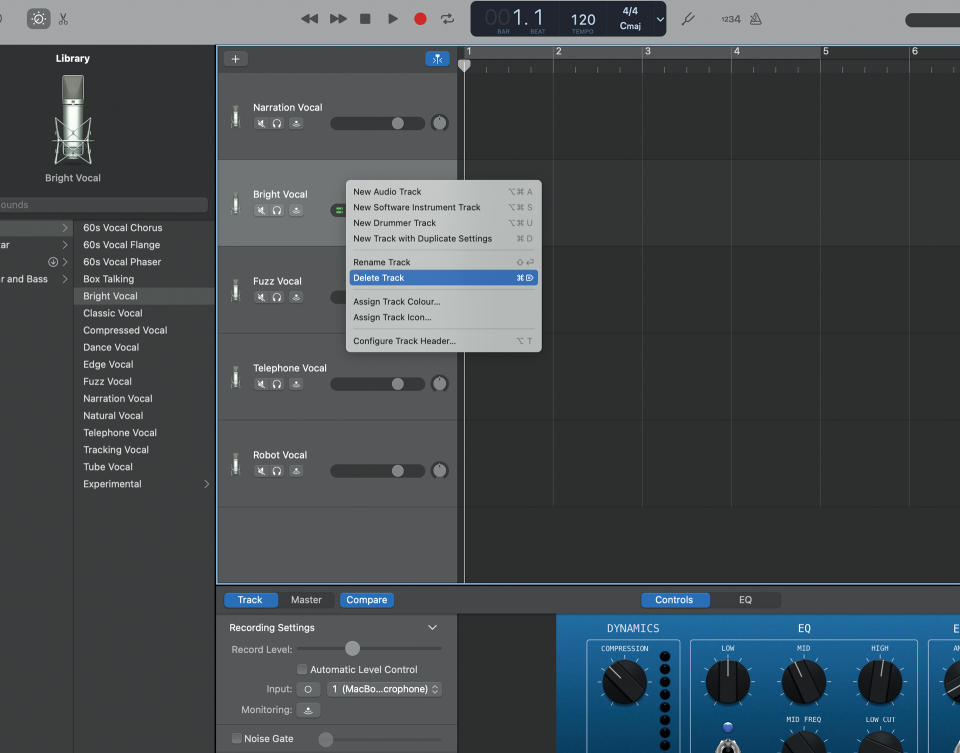
(Image: © Apple)
You will need to wear headphones or mute your Mac’s speakers while recording to avoid feedback. For now, you can ctrl-click on the other audio tracks to delete them. You should see signal showing on the track’s level meter.
03. Record your voice
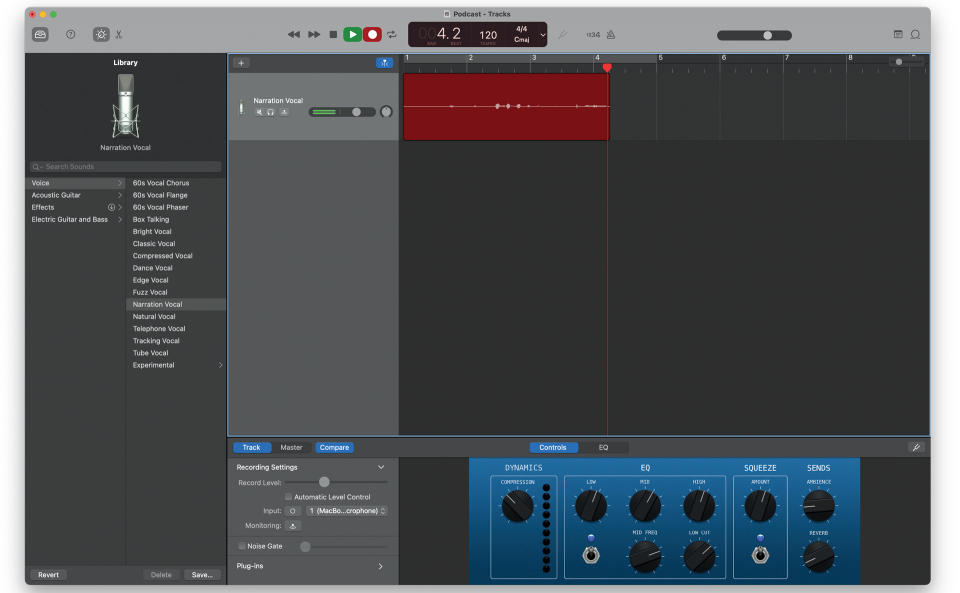
(Image: © Apple)
By pressing Record, you can now record your voice by speaking into the microphone. If you find that it’s too quiet or too loud, try changing the level on the microphone, the interface or the audio track inside GarageBand.
04. Edit the recording
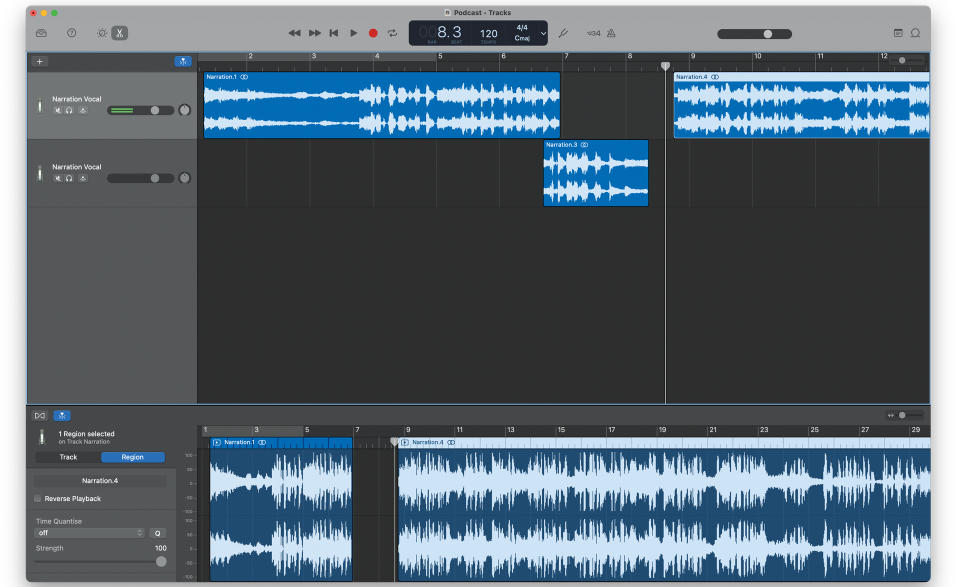
(Image: © Apple)
With some of your vocal track recorded, you can edit it by moving the playhead to the cut point and pressing cmd+t. You will be able to drag and drop chopped clips anywhere including on to new audio tracks.
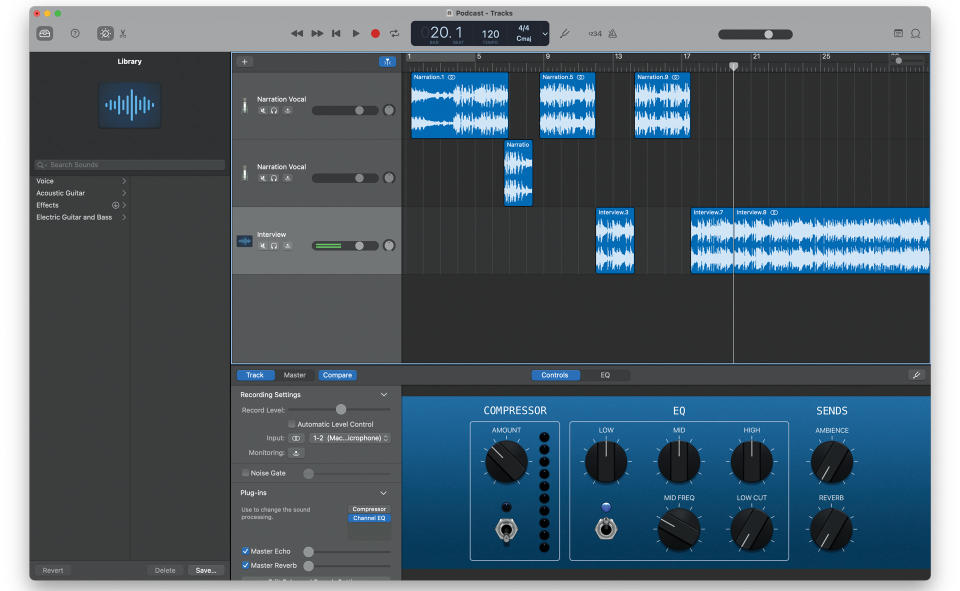
05. Add more tracks
(Image: © Apple)
Use the + button to add a new audio track and record more dialogue, or add two or more tracks to record multiple mics. Use the mute controls on existing tracks to silence anything you don’t want to hear while recording.
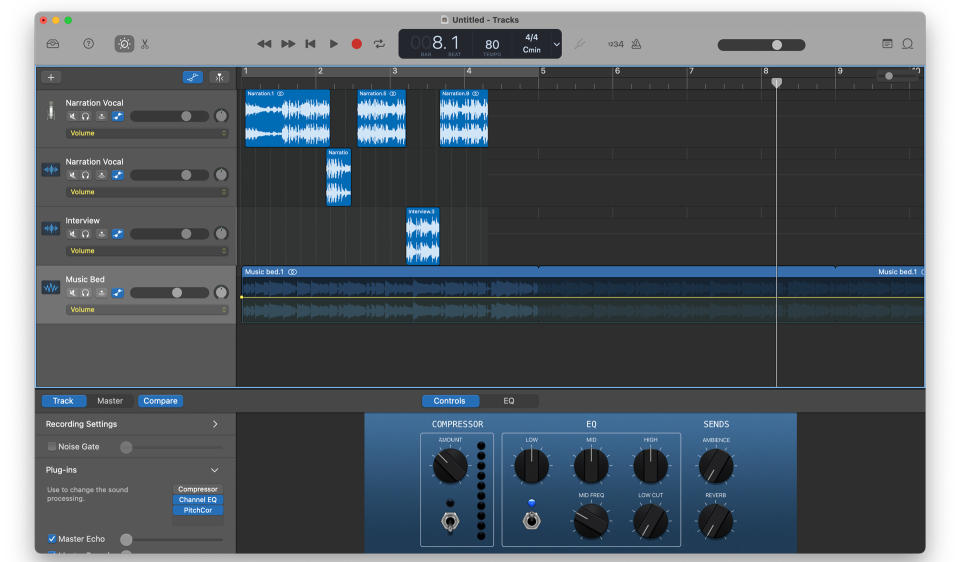
06. Create an arrangement
(Image: © Apple)
Use this edit technique to arrange your voice tracks so that all participants are heard. Use the level controls on the audio tracks to change volumes so they match. You can switch to loudspeakers when you’ve finished recording.
07. Add some music
(Image: © Apple)
To add a jingle to your podcast that fades out as you start speaking, import a music track, select it, then click the Show Automation button. Ensure Volume is selected in the drop-down and a yellow line will appear along the track’s length.
08. Fade out music intro
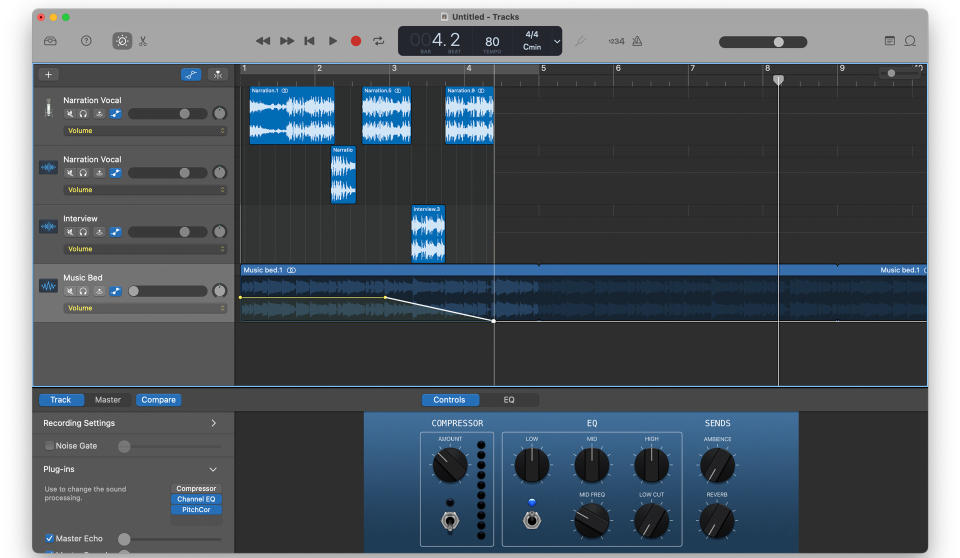
(Image: © Apple)
Click the yellow Volume line to place a control point where you want the music to start to fade. Add a second ‘end’ point where you want the fade to stop. Drag the ‘end’ point all the way down. The music will fade between the two points.
09. Tweak and export
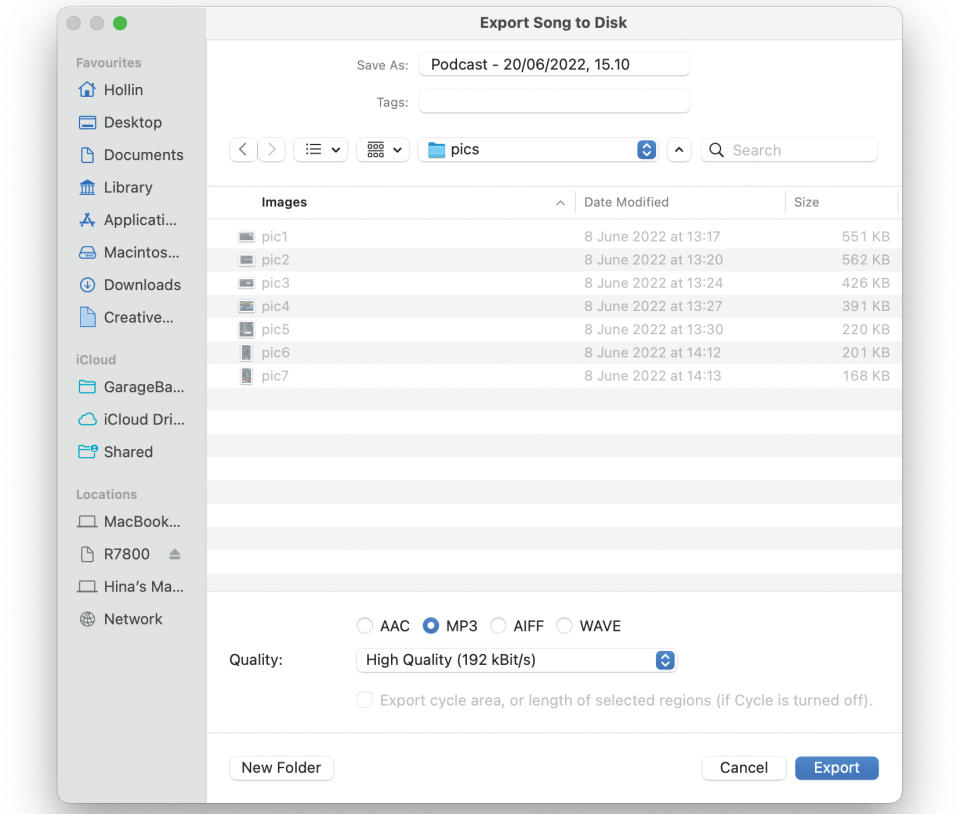
(Image: © Apple)
For each track, go to its Effects tab and make tweaks. Try using an Equaliser (EQ) to shape the sound. When you’re done editing and mixing, choose Share > Export Song To Disk. Then choose either compressed MP3 of full-quality AIFF.
This article originally appeared in MacFormat magazine. Subscribe to MacFormat today.

