How to Poach an Egg in 5 Easy Steps
I've failed at poached eggs an embarrassing number of times. So many that I decided I would just never know how to poach an egg; that it just wasn't my thing and I'd have to make peace with getting my poached-egg fix at diners and breakfast joints instead of at home.
But then my colleague Kat took me into the Epi Test Kitchen and schooled me on the subject. As it turns out, there are just a few simple steps to getting poached eggs right (and some common misconceptions that can make them go wrong). Once I mastered Kat's easy technique, I saw a whole world of perfectly round, runny-yolked eggs opening in front of me—a world that includes eggs Benedict, bistro salads, and runny-egg-topped pastas whenever (and wherever) I want them. Here's how to do it.
Poached Eggs step 1
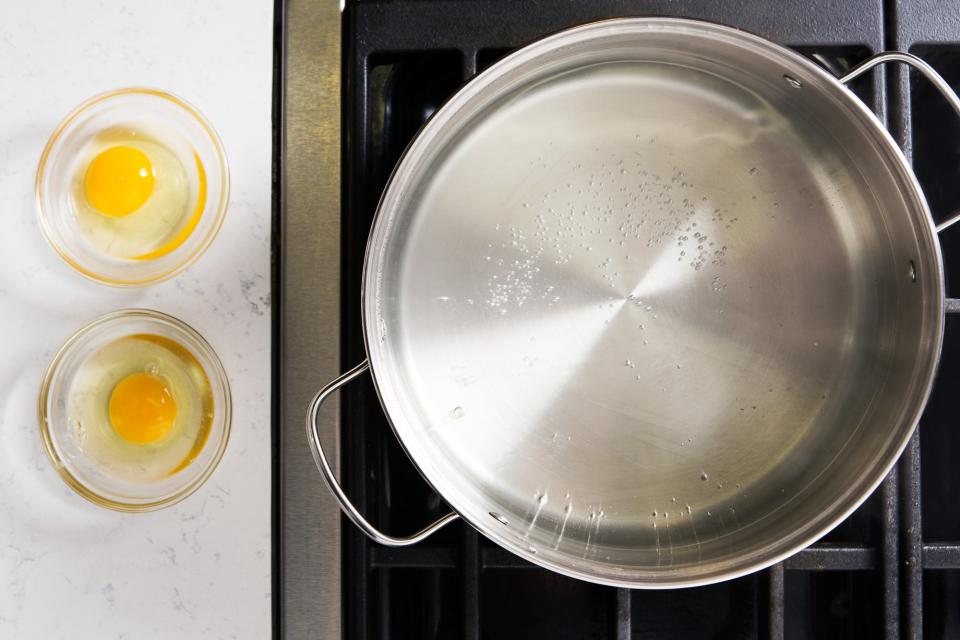
Photo by Chelsea Kyle, food styling by Katherine Sacks1. Bring water to a gentle simmer
Fill a large, wide pot with 3 to 4 inches of water, and bring to a gentle simmer. (Putting a lid on the pan will help it simmer more quickly.) Using a shallow pot with straight sides will make it easier for you to lower and lift the eggs out of the water without being jostled by the edges of the pan.
As for the water, you aren't looking for a rolling boil or even a true simmer here—all that motion will shake your egg around and possibly cause it to pop. Instead, play with the heat of your stove until you see tiny bubbles appearing on the bottom of the pot (the temperature should be around 180°F). Continue to adjust the knob to keep it at that gentle heat level. And don't forget to salt your water!
Poached Eggs step 2
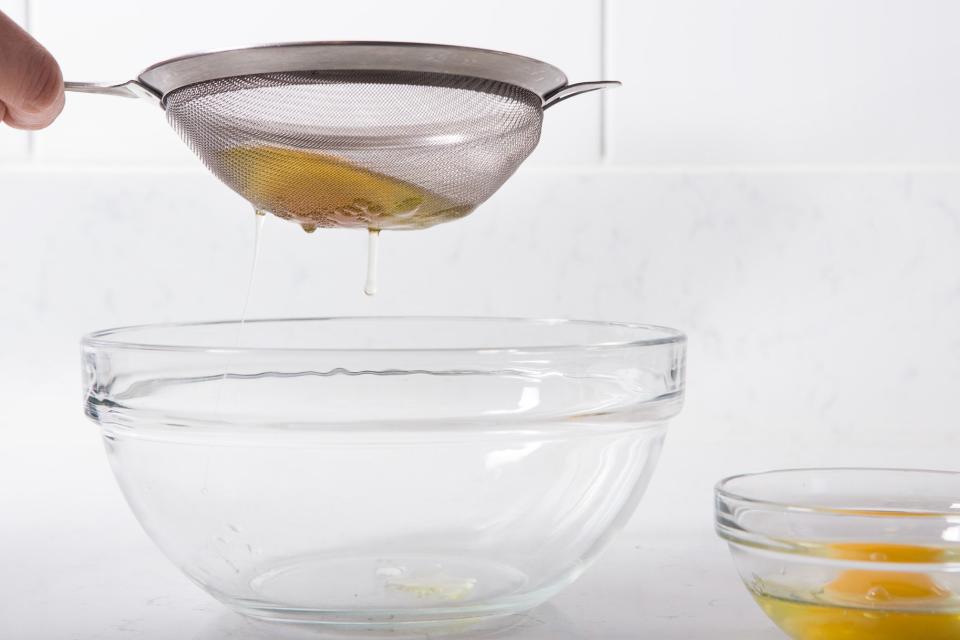
Photo by Chelsea Kyle, food styling by Katherine Sacks2. Crack eggs into a strainer set over a bowl
Grab a fine-mesh strainer. This simple tool eliminates one of the most vexing parts of making poached eggs at home—what to do about those wispy egg whites that spread throughout the water, clouding everything up and making a mess of your otherwise perfectly poached egg. You see, the white parts of eggs have two distinct textures inside the shell. The outermost white is runnier than the white that's closer to the yolk. The older an egg is, the more runny the white will be. When you strain the egg, you're getting rid of the runniest part of the white, which is what creates all those wispy strands.
To do it, just set the strainer over a small bowl, crack an egg into it, and gently shimmy the strainer to allow any stray whites to drain. Scrape the bottom of the strainer against the edge of the bowl to release any dripping bits. Now you're ready to poach.
Poached eggs step 3
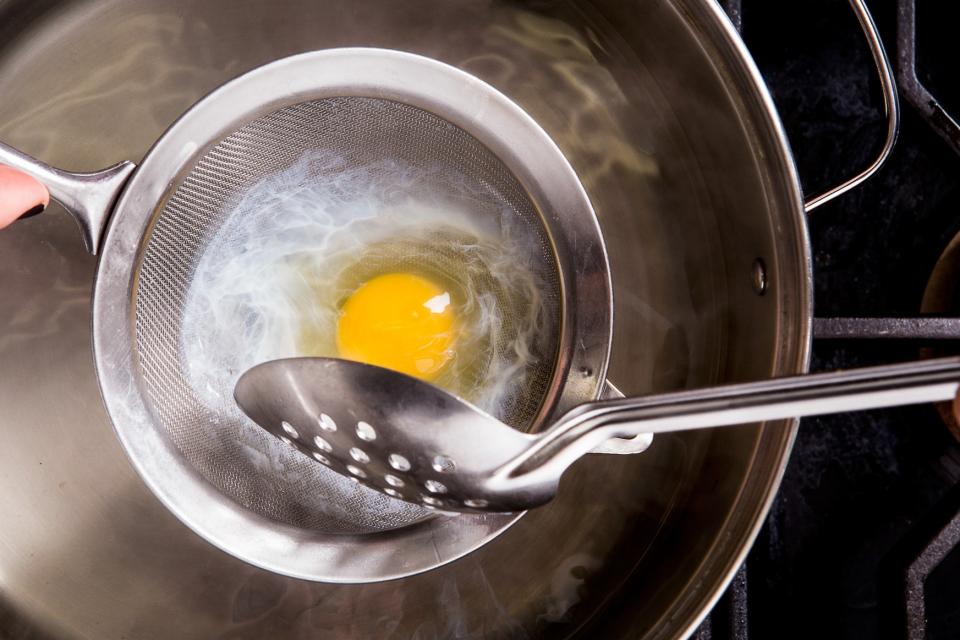
Photo by Chelsea Kyle, food styling by Katherine Sacks3. Use the strainer to shape the egg
Here's where Kat dispelled a major misconception of mine. "Don't I need to create a swirling vortex with the water and drop the egg in the center of it?" I asked. But she completely blew my mind with her two-handed, vortex-free technique. Kat's method calls for carefully lowering the bowl of the strainer straight into the "simmering" water with the egg still inside. With a slotted spoon in the other hand, she then encouraged the whites to form around the yolk. When the edges of the egg white started to turn opaque (30 to 60 seconds), she carefully loosened the egg from the strainer, and then tipped the strainer to release the egg into the water. Genius.
You can repeat this process with up to three more eggs, depending on the size of your pan. Give them plenty of room to move—and don't forget which egg went into the pan first.
Poached eggs "stir"
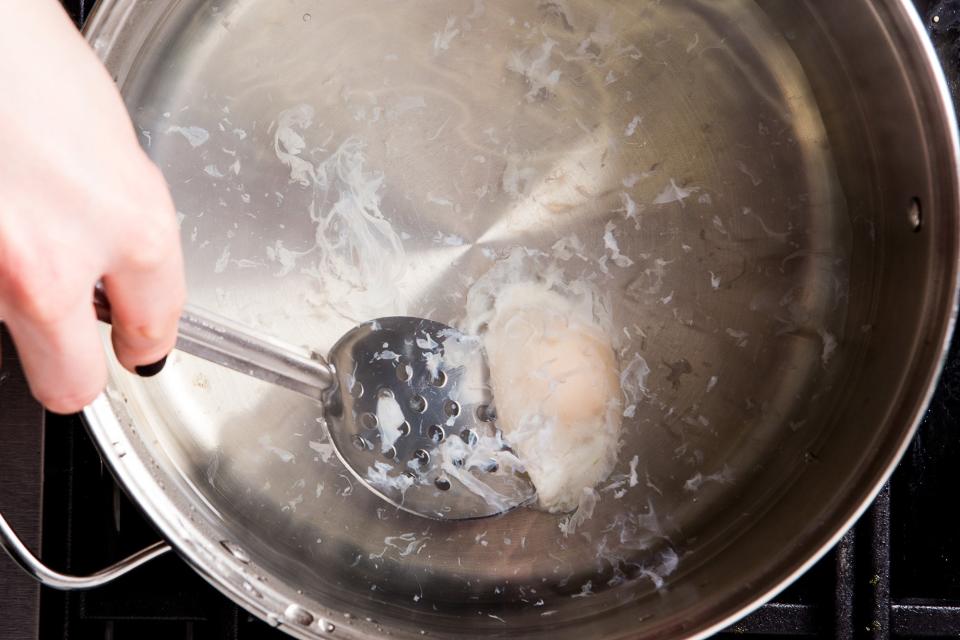
Photo by Chelsea Kyle, food styling by Katherine Sacks4. Continue to poach the egg
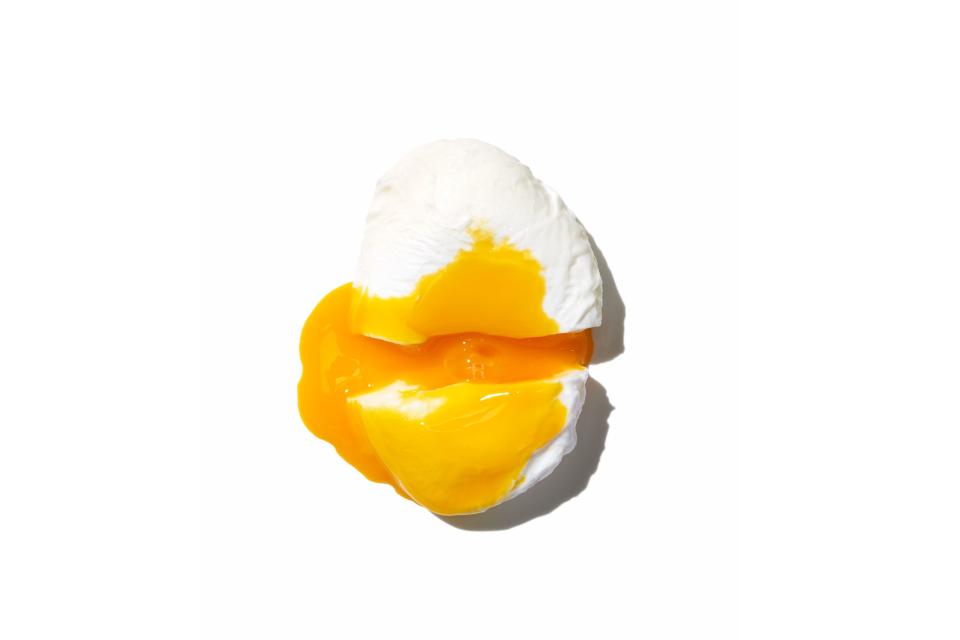
Cook the egg, flipping it occasionally with the slotted spoon, until the white is opaque and firm and the yolk is plump and jiggles slightly to the touch, 3 to 3½ minutes. As each egg is finished cooking, transfer it to a bowl of barely warm water so that it stops cooking, but doesn't get cold.
Poached Eggs step 6
Photo by Chelsea Kyle, food styling by Katherine Sacks5. Drain the egg on a kitchen towel
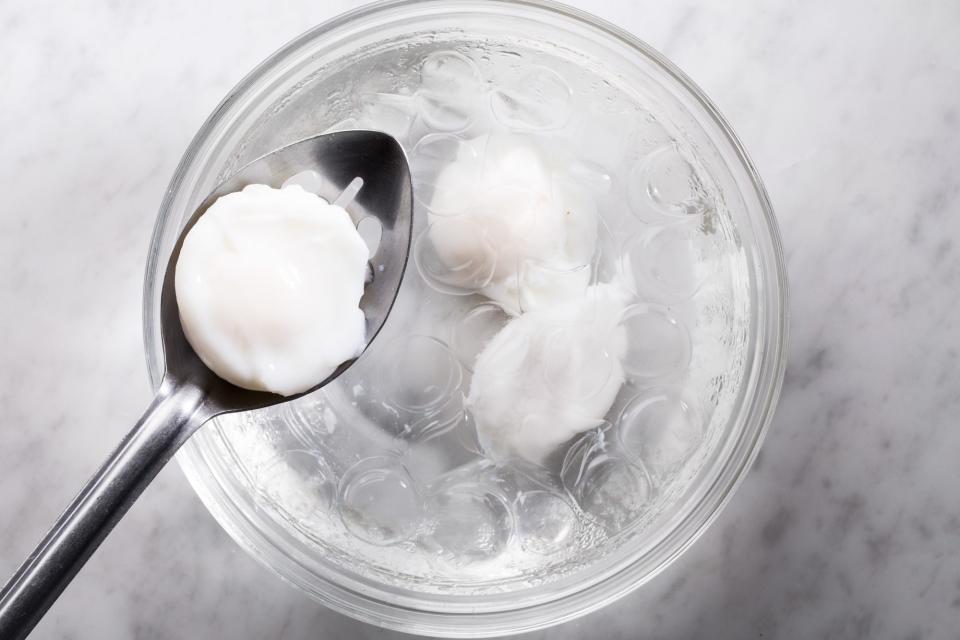
When you're ready to serve, scoop the egg out of the water with that slotted spoon. Gently shift the egg from spoon to a tea towel or paper towel to dab off the excess moisture, then transfer the egg to your dish.
If you'd like to make poached eggs ahead of time for a brunch party, you can poach them up to three days in advance. When they're finished cooking, transfer to a bowl of ice water for holding. If keeping for longer than 2 hours, put it all in a resealable container, keeping the eggs submerged in water in the refrigerator for up to three days. Five to 10 minutes before you want to serve them, gently transfer the eggs to a bowl of hot water (hot tap water is fine here) and let them sit until warm.
Know that you have options
If you're still not convinced this is the easiest way to poach an egg, you do have a few other options. If you're set up to sous vide, click here to find out how to poach an egg that requires a little more time, but far less monitoring.
Whatever way you go, you can serve your poached eggs in any of those classic dishes mentioned above, a stewed tomato sauce with crusty sourdough, on avocado toast, a creamy French garlic soup, or simply topped with salt, pepper, oil, and herbs.
Perfect Poached Eggs
Bon Appétit
Sweet Potato Fritters with Poached Eggs and Avocado

HarperCollins
Originally Appeared on Epicurious

