From Photos to Artwork, Here's How to Mat and Frame Anything
Erik Johnson
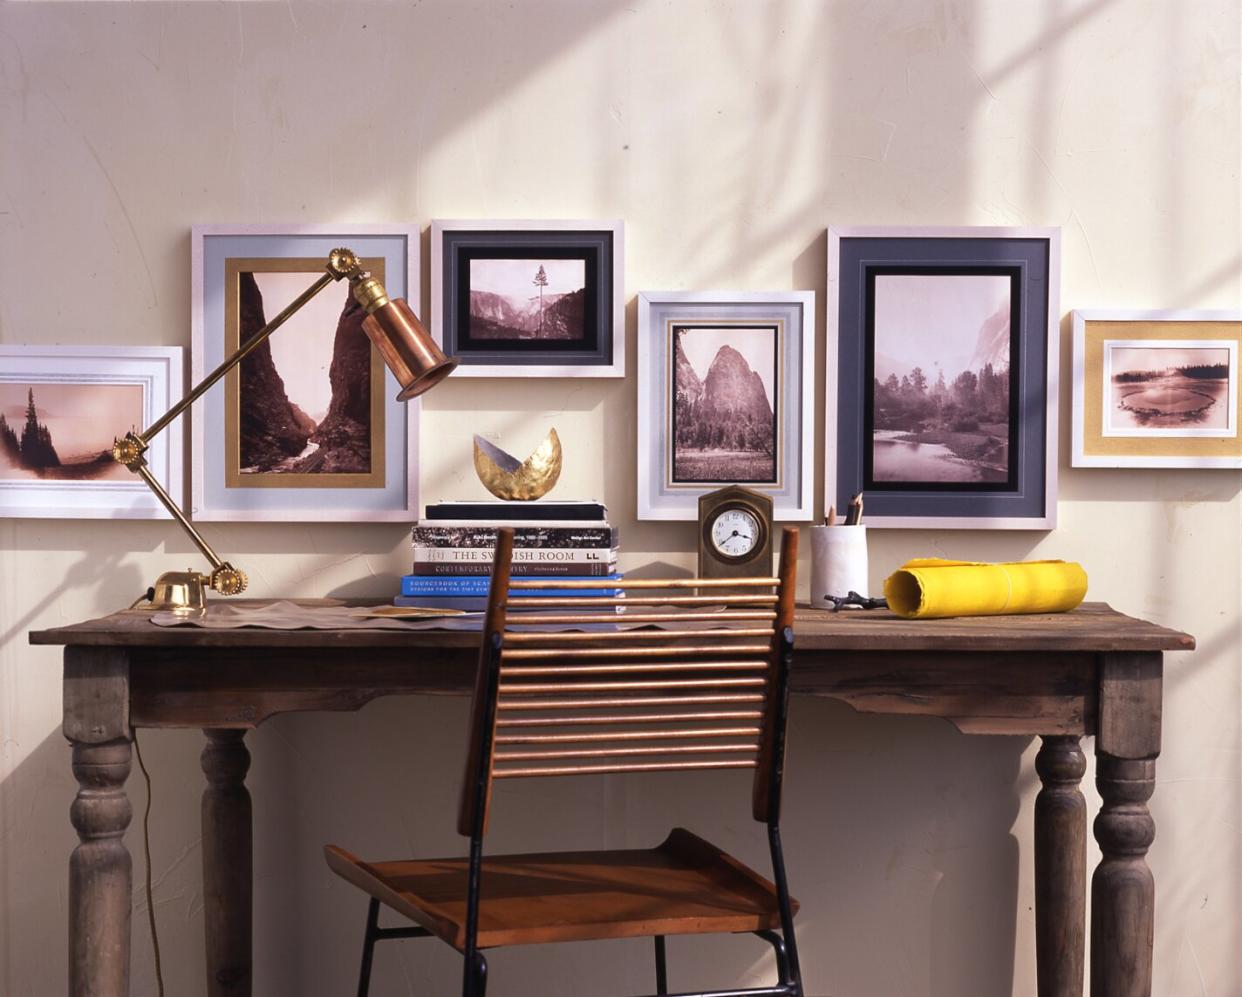
Matting and framing are the best ways to protect and present illustrations and photographs, but you don't need to rely on a professional framer. It's less expensive—and often quite fun—to do the work yourself, particularly when you embellish the mat to suit the style of whatever you're framing. For example, covering a store-bought mat in fabric or textured paper will give it a distinctive surface that can contrast against your walls; simply adding a border of paint or ribbon to a mat can enhance a vintage photo's classic appeal.
Ultimately, a mat is the visual bridge between an image and a frame, the space that allows these two elements to balance and complement each other. Decorating the mat can affect how you see an image and the frame; the busier the design on the mat, the less noticeable the frame may become. Subtle changes in a mat's dimensions, color, thickness, and texture will play a part in the overall look of your framed photographs and artwork. Framing your mat and artwork or pictures will give them a refined look, and it will ensure that they'll be preserved for many years to come.
Related: How to Choose the Right Frames for Your Art
Mat Board and Materials
The mat serves as a protective barrier between the image and the glass. Every mat consists of at least two boards: the window mat, which contains the opening that displays the image, and the mounting mat (or back board) on which the image is affixed. Mat boards can be made from a variety of materials, including wood pulp and cotton. If you want your artwork to look good for many years to come, it's worth investing in an acid-free mat board. Works of art, especially those on paper, disintegrate over time and are vulnerable to damage such as humidity, pollutants, light, and insects. Photographs are especially susceptible because of the chemicals used in processing and their sensitivity to light.
To avoid discoloration of your artwork, use acid-free mat board. Although an acid-free mat won't necessarily protect against deterioration, it won't contribute to it. Also, look for mat boards that are lignin-free; lignin is a by-product of wood pulp that can darken when exposed to light. One-hundred-percent rag mat board, which is made of cotton, is best for framing valuable pieces of art because it is pH balanced (close to seven on the pH scale). You can also use an acid-free and lignin-free mat board made of a combination of rag and purified wood pulp. These are often called conservation, museum quality, or archival boards, and they are only marginally more expensive than non–acid-free boards. Mat boards also come in a variety of thicknesses, ranging from two- to eight-ply. The thickness affects the depth and thus the look of the window. Conservators recommend that you use at least four-ply board for adequate depth. You will also need linen hinging tape (used to affix artwork to a mat), a frame, and hanging wire.
Step-by-Step Instructions
The following mounting and framing techniques are used in professional frame shops. Changes in temperature and humidity cause the layers of mat board and backing to expand and contract, creating a vacuum that can suck dust and other particulates into the layers. Sealing the artwork with the paper backing keeps it clean inside the frame.
First, place the window mat facedown and the mounting mat face-up, with the top edges touching. Cut a strip of tape and join the two sections of the mat, making a hinge between them. Place the artwork on the mounting mat, centering the image where you want to affix it, and fold over the window mat. Adjust the artwork to make sure it is centered. While the window is still down, place a few weighted objects—such as clean stones, a book, or a stapler—onto the image to keep it from moving. Lift the window mat up again. Cut four two-inch pieces of hinging tape. Stick one piece, sticky-side up, to the back of the artwork an inch from one of the top corners; leave about an inch of the tape exposed at the top. Repeat on the opposite top corner. Stick the remaining pieces of tape—sticky-side down—horizontally over the exposed tape that is already stuck to the back of the mat. Take care not to tape over the front of the picture.
Lay a towel out on a flat surface. Remove the glass from your frame and lay it gently on the towel. Clean both sides of the glass with glass cleaner and a paper towel. Lift the glass up, with one edge resting on the towel, and look through it to make sure there are no streaks, dust, or fibers. Trace the outline of the mounted artwork onto a piece of foam board, and cut it out with a craft knife and a straight-edge. This will be the backing for the frame. You may want to cut out multiple pieces of foam to create a sturdier backing. Place the glass and mounted artwork into the frame, followed by layers of foam board to 1/4 inch of the edge of the frame. Starting about one inch from one corner, insert a framing brad where the foam board and frame meet; hold the edge of the frame to keep it from slipping, and wedge the brad in by pushing it with a flathead screwdriver (and a hammer for more force). Apply brads around the corners and then move to the sides of the frame, applying brads every few inches.
To apply a paper dust protector to the back of the frame, first apply white craft glue to the back edges of the frame. Lay a piece of kraft paper onto a self-healing mat. Turn the picture frame, glue-side down, onto the paper. Let the glue dry before trimming the excess paper from the sides with a craft knife. Flip the frame back over onto the towel to protect the glass from breaking or scratching. With a spray bottle, liberally spritz the paper; it will ripple slightly. Use a hair dryer to dry the paper completely. Even if the paper appears dry, continue drying it until it pulls taut like a drum.
To give your frame a professionally finished look, rub fine sandpaper against where the frame and paper meet. This will remove any jagged pieces of paper that might otherwise show once you hang the frame. To attach the hanging hardware, measure one-third of the way down from the top of the frame and make a mark on each side with a pencil. Screw in the frame hangers at these pencil marks. For the hanging wire, measure the width of your frame, and then add about 12 to 14 inches—about 10 inches for wrapping the ends of the wire, and two to four inches for slack. Insert one end of the wire into one of the hangers and double knot, leaving a 5-inch tail. Wrap the tail around the longer piece of wire. Repeat on the opposite side, making sure to leave enough slack in the wire to hang the picture. Add rubber bumpers to the bottom corners of the back of the frame.

