Make the Perfect 'Lazy' Poached Egg in the Microwave — in Under 2 Minutes
I take pride in making a perfect poached egg. It took several test runs to get my technique right, but it works every time: a splash of vinegar in a saucepan full of simmering water creates a fully-cooked exterior and a runny yolk. But while poached eggs are a relatively quick breakfast, they aren't quick enough when I'm short on time — which is why I'm always on the lookout for an easier way to make my favorite morning meal. Recently, I came across a poached egg hack that has dramatically improved my breakfast routine: it takes only two minutes (as opposed to 10), and cleanup is easy. Learn how to do it below.
How To Cook a Poached Egg in the Microwave
To cook a poached egg in the microwave, chef Erica Swides recommends using a small bowl and water — that's it! Follow the steps here:
Crack the egg into a bowl or a ramekin. (I used a small mug.) "You need something that is at least twice as deep as the height of the egg," Swides explains.
Pour water over the egg. "You want to submerge the egg by at least half an inch to an inch," she says. "The egg has to be submerged. Otherwise you could risk 'egg-splosion.'"
Microwave the egg for anywhere between 35 seconds to a minute. Chef Swides says that 44 seconds is the perfect amount of time on her microwave. (Note: The time depends on a lot of factors: microwave power, egg size, bowl material and size, and how much water you added.) Start with less time, check the egg, and add 10 to 30 seconds depending on how cooked it is.
Testing This Hack Myself
I couldn't wait to give Chef Swides' trick a try. Since I didn't have a small ramekin or dish, I used a small mug (the egg yolky-yellow color seemed like a good fit for the occasion). Set-up was simple: I cracked the egg into the mug, filled it with water, and popped it in the microwave for 45 seconds.
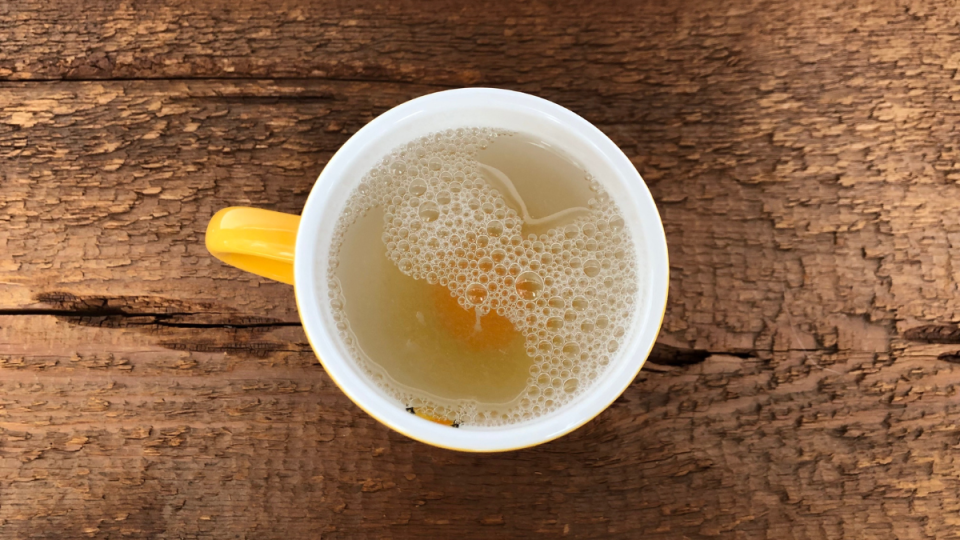
After 45 seconds, I pulled out the mug and took a peek. The water was completely cloudy, so I used a spoon to fish around for the egg and bring it to the surface. The outside had solidified, but the whites around the yolk were still uncooked. It took about 40 more seconds for the whites to completely cook — at which point, I realized that I had poured too much water into the cup. (Chef Swides recommended filling it until it covered the egg by a half inch to an inch; I had filled the cup to the top. Oops.) Fortunately, my mistake didn't ruin breakfast. It looked overcooked, but still good.
When I cut into the yolk with a spoon, I was pleasantly surprised; half of the yolk was still runny. And it tasted delicious. I couldn't believe that the whites had stayed together — it must have been the power of the microwave.

The Bottom Line
Though this method takes a little perfecting, I love how convenient it is. I no longer have to wait for the water to simmer in a saucepan to poach my egg, and I use less water. Plus, it's mess-free and oil-free, as opposed to making fried eggs. There is one downside: You can cook only one egg at a time. Yet this method is also so quick that you can microwave two eggs separately, and still be ahead of the game.
Of course, I'll still use the vinegar method if I'm cooking breakfast for my family. But for a quick, nutritious morning meal on the go, this trick can't be beat.
This article originally appeared on our sister site, First for Women.

