How to Make a Paver Walkway
Step up your curb appeal with a DIY paver walkway. We lay out the steps to make this large project less intimidating.
A brick paver walkway is a gorgeous addition to your home that stands up to the test of time. With a rustic brick look and your choice of pattern, this pathway can work with any home style. You may hire a professional to get the job done, but with a little hard work and determination, you can build the paver walkway yourself! A DIY project like this adds even more character to your curb appeal.
You can customize your paver walkway in several ways to get the design you want. Check out our steps and tips below to see how you can make a winding path of your own.
:Check out these glorious garden paths
Brick Pattern Options
Herringbone
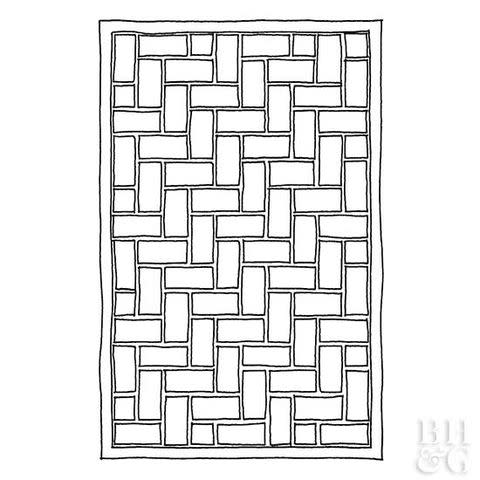
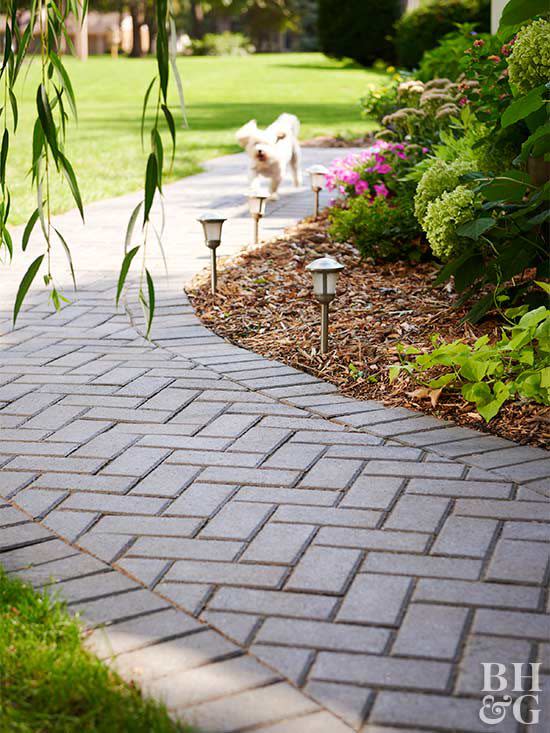
This centuries-old pattern may look the most familiar when it comes to brick pathways. The unique angles make it ideal for irregular spaces, such as a curvy path. When set at a 90-degree angle, this classic pattern requires only occasional cuts and is also the design we chose for our walkway, as shown in the steps below.
Basket Weave
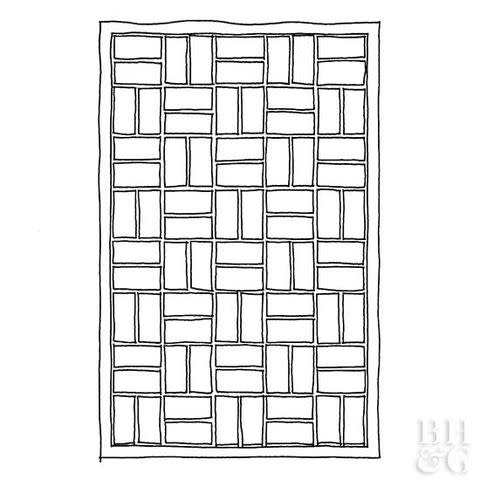
Place pavers in alternating vertical and horizontal pairs for a vintage look. This cottagelike design is known as basket weave and is reminiscent of a tiled floor. With its symmetrical design, this pattern is great for straight pathways and can also be easily incorporated into another pattern.
Concentric Square
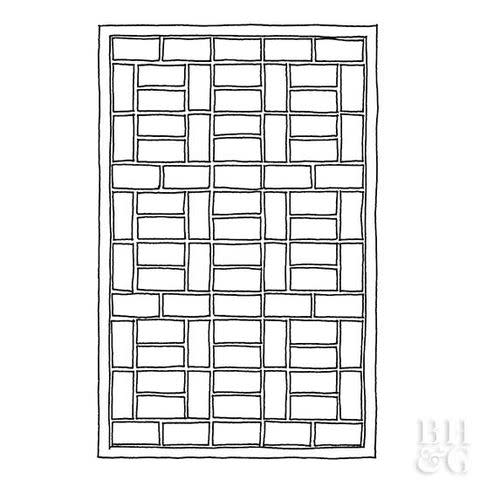
An uncommon option is to lay your pathway with concentric squares. In this design, pavers form a large repeating pattern. This look is great for ample spaces where the overall design has room to shine.
What You Need
Garden hose
Spray paint
Shovel
Tamper
Tape measure
Stakes
String
Weed barrier sheet
Crushed road stone with fines
Sand
1-inch PVC pipes
2x4 board
Pavers
Hammer and brick chisel
Paver saw
Polymeric sand
Broom
Concrete sealer, optional
Step 1: Map Out Path
Use a long and flexible object, such as a garden hose, to map out the path of your walkway. Once you're happy with the placement, use a light spray paint to mark the guidelines where you want the pavers to go.
Step 2: Dig Path
Safety Tip: Before you start digging, first call your local utility company to have your utility lines marked.
Using a shovel, excavate an 8-inch-deep trench slightly wider than your intended path. You may need to add or remove more soil in areas to make sure the path is at an even level.
Flatten the trench by pressing down on the soil with a tamper.
Step 3: Mark Edges
Place stakes along the edges to mark the exact walkway dimensions. There should be 2 to 3 feet between each stake. Connect the stakes by stretching string along the path edges.
Step 4: Build Base
Cut a sheet of weed barrier to fit and lay it along the path. Lay a 4-inch base of 3/4-inch crushed road stone with fines. Firmly press down on the stone with a tamper until it is level and smooth.
Lay a 1-inch layer of sand on top. To level the sand, place 1-inch PVC pipes on either end of the pathway. Balance a board on top of the pipes and press down while dragging it across the sand, evening the surface throughout.
Step 5: Lay and Cut Pavers
Set the pavers atop the sand in the desired pattern. Use the string barriers to ensure lines are straight and curves flow well.
:Learn how to clean brick pavers for a new walkway
You will need to make cuts in the pavers, especially at the edges. A hammer and brick chisel work well for straight cuts, but we rented a paver saw from a local home improvement store for the tricky cuts around the curves. Follow the manufacturer's instructions when using the saw.
Step 6: Fill Joints and Finish
After all the pavers are in place, use a broom to fill the joints with polymeric sand. Softly sweep away excess sand from the surface and mist the path with a hose several times so the sand will activate and harden. If desired, finish your pathway with a concrete sealer.
