How to Make an Patterned Upholstered Headboard

A headboard can be the perfect accent in a bedroom, especially if you're dealing with small paces, where that 4 x 3 rectangle might be your only furniture? The only problem? Upholstered headboards can get pricey, and painting one directly on the wall isn't for everyone. Lucky for you, we've broken down just how to create one all on your own. The hardest part of this DIY is picking out a fabric. For our monochrome blue space, we chose a fun watercolor from Ellen DeGeneres for JoAnn Fabric.
You'll also need:
Scissors
Upholstery Foam
Batting
Staple Gun
Plywood
Spray Glue
The plywood should be cut to the width of the bed and your preferred height. We cut our standard Queen headboard to 48H x 60W in.
1. Lay Down the Foam

Upholstery foam comes in a variety of thicknesses and types. The denser the foam, the plusher the cushion without sacrificing space. For a headboard choose a high density foam in a low depth, like the 3" seen here, so you can comfortable sans pillow.
Roll out the foam and cut to size, attaching to the wood with spray glue. Push down on the foam to bind the wood and foam together.
2. Secure with Batting
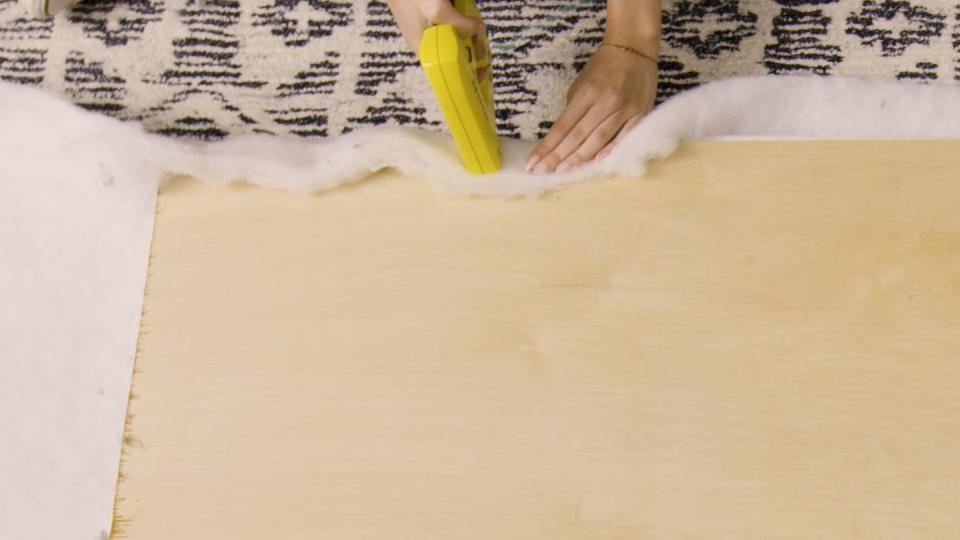
Upholstery batting holds the foam and base together, priming the piece for your dream fabric. Roll out the batting on top of the foam and flip the headboard over, so the batting is facing the floor. Pull the edges of the batting taut over the plywood, stapling into place with a staple gun. Cut off excess.
3. Fabric
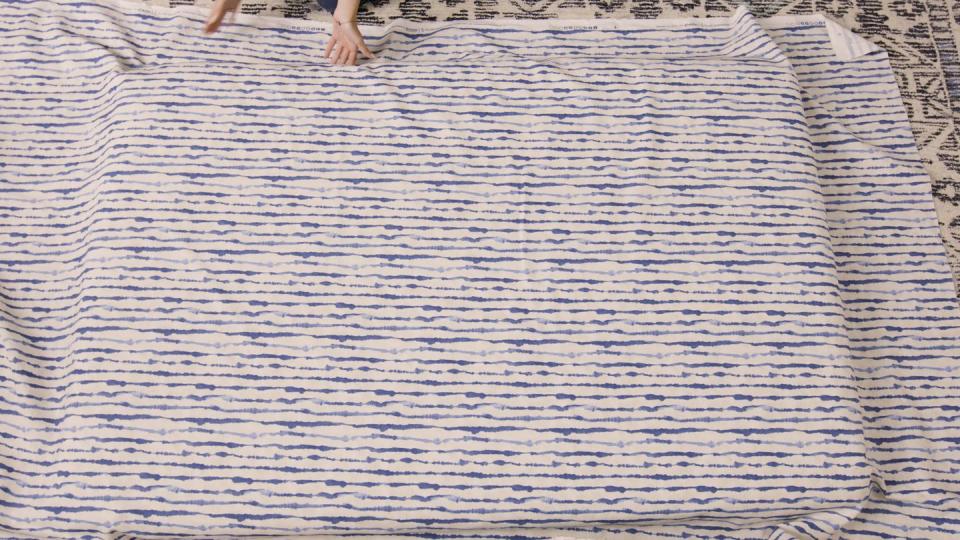
Flip the headboard back over and spread out the fabric over the headboard, print side out. Line the pattern up level with the edges of the wood. Flip the headboard and fabric back down facing the floor. Pull the fabric taut over the batting, stapling it into place. Cut off excess and you're ready to mount it!
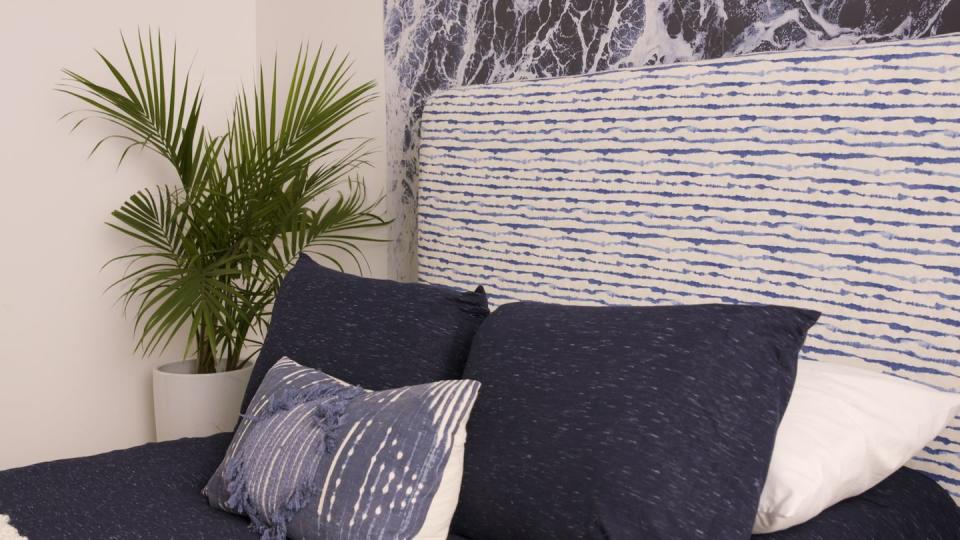
In 3 easy steps, a cheap, easy way to make your space feel both custom and expensive.
Follow House Beautiful on Instagram.
You Might Also Like

