Before and After: Painting the Cabinets in This Kitchen Made Everything Look New Again (No Gut Reno Needed)
From white to grayish-green to navy to pink and even red, “hot” kitchen cabinet colors change from season to season. Whether you’re painting to stay on trend or just looking for a change of pace in your kitchen, designer Drew Scott (@lonefoxhome) has some great tips for painting cabinets:
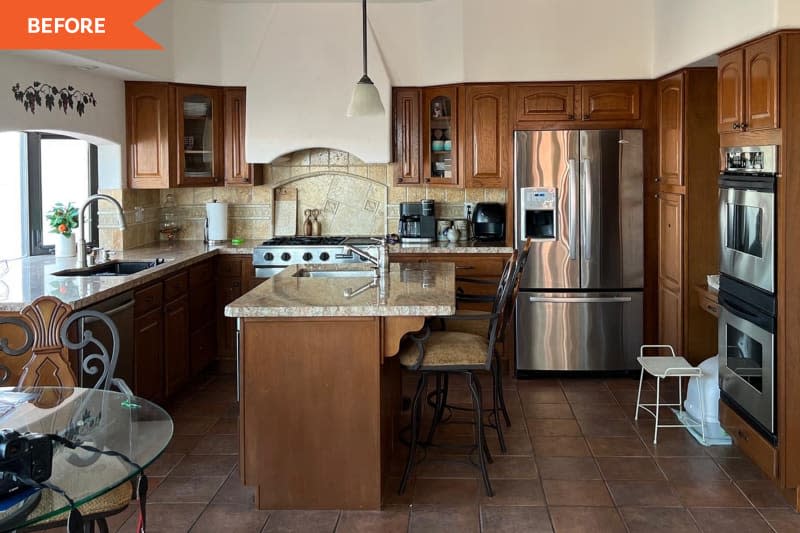
First, number each hinge and door as you remove them so you’ll know where everything goes when it’s time to put them back. Second, once you’re painting, try to use a paint sprayer to achieve a streak-free finish. And third, don’t be afraid to repaint if the color didn’t come out exactly as you’d envisioned — in fact, it’s best to test a few colors beforehand so you don’t have to do this. These are all things that Drew learned while renovating his parents’ kitchen, which was a “Tuscan-inspired and very warm” space before.
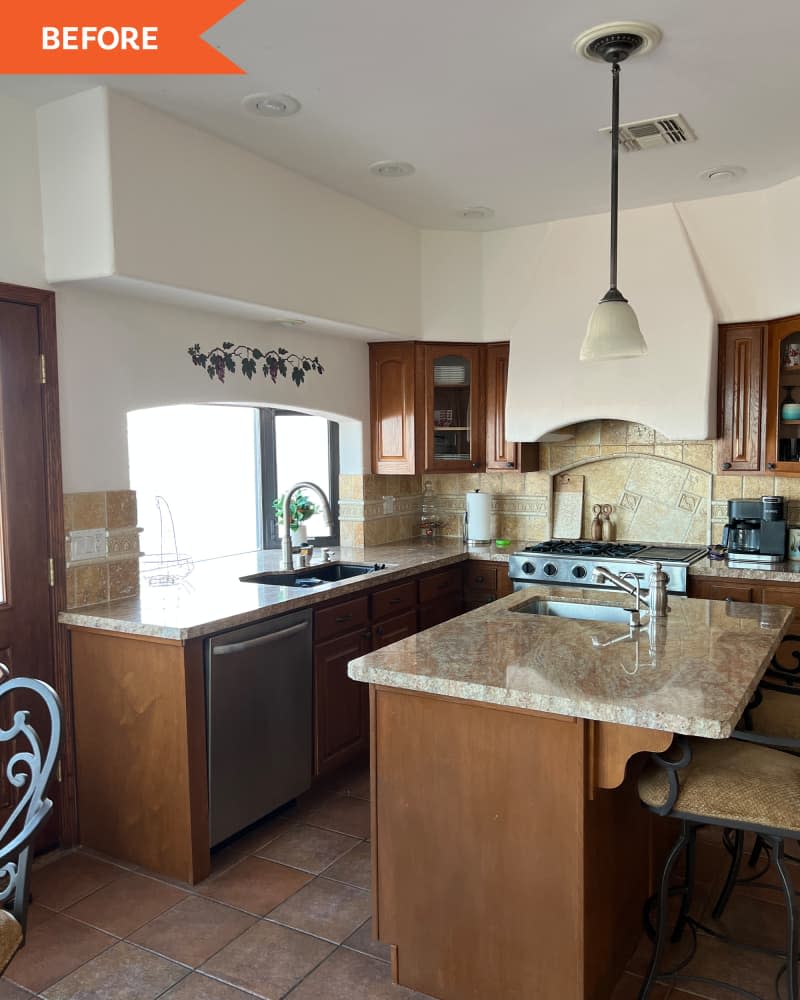
Drew’s mom wanted to keep the tile backsplash, and they both loved the tile floors, so Drew’s goal in the project was to highlight the existing tile work (and the white plaster hood) but make a change to the grainy orange wood cabinets. He also wanted to swap some dated decor for more contemporary choices.
“The first step was to remove all the cabinet doors and de-gloss them for the painting process,” Drew says. “This process is straightforward, but time consuming.” (Again, numbering the hinges and doors was well worth the extra time it took, according to Drew.) He also had to de-gloss the cabinet framework prior to painting; he used Jasco’s Easy Liquid Sander Deglosser and a sponge for this.
“Next was the actual painting process, which required about six hours of taping and masking,” Drew recalls. Because he was using a sprayer, he cautiously taped every surrounding surface.
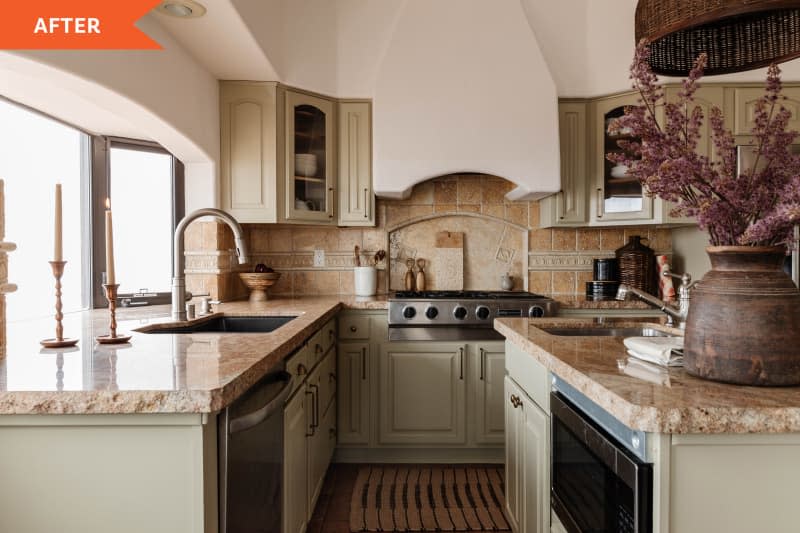
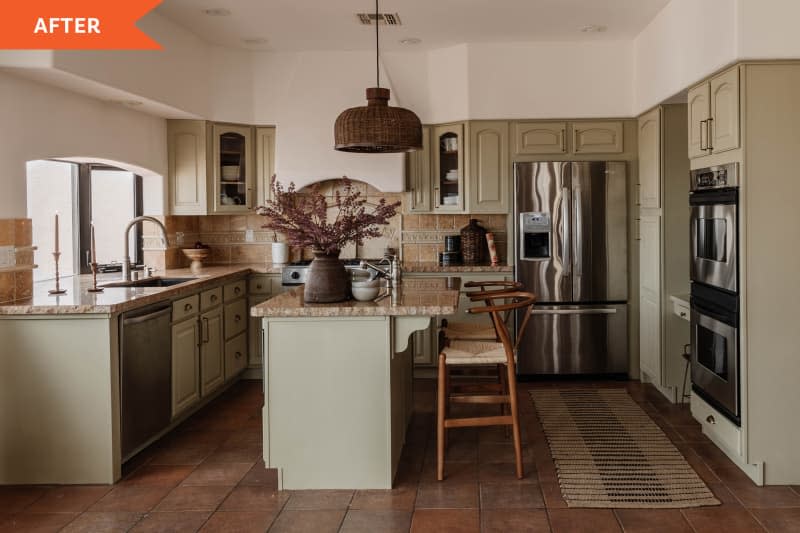
Another step that was unexpectedly time consuming was choosing the right paint color. Drew initially chose Magnolia Home’s Summer Hay for the cabinets, but after seeing it on the cabinets, he thought it was a little too cool-toned. “It looked like mint chocolate chip ice cream when I walked in the kitchen the next day,” Drew says. So he decided to repaint the cabinets in a warmer shade, Gold Moss.
“I am most proud of trusting my instinct and changing the color in the kitchen,” Drew says. “I honestly didn’t want to have to go through the entire process again, but it was 100 percent worth it.”
Drew’s advice to future cabinet painters is to test a few shades before painting all of the cabinets.
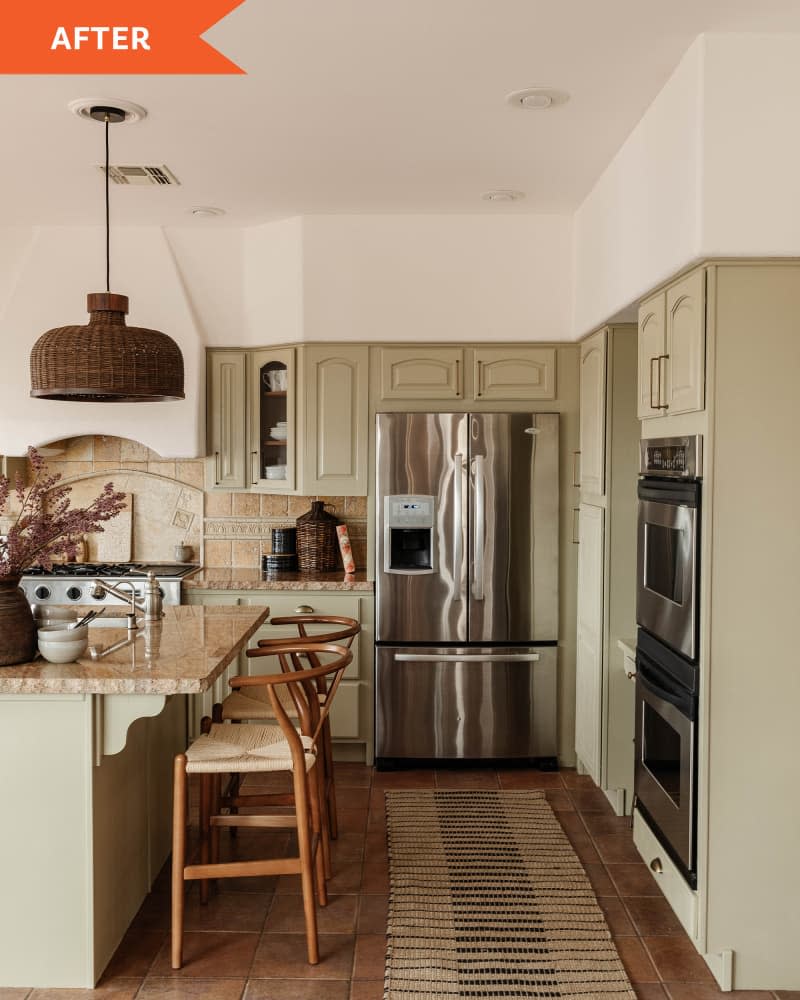
After the paint was dry, it was time to redecorate. “I chose decor and accents that flowed nicely with the new paint, existing backsplash and countertops,” Drew explains. “I replaced the cabinet hardware with antique brass hardware. I also added a new, modern light fixture and bar stools that went with the aesthetic.”
Drew says he is proud that the new furniture, rugs, and decor make the once-dated-looking surfaces feel new again in the now cozy and organic yet modern space. Because he didn’t have to buy new appliances, tile, or countertops, his parents’ redo was fairly budget-friendly — and he was able to splurge here and there on decor and finishes.
Mostly, Drew is pleased that he was able to make a positive change for his parents. “For the week following the makeover, my parents called me every day to let me know how much they loved their new kitchen,” he says.
This post originally published on Apartment Therapy. Read it there: Before and After: Painting the Cabinets in This Kitchen Made Everything Look New Again

